Print this article Font size 16
As you understand, crankcase protection on the VAZ 2114 is necessary in order not to damage or deform the crankcase itself. What is this crankcase? Essentially, this is a container or pan where the engine oil is located. Now it becomes clear why the condition of the crankcase needs to be monitored with special care. Otherwise, an oil leak will occur, the engine will require crankcase replacement at best, and a major overhaul or complete replacement of the power unit at worst.
With insulation
Where is it located?
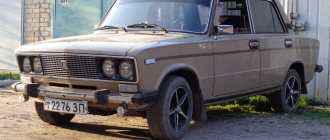
If you open the hood of your car, you will have a hard time seeing the protection. To do this, direct your gaze to the lowest point of the engine compartment.
Location
In order not to torment yourself and your eyesight, approach the car from the other side, that is, from below. It is under the bottom that you have to work with the crankcase protection.
DIY installation
At the second stage, when the engine crankcase protection and brackets are made, installation can begin, tightening no more than two bolts. Now you should check the product for excess metal and the presence of gaps in places where they should not be. At the same time, do not forget about the coincidence of the remaining mounting holes.
Depending on the dimensions, the hatch is cut out with a grinder or a crown. If it is left open, dirt will enter the engine compartment. To get rid of this problem, from the top of the sheet, around the perimeter of the hatch, you should drill 4 holes and weld nuts to them, which will be used to tighten the bolts securing the hatch. At the last stage, the protection should be primed and painted. When it dries, the work can be considered completed.
When replacement is required
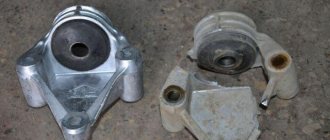
If the old device no longer copes with its direct responsibility, that is, it has become deformed and is as close as possible to the pallet itself, immediately begin the replacement procedure.
When the position of the protection approaches the sump, the slightest collision with even a small bump can lead to the fact that the element that initially plays the role of protection itself will cause damage to the engine crankcase.
Preparing to replace the engine mount, tips
In order to ideally carry out the procedure for replacing a VAZ engine mount, it will be necessary to have elements such as an overpass or a regular inspection hole. If you do not have access to any of these tools that allow you to carry out repairs at a more comfortable level, replacing the engine mounts can be done without them, but the work will be significantly more difficult.
In order to competently replace VAZ engine mounts, you will need to purchase a support or, as it is also called, a cushion, a set of keys and wrenches, a rust remover, and a ratchet with a board. After all the necessary materials have been collected, you need to drive the car to the top of the pit and carefully insure the vehicle using high-quality stops. This must be done to ensure that the machine does not move during operation.
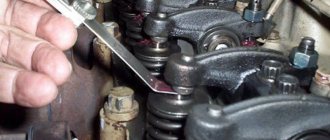
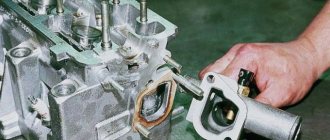
After this, in order to safely replace the VAZ engine mount, you will need to remove the terminals on the battery. Next, a jack is installed on the engine under the pallet through a wooden stand, and the removal of the elements protecting the engine begins.
In order for the VAZ 2114 engine support to be easily removed from the place allocated by the manufacturer, keep in mind that for the front support it is necessary to handle the internal combustion engine from the pallet using a jack. And in order to replace the rear and side mounts of the VAZ engine, it is necessary to work with the gearbox using a jack. Please note that when replacing the front support, all cushions, in most cases, are cracked and replacement must be carried out.
At least so that in conditions of the quality of city roads, replete with a large number of irregularities, the engine does not have to hit the parts. In this case, it would be better to replace everything. Then you will be confident that all VAZ engine mounts will be in full working order. When doing the work yourself, you must be prepared for the fact that the VAZ engine mount is screwed on too tightly.
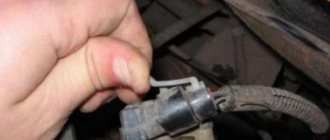
Because of this, when unscrewing the bolts, the stud may also unscrew along with them. And if it rests against the starter, it will also need to be removed. When performing this operation, keep in mind that it is secured using three bolts and, before you begin unscrewing, you must remove all unnecessary parts from it.
What to choose?
When choosing new protection, it is important to pay attention to the individual characteristics and features of your particular car.
The design of the selected element directly depends on the type of body, the gearbox used, the engine and other parameters. Therefore, when going to an auto parts store, collect all the necessary information.
Sheriff
Based on the experience of VAZ 2114 owners, devices from two brands are excellent for this model.
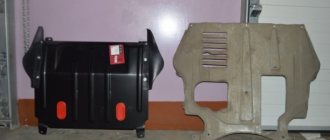
- Sheriff. Despite the foreign name, it is actually a company from the Russian city of St. Petersburg. To make the protection, the manufacturer uses high-strength steel 2 millimeters thick. The design of the element completely replicates the parameters of the factory device, but has higher reliability and durability. Plus, the Sheriff device is offered with auxiliary wings made of plastic or metal. They allow you to additionally cover the engine space from dirt, dust and other “pests”. Another important advantage of Sheriff devices is two hatches. One is for replacing the filter, and the second is for draining the oil. This will allow you to change the oil or oil filter without removing the protection.
- Titanium. Also a Russian manufacturer that uses hot-rolled steel to produce protection for the VAZ 2114. The thickness of the element can be up to 2.5 millimeters. The popularity of the company is largely due to the fact that for production they use hot rather than cold rolled products. This has a positive effect on the performance characteristics of the part, which are superior to analogues made from cold-rolled steel. Titanium uses stamping, that is, the protection structure is monolithic and not welded. Consequently, we get a durable, reliable design.
Replacement
Replacing the engine crankcase protection on a VAZ 2114 is not at all difficult. You don't need to be a professional mechanic to handle this task.
- First of all, you need to remove the old device. To do this, place the machine over an inspection hole or lift it with a lift. One way or another, you should end up under the car.
- Now examine the structure to see what nuts and bolts hold it in place. All found fasteners are dismantled, after which the protection is easily removed from its place.
- If you have the desire and opportunity, do a little “cleaning” of the space. Removing the crankcase protection allows you to get to some components - the same oil filter. It is quite possible that the time has come to replace it or change the oil in the crankcase. This is a good time to perform such procedures.
- Now take the new piece you purchased and secure it in place with the new fasteners. If the old bolts and nuts are in good condition, clean them and use them for the new element.
How to attach the protection to a VAZ 2114
The risk of damaging the engine sump or gearbox housing of a VAZ 2113 when overcoming obstacles, parking on one side on a curb, or unexpectedly colliding with objects falling onto the road from a truck is quite high, so installing power unit protection is one of the first operations that must be performed on a purchased car .
The front mounting lugs protect the brace brackets from impact, and the rear ones cover the front suspension arm mounting brackets. In addition, the protection protects the engine from water, dirt flying from under the front wheels, or when driving along deep ruts.
But don’t think that protection is a panacea for all ills. With a strong enough impact, the sheet will bend and transfer some of the energy to the power unit. In addition, the protection impairs the ventilation of the engine compartment, which can lead to overheating of the Lada 2114 engine, especially in hot weather.
In general, installing protection is more beneficial than harmful. Nevertheless, it will, of course, protect the stamped engine sump from damage or deformation under the influence of small objects, will not allow the oil receiver tube to bend and leave engine parts without lubrication. But you should choose protection carefully and carefully. There are many fakes and extremely unsuccessful designs that are attractively cheap, but do not have, for example, holes for ventilation of the engine compartment or access to the oil drain plug or interfere with the operation of the front suspension. If, after installing the protection, you notice any deterioration in the vehicle’s performance parameters, you should remove it and replace it with another one. It is better to opt for more expensive, but tested and certified products.
After deformation from an impact, the protection sheet may begin to touch car parts, for example, the engine sump of a VAZ 2114, which will be indicated by a characteristic vibrating sound. In this case, the protection sheet must be straightened, otherwise the oil pan may be damaged. The protection, as a rule, is made of steel (in rare cases aluminum) stamped sheet about 2 mm thick, with eyes for fastening and holes for ventilation and access to the oil drain plugs of the engine oil pan and gearbox housing
We carry out the work on an inspection ditch or overpass.
Using a 17mm socket, unscrew the front mounting bolt of the front suspension extension bracket.
In the same way, unscrew the bolt of the front fastening of the bracket of the other extension.
Using a 19mm wrench, unscrew the nut of the bolt securing the front suspension arm, holding the bolt from turning with a wrench of the same size.
Similarly, unscrew the nut of the bolt securing the other lever.
We apply protection for the VAZ 2115.
If necessary, use a hammer to bend the mounting eyes.
We put the protection with the rear eyes on the lever bolts and attach nuts and washers to the bolts.
We tighten the bracket bolts and tighten them to a torque of 42–52 N.m.
We finally tighten the nuts of the rear protection fastening in the “Lada 2113 car on wheels” position with a torque of 78–96 N.m.
Welcome! Crankcase protection - thanks to it, this same crankcase does not break or deform, in other words, it simply remains in a normal state, but not everyone knows what an engine crankcase is, so we will briefly explain! This is the so-called container (It is also simply called a pan) in which motor oil is located and is poured into the car engine and therefore this crankcase must be monitored very carefully, otherwise the oil will all pour out of the car when it is deformed and as a result there will be a very deplorable situation with the engine and thus you will end up with a major overhaul of your engine, so this crankcase, as was said a little earlier, needs to be monitored and so that it does not become deformed, you need to have protection that will protect it in the event of a collision with a stone or something else obstacle, but after a collision this protection is sometimes deformed and the very moment comes when it has to be replaced, but not everyone knows how to do this and that is why we have prepared this article in which we described in detail the process of replacing it.
Additional protection
Many motorists believe that conventional protection for the VAZ 2114 engine is not enough. Therefore, they decide to install an additional one. Such solutions allow you to more reliably protect your engine from collisions with stones, for example, or other obstacles on the road.
But there are several important recommendations in this regard.
- Do not use low protection, after installation of which the distance from the element to the power unit is less than 3 centimeters. This is due to the fact that the element can sag. Consequently, when hitting a hard object, it will bend and damage the crankcase.
- Additional protection effectively copes with impacts under the floor, but poses a potential danger in frontal collisions. If during such an impact the usual protection falls from its mounts and the engine also ends up on the ground, then the additional one helps ensure that the engine remains on it and is directed into the cabin. This could result in serious injury to all people sitting in front.
- If there are good roads in your city and if you live there regularly, there is no point in additional protection. It is designed for difficult road conditions.
- Additional protection for the engine crankcase is relevant for a city with more or less good roads if you lower the car. Being close to the ground, a simple collision with a stone can lead first to damage to the sump, and then to breakdown of the engine itself.
Crankcase protection is an important component for the VAZ 2114 and any other car that plays a serious role in the functioning and operation of the car. Therefore, it should be given increased attention, monitor its condition and take timely measures to replace it.
The procedure for changing such an element is quite simple and does not require professional skills and knowledge. Therefore, you can completely do everything yourself. You only need an inspection hole and a set of keys to dismantle the fasteners.
Engine protection VAZ 2114
As you understand, crankcase protection on the VAZ 2114 is necessary in order not to damage or deform the crankcase itself. What is this crankcase? Essentially, this is a container or pan where the engine oil is located. Now it becomes clear why the condition of the crankcase needs to be monitored with special care. Otherwise, an oil leak will occur, the engine will require crankcase replacement at best, and a major overhaul or complete replacement of the power unit at worst.
With insulation
Crankcase protection
Over the weekend I hardly left the garage; a lot of work was done. So, I’ll start in order: on Saturday morning I went to the car market and bought various parts for my white car: crankcase protection, interior carpets, rear arch linings for the VAZ 2108-09-099, a tray in the trunk, a mechanical steering wheel lock, an alarm system and also chrome bolts in quantity 12 pieces.
Speaking of these bolts, they are for alloy wheels since there are no bolts for chrome stamps, what does this mean? This means that they have a different cone and a longer thread, so if we tighten them, we will not be able to turn the wheel since the bolts will rest against the calipers and brake cylinders with pads. Even before the purchase, we understood that we would have to tinker, and when we came to the seller of alloy wheels, the dialogue was something like this: (me) - Hello (p) - Good morning (me) - We need chrome bolts, how much do they cost? (n) -What kind of wheels? bolts fifty dollars apiece (I) - Stamps (p) - They won’t fit, the cone is different and the thread is long (I) - I know we will shorten (after these words the seller’s eye almost twitched and he wondered how it was and why he handed me the bolts) . Weakling! I thought, took a handful of bolts and went further along the rows. It all arrived at the garage and work began.
First of all, I glued the STP ceiling in the front part, that is, above the driver’s head, and went over the final layer of splen.
Then I pressed it again in all places so that everything would stick together more tightly, and completely installed the ceiling trim along with all the handles, lamps and clips. The ceiling was assembled and the appearance pleased me.
Then we moved on to the technical aspect, I would say, and the car was unscrewed and the fenders were removed, cleared of factory mastic at the junction with the body and prepared for processing. I’ll tell you why I take off the wings at all, because many may wonder. Let me start with the fact that this will be a low pelvis, and therefore the issue of processing arches and wings must be approached with special trepidation this time.
Two, I know that under the mastic at the junctions of the wings with the body there is completely clean, unprimed metal, as it was on my father’s 15, so I have a 14 here, and it was in these places that the metal was exposed to 8, so gentlemen, do not be lazy and pay attention. The removed wings were processed a thick layer of red lead was literally poured into the fold of the wing so that all the cavities were treated.
Let's move on, many have noticed that on old chisels the corner under the windshield just above the fender gets stuck, the metal first swells with bubbles and then completely falls through to holes - a terrible sight for me. The reason for all this is very simple: this place is a cavity into which condensation falls, but there is nowhere for it to go since there is no drain from this cavity, so water stands there both in winter and in summer, which creates an excellent environment for rust.
This is how this issue was resolved: a limiter was put on a 12 mm drill (a silicone hose or something suitable for the diameter of the drill) so that the drilling depth did not exceed 10 mm. This must be done, otherwise without a stopper you can drill through the hole, then you will cry and clutch your head. After all these tricks we get the following two holes on each side (with a knife I visually point out the drainage holes made)
Now the cavity is breathing; moreover, the mixture under pressure will be blown into it by nozzles. After drilling work, the arches inside were also treated with the first layer.
The bottom also took on the first layer.
There is another intimate place on these machines - the plane under the muffler, since during winter there is a greater amount of condensation due to the heating of the muffler cooling plus exhaust gases. On older cars you can easily see rot under the muffler. Therefore, I took off the ten-thousandth muffler and treated this appendicitis
pay attention to this place in your cars.
I reached into the cellar for potatoes just before leaving and was stopped by the sight of the engine, I thought that if the bolts from the crabs were easily unscrewed, then I would use my last strength to install protection. I took the cylinder cross wrench and surprisingly the bolts went easily, well, back and forth and the protection is in its rightful place.
The calipers are painted.
The door cards have been removed in the cabin and we are preparing for alarm installation and processing.