Most owners of VAZ-2107 cars have encountered the problem of engine overheating due to untimely activation of the radiator fan. Such a malfunction poses a serious threat not only to the cooling system, but also to the entire power unit. An increase in coolant temperature to critical levels can damage the cylinder head gaskets, valve cover, and also cause jamming of the moving parts of the engine.
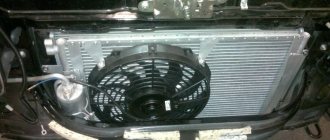
Most often, the radiator fan does not work due to problems with its activation sensor. This can be either a banal lack of contact on the connectors or failure of the device as a whole. In this article we will talk about what measures can be taken if the fan switch on the VAZ-2107 has lost its functionality, and we will also consider the process of checking and replacing it.
Signs of engine overheating and precautions
If you, while driving a car, find that the arrow on the instrument indicating the coolant temperature has moved into the red sector and continues to deviate in the direction of increasing it, it would be better to stop on the side of the road and immediately turn off the engine. If this is not done, the antifreeze or antifreeze will simply boil and try to escape, breaking the tightness of the system. Continuing to drive in such a situation is quite dangerous. Having stopped, it is necessary to check the functionality of all elements of the cooling system and determine the cause of overheating. Then, if possible, it should be eliminated. And if this is not possible, tow the car to the nearest service station.
What's wrong with the fan?
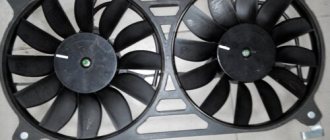
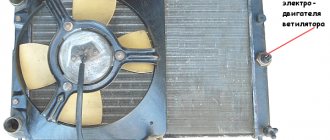
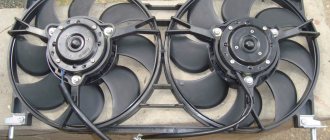
If you suspect a faulty radiator fan is overheating, first check that it is working. This is not difficult to do. Disconnect the electrical connector from the electric motor, and supply electricity from the battery to its contacts. Do not mix up the polarity!
If the fan does not work when connected directly, the reason must be sought in the electric drive. If the electric motor starts working, the problem most likely lies in the elements that ensure its activation. This could be a fuse, relay, wiring, or sensor.
Further check
Further testing should be carried out according to the scheme “from simple to complex”. Diagnosing wiring without the appropriate tools and skills is almost impossible. The situation is similar with relays. It is unlikely that you will be able to check it yourself, especially in the field. The only thing you can do is pull out a similar device from a nearby socket or another car and insert it into the corresponding socket. It works - the reason is established, the fan does not work - we move on.
There will be no problems checking the fuse. We find the required insert in the mounting block, check it with a regular tester or a homemade probe made of two wires and a lamp, and the result is obvious. If necessary, change the fuse and continue driving. But if this time we were wrong, the problem should be looked for in the fan switch sensor.
Download
LADA car bodies. Technical requirements for acceptance for repair, repair and release from repair by enterprises of the service and sales network of JSC AVTOVAZ TU 017207.255.00232934-2006, control dimensions of the body, design, diagnostics, design features of VAZ Car bodies general information (Lada 1970-2015) These technical conditions repairs apply to car bodies produced by JSC AVTOVAZ and their components for repair (disassembly and assembly,
Sources
- https://divide.doitwork.ru/skachat-vaz-21043-shema-montazhnogo-bloka.html
- https://camp.provelsk.ru/skachat-vaz-21043-inzhektor-shema-elektrooborudovanija.html
- https://mobiauto.pp.ua/page/2842/
Where is the fan switch located?
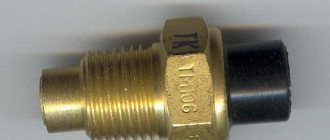
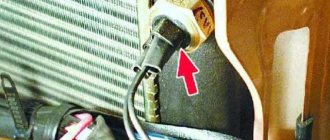
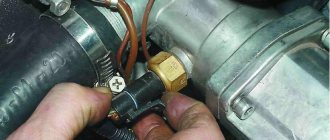
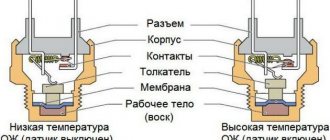
For all outdated modifications of the “classic”, the sensor is located on the cooling radiator housing. Bottom right to be precise. From the outside, it looks like a brass nut “30” with two contacts out. Lift the hood, look at the back of the radiator - you will definitely see it. The principle of operation of the sensor is very simple. The thermocouple reacts to an increase in temperature, closes the contact, and voltage is supplied to the fan. For vehicles with controlled fuel injection, the fan is turned on by a command from the electronic unit based on data received from the sensor. In other words, the ECU itself controls all processes. But where is the fan switching sensor located on injection-powered “sevens”?
As already mentioned, they do not have such a device at all. Don't look for it on the radiator or anywhere else! But pay attention to the thermostat. A coolant temperature sensor is installed on its body. It then transmits to the electronic control unit all the necessary information about the coolant temperature.
What fuel pumps were equipped with classic VAZ models?
Classic VAZs include all models of the Zhiguli family, produced from 1970 to 2012 and their modifications:
- VAZ 2101;
- VAZ 2102;
- VAZ 2103;
- VAZ 2104;
- VAZ 2105;
- VAZ 2106;
- VAZ 2107.
Depending on the year of manufacture, the engines of these vehicles were equipped with different fuel systems. In all the first Zhiguli models, the fuel mixture was injected into the cylinders using a carburetor, and the fuel was supplied by a mechanical fuel pump. The latest modifications of the VAZ 2104, 2105 and 2107 had an injection system and an electric fuel pump.
Carburetor cars of the Zhiguli family were equipped from the factory with mechanical fuel pumps of the diaphragm type DAAZ 2101 (catalog number 1106010) produced by the Dimitrovgrad Automotive Unit Plant. Thanks to their simple design, reliability and maintainability, they have proven themselves well not only on the “classics”, but also on cars of the Sputnik and Samara families, which were equipped with their modified versions.
Injection Zhiguli models were equipped with domestically produced electric fuel pumps. They were produced by the Pekar and Utes enterprises under catalog number 21073–1139009. The latest modifications of the Zhiguli were equipped with products (catalog number 2112–1139009). The same devices were installed on all models of the Samara and Lada families.
Sensor check
Now let's talk about how to check the fan switch sensor (VAZ-2107). Let's start with the carburetor engine. Everything is very simple here. All you need to do is disconnect the wires from the sensor. To do this, remove the electrical connector from its terminals. To determine whether the device is working properly, turn on the ignition and close the contacts on the connector. If it's all about the sensor, the fan will definitely turn on.
It may also happen that the fan switching device does not respond correctly to temperature. In other words, the contact closure mechanism works, but at a higher value. So, for carburetor VAZ-2107 cars, the fan switch sensor should close the circuit when the coolant reaches a temperature of 92 degrees, and open it at 87 ºС.
For engines with variable fuel injection, the inspection process is slightly different. Since VAZ-2107 injection cars do not have a fan switch sensor, you need to check the temperature controller. But first you should check the presence of voltage at the connector contacts. Take the tester and turn it on in voltmeter mode. Connect the negative wire of the device to ground, and connect the positive wire to contact “A” on the connector. Turn on the ignition. The tester must show a voltage of at least 12V. If its value is reduced, the problem must be looked for in the control unit. But if the voltage is okay, unscrew the temperature controller from the pipe for further checking.
Testing the sensor involves measuring its electrical resistance at different temperatures. Switch the tester to ohmmeter mode and measure the resistance at its contacts. It is noteworthy that it rises and falls in inverse proportion to the coolant temperature (20 ºС – 3.5 kOhm; 40 ºС – 1.5 kOhm; 80 ºС – 340 Ohm; 90 ºС – 250 Ohm). While measuring resistance, the controller can be heated by placing it in a container of hot water. The temperature of the fan switching sensor (VAZ-2107, injector) for different versions of ECU firmware can be 92-95 ºС. Its resistance is close to zero.
It should be noted that the fan activation and coolant temperature sensors cannot be repaired. Therefore, if the slightest malfunction is detected, they must be replaced. Let's consider the replacement process for each engine separately.
Controller diagnostics
To diagnose the controller, you will need a calibrated thermometer that can operate at the boiling point of water. The diagnostic procedure is carried out as follows:
- Often the sensor facing the inside of the radiator should be placed in water.
- Next, the tester probes are connected to the controller contacts, and they are adjusted to ensure there is no resistance.
- When the liquid begins to heat up, the resistance disappears at approximately 87-92 degrees. If so, then the controller is healthy and will work as expected.
Loading …
The process of replacing a sensor on a carburetor engine
This is where the process may seem more complicated. After all, given that the sensor is located at the bottom, you will have to drain the coolant. And to do this you need to look for an inspection hole, remove the engine protection, etc. But you don’t have to do this. You just need to quickly screw the new sensor in place of the old one. Naturally, some coolant will spill out, but its amount will be limited to 20-30 ml. In addition, you can always place a properly cut plastic bottle under the connection point.
So, prepare a new sensor and a “30” wrench. Disconnect the wires from the device. Carefully unscrew the sensor using the key. Continue unscrewing it by hand, pressing it against the radiator body. When the sensor comes off the thread, you can pinch the hole with your finger and start screwing in the new element with your other hand. Do not manage to lose the O-ring that is placed on the threaded part of the device. That, in fact, is the whole process. All that remains is to connect the wires to it, start the power unit and check if everything works.
