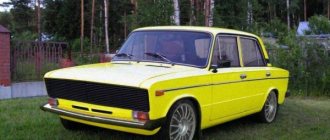
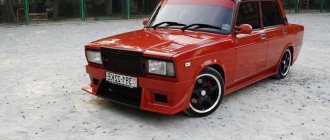
If you carefully examine the VAZ 2106, the first copies of which rolled off the assembly line more than forty years ago, you will see that the interior does not contain high-tech elements. Not many parts of the Six's interior can be modernized, but among them there are those that clearly need improvement: the instrument panel, weak lighting, and a rather primitive torpedo. Tuning these elements will not take much of your time, but you will have to put in some effort.
Backlight
There are not many parts in the interior of the Six that can be modernized. The interior decoration is extremely modest, without any frills. If you drive in a car at night, you will notice a clear disadvantage regarding the insufficient lighting of the VAZ-2106 dashboard. You can do tuning in this direction yourself.
To perform manipulations to change the color and brightness of the backlight, you will need the following materials:
- white instrument dials;
- three LEDs for large devices and one element each for small devices;
- cartridges for light elements;
- special self-adhesive film;
- wires.
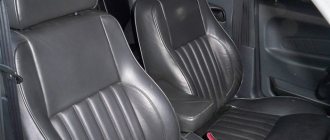
Seats
Tuning VAZ 2106 seats can be done in two ways:
- change the upholstery;
- replace the seats by taking them from another car.
Seat reupholstery
To reupholster the upholstery yourself, follow the instructions:
- Remove the seats from the interior. To do this, move the chair back all the way and unscrew the bolts in the runners. Then slide it forward and also remove the bolts. Remove the seats from the interior.
Installing seats from another car
Updated seat upholstery will decorate the interior, but will not make them ergonomic or comfortable. To do this, seats from another car are placed in the “six”. Seats with a distance between the runners of approximately 490 mm are suitable here. Many car owners say that seats from Ford Scorpio, Hyundai Solaris, VAZ 2105, VAZ 2107 fit well into the cabin . But to get a good result, you cannot do without replacing the fasteners.
Stages of work
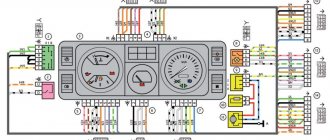
At the initial stage of improving the illumination of VAZ-2106 instruments, it is necessary to dismantle the panel panel, as a result of which access to the indicators becomes available. Next, remove all index arrows. Then unscrew a couple of small bolts and remove the scales. To remove the speedometer indicators, unscrew the screws and turn the scale to the left. At this stage, the gauge needle will drop slightly and begin to dangle. After it freezes, you need to mark the position with a marker. This is necessary for subsequent accurate operation of the speedometer.
After dismantling all the scales, they begin to paste them. New white elements are applied over the standard equipment. To prevent the background from blending in with the arrows, they are highlighted in a different color. To improve the backlight, you will need to remove the light filter, then you can begin installing the LEDs. For these purposes, metal bases are used, which are heated and mounted on the side parts of the panel. If there are VAZ-2106 devices in dark-colored cases, it is advisable to lighten them using white “self-adhesive”.
At the final stage, the LEDs are connected by connecting them to the main wiring of the vehicle through wires. As a result, you will be able to change the color of the scales and arrows, as well as improve the backlight, which is immediately noticeable when driving at night. Most representatives of the domestic “classics” will be improved in a similar way.
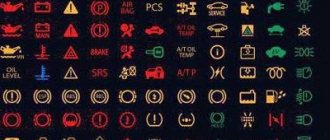
Typical malfunctions of the instrument panel
Deviation of the scale arrow indicates a malfunction of the device and damage to the wire that connects the sensor to the pointer.
The following malfunctions of the instrument panel elements are possible:
- the arrow on the scale of the coolant temperature sensor is constantly either in the initial position or in the red zone;
- the fuel gauge needle: does not leave the initial position even with a full tank, always lies at the end of the scale, moves jerkily and often returns to the beginning of the scale;
- The fuel reserve indicator light is constantly on or does not light up;
- The oil pressure indicator does not light up when the ignition is turned on, it lights up constantly, and goes out at high engine speeds;
- speedometer, tachometer faulty;
- The flexible speedometer drive is noisy.
Device malfunctions are eliminated by replacing sensors, contacts, devices, and restoring wiring.
Instrument panel tuning
High-quality tuning of the instrument panel must be carried out, starting with the removal of the instrument panel, so that during work it is convenient to get all the components and components of the product, right down to the illumination of the VAZ 2106 panel, which can also be made beautiful and modern. The preparatory stage is the dismantling of the front driver's unit, located under the instrument panel, which simply facilitates access and visibility of all elements and electrical wiring of the product, to change the appearance of which you need to make it or buy it yourself in car stores.
First of all, this applies to replacing the sensor dials with white components. The contrast of the dark scales of the VAZ 2106 instrument panel will give the instruments a modern look. They can be done using paints and varnishes. For a beautiful interior, you can cover the instrument panel, the price of which is affordable, with beautiful leatherette, and if funds allow, then with leather.
At the initial stage, the VAZ 2106 instrument panel, a photo of which is posted on our Internet resource, requires cleaning its surface, applying an even layer of special glue, pressing the leatherette to the surface and waiting for the drying process to complete. In the final version, it is necessary to bring the edges of the glued material into an aesthetic appearance.
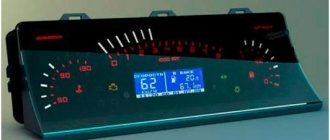
The LED instrument panel is very popular among car enthusiasts, the light emanating from it simply transforms the interior of the vehicle. The only thing to remember is that large instrument panel indicators require the installation of two LED-type elements, while for small-diameter products the integration of one element is sufficient.
A good addition to instrument panel tuning are LED lighting bulbs. For small sensors you can use one bulb each, but for the speedometer and tachometer you will have to install two pieces each.
Modernization of the dashboard
In most foreign cars, this part is quite functional and looks quite presentable. Alas, the same cannot be said about the interior of the VAZ-2106. The “six” torpedo is made very “clumsily”, which forces the owners to modernize it.
The most popular option is to replace the standard element with a modern analogue. Installing an updated panel will not only change the external part of the car, but will also add functionality. The disadvantage of such manipulation is its high cost (from 5-6 thousand rubles, taking into account all materials and components).
Torpedo tuning
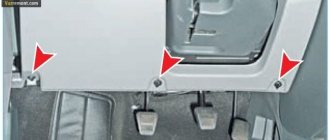
The top front panel of a car is called a torpedo. It is a solid metal structure covered with polymer foam and film. It contains an instrument panel, glove compartment, interior heater, air duct deflectors, and a clock.
The front panel is an important element of the interior, which can be tuned in different ways: replace the dashboard completely with a new one, paint it with liquid rubber, cover the smooth surface of the dashboard with leather, film or flock. Before starting tuning work, you need to remove the panel.
Torpedo dismantling
Removing the console occurs as follows:
- After unscrewing the four fastening screws, we remove the storage shelf.
Tuning options for the VAZ 2106 torpedo
There are several options for tuning a torpedo:
- You can replace the standard torpedo with a new one from domestic or imported cars. It is installed entirely with devices. Since the parts in the “classic” are interchangeable, panels from the VAZ 2105, VAZ 2107 are suitable for the “six” ;
- cover the torpedo with liquid rubber. This option is labor-intensive, and such a coating is short-lived and will begin to crack over time. It will need to be updated periodically. The big advantage of this method is its low cost;
- reupholstering the dashboard with vinyl film, flock, automotive leather or leatherette. This method of improvement is the most effective, but scrupulous and time-consuming. To carry out the work, it is necessary to dismantle the torpedo and take measurements from it. It is best to make a pattern from non-woven fabric. Using the pattern, cut out the component parts. Sew all the pattern pieces together with strong threads. It is advisable to work carefully so that folds do not form on the material, which will spoil the appearance. Then treat the surface of the console with hot glue and pull on the cover. And, using a hair dryer, glue the cover.
Video: do-it-yourself reupholstery of a VAZ 2106 torpedo
Economical way
If the budget for purchasing a new torpedo is not enough, you can go another way. Some owners simply change the color of the specified part. Liquid rubber is used as a painting material, which is used for processing automobile bodies in specialized workshops. This method of tuning the VAZ-2106 dashboard is very simple and does not require significant capital investments. The disadvantages include the fragility of the finish; after 5-6 months, repainting will be required.
Another method of improvement is reupholstering the surface with leatherette. This is a real option for improving the part, but not every driver can handle it on their own. In workshops, such services cost at least three thousand rubles.
Changing the appearance of the torpedo
The next part that just needs to be modernized is the torpedo. The last one in the “six” looks too old-fashioned and does not perform many necessary functions. We offer several simple options for tuning it:
- purchasing a new panel that will provide more comfortable use of the machine;
- painting a torpedo using a material such as liquid rubber. Compared to the first option, this method will be much cheaper and will allow you to update the interior, but the procedure will have to be repeated every 6-8 months;
- panel reupholstery using natural (expensive option) or artificial leather. To carry out this operation, you will need relevant experience, but you can always use the services of specialized companies.
Overlays for the dashboard of VAZ-2106
Tuning of this part of the vehicle is carried out by installing a special lining. This element not only acts as decoration, but also provides a protective option in the interior. The asking price is around two thousand rubles. To install the bright trim, you will need to remove the dashboard. This can be solved by unscrewing the fixing bolts. The dismantled part is thoroughly wiped from dust and degreased.
The removed torpedo is treated with sandpaper and coated with adhesive. After this, carefully install the overlay and wait for the glue to dry. To avoid squeaking of the new part, it is additionally fixed with self-tapping screws and another layer of glue. It must be remembered that prolonged exposure of the car to direct sunlight has a detrimental effect on the lining.
Radio tape recorder
No upgrade of the “six” is complete without installing a speaker system or at least a simple radio. A standard place for a radio receiver in the beard of a small-sized “six”. It should be trimmed to standard 1DIN. This can be done with a metal file. Then sand the edges with sandpaper.
Installing a radio
The radio tape recorder is attached to the beard using a metal case. Radio installation steps:
- Having bent all the tabs, use special spatulas to remove the radio from the case.
- The metal base is inserted into the prepared hole.
- We fix it using special tongues.
Cables are included to connect the player. The most commonly used are:
- black - “earth”;
- red and yellow (often wound together) - ignition “+”;
- blue - power for the active antenna;
- white - front left (FL) speaker;
- gray - front right (FR) speaker;
- green - rear left (RL) speaker;
- purple - right rear (RR) speaker.
You can connect the radio to the ignition switch to the free INT terminal. Then it will only work when the engine is running and the ignition is on. This connection scheme will protect forgetful car owners from completely draining the battery.
If you twist the red and yellow wires together, the radio will no longer depend on the ignition. You can listen to music with the ignition off too.
Typically, a connection manual comes with the audio system. Following the instructions and color scheme, installing audio equipment in the “classic” will not be difficult.
Speaker installation
A good place to place the speakers would be the front door panels. If you choose the right size speakers, they will fit here very well. To install, perform the following steps:
- Remove the trim from the doors.
- On the casing we cut a hole for the speaker. A hole of the required size can be made using a template. To do this, trace the speaker on paper. You need to work carefully so as not to miss the size.
- We attach the column and screw it to the casing using the fastening that comes with the kit.
- We carefully lay the wires in the cavity of the doors so that they do not sag or fall out.
- We install the casing in place.
Don't forget to buy new fasteners for the door trim. Often, when removing the casing, the fasteners break.
Additional speakers are placed on the dashboard or on the side pillars of the windshield.
If the car owner changes the entire beard, creating it himself to his own size, then he can place a 2DIN radio in it. A player with a large screen will add charm to the appearance of the car.
Some craftsmen insert speakers instead of air ducts. But from personal experience I know that the standard “six” torpedo does not have side window blowing. In humid and cold weather, windows fog up and freeze. If you remove the air ducts for the windshield, the airflow will worsen even more. Therefore, I do not recommend this installation of speakers.
Video: installing speakers and Shumka
Antenna installation
The “six” did not have a standard antenna installed, but a place for it was provided on models before 1996. Adherents of original spare parts can find their original antenna on the car market. It is attached to the front fender of the car.
To do this, you will need to make a hole in the wing, install the antenna, tighten the bolts and connect the wires to the radio and ground. This installation method is quite complicated and not every car owner will decide to make holes in the body.
The ease of installation is distinguished by the interior active antenna, which is attached to the windshield. It is not exposed to precipitation, does not require additional care, and does not interfere with aerodynamics when the car is moving. When purchasing an interior antenna, please note that the kit should include instructions, fasteners and stencils to simplify installation. There are two ways to install a radio antenna inside the cabin:
- The housing is attached to the glass behind the rear view mirror, and the whiskers are glued in opposite directions at the top of the glass.
- The antenna body is secured to the top of the windshield on the passenger side, and the poles are glued along the edges of the glass at right angles to each other.
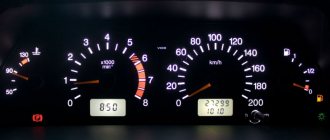
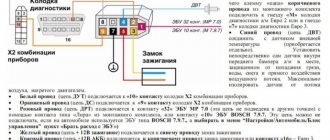
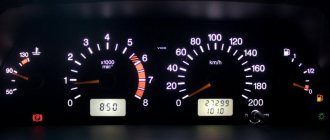
Electronic speedometer for VAZ
Particular attention is paid to the speed indicator on the instrument panel. It is located next to the tachometer, which shows engine speed. Removing this element is somewhat more difficult than other devices. To remove the speedometer, you need to release the panel latches and move the structure toward you. Then unscrew the cable of the device located in its rear part. Then the fasteners are disconnected and the cable of the mileage mechanism is carefully removed.
Upgrading the device can be done using LEDs and replacing scales with arrows. As an alternative, the standard speedometer is replaced with an electronic version. In this case, the cable will be an unnecessary element; it is simply removed. To install a new device, you will need a pulse-type sensor with wiring and M-18 thread. Considering the connection diagram, additional soldering will be required. When installing the part, it is important to ensure that the pluses of the tachometer and speedometer are connected together to ensure synchronous readings.
In conclusion
Knowing how to tune the instrument panel on a Zhiguli car yourself, you can save a lot. In addition, any owner approaches the processing of his cars responsibly at every stage. The cost of similar services in specialized centers is much more expensive, and the quality is not always guaranteed. The simple manipulations and recommendations given above will allow you to radically change the “tidy”. In addition to improving the appearance, you will receive additional protection and some useful options that will be useful for the domestic “six”.