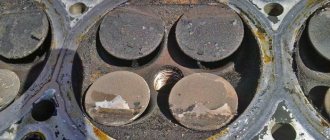
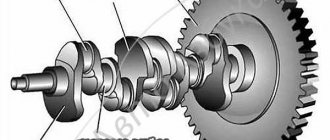
I decided to talk about the grooves on the top of the piston group - in more detail. Namely, how does this whole thing work and is it necessary to install such types on your car - or can you drive with ordinary ones and not worry? To begin with, I will describe the piston itself.
Housing and structure
It is an almost exact copy of a regular car piston, with only one distinctive feature - in the upper part, instead of the usual “mirror,” special recesses appear to increase the service life of both some timing parts and the pistons themselves.
Reasons for installation
Here guys, everything is individual, as I have already written in many articles, if you follow the technical maintenance regulations, install original or high-quality spare parts, then your “iron horse” will not let you down - the units will operate in normal modes.
However, you always want to save money or tune up your car, but this raises some questions. Namely:
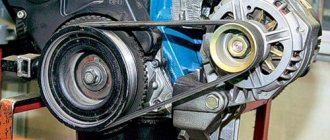
1) If we save, in particular, on the timing system (belt and other rollers) by installing low-quality parts, then their replacement interval drops significantly. For example, as a standard on our VAZs, the timing belt is changed after about 30 - 50,000 km, but if cheap "non-original" ones are installed, it can last about 5,000 - 10,000 km, or maybe less.
2) Also, some “people’s tuners” who try to squeeze more power out of our PRIORs often install air compressors on the engines. But most of the parts are not designed for such speeds (7000 - 9000), just as the gas distribution system is not designed. As you guessed, the connecting link of the belt simply breaks.
So what should we do? After all, you want to save money and drive? There is a solution (damn, just like in the advertisement) - “stickless pistons”!
Groove on top
To call them plug-free is not literary, but in a “garage” way - they will immediately understand you and appreciate your technical potential! This name comes from a simple trick - the piston does not meet the valve with the help of a special groove on top - that is, the valve DOESN'T fit into the piston, that's the name.
However, if you tell it technically and literary correctly, it turns out that there are several grooves in the upper part of the piston. Their number can be different - from 2 to 4 pieces. It is thanks to these grooves that these two engine elements do not meet. That is, the correct name is a piston with grooves.
pros
Needless to say, this system is very durable. Even if your timing belt breaks and the overhead camshaft with a set of valves freezes in place.
If the piston comes from below, pushed by the crankshaft, then no disaster will happen - they will simply fall into the grooves and everything will be fine.
That is, we just take the car to the service station, they restore the timing mechanism and you drive on. A VERY big plus.
I would like to note right away that if there are no such grooves, then you are faced with a very unpleasant repair. You can change the pistons, and the camshaft pastel; I’m already silent about the timing belt with all that it implies.
Repairs, for example, on a foreign car of class “C” or “D” can vary from 30,000 rubles and more! That’s why many people think about installing “stickless” pistons; they sleep more peacefully - well, the system breaks down, so what, the grooves will save them.
But if you think about the disadvantages, they also exist and for many manufacturers they are significant!
Minuses
When many AvtoVAZ engines appeared for front-wheel drive cars, engineers equipped the pistons with such grooves from the factory. That is, this resource was already included in production, such tuning was associated with installing a timing belt instead of a chain, and since it is less reliable, they were simply insured. This was the case with many foreign cars of those times (not all, but a large number).
However, nothing stands still, everything develops. So we got to the piston itself, the fact is that if you lighten it as much as possible, the engine gains additional power, as some manufacturers assure you can achieve about 5 - 7% of the power, this is very significant!
1) The piston with a groove cannot be called light! In order to go deeper in the top (to make grooves) you need to have a thick top, which significantly makes the piston heavier, which consequently removes power.
Which plugless pistons are reliable?
If you do not have the time and desire to constantly care for your car, you should think about converting your engine pistons to plug-free ones, which are characterized by a longer duration of trouble-free operation. Of course, each component has a number of advantages and disadvantages, your task is to choose the lesser evil. Experts recommend taking a closer look at the following non-tube pistons in an auto parts store:
- “Avtramat” - cost about 20,000 - 23,000 rubles per set. For 4 pistons you will have to additionally buy pins, stoppers and rings. If you look at the size category, the devices are classified as group C. The advantage of the “Avtramat” is that the noise level of the car’s movement remains minimal, because the new piston is installed on top of the original one.
- STK, which is praised by many car enthusiasts. They are distinguished by a Teflon coating that protects the “skirt”, they also have a displacer, and the bottom, as in the previous sample, is thicker. The thrust of the Lada Priora after reinstalling the pistons remains the same as before. The set costs from 2,200 rubles, and is sometimes difficult to find.
- ShPG from engine 21124 is another good option for the Lada Priora.
- The STI forged part is suitable for racers. Forging assumes a wide range of revolutions, up to 7800 revolutions in 1 minute.
Comparative characteristics
So that you can understand which group of pistons is better, consider the comparative characteristics of all three manufacturers with photos:
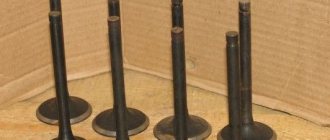
- Let's start with STI products. Forged STI pistons are produced in Togliatti and they are made by hot pressing. As reviews from consumers who have already installed STI show, these forged pistons largely reduce the efficiency of the engine. This is due to the fact that STI parts have a lower compression ratio and a larger combustion chamber. It should also be noted that the alloy of STI pistons contains less silicon, as a result of which the strength of the components at high temperatures will be lower.
Four STI pistons
In addition, as a result of the reduced nickel content in the alloy, the service life of the element can be significantly reduced. With all this, STI plugless pistons are more expensive than STK and Avtramata. - Avtramat cast pistons are produced in Kharkov, Ukraine. In the production of pistons, an alloy identical to the original parts on Priora is used. However, unlike the latter, Ukrainian-made products can have deep countersinks, and this is an undoubted advantage of the Avtramat compared to standard pistons. In this case, we are talking about safety in the event of a timing belt break. As for the compression ratio, in the case of the Avtramat it has not changed.
Two pistons Avtramat
Due to the increased selections for the valves, the area of the combustion chamber was slightly expanded, which also helps to reduce the efficiency of the engine. Domestic motorists do not notice this difference in practice. It should be noted that the cost of Avtramat parts can be lower from 50% to 70% compared to STI, depending on the auto shop. - Now let's move on to STK plug-free forged pistons. STK products are manufactured in Samara, Russia. STK plug-free pistons have almost the same properties as products from Avtramat. The exception is that STK plugless pistons have more weight, as a result of which Prior owners often note in their reviews a decrease in vehicle dynamics during acceleration. In general, pistons from STK have proven themselves well among domestic motorists.
Piston produced by STK
How to keep the timing belt in good condition for a long time
To avoid having to constantly buy new pistons, experts recommend that Lada Priora owners follow these rules for operating the car:
- It is necessary to maintain the working condition of each functional component not when it is on the verge of failure, but by regularly maintaining it and preventing breakdowns.
- Periodically renew the belt and monitor the condition of the rollers.
- If the device has 8 valves, when reinstalling, do not overtighten the belt, otherwise it will quickly break. 16-valve devices are not afraid of this problem, because the manufacturer specially installed a semi-automatic roller, which allows connecting 2 slots on the roller to each other when tensioning the belt. Then the tension will be the most optimal.
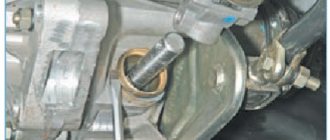
Let's start to disassemble
First, drain the oil and antifreeze. We remove the protective cover, the air filter with pipes, disconnect the ignition coil connectors, the throttle cable and the throttle assembly.
We remove the thermostat housing and simultaneously disconnect all the available connectors and pipes. We remove all the wiring that was in our way towards the battery.
We remove the generator. We unscrew the eight thirteen nuts holding the intake manifold and remove it. We unscrew all the bolts securing the valve cover, as well as the side engine support.
Unscrew the eight nuts and remove the exhaust manifold.
Remove the timing belt, camshaft pulleys and pump.
In three passes, so as not to deform the part, we first loosen and then unscrew twenty bolts of the camshaft bearing housing, the head is eight.
Be sure to follow the sequence shown in the photo.
Remove the bearing housing. We remove the camshafts; there is a distinctive lip on the intake camshaft.
Also, in several passes, we first loosen and then unscrew the ten cylinder head mounting bolts.
Be sure to follow the sequence shown in the photo.
Remove the cylinder head. All sixteen valves are replaced.
Replacing piston rings
On VAZ cars, as well as on all other models of passenger cars, it is advisable to change only the piston rings only if:
- there is no exhaust in the cylinders;
- there are no signs of damage to their inner surface.
If the liners are significantly worn, they need to be bored, and if the last size was already used before, the cylinder block needs to be relined. You can replace the PC on any VAZ engine without removing the internal combustion engine; this will require removing the cylinder head and oil sump. PCs are replaced if the gap at the joints does not exceed 1 mm.
For example, let's consider replacing piston rings on a VAZ-2114 car with an 8-valve internal combustion engine; such work must be carried out on a pit or a car lift:
- turn off the ignition, put the gearbox in neutral, disconnect the negative terminal from the battery;
- drain the antifreeze, remove the air filter housing along with the pipe (injector corrugation);
- remove the valve cover, camshaft, loosen the timing belt and move it to the side;
- disconnect the wires and cooling system pipes from the cylinder head, unscrew the head bolts;
- unscrew the nuts of the exhaust pipe of the muffler;
- We completely free the cylinder head from all fasteners that prevent it from being removed, and we remove the cylinder head;
- if there is protection under the engine, remove it;
- place a container under the engine sump, unscrew the plug on the crankcase, drain the oil;
- remove the lower hatch of the gearbox housing (three bolts);
- Using a 10 mm wrench or a socket wrench, unscrew all the oil pan bolts;
- dismantle the pan, remove the oil receiver;
- Unscrew the connecting rod nuts, remove the lower connecting rod caps, and carefully knock the pistons and connecting rods upward. Pistons should be knocked out through a soft metal drift or through a wooden block. First, you need to carefully knock out the connecting rod bolt without damaging the threads on it, then place the drift on the end of the connecting rod - in no case should you hit the bearings or the seat underneath them;
- It is recommended to remove the connecting rods one at a time, and immediately attach the caps to them; the caps should not be confused with each other, they are placed back strictly in their places, and a lock to the lock is required;
- remove the PC from the pistons, use a piece of the old ring to clean the piston grooves to bare metal. Be sure to check the cleanliness of the groove all around; there should be no coke left in it;
- We install new rings in the grooves, start with the lower MPC, then install the middle compression PK, and lastly the upper one. For installation, you can use a special device, but it is still more convenient to install the rings by hand. If the MPCs are cast iron, they cannot be bent along their axis, they can only be carefully moved apart. Compression rings also need to be bent carefully, to a minimum;
- we install the piston in place using a special mandrel, hammer it in with a wooden hammer handle or a brass or bronze drift;
- We install one piston-rod at a time, and immediately attach a connecting rod cap to each one. The connecting rod nuts should be tightened with a torque wrench, force - from 4.5 to 5.5 kg;
- then we put everything in place - the oil receiver, the engine sump, the cylinder head. We fill the radiator with antifreeze, oil into the crankcase, and start the engine to check. After replacing the PC, the internal combustion engine may initially smoke and consume oil - the engine needs to be run in for approximately 2 thousand km. It happens that despite the seemingly normal condition of the liners, the internal combustion engine continues to smoke even after replacing the rings after break-in. In this case, you will have to bore the cylinders and install a repair piston group.
Let's move on to the cylinder block
We remove the pallet. Rotating the crankshaft as it is convenient for us, unscrew two bolts on each connecting rod cap. We use a TORX E10 head for this.
We take out the pistons along with the connecting rods. To do this, use the wooden handle of a hammer to press the connecting rod from below and lightly tap it to knock it up. We remove the old liners and buy new ones of the same size according to the markings on them. Here is another stone in AvtoVAZ’s garden, the owner has never climbed into the car from the interior or into the engine, but three pistons were of group “B” and one was “C”. It turns out that at the factory they re-sharpened one cylinder a little and simply put an enlarged piston there, no words. There are no options, we take group “C”, don’t sharpen the engine because of this. We will not touch the main liners either.
We buy a new piston group that does not bend the valves, connecting rods and connecting rod bearings.
Eliminating longitudinal play of the crankshaft
It was noticed on this motor. To eliminate it, replace the thrust half-rings. Standard and repair sizes are available. We take the first repair size, if they are too tight we sand them down a little. We unscrew the middle main bearing and gently push it with a screwdriver and move the half rings. The mark on it is in the form of three serifs, shown below.
When the half ring comes out a little, turn the crankshaft, it will push it out. There are two types of half rings: white at the front and yellow at the rear; the grooves on them should point towards the crankshaft cheeks.
We install them as we removed the new half rings; if they go in with great effort, you can grind them a little on a small abrasive stone, but not from the side of the grooves. Checking the play.
We tighten the main bearing with a torque of 8 kgf*m.
Assembling the piston
There is an arrow stamped on the top of the piston; it should be directed towards the front of the engine. And there are marks on the connecting rod that should look the same way.
We insert one retaining ring into the groove on the piston. We insert the connecting rod into the piston and, having lubricated the connecting rod and the piston pin with oil, insert it into place. Insert the second retaining ring. Although this operation seems simple, it will take some pains. We inspect the assembled structure; all retaining rings must be clearly in their grooves, otherwise a ring that has jumped out while the engine is running can cause a lot of trouble.
After assembly, you need to break off the connecting rod bearing cap, since the connecting rod is made in one piece. It's like that on our cars. First, unscrew the bolts. We insert the connecting rod into the cleats at the level of the mark shown in the figure with the black arrow and lightly clamp it, then break it off with a slight movement of the hand. The first time is very scary. We put the cover in place and tighten the bolts so as not to mix it up in the future.
Engine piston rings
In an internal combustion engine (ICE), piston rings (PR) serve as a seal between the cylinder walls (liners) and the piston, due to which compression is created in the cylinders. If you forget to put the PC into the engine during assembly, the engine will not start, since the necessary compression of the working air-fuel mixture will not be ensured.
In passenger cars, three rings are standardly installed on each piston - two compression rings and one oil scraper ring, and oil scraper rings can be stacked, that is, consist of several elements. Compression piston rings (CPRs) are used to create compression in the cylinders and are always made of high-strength cast iron with various additives. The upper CPC has the greatest strength, since it operates in the most severe temperature conditions and experiences maximum loads.
Engine oil piston rings (OPRs) are needed to drain oil from the cylinder walls; if the rings do not perform their function, the engine will consume oil. MPKs can be either cast iron or steel, and cast iron PCs are almost always made in one piece, but steel oil scraper rings can only be assembled (composite). Steel MPC for one cylinder consists of:
- two spring steel rings;
- axial expander;
- radial expander.
Reasons for installation
Here guys, everything is individual, as I have already written in many articles, if you follow the technical maintenance regulations, install original or high-quality spare parts, then your “iron horse” will not let you down - the units will operate in normal modes.
However, you always want to save money or tune up your car, but this raises some questions. Namely:
1) If we save, in particular, on the timing system (belt and other rollers) by installing low-quality parts, then their replacement interval drops significantly. For example, as a standard on our VAZs, the timing belt is changed after about 30 - 50,000 km, but if cheap "non-original" ones are installed, it can last about 5,000 - 10,000 km, or maybe less.
2) Also, some “people’s tuners” who try to squeeze more power out of our PRIORs often install air compressors on the engines. But most of the parts are not designed for such speeds (7000 - 9000), just as the gas distribution system is not designed. As you guessed, the connecting link of the belt simply breaks.
So what should we do? After all, you want to save money and drive? There is a solution (damn, just like in the advertisement) - “stickless pistons”!
practical guide
Piston rings are replaced when repairing the connecting rod and piston group, if they are worn out or damaged. Also, rings are replaced during engine overhauls.
To complete the job, you will need a piston ring mandrel.
Removal
1. Remove the cylinder head.
2. Remove the engine oil pan.
4. Turning the crankshaft by the bolt securing its pulley with a 17 mm wrench, set the piston of the first cylinder to the lower position.
5. Using a TORX wrench, unscrew the two nuts securing the connecting rod cover of the first cylinder.
6. Remove the connecting rod cover.
7. Place the hammer handle against the piston and push it up.
8. Remove the piston from the cylinder.
9. Remove the liners from the connecting rod and its cover.
10. Fix the piston by the connecting rod in a vice. Slightly spreading the ring lock, remove the upper compression ring. Similarly, remove the lower compression ring, oil scraper ring and its expander.
Recommendation
The rings are thin - to avoid breaking them, cut a strip from a plastic bottle slightly shorter than the circumference of the piston. Place the edge of this strip under the lock of the upper compression ring, and then in a circle under the entire ring.
Remove the strip along with the ring from the piston. Remove the second compression and oil rings in the same way.
Comment
The advisability of replacing the rings depends on the degree of wear of the cylinders. Small uniform wear of the cylinders (within 0.05 mm) can be compensated by installing a piston of a different class with a larger diameter.
Installation
1. Thoroughly clean the piston
from soot and deposits. We inspect the piston, connecting rod and pin. Cracks on them are unacceptable.
Comment
We select new rings in accordance with the piston diameter - nominal or repair size.
2. Before installing new rings, use a set of feeler gauges to measure the gap between the piston ring and the wall of the groove into which the ring will be installed.
Table 9.1.3 Permissible gaps between the groove walls and piston rings:
| Ring | Gap, mm |
| Upper compression ring | 0,04-0,075 |
| Bottom compression ring | 0,03-0.065 |
| Oil scraper ring | 0,02-0,055 |
Comment
The permissible gaps between the groove walls and the piston rings are shown in table. 9.1.3. If the gap exceeds the maximum allowable, the piston must be replaced.
3. To select piston rings based on the thermal gap, install the rings one by one into the block cylinder to a depth of 20-30 mm and use a set of flat screws to determine the gap in the lock.
Comment
The maximum permissible thermal gap during wear (for used rings) is 1 mm, the gap for new rings is 0.25-0.45 mm. If the gap exceeds the maximum allowable, the ring must be replaced.
4. Place the rings on the piston. In this case, the oil scraper ring
and install the compression ring with the word “TOP” facing up.
We install new rings on the piston, starting with the oil ring expander.
Using a mandrel, we put on the oil scraper ring, and then the lower compression ring (we put the rings on the mandrel and carefully move them down until they are installed in the groove).
We put on the upper compression ring without a mandrel: having spread the ring lock (no more than is required to put the ring on the piston), we first place the lock on the piston, and then the back part of the ring.
5. Rotate their locks so that they are located at an angle of 120° relative to each other. The expander lock must be rotated 180° relative to the ring lock.
6. Lubricate the cylinder wall with clean engine oil
and the outer surface of the piston.
7. We put the mandrel on the piston and compress the rings with it, periodically lightly tapping the mandrel with the handle of a hammer to self-install the rings.
Warning!
The connecting rod caps are not interchangeable. The engine is equipped with “chopped connecting rods”, the covers of which are made using a special method. The contact surfaces of the cap and the connecting rod are uneven, which ensures a perfect fit of the parts during assembly.
8. We wipe dry the liners in the connecting rod and the cover, and install the liners in them.
9. Lubricate the inner surface of the liners with clean engine oil.
10. Install the piston into the block cylinder.
Warning!
The arrow on the piston crown should point towards the crankshaft pulley.
11. Pressing the mandrel against the block and tapping the piston bottom with the handle of a hammer, we recess the piston into the cylinder (at the same time we control the movement of the connecting rod to the crankshaft journal).
12. Install the cover on the connecting rod and tighten the bolts to a torque of 43.32–53.51 Nm (4.42–5.46 kgcm).
We assemble and install the other three pistons in the same way.
After installing all the pistons, reassemble the engine in reverse order.
Cylinder head repair
We mark all hydraulic compensators with numbers using an ordinary clerical touch and put them away. An ordinary magnet will help you pull them out. We dry out the valves and remove the oil seals (valve seals), the valves into scrap metal, the oil seals into the trash. We clean all channels. We take the head for grinding, just in case. After washing it again with kerosene after sanding and blowing it with air, we begin to assemble it.
We arrange the recently purchased valves in the sequence in which they will be located in the cylinder head and begin to grind in one by one. Lubricate the valve stem with clean oil and apply lapping paste to the edge.
We insert the valve into place and put a valve grinding tool on the valve stem. The stores sell a device for manual lapping, but since this is the twenty-first century, we are mechanizing the process. We take the old valve and cut off the rod from it, select a rubber tube for it of such a diameter that it fits tightly. The rod is in a reversible drill, one end of the tube is on it, the other is on the valve being ground in. At low speeds we begin to grind the valve, constantly change the direction of rotation and periodically press it to the seat or weaken the force. On average, the valve takes about twenty seconds. We take it out and wipe it.
The valve is considered ground in if a uniform gray strip of at least 1.5 mm wide appears on the chamfer.
The same stripe should appear on the valve seat.
Decarbonization of piston rings
If the engine starts to smoke, there is a possibility that there are rings stuck in the piston grooves. Nowadays, there are many different modern means for decarbonizing piston rings, and many drivers use them to restore engine performance. Among the most popular compositions are:
- Nitrox Power;
- LAVR ML-202;
- Titanium;
- LIQUI MOLY;
- WYNN'S.
Motorists believe that if the engine starts smoking, you need to use a decarbonizer, and the engine will work as before, without oil consumption and without smoke. Indeed, sometimes these remedies help, but only in cases where the motor has stood motionless for a long time (for example, after winter), and moisture has accumulated in it. If the car is subject to long-term preservation (put in a garage for winter storage), you should remove the spark plugs and pour oil into the cylinders, and plug the spark plug holes with plugs. With such prevention, the spark plugs will not become damp and rust will not accumulate on the sleeves.
But if, after all, a forgetful car owner has not taken preventive measures, you can use a decarbonizer. We get rid of rust in cylinders as follows:
- pull off high-voltage wires;
- unscrew all spark plugs;
- rotate the crankshaft so that all pistons are in the middle position;
- pour 45 ml of liquid into each cylinder, install spark plugs;
- leave the cylinders to “soak” for 6-7 hours;
- why do we turn out the spark plugs, turn the starter a few revolutions so that all the dirt flies out of the engine;
- We put the removed parts back in place and start the engine. At first it may smoke a lot, but then the smoke will go away.
Car owners should remember that decarbonization is not a panacea for all ills, and if the piston rings are worn out, then only replacing them will help.
Beginner car enthusiasts who have recently become happy owners of a Lada Priora will do well to know that this model of a domestic car differs from the VAZ 21124 engine in the engine of a lightweight connecting rod and piston group, thanks to which the vehicle moves almost silently and fuel costs are reduced. The pistons installed in the engine are called plug-in pistons, but there is a significant disadvantage - if the belt breaks, the valve immediately bends.
The manufacturer's instructions indicate that the timing drive lasts for 200,000 km, but in reality, on forums you can often find reviews from dissatisfied drivers whose timing belt broke after 40,000-60,000 km. Even when the rollers are destroyed due to wear, this can also cause the valves to bend, the repair of which costs a pretty penny.
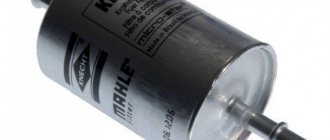
Priora fuel system
• gas tank;• pump and filter located in the tank;• fuel line;• pressure regulator;• fuel rail;• four injectors;• throttle valve;• intake manifold;• electronic engine management system.
The work is based on the fact that when the ignition is turned on, the electric fuel pump starts working, which builds up pressure in the rail. Further, when the engine is cranked by the starter, the electronic control unit opens and closes the injectors, the air-fuel mixture enters the combustion chambers, according to the operating diagram.
After fuel enters the combustion chamber, a spark is formed between the electrodes of the spark plugs. The fuel ignites and the engine starts. The injectors are electromagnetic valves, and the control unit is responsible for their operation. He is also responsible for the quality of the mixture, the ratio of air and gasoline. Sometimes problems arise and you have to disassemble the fuel system for repairs.
Replacement and installation of the intake manifold Lada Priora 8 and 16 valves
Sooner or later, the car needs to be repaired. In some places the replacement must be carried out as planned, in others it is not. But every car owner faces a similar problem.
The question immediately arises: what repairs can you realistically carry out on your own, and where do you need to go to a car service center? Thanks to the Internet, all the necessary information, even with video instructions, can be found quickly.
The main function of the manifold is to distribute air among the engine cylinders, and also mix the fuel-air mixture there. And if you do not diagnose the operation of the air system in a timely manner and do not pay attention to the symptoms, this can lead to more serious engine damage.
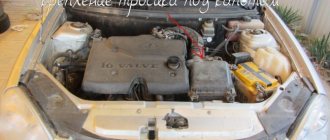
Removing the intake manifold
It is removed either for replacement or when repairing the ramp and injectors. Polishing the intake manifold will also help, as this will make it easier for fuel to enter the combustion chambers. Consequently, the power will increase. It is necessary to begin work by reducing the pressure in the fuel system. This can be done by removing the fuse for the fuel pump and starting the engine.
Wait until the engine stops on its own. This will indicate that there is no gasoline left in the system and the pressure has dropped. Now disconnect the battery and begin dismantling the system elements. First you need to remove the decorative casing, which is located on the top of the engine. It is attached at three points. Then proceed to dismantle the air filter. Remove the pipes that go to it.
Having freed up space, you can begin to remove the throttle assembly. There will be no problems with its dismantling, the main thing is not to remove the screws securing the damper. Otherwise, if you do not tighten and secure it properly, it may fall out and go into the engine. Then you will have to carry out large-scale repairs, which can be compared with a major one. With the throttle assembly removed, you can begin removing the intake manifold. Installation is carried out in reverse order.
Review of the exhaust system of Lada Priora
The exhaust gas exhaust system on the Lada Priora performs the following functions:
- exhaust gas removal;
- noise reduction when the engine is running;
- neutralization of toxic hazardous substances in exhaust gases.
The basis of the Priora exhaust system includes:
- 1. Exhaust manifold with converter;
- 2. Resonator;
- 3. Main muffler;
- 4. Auxiliary muffler;
- 5. Connecting pipes.
The manifold is used to remove exhaust gases from the cylinders into the exhaust pipe. The tightness of the connections is ensured by sealing with a metal gasket in two layers between the block head and the exhaust manifold. The attachment of the exhaust manifold to the cylinder head on one side goes into connection with the converter on the other. The collector and converter connected into one unit make it possible to reduce the warm-up time to the operating temperature of the latter, which significantly increases the efficiency of the converter.
Installation of oxygen concentration sensors at the inlet and outlet of the converter ensures constant monitoring of the quality of exhaust gases. The connection between the intake pipe and the manifold has a heat-resistant seal in the form of a metal-asbestos gasket. And the metal compensator connecting the additional muffler with the exhaust pipe serves as a vibration damper from the engine to the body and the entire exhaust system.
The exhaust gas exhaust system is connected by attaching it to the body brackets using 4 rubber rings. On the main muffler, the suspension cushion has a reinforced structure, which is due to the increased load on it.