The car jerks, there is no traction, vibration is felt, or the engine is rough; all these are symptoms of improper operation of the individual ignition coil (IIC). Other signs of a faulty ignition coil are the presence of errors 0301, 0302, 0303 and 0304, indicating misfire in one of the cylinders. Let's look at a few simple ways to check the ignition coil with your own hands.
It is worth noting that the process of checking IKZ on modern Lada cars (XRAY, Vesta, Largus, Granta, Kalina and Priora) does not have significant differences. All actions are performed in the same way.
Life hack: Priora car ignition coil for 16 valves, its price and design
To go, you need to start!
The ignition coil of a Priora car is not expensive. Its price for VAZ 2170 is from 2000+ rubles. On some machines this is a sore part that constantly breaks down. On a Priora with a 16-valve engine, there are about 4-5 analogues of this part. Read the article to the end and find out how to check its performance and which one is better. Starting the engine of a Lada Priora car is a difficult procedure, which involves several parts and assemblies at once. At the same time, the standby engine start is carried out very quickly. At this time, several small subprocesses take place, and one of them is the creation of the first spark to ignite the fuel-air mixture.
To create a spark, it is not possible to place an open fire under the hood. The injection engine has become more “advanced” compared to its carburetor predecessor - it uses ignition coils, one installed with each cylinder.
An incident may occur, causing the engine to start “unevenly”. You will have to immediately look for how to check the elements of the ignition system. If it turns out that the problem is in these small parts, do not rush to despair, because in stores there is a good standard ignition coil for Priora 16 valves, the price of which is comparable to analogues. The wires to the ignition coils are an equally important component, which if it doesn’t work, you won’t go anywhere.
Basic faults
A normal Priora part should last from 50 to 100 thousand kilometers, depending on how often you start the engine. If an element of the Priora ignition system malfunctions, the following symptoms will occur:
- When accelerating, the car will jerk (as if the box is kicking in a car with an automatic transmission), or when driving in first or second gear.
- The integrity of the winding is broken. It is worth paying attention to the tip of the ignition coil of the Priora car.
- The motor "troits". This manifests itself in vibration and excess noise that appears under the hood, while traction decreases.
Trouble the engine: why is it dangerous?
This is a rather critical phenomenon, especially if the unit begins to vibrate during acceleration.
This behavior of the engine is especially dangerous when the driver decides to overtake, but there are cars in the oncoming lane. In the process, while the motor is running, the engine power is significantly reduced. The compression ratio decreases - there may not be enough dynamics to successfully complete the maneuver.
Considering that the Lada Priora has been manufactured since 2007, there are often instances where the engine knocks like on an old car 20 years ago. This is an engine running on three cylinders. It may have the latest firmware, but if the Lada Priora has a bad engine, then such a car will not have much life left.
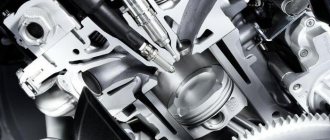
Design and principle of operation
So, starting the engine begins with turning the key in the ignition switch. At the same time, current must flow to the spark plugs, they give a spark to the fuel-air mixture, which is pumped up by the pump, the starter begins to rotate, causing the crankshaft to start moving. But the battery operates with low voltage electrical current.
Each coil is a small transformer. Two levels of winding are hidden under the housing of the element of the VAZ-2170 Priora ignition system. Its wires are low-voltage and high-voltage. The first ones receive current from the battery, the second ones transmit it to the spark plugs. When the current is converted, it is transferred to the spark plugs. The ECU “manages” this process, correctly distributing the force between the spark plugs.
As for how many ignition coils are in the Priora, there are 4 of them - one for each cylinder. Their work does not mix or overlap in any way. Each of them has “its own scope of work.”
Summary
So, we looked at why the car is tripping. These are not all possible reasons, but they help to accurately diagnose the operation of the motor and find the malfunction.
The ignition system is the weak point of the Priora, and not only it. The ignition coils in a Priora car are individual, one per cylinder, that is, 4 in total. It happens that one of them stops working, and along with it one of the cylinders falls out of the working rhythm.
This is accompanied by vibration and strange sounds under the hood. Experienced car enthusiasts in such situations understand that the car is tripping.
What is the coil for? To ignite the air-fuel mixture in the cylinder, you need a high voltage current, but in a car battery it is low voltage. Thus, the ignition coil is something like a transformer, generating a current with high voltage. Its primary winding consists of only 150 turns, and in the secondary their number is much larger, which allows it to generate pulses using the spark plug as a spark gap.
To make the magnetic field as strong as possible, an iron core is located inside the coil.
The main characteristic of a coil is the resistance value of its windings, which is taken into account when diagnosing ignition. Failure of such an important component threatens to completely stop the engine, not to mention interruptions in operation
Manufacturers and prices of analogues - which ignition coils are better for the Priora
No one, not even AvtoVAZ, promises that the analogue will work as long as the standard model. There are a sufficient number of options on the market. It will take quite a long time to determine which is better. The following components are suitable for Priora 16cl:
- SOATE (manufactured in Stary Oskol) (article 2112-3705010-12), price – 1,200 rubles.
- MZATE-2 (article 59.3705), price - 1,000 rubles.
- Baker Priora 2112-3705010-10 – 1100 rubles.
- Fenox IC16085 (STK) – 1,300 rubles.
How to distinguish a simulator from a real short circuit
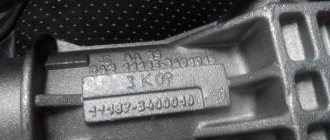
There are plenty of counterfeit goods on the markets. First of all, you should focus on cost. A short circuit for the fuel system of Priora cars should cost from 1,200 rubles in retail sales. The original product must have a plastic casing under the protective casing.
The mounting axle box should have a lightning bolt symbol to indicate high voltage. The plug surface is finished perfectly, the letters are clear and laser-etched. The serial number must be taken in the oval. The coils of the spring are tight. Experts advise cleaning the short circuit attachment points as often as possible, removing dust accumulations and moisture from them, checking the tightness of the wiring fasteners, first of all, high-voltage wiring, and replacing the short circuit as soon as the warranty period expires.
Performance check: how to check ignition coils on a Priora
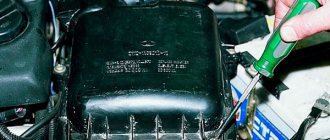
Before you start replacing the ignition coils, you definitely need to check them and inspect them. Cracks, chips, and other damage to its body are unacceptable. If you see that the plastic is damaged, it means the part has overheated and cannot be used further.
The answer to the question of how to check an element of the 16-valve Priora ignition system is not limited to inspection. First you need to swap them and see if there are interruptions in the other cylinder. If there are interruptions, the problem is in the coil. There are several ways to use devices. To work you need:
- Secure the car in place and turn off the engine.
- Remove the negative from the battery.
- Disconnect the part from the motor, and then connect a fully functional spark plug to it.
- Turn off the fuel pump.
- Use protective equipment against electric shock, this is a must!
- Turn on the ignition and crank the starter. The spark plug should spark during normal operation.
- Sometimes repair of the Priora ignition coil begins after receiving data from the ECU. The codes start with 0301 and end with 0304, indicating each cylinder accordingly. However, the problem is displayed in the coil-plug module, so the culprit will have to be found out separately.
Now we check the ignition system element on the Priora with a multimeter. For this and further work with components, models AZ-1 or MD-1 are suitable. For this:
- Remove the part to be examined from under the hood.
- Set the measurement switch to the “200 Ohm” position, connect the probes. The display should show “0” or values close to it.
- Using probes, the external winding is checked. Pinout – 1.3. The display should show exactly 0.08 Ohm. The error is the number that the display showed during calibration; it must be subtracted. If nothing is shown, check that the probes are accurately touching the winding. If there is contact, but there is no result, the winding is broken and needs to be replaced.
- Set the multimeter to 2 MΩ measurement limit to test the high voltage winding. Connect the black probe to the terminal of the second connector, and the red probe to the terminal of the coil. The indicator should be 342 kOhm - but only for a cold part. It should be cooled before testing. This also requires checking the exact contact with the probe.
What to do
If the engine jerks at idle, the cause should initially be determined. Then replace the damaged unit.
For carburetor models, the primary diagnosis begins with the throttle and the combustible mixture formation unit itself. Usually on old foreign cars and VAZs the root of evil is located here.
If the problem arose on a modern VAZ 2114/15 or on an “exotic” model like 1JZ-GE. The source of the problem may be inside the sensors. First of all, the DPKV, temperature sensor, temperature control system and others are checked. If everything is in order, you need to move on. High-voltage wires, spark plugs, and the ECM are diagnosed, and the ECU is checked last.
The car jerks at idle and when driving
If the problem occurs not only while parked, but also while driving, it is necessary to check the ignition, carburetor, and serviceability of the throttle valve.
For the injector, diagnostics of the fuel rail, its pressure, tightness, and the condition of the injectors are appropriate.
Also in both cases, the electronic part is diagnosed: control units, distributor, wiring, spark plugs.
The malfunction is caused by a failure, incorrect operation, of one of the vehicle systems.
The injector jerks
Main reasons:
- injectors or individual fuel supply elements are clogged;
- ignition coils are not working properly;
- The ECU and sensors are not functioning correctly.
The carburetor jerks
Everything is simpler with a carburetor. Here's what you should check:
- throttle valve condition;
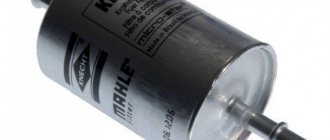
- filters;
- spark plugs;
- distributor;
- Is the fuel pump working correctly?
At idle the car jerks and stalls
If the engine does not idle during a cold start in winter, there is nothing terrible - the block will warm up and everything will return to normal. However, if there is a failure after warming up, there may be several reasons for the breakdown.
- Idle air control failure.
- Clogged, throttle malfunction.
- The carburetor and jets are clogged (the injectors are checked for the injector).
- The fuel supply pump is faulty.
- The air/fuel filter is worn out.
- Failure of the electronic sensor MRV, TPS, DPKV.
The car shakes at idle
If vibration is transmitted to the car body, the first step is to check the wear of the power plant mounts. Squashed cushions do not reliably hold the engine in place, which causes severe shaking, deviation of the internal combustion engine from the nominal position and, as a result, vibration.
Other causes of shaking are described above.
The car shakes and jerks at idle
The process of engine tripping is a consequence of the malfunction of one or more cylinders. A similar breakdown is caused by a failure of the spark plug or a breakdown of the high-voltage wire.
- With the engine running, remove the spark plug cap from the first cylinder.
- After 3-4 seconds, install the element in place.
- Consistently repeat the procedure for all boilers.
During the check, you must listen to the sound of the engine. If the growling gets worse (the system doubles), the compartment is fine. If the result is neutral (nothing has changed), it is worth checking the line completely for serviceability.
The primary source of failure may be the following reasons:
- incorrect mixture setting - the cylinder floods;
- spark plug or wiring is of poor quality;
- occurrence of rings;
- piston wear.
Diesel car jerks at idle
There can be only three reasons here.
- The cylinder compression has dropped. As a rule, this occurs due to burnout of the cylinder head gasket and wear of the piston group elements.
- Injector problems - poor mixture supply, blockages, intake failure.
- Malfunction of the injection pump.
The car on gas jerks at idle
If a breakdown is detected, it is strictly not recommended to interfere with the unit yourself. You must contact a qualified gas fitter.
Interruptions on a cold engine
If the engine stalls at idle and then levels out after warming up, don’t worry too much. When cold, the power plant does not have normal clearances and can operate unstably. After reaching the design temperature, the motor stabilizes and stops twitching.
If the vibrations are strong and prolonged
When vibration in the engine does not disappear, but persists for a long time, this may indicate problems:
- wear of the piston group;
- violation of internal combustion engine fasteners;
- incorrect operation of the fuel system;
- ignition problems.
Removing and installing a coil on a Priora
To change the ignition system element in a 16 valve engine, follow these steps:
- Park the car level, securing it with the hand brake.
- Raise the hood and remove the negative from the battery.
- Undress the motor by removing its plastic protective casing.
- Find the spare part you need, and then the wire block connected to it.
- Squeeze the wire block clamp and turn off the power.
- Using the 10th key, unscrew the bolt that secures the part to the metal.
- Carefully remove the spool, trying to move it vertically. It would be a shame to damage the wiring at the very last moment.
- Remove the faulty part and replace it with a new one. Tighten the fastening bolt, connect the wire block and place the negative on the battery. Check functionality.
Source
Repair of individual ignition coils
Signs of malfunctions of individual ignition coils (ICO) may be different. For example, the engine is running rough, the “Check Engine” indicator comes on, and the on-board computer shows the “cylinder misfire” error. There is an opinion among car enthusiasts that in order to extend the life of the ICP, as well as to reduce the number of breakdowns, heat shrinkage should be put on the ignition coil. Is it worth doing this?
You will need : heat shrink tube with a diameter of 25-30 mm, a hair dryer, scissors.
Procedure:
- Place heat shrink on the ignition coil;
- Cut the heat shrink to length;
- Heat it with a hair dryer so that the heat shrink fits tightly onto the coil.
Some motorists repeat the operation, putting on 2-3 layers of heat shrink.
Reviews about such repairs of ignition coils can be divided into two groups:
- The ignition coil no longer breaks. The error was cleared and it no longer lights up. The engine stopped running and became playful. Can be considered as a temporary repair in the field.
- You cannot repair the ignition coil this way. There is no effect and there should not be. There is no point in putting heat shrink on the ignition coil.
Have you ever repaired ignition coils yourself? Before replacing, first check the ignition coil with a multimeter.
Let's remember that we previously looked at a simple modification to individual ignition coils, which can help cope with unstable sparking.
Source
Checking a faulty ignition coil on a Priora
To go, you need to start! The ignition coil of a Priora car is not expensive. Its price for VAZ 2170 is from 2000+ rubles. On some machines this is a sore part that constantly breaks down. On a Priora with a 16-valve engine, there are about 4-5 analogues of this part.
Read the article to the end and find out how to check its performance and which one is better. Starting the engine of a Lada Priora car is a difficult procedure, which involves several parts and assemblies at once. At the same time, the standby engine start is carried out very quickly. At this time, several small subprocesses take place, and one of them is the creation of the first spark to ignite the fuel-air mixture.
To create a spark, it is not possible to place an open fire under the hood. The injection engine has become more “advanced” compared to its carburetor predecessor - it uses ignition coils, one installed with each cylinder.
An incident may occur, causing the engine to start “unevenly”. You will have to immediately look for how to check the elements of the ignition system. If it turns out that the problem is in these small parts, do not rush to despair, because in stores there is a good standard ignition coil for Priora 16 valves, the price of which is comparable to analogues. The wires to the ignition coils are an equally important component, which if it doesn’t work, you won’t go anywhere.
Basic faults
A normal Priora part should last from 50 to 100 thousand kilometers, depending on how often you start the engine. If an element of the Priora ignition system malfunctions, the following symptoms will occur:
- When accelerating, the car will jerk (as if the box is kicking in a car with an automatic transmission), or when driving in first or second gear.
- The integrity of the winding is broken. It is worth paying attention to the tip of the ignition coil of the Priora car.
- The motor "troits". This manifests itself in vibration and excess noise that appears under the hood, while traction decreases.
Diagnostics of spark plugs by plaque
When the engine starts running cold or hot, you can check. If the coating is white, this indicates a lean mixture and overheating of the engine. A black tint indicates a rich mixture. In both the first and second cases there are problems with the operation of the electronics. This is either installing new firmware, or replacing the ECU. A normal spark plug has By the way, the engine may stall at idle if the part is damp. This also significantly increases the warm-up time. In addition to the spark plugs, the ignition coil may also be acting up. Priora (8 valves) is equipped with distributor ignition. Overheating of the coil is often observed. You can restore the operation of the motor by simply replacing the element.
General principle of operation of the ignition coil, history
Like most active electrical devices, the bobbin operates on the induction effect. The point is this. The coil is constantly supplied with 12 volts. There are two windings running inside the device. High and low voltage. The trick is that at the moment the circuit closes, there is 12 volts in the low voltage winding. In the second, internal, short high-voltage pulse is induced. Up to 24 volts. That is 24 thousand. This impulse is applied to the spark plug, and a high-temperature spark flashes between its electrodes, igniting the fuel mixture. There are three types of ignition systems:
- Contact - 14-18 volts.
- Electronic - 19-22 volts.
- Electronic engine control system (ECM) - 22-26 volts.
Design and principle of operation
So, starting the engine begins with turning the key in the ignition switch. At the same time, current must flow to the spark plugs, they give a spark to the fuel-air mixture, which is pumped up by the pump, the starter begins to rotate, causing the crankshaft to start moving. But the battery operates with low voltage electrical current.
Each coil is a small transformer. Two levels of winding are hidden under the housing of the element of the VAZ-2170 Priora ignition system. Its wires are low-voltage and high-voltage. The first ones receive current from the battery, the second ones transmit it to the spark plugs. When the current is converted, it is transferred to the spark plugs. The ECU “manages” this process, correctly distributing the force between the spark plugs.
As for how many ignition coils are in the Priora, there are 4 of them - one for each cylinder. Their work does not mix or overlap in any way. Each of them has “its own scope of work.”
Signs of Engine Cylinder Failure
When driving, the engine begins to pull poorly. Work intermittently. However, at idle it seems to run smoothly. At speeds, if the neutral gear is engaged, there are no interruptions either. But as soon as you start moving, the engine shakes. Speed is gained pl
The electronic injection system is designed in this way. That it will compensate for the lack of operation of one cylinder. If you are supposed to maintain a certain number at idle. Even if the cylinder is not working, the electronic unit will give a command to increase the speed. And compensates for the loss of one cylinder. Also, as the speed increases, the injectors will begin to supply more fuel to the remaining cylinders than usual. The absence of one cylinder will not be noticeable. It's worth starting to move. The electronic control unit will also equalize engine speed by increasing the fuel supply to the working cylinders. But the loss of power will already be visible. Three cylinders are not four. The engine will choke. The sound of the engine will change. And there will be no pleasant acceleration like when 4 cylinders are running. Diagnostics involving a tester is expensive. Moreover, a faulty coil can be detected directly on the car.
Checking the ignition coil and its circuits Lada Priora (VAZ-2170)
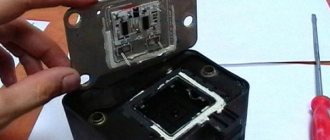
To check the functionality of the ignition coil, we relieve the pressure in the engine power supply system and do not replace the fuel pump fuse (see “Replacing the fuel filter”). Remove the ignition coil (see “Checking the condition and replacing spark plugs”). We insert a known-good spark plug into the rubber tip of the coil and connect the engine management system wiring harness block to the coil.
We place the spark plug on the cylinder head cover... ...so that there is contact between the side electrode of the spark plug and the engine ground.
To avoid electric shock, when cranking the crankshaft with the starter, do not touch the spark plug and the tip of the coil with your hands, but hold the coil by its plastic housing. An assistant, turning the ignition key to the “starter” position, turns the crankshaft. If the ignition coil and its circuits are in good working order... ...a spark should regularly jump between the electrodes of the spark plug. If this is not the case, you need to check the power supply and coil control circuits. To check the coil power circuit, disconnect the engine control system wiring harness block from it...
...and connect the tester probes to terminals “2” and “3” of the wiring harness block. When the ignition is turned on, the device should detect a voltage equal to the voltage at the battery terminals. If the voltage value does not correspond to the norm, check the serviceability of the circuits (open and short to ground) between terminal “3” of the wiring harness block and terminal “30” of the socket of the main relay of the engine management system (“+” power supply), as well as between terminal “ 2" wiring harness blocks and engine ground. To check the ignition coil control circuit, we use a probe with a 1.2 W lamp (you can use, for example, a cigarette lighter lamp).
We connect the probe probes to terminals “1” and “3” of the control system wiring harness block. If the control and power circuits of the ignition coil are working properly, the probe light should blink frequently when cranking the crankshaft with the starter. Otherwise, check the wire connecting terminal “1” of the wiring harness block to the corresponding (for each engine cylinder) terminal of the controller for open circuit and short to ground. If the power and control circuits of the ignition coil are working properly, but when checking there is no spark on the working spark plug inserted into the tip of the coil (see above), then the coil is faulty and must be replaced.
The ignition coil, which is located in the car, essentially converts the low voltage from the battery and generator into high voltage, to supply it individually to each spark plug. Roughly speaking, this is a miniature electrical transformer, the moment of failure of which is almost impossible to predict and repairs and diagnostics have to be carried out on the failed device. Below in our article we will tell you in detail how to check the ignition coil for a VAZ-2112 with your own hands.
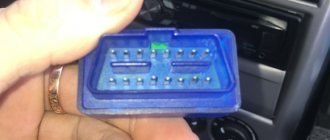
Assignment of contacts of the instrument cluster block
1 To the electric power steering 2 To the hazard warning lamp 3 To the emergency oil pressure sensor 4 To the parking brake switch 5 To the immobilizer control unit 6 To the airbag control unit 7 To the exterior lighting switch 8 To the turn signal switch (starboard side) 9 To the indicator switch turn (left side) 10 To the fuel injection system control unit 11 To the front passenger airbag deactivation sensor 12 To the seat belt sensor not fastened 13 To the control unit of the electronic brake force distributor 14 To the “RESET” button on the steering column switch (-) 15 To the level sensor brake fluid 16 To the anti-lock brake system control sensor 17 To the headlight high beam switch 18 To the instrument cluster lighting switch 19 Housing 20 To terminal “30” of the battery 21 To terminal “15” of the ignition switch 22 To the fuel consumption sensor 23 To the function switching mode key trip computer in a ring forward and changing the minutes (-) 24 To the mode key for switching the functions of the trip computer in a ring back and setting the clock (-) 25 To the outside temperature sensor (-) 26 To the outside temperature sensor (+) 27 To the fuel level sensor 28 To speed sensor 29 To coolant temperature sensor 30 Low-voltage tachometer input 31 Diagnostics during production of instrument cluster 32 To terminal “L” of generator relay regulator
Manufacturers and prices of analogues - which ignition coils are better for the Priora
No one, not even AvtoVAZ, promises that the analogue will work as long as the standard model. There are a sufficient number of options on the market. It will take quite a long time to determine which is better. The following components are suitable for Priora 16cl:
- SOATE (manufactured in Stary Oskol) (article 2112-3705010-12), price – 1,200 rubles.
- MZATE-2 (article 59.3705), price - 1,000 rubles.
- Baker Priora 2112-3705010-10 – 1100 rubles.
- Fenox IC16085 (STK) – 1,300 rubles.
Performance check: how to check ignition coils on a Priora
Before you start replacing the ignition coils, you definitely need to check them and inspect them. Cracks, chips, and other damage to its body are unacceptable. If you see that the plastic is damaged, it means the part has overheated and cannot be used further.
The answer to the question of how to check an element of the 16-valve Priora ignition system is not limited to inspection. First you need to swap them and see if there are interruptions in the other cylinder. If there are interruptions, the problem is in the coil. There are several ways to use devices. To work you need:
- Secure the car in place and turn off the engine.
- Remove the negative from the battery.
- Disconnect the part from the motor, and then connect a fully functional spark plug to it.
- Turn off the fuel pump.
- Use protective equipment against electric shock, this is a must!
- Turn on the ignition and crank the starter. The spark plug should spark during normal operation.
- Sometimes repair of the Priora ignition coil begins after receiving data from the ECU. The codes start with 0301 and end with 0304, indicating each cylinder accordingly. However, the problem is displayed in the coil-plug module, so the culprit will have to be found out separately.
Now we check the ignition system element on the Priora with a multimeter. For this and further work with components, models AZ-1 or MD-1 are suitable. For this:
- Remove the part to be examined from under the hood.
- Set the measurement switch to the “200 Ohm” position, connect the probes. The display should show “0” or values close to it.
- Using probes, the external winding is checked. Pinout – 1.3. The display should show exactly 0.08 Ohm. The error is the number that the display showed during calibration; it must be subtracted. If nothing is shown, check that the probes are accurately touching the winding. If there is contact, but there is no result, the winding is broken and needs to be replaced.
- Set the multimeter to 2 MΩ measurement limit to test the high voltage winding. Connect the black probe to the terminal of the second connector, and the red probe to the terminal of the coil. The indicator should be 342 kOhm - but only for a cold part. It should be cooled before testing. This also requires checking the exact contact with the probe.
Remember that the winding of this spare part does not change, but the tip can be easily changed. Most often, repairs are limited to routine replacement - in order to be completely sure of the tightness of the part.
Checking the performance of the coil
A multitester is a device that combines a voltmeter, ammeter and ohmmeter. Before connecting the device to the coil, its internal resistance must be checked to take into account possible errors. Then we connect the tester to the primary winding. If the device shows no more than 0.5 Ohm, taking into account the measurement error, then everything is fine with this coil. I mean, with its primary winding. But there is also a secondary one. How can I check it?
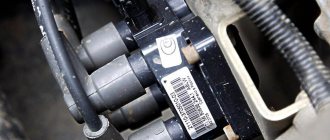
You need to remove the coil from its place by disconnecting the negative terminal of the Priora battery. Decorative plastic is removed from the motor. Then you need to press out the plastic clamp and disconnect the coil from the wiring, after which the fastening bolt is unscrewed with a 10mm wrench and the device is removed from the spark plug well.
Problems with coils can lead to sudden jerks in engine operation, speed surges, and cylinder failures. Therefore, if you have such symptoms, it is better to use the above information and replace the suspicious part before it completely fails. It also happens that the coil has not yet broken, but is already malfunctioning. This does not necessarily mean that a replacement is needed; some repairs will do, or rather cleaning of water condensation and dirt.
Sometimes coils fail when the spark plug gap is incorrect. Checking the performance of the coil on a Priora car can be easily done by turning the crankshaft. To do this, you need to relieve the pressure in the fuel system and remove the fuel pump fuse. Then we remove the coil, insert a spark plug into its rubber tip, and connect the wires to the coil itself.
You can check the coil power circuit. You need to take the multitester mentioned above and connect its probes to its terminals. If you turn on the ignition at this moment, the tester should show a voltage equal to that at the battery terminals. Otherwise, it is necessary to check the circuits for opens and shorts. If the power and control circuits are working properly, but when checking there is no spark on the working spark plug inserted into the tip, then the coil is faulty and will have to be replaced.
How to determine a breakdown
In order to determine the malfunction, you just need to take a closer look at the behavior of the car. Typical signs of problems with ignition coils are as follows:
- the engine begins to “trouble”, unstable operation of the power plant is noted, the more time passes from the moment the problem appeared, the worse the engine performs;
- The poor performance of the unit is especially noticeable at sub-zero temperatures; the situation more or less normalizes only after the engine warms up. In addition, the problem may occur frequently if the machine is located in an area of high humidity;
- when you sharply press the gas pedal on the engine;
- There is a special indicator on the instrument panel, the so-called Check Engine. It signals to the car owner that there is some kind of malfunction in the car’s power circuit. You can decipher the indicator readings using the instruction manual that came with the car upon purchase.
Diagnosing a failure of an element is not difficult; it is more difficult to identify which part is not working. Each cylinder in the Priora has an individual coil installed; there is no ignition module on the car. Therefore, you will have to call each of them with a multimeter, check each tip
Special attention should be paid to the caps, because if a problem happens to them, you won’t have to change the part. To identify the problem, you just need to remove the element and clamp it with pliers
If the silicone from which the part is made begins to wrinkle, then the tip needs to be replaced. If, when compressed, it remains even and smooth, then the problem lies in something else.