Before replacing the oxygen sensor, you need to make sure that it is this that is causing the engine to malfunction: failures during acceleration, loss of power, increased consumption, engine tripping. To do this we need to check the oxygen sensor.
List of possible malfunctions of the lambda probe (oxygen sensor):
- heating not working;
- loss of sensitivity - decreased performance (how to repair the sensor (restore sensitivity)?).
As a rule, the death of a sensor is most often not recorded on a car if the cause is in the sensitivity of the sensor. But if there is a break in the sensor heating circuit, the on-board computer will instantly give you an error.
Checking the sensor power (voltage at the oxygen sensor)
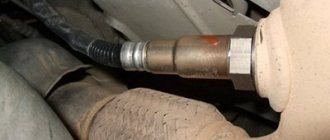
Before replacing the sensor, you need to make sure that it is receiving power and that all circuits are working properly. To do this, open the hood and disconnect the sensor connector (it is attached with a clamp to the cooling system pipe).
- Check the heating element circuit. We take the tester and connect its “minus” to the engine, and attach the “plus” to contact “B”. Turn on the ignition and look at the tester readings: it should show 12V. If the tester readings are less than 12V or are absent at all, then either the battery is discharged (which is unlikely) or the power circuit is open (we eliminate the malfunction). The ECU may also be faulty, but as a rule, the on-board computer immediately indicates this error.
- We check the circuit of the sensitive element. We measure the voltage between contacts “A” and “C”. minus on "C" plus on "A". The voltage should be 0.45V. If the voltage is absent or differs by 0.02 V or more, then the power circuit is faulty (you need to find and fix it) or the ECU is faulty (which is also unlikely).
You can fully check the sensor for functionality only with the help of an oscilloscope, which most car enthusiasts do not have, so I see no point in describing this situation. I will only say that to check it you will need to artificially lean and enrich the fuel mixture and look at the sensor readings. If the sensor has already traveled quite a bit - more than 100,000 km, then it can be safely replaced. Because, even if it is working, the sensitivity has noticeably deteriorated - which leads to extra costs for gasoline.
The main symptoms of a malfunctioning lambda probe
The main sign of a faulty lambda probe is a change in engine operation, since after its breakdown the quality of the fuel mixture supplied to the combustion chamber significantly deteriorates. The fuel mixture essentially remains uncontrolled, which is unacceptable.
The reason for the lambda probe to fail to operate may be the following:
- depressurization of the housing;
- penetration of external air and exhaust gases;
- overheating of the sensor due to poor-quality engine painting or improper operation of the ignition system;
- obsolescence;
- incorrect or interrupted power supply that leads to the main control unit;
- mechanical damage due to incorrect operation of the vehicle.
In all of the above cases, except the last one, failure occurs gradually. Therefore, those car owners who do not know how to check the lambda probe and where it is located will most likely not immediately notice the malfunction. However, for experienced drivers it will not be difficult to determine the reason for changes in engine performance.
The gradual failure of the lambda probe can be divided into several stages. At the initial stage, the sensor stops functioning normally, that is, at certain operating moments of the motor, the device stops generating a signal, subsequently destabilizing the idle speed.
In other words, they begin to fluctuate over a fairly wide range, which ultimately leads to a loss of quality of the fuel mixture. At the same time, the car begins to jerk for no reason, you can also hear popping noises that are uncharacteristic of the engine, and a warning light always lights up on the instrument panel. All these anomalous phenomena signal to the car owner that the lambda probe is not working properly.
At the second stage, the sensor stops working completely when the engine is not warmed up, while the car will signal the driver about the problem in every possible way. In particular, there will be a noticeable loss of power, a slow response when pressing the accelerator pedal and the same popping noises from under the hood, as well as unjustified jerking of the car. However, the most significant and extremely dangerous signal of a lambda probe failure is engine overheating.
If you completely ignore all previous signals indicating a deterioration in the condition of the lambda probe, its breakdown is inevitable, which will cause a large number of problems. First of all, the possibility of natural movement will suffer, fuel consumption will also increase significantly and an unpleasant, pungent odor with a pronounced hint of toxicity will appear from the exhaust pipe. In modern automated cars, in the event of a breakdown of the oxygen sensor, an emergency lock can simply be activated, as a result of which subsequent movement of the car becomes impossible. In such cases, only an emergency call to a tow truck can help.
However, the worst case scenario is depressurization of the sensor, since in this case the movement of the car becomes impossible due to the high probability of engine failure and subsequent expensive repairs. During depressurization, exhaust gases, instead of exiting through the exhaust pipe, enter the atmospheric reference air intake channel. During engine braking, the lambda probe begins to detect an excess of oxygen molecules and urgently sends a large number of negative signals, which completely disables the injection control system.
The main sign of sensor depressurization is a loss of power, this is especially felt during high-speed driving, a characteristic knocking sound from under the hood while driving, which is accompanied by unpleasant jerking, and an unpleasant odor that is emitted from the exhaust. Depressurization is also indicated by visible deposits of soot formations on the exhaust valve body and in the area of the spark plugs.
How to determine a faulty lambda probe is described in the video:
What and how can you check the lambda?
To check, you will need a digital voltmeter (preferably an analog voltmeter, since its “sampling” time is much shorter than that of a digital one) and an oscilloscope, if possible, the measurements will be more accurate. Before checking, you should warm up the car since lambda operates correctly at temperatures above 300C°.
First we look for the heating wire:
We start the engine, do not disconnect the lambda connector. We connect the negative probe of the voltmeter (ordinary gauge) to the car body. We “poke” the positive probe on each wire contact and observe the voltmeter reading. When the positive wire of the heater is detected, the voltmeter should show a constant 12 V. Next, using the negative probe of the voltmeter, we try to find the negative wire of the heater. We connect to the remaining contacts of the sensor connector. If a negative contact is detected, the voltmeter will again show 12 V. The remaining wires are signal wires.
General connection rules
Since 1999, cars have typically been equipped with zirconium or titanium oxygen sensors that meet certain standards regarding wire colors. The number of wires is usually four. Below are tables for both probes. In the vast majority of cases, to check you will need the first table - for zirconium sensors, but occasionally you can find titanium ones.
If, during reconciliation, it is revealed that the combination of colors in one of the columns of the table corresponds to the colors of the lambda probe wires of your car, this means that the probe is structurally designed this way, and the pinout should be done in accordance with these data.
| Purpose | Color combinations (zirconium probes) | ||||
| 1 | 2 | 3 | 5 | 6 | |
| Signal (plus) | Blue | Black | Black | Violet | Green |
| Signal (minus) | White | Grey | Grey | Beige | White |
| Heater (plus) | Black | Violet | White | Brown | Black |
| Heater (minus) | Black | White | White | Brown | Black |
| Purpose | Color combinations (titanium probes) | ||
| 1 | 2 | ||
| Signal (plus) | Grey | Yellow | |
| Signal (minus) | Grey | Black | |
| Heater (plus) | Black | Red | |
| Heater (minus) | Black | White | |
Tip for using the table:
- Check the oxygen sensor wires in your car.
- Compare their colors with the columns in the tables.
- If the colors completely match one of them, then this is exactly the design you have and you should build on it.
For example, your lambda probe is equipped with four wires of the following colors: beige, purple and two brown. The same combination is indicated in the fourth column of the first table. This means you have a zirconium device with the same wires and operating principle. Next, we look at the first column of the same table and see that the arrangement of the wires according to the diagram is as follows: the beige one goes to ground (minus), the purple one is responsible for transmitting signal data, and the two brown ones are needed for the operation of the heater. This way you can accurately identify the wires by their shades.
Main reasons for failure
There can be many reasons for the breakdown of the oxygen sensor, among them, of course, the quality of the fuel used. Let's look at the main ones:
- Damage or shaking of the probe due to careless driving (hitting an obstacle, a hole).
- Probe overheating due to a malfunction in the ignition unit.
- Clogging of the ceramic surface with combustion products of low-quality gasoline.
- Engine malfunction (oil getting into the exhaust).
- Short circuit in the sensor wires.
Sensor failure can occur gradually, causing the engine to malfunction. On modern cars there is a second probe after the catalyst, which improves the quality of the internal combustion engine and protects the atmosphere from fuel combustion products.
Description and purpose of devices
Oxygen sensors, most often, are a galvanic system with a solid-state electrolyte, which enters the operating mode when heated above 300˚C. They are made using various materials as the electrolyte and have designs depending on their purpose.
The name λ-probes was given because this Greek letter denotes the coefficient responsible for the excess air in the internal combustion engine. With the best proportion of fuel and air in the engine cylinder (maximum efficiency is achieved with minimal fuel consumption), the ratio of the flow rate of the air mixture used to the stoichiometric (optimal): λ = 1. With this indicator, the car engine operates in an economical mode and the best efficiency of the catalyst is achieved, eliminating harmful substances from exhaust gases.
The purpose of the sensors is to control oxygen or residual fuel in exhaust gases for the operation of internal combustion engines and boilers in economical mode and to minimize harmful emissions of carbon monoxide, nitrogen oxide, and hydrocarbons using automation.
Classification, device and principle of operation
Sensors are divided into types depending on the material of the active elements, the presence of a heating system, design features and principle of operation. Let's consider the existing types of probes.
Zirconium
For this type of sensor, zirconium dioxide serves as the solid electrolyte of the galvanic system - a ceramic membrane permeable to oxygen ions, which exhibits operating properties at temperatures above 300˚C. The solid-state zirconium tip is coated with a thin layer of yttrium oxide for better permeability of oxygen atoms, and on the outer and inner sides it is partially coated with a thin layer of platinum, which acts as electrodes. Using the example of Fig. 1, let us consider a cross-section of a λ-probe.
Fig.1
- Wires: signal and heater power.
- Heating wire contact plate.
- A steel body connected to a casing that is threaded into the socket of the exhaust pipe opening.
- Zirconium electrolyte with outer and inner platinum electrode plates.
- Heater.
- Ceramic heat insulating element.
- Contact plane.
- Metal housing with holes for flue gases to enter.
Principle of operation
It's pretty simple. In the inner chamber of the working element with a platinum electrode there is ordinary air, which has a standard (reference) oxygen permeability with its own pressure on the walls of the zirconium tip when it is heated to 350-400˚C.
The outer platinum electrode receives exhaust gases, making the permeability variable, depending on the volume of oxygen in these gases. The potential difference on the electrodes appears due to the movement of oxygen ions from the side of higher pressure to the side with lower pressure.
A sharp voltage drop (from approximately 850 mV to 75 mV) when the presence of oxygen in the exhaust changes from a mixture with excess fuel and a lack of oxygen (rich, where λ<1) to a mixture with a lack of fuel and excess oxygen (lean, where λ>1) , allows you to make measurements with an error of about 5%.
Titanium
The working element of this probe is titanium dioxide. The sensor design is similar to zirconium, but does not require a chamber with a reference air mixture. The operating principle is based on a change in the resistance of the material when the volume fraction of oxygen in the exhaust changes. The more oxygen ions, the greater the resistance that occurs in the working element. For the system to function, a high heating temperature of titanium dioxide (over 600˚C) and a constant power supply to the electronic control unit - 5V are required.
Advantages of titanium probes:
- Durability, small size.
- There is no chamber with a reference comparative mixture, which increases their durability.
- Quickly achieve heating and working condition.
The disadvantages include a higher price than zirconium, which has led to the refusal of car manufacturers to use them in modern models.
Broadband – LSU sensors
With a wide measurement range in areas with different excess air ratios (λ<1; λ>1), oxygen probes of this design are universally used in various types of engines (gas, diesel, internal combustion with positive ignition) and heating installations. The broadband device more accurately sends a signal to the electronic control unit about the ratio of the presence of oxygen and fuel in the exhaust gases of the internal combustion engine, which allows better control of the level of emissions.
In appearance, the probe is similar to zirconium, but the operating principle is slightly different. The operation of the system is based on maintaining a constant potential difference between the electrodes within 0.45 V, corresponding to an excess air mixture ratio of unity.
The sensor consists of two working elements - zirconium, which performs a measuring function, and an element for introducing or removing oxygen from the system. Between the working elements there is an elongated hole, ranging in size from 20 to 50 microns. Two electrodes are placed in the hole for measuring and adjusting (pumping) the volume fraction of oxygen. A barrier is inserted into the measuring hole, separating it from the exhaust gases and regulating the injection or pumping of oxygen from it. The zirconium element is in contact with the external atmosphere thanks to a small supply channel.
If the mixture supplied to the engine is lean in fuel, then the exhaust gases are rich in oxygen and it is removed from the measurement hole using a positive voltage to the output working element. Otherwise, a voltage with the opposite sign is applied to the element, oxygen enters the measuring hole.
The electronic circuit strives to maintain a voltage of 0.45 V through a constantly changing voltage on the electrodes of the element for introducing/removing oxygen from the system so that the oxygen concentration in the hole corresponds to: λ = 1. A heater is built into the sensor to achieve a temperature of 700˚C and higher, depending depending on the type of probe.
pros
The advantages of broadband probes include:
- Wide range of measurements and regulation of oxygen in the exhaust.
- Quick heating and activation when starting the car.
- Wide range of applications.
It should be noted that lambda probes come with 2, 3, 4, 5 leads. Devices without heating usually have 2 terminals - signal and ground. Broadband devices have 5 or more pins.
In what systems are they used?
Oxygen sensors allow you to measure the volume fraction of oxygen in gases present after fuel combustion in internal combustion engines and boilers operating on solid fuel or methane.
λ-probes are used in instruments that measure the proportion of oxygen in the flue gases of boilers at thermal power plants and other industrial enterprises for the best adjustment of the efficiency of fuel combustion by supplying air to the furnace, depending on the instrument readings.
Sensors are most widely used in the automotive industry for automatically adjusting the supply of gasoline-air mixture to engine cylinders.
Operating principle of the oxygen sensor
The principle of operation of the oxygen sensor is quite simple. The lambda probe must compare the readings with some ideal results in order to understand how the percentage of oxygen in the mixture changes, so measurements are taken in two places - atmospheric air and combustion products are measured.
This approach allows the sensor to feel the difference if the fuel mixture ratio changes.
The ECU must receive an electrical impulse from the lambda probe. To do this, the sensor must be able to convert measurements into electrical signals. For measurements, special electrodes are used that can react with oxygen.
Lambda uses the principle of galvanic cells - changing the conditions of chemical reactions leads to a change in the voltage between the two electrodes. When the mixture is rich and the oxygen content is below the lower threshold, then the voltage rises. If the mixture is lean, the voltage will drop.
Next, the impulse that occurs at the stage of chemical reactions is sent to the ECU, where the parameters are compared with the fuel maps stored in the memory. As a result, the operation of the power system is adjusted.
The tip is coated with platinum - it is this layer that reacts with oxygen. One side of this tip is in contact with the exhaust gases, the other side with the air in the atmosphere.
The lambda probe electrodes have one feature. So that the reaction is more efficient and the indicators are accurate, measurements of the oxygen content in the exhaust are carried out under certain temperatures.
In order for the tip to reach the performance characteristics and the required electrical conductivity, the temperature of the environment should be 300-400 degrees.
Some oxygen sensor models are equipped with electric heaters. Thanks to them, the lambda can quickly reach operating temperature conditions. Heating uses energy from the vehicle's on-board network.
Replacing an oxygen sensor is not a planned procedure, but recommendations often boil down to the following:
- heated sensors require replacement every 100 thousand kilometers;
- sensors without heating - replacement every 50-80 thousand kilometers; mileage:
- planar sensors - replacement every 160 thousand kilometers.
The lambda probe is replaced after checking it for damage using any of the methods described above. Repair work to troubleshoot a lambda probe is divided into two stages: preparatory and installation phase.
The preparatory stage involves the availability of the necessary tools, selection and purchase of a replacement part (lambda probe). Next, the protection is dismantled and the nut is processed for fixation with a liquid wrench or WD-40. It is also necessary to prevent the manifold from expanding and reduce the engine temperature to an acceptable level.
Symptoms of malfunction
In most cases, the lambda probe fails due to poor fuel, fuel or oil getting inside, or breakdowns in the injection system.
You can identify a device malfunction by the following symptoms:
- Increasing engine speed to maximum followed by stopping the engine;
- Unstable engine speed when idling;
- As the engine speed increases, its power is lost;
- The ECU indicator light (check) lights up;
- The movement of the vehicle is irregular.
In order for the sensor to start functioning properly again, it must be removed and properly cleaned. To clean it, you need to remove the ceramic head and clean the dirt with a cloth and chemical cleaner.
If these steps do not help, it must be replaced with a new one.