To ensure stable operation of a modern car engine, many different sensors are used to collect information about the operation of a particular system. Based on their data, the electronic control unit adjusts the quality of the fuel mixture, regulates its quantity entering the combustion chambers, determines the desired ignition timing, and turns on and off various additional mechanisms.
In this article we will talk about what the oxygen sensor (lambda probe) of the VAZ-2114 is, consider its design and principle of operation. In addition, we will try to understand the malfunctions of this element and methods for eliminating them.
What is an oxygen sensor
An oxygen sensor is an electromechanical device designed to determine the quantitative oxygen content in exhaust gases. Its use is mandatory for all cars with an environmental class above Euro-2.
Why is it needed? The fact is that modern environmental standards require a car to have a minimum content of harmful compounds in its exhaust. It is possible to achieve their reduction only by forming an ideal (stoichiometric) fuel mixture. It is for these purposes that the oxygen sensor, or, as it is also called, the lambda probe, serves. The electronic control unit, having received information about the oxygen content in the exhaust, increases or decreases the amount of air to form the mixture.
Try our service station selection service
Creating an application is absolutely free and will take you no more than 5 minutes
The operation of internal combustion engines of modern cars is controlled using special electronic devices (controllers). One of the main tasks of the controller is to regulate the composition of the fuel mixture supplied to the cylinders of the power unit. It is on this that the fuel consumption, the stability of the engine, as well as its power and traction properties depend. To do this, the electronic control unit collects and analyzes information coming from various sensors. Based on the received data, the ECU sends the necessary commands to the appropriate devices.
In this article we will talk about what the VAZ-2110 oxygen sensor is and what it is intended for. We will also look at its design, possible malfunctions and diagnostic methods.
How does an oxygen sensor work?
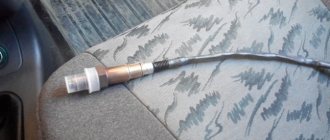
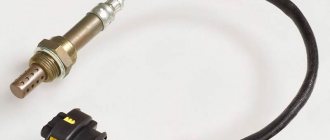
The VAZ-2114 lambda probe has a fairly simple design. It is based on a ceramic element with two electrodes. They are usually coated with zirconium dioxide. One of the electrodes is in contact with air (placed outside the exhaust pipes), and the second is in contact with exhaust gases.
The operating principle of the device is based on the potential difference that occurs between the contacts of the device during engine operation. The electronic control unit sends an electrical impulse to the sensor and analyzes its changes. Based on the increase or decrease in voltage at the probe contacts, the ECU “makes a conclusion” about the amount of oxygen in the exhaust.
How to properly check the oxygen sensor for serviceability of the Priora: instructions
If there is a suspicion that the lambda probe itself is faulty, and not its circuit, then it is not recommended to rush to change it without first checking it. The check is performed as follows:
- On the DC installed on the car, you need to disconnect its connector. This should change the sound of the engine. The engine should go into emergency mode, which is a sign that the sensor is working. If this does not happen, it means that the motor is already operating in emergency mode, and the DC is 100% certain to be unusable. However, if when the sensor is disconnected, the motor goes into emergency mode, this is not a guarantee of complete serviceability of the product.
- Switch the tester to voltage measurement mode (minimum up to 1V).
- Connect the tester probes to the following contacts: the red probe to the contact of the black wire of the DC (it is responsible for the signal that goes to the ECU), and the black probe of the multimeter to the contact of the gray wire.
- Below is shown the pinout of the lambda probe on the Priora, and which contacts to connect the multimeter to.
- Next you need to look at the readings of the device. As the engine warms up, they should change from 0.9V and drop to 0.05V. On a cold motor, the output voltage values vary from 0.3 to 0.6V. If the values do not change, this indicates a malfunction of the lambda. The device should be replaced. Despite the fact that the device has a built-in heating element, after starting a cold engine, readings should be taken and the correct operation of the element should be determined only after it has warmed up (about 5 minutes).
However, it is possible that the heating element in the sensor could have failed. In this case, the device will also not work correctly. To check the health of the heating element, you will need to check its resistance. The multimeter is switched to resistance measurement mode, and its probes need to be touched to the other two terminals (red and blue wires). The resistance should be 5-10 Ohms, which indicates that the heating element is working properly.
Important! The colors of the wires on sensors from different manufacturers may differ, so you should focus on the pinout of the plug.
Based on simple measures, one can judge the suitability of the recreation center.
Interesting! If there is a suspicion that the DC is faulty, then after the verification procedure it must be dismantled and the working part cleaned. After this, repeat the measurements.
If the lambda probe on the Priora is working, then it would not be superfluous to check the serviceability of the circuit. The power supply of the heater is checked with a multimeter by measuring the voltage at the contacts of the plug to which the device is connected. Checking the signal circuit is carried out by checking the wiring. To help with this, schematic diagrams of wiring are presented to help.
Diagram for oxygen sensor No. 1
Diagram for oxygen sensor No. 2
A faulty sensor must be replaced. Testing both sensors is identical. Below is a description of the operating principle of the devices from the manual for Priora cars.
Description UDC Priora
Description of DDK Priora
It is important to understand that when checking the lambda by output voltage, low readings indicate an excess of oxygen, that is, a lean mixture is supplied to the cylinders. If the readings are high, then the fuel assembly is enriched and there is no oxygen in it. When starting a cold engine, there is no signal from the DC due to the high value of internal resistance.
Lambda probe: signs of malfunction (VAZ-2114)
Failure of the “fourteenth” oxygen sensor is usually accompanied by the following symptoms:
- the “CHECK” warning light lights up on the instrument panel, warning the driver about an error;
- engine operation at idle speed is unstable (the speed fluctuates, the engine periodically stalls);
- a noticeable decrease in the power and traction characteristics of the power unit;
- the car “jerks” when accelerating;
- increased fuel consumption;
- excess level of toxic substances in exhaust gases (determined by measurement at a specialized station).
Signs and causes of sensor malfunction
If the lambda probe is faulty, the exhaust gases become more toxic. This can be determined using special diagnostic equipment. In this case, there will be no external signs, just as there will be no special smell.
Fuel consumption increases . Drivers, as a rule, monitor how full the fuel tank is and try to determine the speed at which consumption is minimal. The increased consumption will be immediately noticeable. Depending on the severity of the oxygen sensor failure, the flow rate will increase from 1 liter to 4 liters.
Catalytic converter overheating . If the lambda is faulty, an incorrect signal is sent to the ECU. This may cause the catalyst to malfunction. It overheats until it turns red and fails.
The car will jerk and the driver will be able to hear popping noises. Lambda stops generating correct signals, resulting in unstable XX. RPM can fluctuate over very wide ranges.
This is interesting: How to restore the leather on a car steering wheel by painting
Dynamic characteristics are reduced . The car loses power. These signs can be observed in severely advanced cases. The sensor does not work on a cold engine, and the car signals a malfunction in every possible way.
Among the causes of breakdowns are:
- Damage caused by strong impacts, road accidents, curb collisions;
- Incorrect operation of the internal combustion engine and problems in the operation of the ignition system, when the element overheats and fails;
- System clogged and low-quality fuel. The more heavy metals in gasoline, the faster the lambda will fail;
- Piston group - often due to a worn CPG, oil enters the exhaust manifold, and its combustion products clog the probe;
- Short circuits in electrical wiring;
- Lean or too rich mixture;
- Excess air entering the exhaust system;
- Misfires;
- Fuel additives.
What can the electronic control unit tell you?
If a warning light comes on on the dashboard, indicating errors in engine operation, and its lighting is accompanied by the above problems, it is advisable to test the controller. Today this can be done both at a service station and at home. Of course, if you have a special tester and a laptop (tablet, smartphone) with the appropriate software. When connected, this device will give you codes for possible problems.
For VAZ-2114 vehicles, a malfunctioning lambda probe may indicate its malfunction with the following errors:
- P0130 – incorrect sensor signal;
- P0131 – excessive oxygen level in the exhaust gases;
- P0132 – oxygen content too low;
- P0133 – weak or slow sensor signal;
- P0134 – lack of sensor signal.
How is the lambda probe diagnosed and replaced?
For a VAZ car or any other vehicle, you can use professional equipment. Use auto repair services that have an oscilloscope. The condition of the oxygen sensor can also be determined using a multimeter. This device can be used for VAZ cars.
The verification procedure is carried out with the engine running, since if the sensor is in a calm state, it is impossible to determine its functionality. If the lambda probe does not work correctly, it is recommended to replace the part.
In most cases, the VAZ probe cannot be restored - it is much easier to install a new part. If several errors appear on the dashboard, then you need to conduct a full diagnosis of the car. If you already go to a car service center, then it is worth checking as many car systems as possible.
What can happen to the lambda probe
The lifespan of the lambda probe for the “fourteenth”, declared by the manufacturer, is 80 thousand kilometers. But this does not mean at all that it cannot fail much earlier or last twice as long.
The cause of a malfunction of the VAZ-2114 lambda probe may be:
- overheating of the working element;
- violation of the tightness of the connection between the sensor and the exhaust manifold body;
- clogging of the device contacts due to the use of low-quality fuel, or oil (coolant) getting into gasoline.
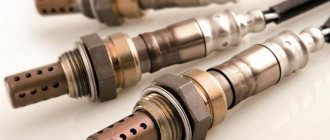
What kind of lambda probe for VAZ-2114
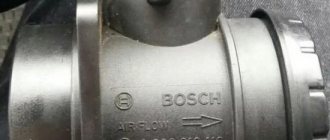
On the first Samar models of the fourteenth model with one and a half liter engines, sensors 0 258 005 133 were installed. This lambda probe ensured the operation of the power unit in accordance with the requirements of Euro-2 standards.
Since 2004, VAZ-2114 engines began to be equipped with Bosch sensors 0 258 006 537. They differ from the previous modification by the presence of a heating element. It is noteworthy that all oxygen sensors for the “fourteeners” are interchangeable.
We check the performance of the oxygen sensor with our own hands
How to check the lambda probe on a VAZ-2114 for functionality? Full diagnostics of the device can only be done using an oscilloscope. But it is possible to determine whether it is working or not without complex electronics. To do this, you only need a voltmeter. Connect its “negative” probe to ground, and the “positive” probe to terminal “B” in the sensor connector, without disconnecting it from the on-board network. Turn on the ignition and look at the voltmeter reading. The voltage at the device terminals must match the battery voltage. If it is less, it means there may be a break in the sensor circuit.
If the voltage is okay, check the sensitivity of the working element of the probe. To do this, connect the “negative” probe of the volt sensor, and the “positive” probe to contact “A”. The voltage should be within 0.45 V. If this indicator is exceeded by more than 0.02 V, the sensor must be replaced.
Is repair possible?
In some cases, you can try to restore a failed sensor. But this option is applicable only in cases where the cause of its breakdown is carbon deposits on the working elements of the device. Combustion products disrupt the normal operation of the lambda probe, distorting the output signal. In order to independently get rid of carbon deposits on the working surfaces of the sensor, we will need:
- hacksaw for metal;
- vice;
- gas burner (you can use a burner from a household gas stove);
- clean glass container;
- orthophosphoric acid;
- soldering iron, flux and solder.
First of all, disconnect the sensor connector and unscrew it from its seat. Now it needs to be sawed, because the probe cannot be disassembled. Carefully clamp it in a vice and saw off both protective caps to get to the ceramic rod. When this is done, heat the sensor over the burner. This is necessary to burn off carbon deposits. Under no circumstances should you attempt to remove combustion products mechanically. This will only damage the device.
After heating procedures, you can continue to restore the working elements of the sensor by placing it in phosphoric acid. It dissolves carbon deposits perfectly. But don't overdo it. It is not recommended to keep the probe in acid for more than 30 minutes.
Upon completion of work, the sensor must be assembled. To do this, you will need to solder the sawed-off caps to the body using a soldering iron, flux and solder.
Repair or replacement
Having determined that the lambda probe of the “fourteenth” is faulty, you can either try to repair it or simply replace it. Restoring the sensor involves cleaning its contacts from carbon deposits. This may be the reason why the device has stopped functioning normally.
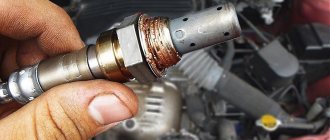
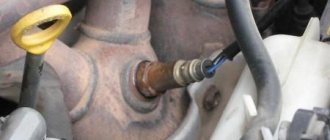
To begin, the sensor must be unscrewed from the manifold or exhaust pipe. This is not always easy to do. The fact is that its body very often sticks to the specified elements of the exhaust system. In this case, anti-rust liquid (WD-40 or similar) can help. Treat the joint with this liquid and wait half an hour.
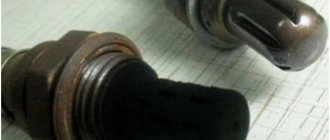
When the sensor is unscrewed, pay attention to its body. It is not removable. The contacts that we have to clean are located behind the slots in the case at the bottom.
Important: do not clean contacts mechanically (knife, sandpaper, file, etc.)! This will only aggravate the situation and permanently disable the sensor.
Contacts should only be cleaned using chemicals. For example, orthophosphoric acid. Simply place the lower part of the probe in acid for half an hour, and then dry it on a gas burner.
There is no need to disassemble the sensor by sawing its body. As practice shows, after such a procedure, its performance does not return.
If you decide to replace the lambda probe, buy a new device that meets the specifications from a car dealership and install it in place of the old one. With the ignition on, start the engine, warm it up and check if the CHECK warning light is on.
Checking the lambda probe using a diagnostic tool
In most cases, the internal combustion engine itself tells you whether there are any malfunctions in the operation of the sensors. The fastest and most effective diagnostic method in this case is to connect an ODBII scanner.
Of the options available on the market, we recommend paying attention to the Korean-made Scan Tool Pro Black Edition
.
This device belongs to the budget segment, but unlike Chinese analogues on an 8-bit chip, it has a 32-bit base, which allows you to diagnose not only the engine, but also other vehicle systems (gearbox, transmission, ABS, ESP, air conditioning system etc.).
The scanner is quite easy to use, has wide functionality and is compatible with most cars produced in 1993.
If everything is bad, then the ECU will display the following errors - P0131, P0134, P0171. More details about them in the video below.
The “check engine” light will also come on, but here the exact cause can only be determined using diagnostics. The check also lights up in case of other problems.
Ways to deceive the electronic control unit
There are three more ways to restore the engine to its former performance without buying a new oxygen sensor. Without a doubt, they were invented by our craftsmen. And they consist in the fact that it is necessary to mislead the electronic control unit so that it does not notice errors in the operation of the sensor.
The first method is mechanical. To implement this, a special spacer (bushing) is screwed in between the lambda probe and the manifold body (intake pipe). Its use allows you to distance the sensor contacts from the exhaust gases. Thus, the amount of oxygen between them artificially increases, and the electronic control unit “remains satisfied” with the result obtained.
A similar VAZ 2114 lambda probe costs about 500 rubles. And if you have a lathe, you can make it yourself.
The next way to deceive the ECU is electronic. Its essence is to install a primitive converter in the sensor circuit, consisting of one resistor (1 MΩ) soldered into the gap in the blue wire of the connector and one capacitor (1 μF) connected between the blue and white wires. As a result of such a simple deception, the electronic control unit will constantly receive a signal of the required voltage and perceive the operation of the lambda probe as proper.
Alternatively, you can also reflash the controller by changing its software. But it is better to entrust such manipulations with the “brain” of the engine to specialists.
How to extend the life of a lambda probe
To ensure that your oxygen sensor lasts as long as possible, do not neglect the following tips:
- use only high-quality fuel;
- do not allow oil and other process liquids to get into the fuel;
- Monitor the operating temperature of the engine, do not allow it to overheat;
- carry out diagnostics of the oxygen sensor in accordance with the schedule of routine maintenance provided by the manufacturer;
- If you identify signs indicating problems with the lambda probe, do not delay diagnosis.