To reduce environmental pollution and increase the environmental friendliness of the vehicle, the VAZ 2110 has a catalytic converter. For its normal functioning, a sufficient amount of oxygen must be present in the exhaust gases.
The task of monitoring this is assigned to the lambda probe. It measures the oxygen concentration and sends information about this to the main module. The ECU analyzes the received data and, according to the established algorithm, generates a control command to create an air-fuel mixture with a certain proportion of its constituent parts.
Briefly about the lambda probe
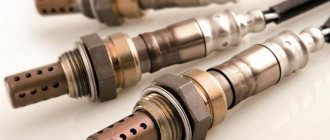
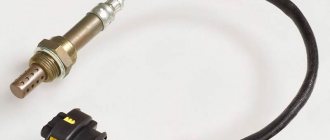
I can assume that the oxygen sensor is perhaps the most popular among all other car sensors that auto repair shop diagnosticians have to deal with. As you can see in the photo, the lambda probe (also known as an oxygen sensor) is made of a ceramic element (zirconium based) and coated with platinum. This galvanic element, depending on the presence of oxygen and temperature in the environment, changes its voltage and transmits data to the electronic control unit. Since the zirconium tip more accurately reads the presence of oxygen at a temperature of at least 360 degrees Celsius, a heating element is built into the lambda probe, which turns on when the engine starts and helps to quickly warm it up.
Oxygen sensor device
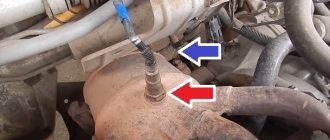
To accurately read the data, the lambda is installed in the exhaust pipe so that its working surface is “washed” by as much exhaust gas as possible.
Pads for VAZ 21103
There are also several types of oxygen sensors, which differ in operating principle and connection method:
Types of connections LZ
Attention! It is possible to replace a heated oxygen sensor instead of a non-heated oxygen sensor. In this case, it will be necessary to connect the LZ heating circuit to the car’s electrical circuit, which is “powered” when the ignition is turned on, for example, the fuel pump circuit. Reverse replacement is not acceptable; this creation will definitely not work. And, of course, it is necessary that the threads of the sensors coincide with the cut threads in the seat.
Principle of operation
Depending on how much oxygen is in the exhaust gases, the sensor signal going to the electronic control unit also changes. The ECU, in turn, compares the received signal with the standard of this state “stitched” in its memory, and depending on the difference with the optimal value, adjusts the duration injection phases of the injectors, thereby regulating the air-fuel mixture of the engine. With an increased oxygen value, the LZ voltage signal drops to 0.1 volts (which is much lower than the required 0.45); if there is a shortage, its voltage increases to 0.8-0.9 volts. This is a two-way connection with the controller and subsequent adjustment to a specific mode engine operation ensures minimization of atmospheric emissions and maximum fuel economy.
Repair
Diagnostics
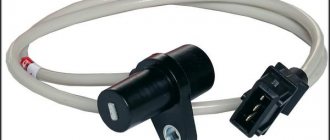
The VAZ 2110 lambda probe has four outputs:
Pads for VAZ 21102
Checking the oxygen sensor heater comes down to a basic check of the heater circuit:
In the future, we are exclusively interested in the signal wire, or rather, the change in voltage passing along it from the sensor to the ECU during various engine operating modes. You can check the operation of the sensor in two ways:
- Using a voltmeter;
- Using an oscilloscope (motor tester).
Since this instruction is intended for the common man who simply cannot have professional equipment in principle, we will diagnose the sensor using a voltmeter.
Method one: reading trouble codes
In order to read the fault codes located in the controller’s memory, it is necessary to either connect special diagnostic equipment to the diagnostic block (located on the left side under the instrument panel console) (too simple - not for us), or close contact “B” to ground, which is so The same can be done by connecting contacts “A” and “B”.
Diagnostic block VAZ 2110
- “A” - contact connected to the vehicle ground;
- “B”—controller signal contact;
- “G” — control of the VAZ fuel pump;
- “M” is a contact for issuing information (serial data).
After these contacts are closed, turn the ignition key to position “III” (do not start the engine), observe the “CHECK” indicator, which should flash the number 12:
- Flash;
- 1-2 second pause;
- Flash;
- Flash;
- Long pause of 2-3 seconds;
- Double repetition of the above cycle.
Reading fault code number “12”
Attention! This code indicates that the self-diagnosis program is running, otherwise this program does not work.
After this, the program displays codes of existing faults in a triple cycle (each code three times), in the absence of these, code “12” continues to be displayed constantly.
Attention! When the diagnosis is completed, these contacts are allowed to be opened only after the ignition is turned off, after ten seconds.
Erasing fault codes from the ECU memory in order to make sure that the fault has been eliminated occurs by turning off the controller's power for at least ten seconds. The power is turned off either by disconnecting the negative terminal from the battery or by removing the controller fuse.
On which cars is this problem most common?
The problem with code P0134 can occur on different machines, but there are always statistics on which brands this error occurs more often. Here is a list of some of them:
- Acura (Acura mdx)
- Audi (Audi a6)
- BMW
- Chery (Chery Amulet, Tiggo, Fora)
- Chevrolet (Chevrolet Aveo, Cavalier, Captiva, Cruz, Lanos, Lacetti)
- Chrysler (Chrysler Voyager)
- Citroen (Citroen Berlingo)
- Daewoo (Daewoo Nexia)
- Dodge (Dodge Durango, Caravan, Neon, Stratus)
- Ford
- Geely
- Honda (Honda Accord, SRV, Stream, Civic)
- Hover
- Hyundai (Hyundai Accent, Getz, Santa Fe, Solaris, Tucson, Elantra)
- Kia (Kia Rio, Sid, Sportage, Cerato)
- Lifan
- Mazda (Mazda 3, Mazda 323, Mazda 6, Mazda cx7, Demio)
- Mercedes (Mercedes w204)
- Mitsubishi (Mitsubishi Outlander, Galant, Lancer, Pajero)
- Nissan (Nissan Almera, Qashqai, Maxima, Note, Pathfinder, Primera, Teana, Tiida)
- Opel (Opel Antara, Astra, Corsa)
- Peugeot (Peugeot 206, 307, Partner)
- Saab 9-5
- Skoda (Skoda Octavia, Fabia)
- Subaru (Subaru Outback, Forester)
- Suzuki (Suzuki Grand Vitara, Liana, Swift)
- Toyota (Toyota Avensis, Corolla)
- Volkswagen (Volkswagen Golf, Passat)
- Volvo (Volvo xc90)
- VAZ 2104, 2107, 2110, 2112, 2114, 2115
- Gazelle Business, umz 4216
- Zaz Chance
- Lada Vesta, Granta, Kalina, Niva, Priora
- UAZ Patriot
With fault code P0134, you can sometimes encounter other errors. The most common ones are: P0030, P0053, P0112, P0130, P0131, P0132, P0135, P0137, P0138, P0154, P0155, P0171, P0172, P0301, P1135, P1496, P2243.
Replacing the oxygen sensor
For various reasons, car owners unsolder the brake pads for the VAZ 21102. Some due to the replacement of an LZ that has a different connector from the original, others to install a non-standard exhaust manifold, which requires extending the wire. In any case, you should take care of insulation and high-quality wiring, for example as in the following photos:
Insulation example 1
Isolation Example 2
Replacement procedure
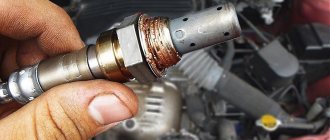
- Disconnect the oxygen sensor connector and unscrew it.
Advice! When unscrewing the LZ, you must use either a long head or a spanner. Since the LZ is most likely “burnt”, it must first be “soaked” with special auto chemical products.
Advice! For those who are not afraid of anything, unscrew it with the engine running until a slight smoke appears through the threaded part, then turn off the engine and unscrew it completely.
This method is directly related to the property of bodies to expand when heated and compress when cooled (textbook “Physics 5th grade”, page 40, paragraph 7, paragraph 2):
- We cut off the wires from the old one and connect them with the wires of the new sensor cut off from the block (standard colors and purposes of the wires are given earlier in the pictures);
Advice! For a three-wire standard LZ, the wires are written on the connector: heating - wires “A” and “B”, signal “C”. The polarity of the white heater wires does not matter; the signal wire is black.
- We remove the unused fourth wire from the harness and securely attach it to the vehicle ground, for example, to the bolt securing the brake master cylinder bracket;
- We screw in a new lambda probe (the three-wire probe is lubricated with graphite grease for better contact with the exhaust manifold body);
Advice! It is best to do the wiring of the block for the VAZ 2110 before installing the oxygen sensor in place, it is safer and more reliable.
- We reset the memory of the electronic control unit and check the operation of the new lambda probe.
At this point I consider this instruction complete. I didn’t add a video, I hope I made everything clear and simple. Good luck.
A modern car is an electromechanical system that consists of many parts and assemblies that are interconnected by a combination of various sensors. These sensors maintain the operating condition of the car and ensure its productive operation. Today in this article we will talk about the oxygen sensor (lambda probe). In particular, we will answer the question of how to check a lambda probe with 4 wires with a tester. This is the most common type of sensor and is quite important. Before you begin studying and testing the performance of the LZ, we recommend that you briefly study its design features, types and principle of operation.
Diagnostics
It should be noted that checking the functionality of the lambda probe should be carried out in conjunction with vehicle maintenance, at intervals of every 10 thousand kilometers. However, if the car was operated in unfavorable climatic conditions, which is applicable to Moscow, or in aggressive mode, maintenance should be carried out more often. This is the manufacturer's recommendation.
The manufacturer also does not recommend performing independent diagnostics or repairs if there are signs of any malfunction. To fix it, you should contact a service center.
Diagnosis by visual inspection
The beginning of any diagnosis begins with a visual examination. Primary methods for diagnosing an oxygen sensor include:
- visual inspection of the electrical wiring of the lambda probe for integrity and absence of mechanical damage or rupture;
- inspection of the lambda probe itself. There should be no soot or hard deposits on its surface.
Carbon deposits on the oxygen sensor housing indicate a faulty electric heater or an excessively rich combustible mixture entering the combustion chambers.
Solid deposits on the sensor body indicate poor fuel quality and the presence of harmful impurities in it, or an incorrect proportion of the combustible mixture.
If there are no visible causes of the malfunction, more detailed diagnostics are performed.
What is a lambda probe, principle of operation and its types
So, an air sensor is a small device that is installed in the exhaust manifold of any modern car and serves to assess the concentration of residual oxygen in the exhaust gases. Thanks to the readings of this device, the computer unit of your car receives data on the basis of which it prepares a combustible mixture. The lambda probe takes into account the residual oxygen concentration in the burned fuel and sends a signal to the electronics that the newly incoming combustible mixture needs to be either enriched or depleted of air. It goes without saying that any malfunction of the lambda probe may affect the performance of the car’s engine.
Remember! For combustion of 1 kg. mixture of fuel and air, you need to spend about 15 kg . oxygen.
Lambda probe device
A modern air sensor is a small structural device inside which there are a number of interconnected parts.
Lambda probe design
- A metal body with threads. It is designed to fix the sensor in the mounting hole;
- Insulator made of ceramic;
- O-ring seal;
- Conductors;
- Protective shell with hole for ventilation;
- Contact;
- Ceramic tip;
- Electric heater;
- Gas outlet;
- Steel shell.
As a rule, the start of exhaust gas measurements occurs at a temperature of 310-400 degrees . It is at this temperature that the special filler in the sensor becomes electrically conductive. Until the temperature reaches the desired value, the car’s electronic control unit takes readings from other sensors, and only then from the lambda probe. The peculiarity of its operation is that the exhaust gases and atmospheric air are separated by a container with a current-generating composition. As a result of certain chemical effects on this capacity from the exhaust side and from the air side, a difference in oxygen concentration occurs, on the basis of which an electrical potential is generated. The values of this potential are sent to the vehicle control unit.
All oxygen sensors are divided into four types depending on the number of wires in their design:
1. Single-wire; 2. Two-wire; 3. Three-wire; 4. Four-wire.
Types of lambda sensors
All of the above lambda probes come in narrowband and broadband .
Device
The design of the lambda probe includes the following elements:
- Body made of metal;
- An insulator made from ceramics;
- O-ring with cuffs and wiring;
- Protective cover with ventilation holes;
- A circuit contact through which current is conducted;
- Ceramic tip;
- Filament coil;
- Protective shield with holes that allow gases to escape.
In this case, devices range from single-wire to four-wire.
The main causes of lambda probe malfunctions and the consequences of its breakdown
Once we have defined the concept and operating features of the oxygen sensor, we can conclude that it plays a key function in the normal operation of the internal combustion engine. So what can cause the lambda probe to break down and fail? There are two aspects to this issue: external factors and internal ones, about which read below.
- Coolant or brake fluid leaking into the sensor housing;
- Caring for the sensor with means that are not intended for such purposes;
- Poor quality fuel with excessive lead content;
- Overheating of the sensor, which also happens when using bad fuel.
After the lambda probe fails your car will begin to show certain signs:
- Significant jerks when moving;
- Excessive fuel consumption;
- Poor performance of the catalyst;
- Floating engine speed;
- Excess toxic waste in exhaust gases.
The seriousness of all of the above should prompt the driver to check the lambda probe almost every 10 thousand km. Its complete replacement is desirable after every 40,000 km.
Symptoms of a problem
The main symptoms of a failed lambda probe are frequent engine overheating, the use of poor quality fuel, moisture or coolant ingress, the accumulation of large amounts of soot on it, as well as depletion of resource capabilities.
A faulty oxygen sensor 2110 leads to incorrect operation of the entire engine.
Signs of its malfunction or incorrect operation are:
- jerking of the car during acceleration;
- Unstable engine operation at idle (independent increase or decrease in the number of revolutions);
- increased fuel consumption;
- engine overheating;
- sudden stop of the engine after acceleration or revving;
- reduction in vehicle traction capabilities;
- increased toxicity of exhaust gases, changes in color, density and odor;
- The Check Engine light on the dashboard came on.
Checking a lambda probe with 4 wires with a tester. Methods for checking LP
So, we come to the question that worries every car enthusiast: how to check the lambda probe sensor at home? To do this, you will need a regular tester (multimeter) or voltmeter.
Lambda probe 4 wires
The first step is to warm up the engine, and then measure the resistance on the heater wires. As a rule, these are two white wires, the polarity between which may not be observed. The normal resistance between them should be from 2 to 10 ohms . If this value is different, then the sensor is faulty.
Lambda probe voltage graph
Let's move on. Now you need to connect the negative wire of the tester to the engine housing. In this case, connect the positive contact to the signal wire of the sensor itself. Typically this will be the black wire. With the engine warm, press the gas pedal and accelerate to 3000 rpm . Hold the pedal in this position for about three minutes. At this time, the lambda probe is warmed up. Now you can check whether the oxygen sensor is turned on.
The voltage between the motor housing and the signal (black wire) of the part should fluctuate between 0.2 and 1 volt . For every 10 seconds , the sensor should turn on about 10 times . In cases where the tester shows 0.4-0.5 volts and does not turn on, we can conclude that the lambda probe is faulty.
You also need to know that when you press the gas pedal sharply, the tester should show a voltage of about 1 volt . When the pedal is suddenly released - zero volts .
That's all for us. We hope that your sensor is fully operational and performs its intended functions. If you have any questions, please leave them in the comments.
How to check the lambda probe and signs of malfunction? Will a Bosch universal fit?
- The car jerks when you drive at low speeds - 1 answer
What and how can you check the lambda?
To check, you will need a digital voltmeter (preferably an analog voltmeter, since its “sampling” time is much shorter than that of a digital one) and an oscilloscope, if possible, the measurements will be more accurate. Before checking, you should warm up the car since lambda operates correctly at temperatures above 300C°.
First we look for the heating wire:
We start the engine, do not disconnect the lambda connector. We connect the negative probe of the voltmeter (ordinary gauge) to the car body. We “poke” the positive probe on each wire contact and observe the voltmeter reading. When the positive wire of the heater is detected, the voltmeter should show a constant 12 V. Next, using the negative probe of the voltmeter, we try to find the negative wire of the heater. We connect to the remaining contacts of the sensor connector. If a negative contact is detected, the voltmeter will again show 12 V. The remaining wires are signal wires.
Checking the lambda probe with a tester:
We take an electronic constant voltage millivoltmeter and connect it in parallel with the LZ (“+” “-” to the LZ, - to ground), and the lambda probe must be connected to the controller.
When the engine warms up (5-10 minutes), then you need to look at the voltmeter needle. It should periodically move between 0.2 and 0.8 V (i.e. 200 and 800 mV, and if less than 8 cycles occur in 10 seconds, it’s time to change the LZ. Also replace if the voltage “stands” at 0 .45 V.
When the voltage is always 0.2 or 0.9 V, then there is something wrong with the injection - the mixture is too lean or too rich. Since the oxygen sensor voltage should change all the time and jump from ≈0.2 to 0.9V.
There is another quick way to check the lambda probe . You should do this:
Carefully pierce the positive contact of the tester (black lambda wire), the other contact to ground. With the engine running, the readings should range from 0.1 to 0.9V. Constant readings (for example, 0.2 all the time) or readings that go beyond this range, or fluctuations with a smaller amplitude indicate a malfunction of the probe.
- all the time 0.1 - little oxygen
- all the time 0.9 - a lot of oxygen
- The probe is fine, the problem is something else.
If you have the time and desire to bother, you can conduct several tests on a rich and lean mixture and additionally check the lambda probe sensor .
- Disconnect the oxygen sensor from the block and connect it to a digital voltmeter. Start the car and, by pressing the gas pedal, increase the engine speed to 2500 rpm. Using a device for enriching the fuel mixture, reduce the speed to 200 per minute.
- If your vehicle is equipped with an electronically controlled fuel system, remove the vacuum tube from the fuel pressure regulator. Look at the voltmeter reading. If the instrument needle approaches the 0.9 V mark, it means the lambda probe is in working condition. A malfunction of the sensor is indicated by the lack of response from the voltmeter, and its readings are less than 0.8 V.
- Do a lean mixture test. To do this, take a vacuum tube and provoke an air leak. If the oxygen sensor is working properly, the digital voltmeter reading will be 0.2 V or lower.
- Check the operation of the lambda probe in dynamics. To do this, connect the sensor to the connector of the fuel supply system, and install a voltmeter parallel to it. Increase engine speed to 1500 rpm. The voltmeter readings with a working sensor should be at the level of 0.5 V. Another value indicates a failure of the lambda probe.
Checking the voltage in the heating circuit
To check the presence of voltage in the circuit, you need a voltmeter. We turn on the ignition and connect it with probes to the heater wires (you cannot disconnect the connector, it is better to pierce it with sharp needles). Their voltage should be equal to what the battery produces when the engine is not running (about 12V).
If there is no plus, you need to go through the battery-fuse-sensor circuit, since it always goes directly, but the minus comes from the ECU, so if there is no minus, look at the circuit to the block.
Checking the lambda probe heater
In addition to measuring voltages with a multimeter, you can also measure resistances to check the serviceability of the heater (two white wires), but you will need to switch the tester to Ohms. The documentation for a particular sensor must indicate the nominal resistance (usually it is about 2-10 Ohms), your task is only to check it and draw a conclusion. The video shows this method:
Checking the oxygen sensor reference voltage
We switch the tester to voltmeter mode, then turn on the ignition and measure the voltage between the signal and ground wires. In most cases, the lambda probe reference voltage should be 0.45V.