Let's start with the fact that during the operation of the car, drivers quite often encounter the fact that the engine does not start, runs intermittently, or suddenly stalls. In this case, diagnostics usually affect the ignition system (on gasoline cars) and the power system.
As practice shows, unstable operation of the power unit on gasoline cars is in many cases due to the fact that gasoline is not supplied to the engine. In this article we will talk about why this happens, as well as what the driver should do if there is no gasoline entering the engine.
Causes
Fuel does not enter the carburetor for several reasons
:
- lack of pressure in the fuel supply system;
- the fuel pump has failed (quite a common problem);
- problems with the vacuum pipeline;
- dirt plug in the supply hose from the gas tank;
- production of a gas filter;
- other;
The engine may not start not only because there is no fuel supply to the carburetor, although this is the first thing that comes to mind. The engine does not respond to ignition due to:
- lack of current supply to the coil;
- no high voltage from the coil;
- high voltage does not reach the spark plugs;
- there is fuel in the carburetor, but it does not reach the chambers;
- failure in the ignition system, etc.
Carburetor check sequence
On the car we tested, the engine air filter is located directly on the carburetor. Therefore, to gain access it must be disassembled.
- Remove the filter cover using a wrench. We take out the filter element (at the same time check its cleanliness) and unscrew the bolts securing the casing to the carburetor. Remove the body;
- Let's look inside the carburetor. Depending on the engine temperature, the throttle valve may be open or closed. In the second case, we open it by hand. Then we press the throttle mechanism drive and check whether a stream of gasoline appears from the pump;
- After making sure that there is gasoline in the carburetor, we get into the car, press the gas, and try to start the engine. If it doesn’t start, look further;
- Remove the top carburetor cover so that the fuel level in the carburetor chamber can be seen. The cover is secured with 5 screws. You should also disconnect the throttle cable bracket and turn off the idle air valve;
- Having released the float chamber, we assess the gasoline level. During normal operation of the fuel supply system, the level should be 23 mm below the walls. You can estimate the level using the tail of a caliper, having previously set it to a depth of 22-23 mm;
- We put the cover back on, fix it with a pair of screws, and start the engine again, having first depressed the gas pedal all the way;
- If the chamber is empty, the verification algorithm is slightly different. We put the lid on, leaving a small gap between the upper edge of the float chamber and the plane of the lid. We fix the gap with a flat steel ruler or a small screwdriver;
- We fill the chamber by manual pumping or by turning the crankshaft a few turns with the starter. After filling the chamber, we try to start again, having first secured the lid;
- The motor starts working - this is a sign of a malfunctioning needle valve. It should be replaced because it is almost impossible to restore it.
A tested and restored carburetor can be assembled, although it would be more correct to dismantle it (since you got to it anyway) and wash all internal parts with acetone.
Checking the fuel supply
The simplest, but far from effective way to determine whether fuel is supplied to the carburetor is to check it manually. To do this, the inlet fitting on the carburetor is released from the fuel supply hose. Press the lever for manual pumping of gasoline several times - if fuel comes out from the removed hose, then the problem is stuck in the carburetor; if it doesn’t work, you need to contact the fuel pump.
However, manual checking is not effective
, because, firstly, it depends on the position of the damper in the air filter, and secondly, there are often situations when in manual mode everything is fine, but we start the engine - there was no fuel in the carburetor, and there is no fuel.
Testing with a bottle in this regard is a more reliable method of testing gasoline supply. To do this check, tie a plastic bottle to the removed gasoline supply hose and start the engine. This verification method gives an unambiguous answer about the location of the fault.
{banner_content}
Why does the starter turn normally, but the engine does not catch and does not start?
In half the cases when a car refuses to start, the starter is to blame. At the same time, the other half occurs in situations where the starter regularly rotates the crankshaft, but the engine starts only after repeated attempts or is completely silent. This could be due to a variety of reasons.
Driver inattention or negligence
The notorious human factor can manifest itself in the most unexpected ways. For example, a banal lack of fuel or an alarm that blocks the fuel pump. It also happens that some “well-wisher” clogged the exhaust pipe, or a careless driver, while backing up, got stuck in a pile of soil or a snowdrift. Such reasons do not fall into the category of technical malfunctions, but they can spoil a lot of nerves.
Technical problems - starter malfunctions
The starter is considered faulty in the following cases:
- The Bendix gear cannot engage with the flywheel ring gear. This manifests itself in a loud metallic grinding sound that appears when the starter is turned on. The reason for this phenomenon is wear of the mating surfaces, chipped teeth, etc. The solution to the problem is to install a new flywheel or ring. The latter can be rotated 180° and thus avoids the need to purchase a new part.
- The overrunning clutch or retractor relay mechanism is stuck. At the same time, the starter motor hums, but it makes no attempt to start the engine. In some cases, repeated attempts to turn on the starter help, but this only postpones the need for repair or replacement for some time.
- The crown is loose. A similar malfunction occurred on cars from the end of the last – beginning of this century, including the popular “nines”. In this case, the starter engages with the ring and begins to turn it, but it turns on the flywheel with a grinding noise. Only replacing the latter will help.
Carburetor malfunction
The first to be inspected is the fine-mesh filter after the inlet fitting. It is designed to clean the fuel mixture before entering the float chamber. It closes with a plug that needs to be unscrewed, the filter mesh removed, washed and blown out, then put back in place and screwed on the cap.
There is no point in checking the jets, since if one were clogged, the engine would operate, albeit in a different mode.
Checking the starter circuit
For starter malfunctions, see the section Diagnosis of engine malfunctions: “The crankshaft does not turn with the starter”, “Lots of noise when the starter is running”
How to check the functionality of the starter circuit
If the starter does not crank the engine when the ignition key is turned to the appropriate position, then there are four possible reasons:
1. the battery is discharged;
2. electrical connections between the starting relay, battery and starter are broken, i.e. current from the battery is not supplied to the starter;
3. the starting (traction) relay is faulty;
4. The starter is stuck or its electrical part is faulty.
• To check the battery, turn on the headlights. If they go out after a few seconds, the battery is discharged or damaged. If the headlights are bright, turn on the starter and see what happens to the headlights. If the headlights dim, voltage is supplied to the starter, but it does not rotate. The starter needs to be removed for inspection. If the starter rotates very slowly, proceed to the next test.
• If the headlights still shine brightly when you turn on the starter, then there is no voltage reaching it. Check all connections from the battery to the start relay and starter for tightness and cleanliness. If the car has a good battery, then the most likely cause is a malfunction of the starter itself. Check that the flexible ground wire between the engine and the body is tightly screwed - this sometimes helps eliminate an apparent malfunction.
• If no results are achieved, turn off the headlights to avoid draining the battery. You may hear a clicking sound each time you turn the ignition key to the starter position. These are the sounds of the solenoid (traction relay) operating, but this does not mean that the main contact is operating properly. (If you do not hear a click from the relay, it may be faulty.) The solenoid contact can be checked by connecting a voltmeter or test light to the main wire connection (battery to starter) on the "starter" side of the relay and to ground. When you turn the ignition key, the voltmeter should show voltage, or the light should light up. If this does not happen, then the traction relay is faulty. (Do not connect a light bulb to the two relay contacts. If the starter is working, the light will light up.) If, in the end, it is determined that the relay is working properly, and voltage from the battery is supplied to the starter, then most likely the starter itself is faulty.
Video
Fuel pump testing
The fuel pump, like the air filter, has a manual feed lever. The first check is carried out with its help.
Since the fuel line is already disconnected from the inlet fitting on the carburetor, it can also be disconnected from the fuel pump and purged as a preventive measure. A rag is placed under the outlet fitting of the fuel pump to prevent gasoline from splashing and spreading throughout the engine and engine compartment, and the manual feed lever is pumped several times.
The presence of gasoline at the outlet fitting of the fuel pump will indicate loosening of the pump mounts
. It is necessary to tighten the mounting bolts on the pump housing.
Lack of fuel supply again leaves two options for failure
. The first option is failure of the fuel pump, which is most likely, and the second is a clogged supply line from the gas tank to the pump, which is less likely and rarely occurs.
Check the operation of the pump in the same manual mode by covering the hole in the outlet fitting with your finger and pumping the lever.
The pressure won't be strong, but it should be there. The absence of a characteristic sound of air escaping gives a definite answer about its failure. Based on the above, we can conclude that there are only two truly serious reasons for the fact that fuel does not flow into the carburetor - failure of the fuel pump and a breakdown in the carburetor itself. Other reasons, such as clogged lines or input and output filters, are less likely and less common.
No gasoline supply to car engine
Stopping the supply of gasoline to the engine is one of the main car malfunctions.
Its cause may be a malfunction of one or more elements of the power system: fuel tank, fuel lines, carburetor, filters. In such a situation, the car engine may not start at all (either cold or warm), and the engine may suddenly stop while driving.
Checking the fuel supply
A check will help narrow down the troubleshooting. You should check whether fuel is flowing from the fuel system to the carburetor or not. Remove the hose from the carburetor inlet pipe or from the fuel outlet pump and press the manual fuel pump lever on the fuel pump several times. If there are any problems with the fuel supply from the fuel lines, tank, or a faulty fuel pump, the fuel stream from the hose will be absent or too weak. If there is a jet, the carburetor is faulty.
Checking the fuel supply through the engine power supply using the manual fuel pump lever
Several of the most common reasons for the lack of fuel supply to the engine using the example of the fuel system of VAZ 2108, 2109, 21099 cars
We begin to look for a fault in it if fuel comes from the fuel pump (see check above).
What to look for in the carburetor.
— Strainer in the carburetor (for clogging).
We unscrew the filter plug, remove the filter mesh element, wash it with gasoline, clean it with a toothbrush, and blow it with compressed air. We also clean and blow out the hole under the filter in the carburetor cover.
Solex carburetor fuel strainer
— Details of the float mechanism in the float chamber of the carburetor.
The reasons for stopping the supply of fuel from the float chamber may be the needle valve needle hanging in the upper locking position, due to the needle being skewed in the body or the floats touching the walls of the float chamber (do not go down). You should also pay attention to the correct adjustment of the fuel level in the carburetor float chamber. To check the elements of the carburetor float chamber, remove its cover.
Solex carburetor needle and floats
In some cases, just a light tap on the carburetor is enough to wedge the valve needle.
— Fuel nozzle of the GDS of the 1st chamber of the carburetor, emulsion tube.
We remove the carburetor cover, turn out the tube and jet, clean them with a wooden stick or copper wire, rinse with acetone, and blow with compressed air.
Air jets, fuel jets, emulsion tubes and Solex carburetor wells
Now the reasons for stopping the fuel supply are related to the power system itself (fuel does not come out of the fuel pump)
— The gas tank has run out of fuel.
If for some reason the sensor on the instrument panel is deceiving, then it is quite possible to find yourself in a situation where the fuel in the tank has already run out, and the driver is not even aware of it. Look at the fine fuel filter. If it is empty or there is very little gasoline in it, most likely the reason for the shutdown of fuel supply is its lack of fuel.
Fuel tank (gas tank) VAZ 2108, 2109, 21099
— The fuel pump itself is faulty
There may be problems with the diaphragm (leaky), pusher, strainer or valves. A broken diaphragm will give itself away as fuel leaks at the fuel pump and the smell of gasoline. To clean the strainer, you must remove the fuel pump cover. The protrusion of the pusher should be checked and adjusted. In addition, a feature of the DAAZ fuel pumps of VAZ 2108, 2109, 21099 cars is their refusal to work in hot weather, when the engine is very hot. In such a situation, a wet rag placed on top of the fuel pump cover will help. For more information, see “Fuel pump malfunctions.”
Measuring the protrusion of the VAZ fuel pump pusher
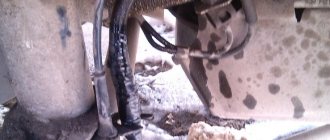
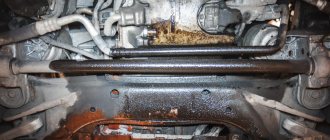
— The fuel line from the gas tank to the fuel pump is faulty (damaged, clogged)
It is necessary to ensure the safety of both the metal pipe of the line and its rubber hoses. To do this, it is advisable to inspect it from the tank to the fuel pump. Damage to the line is usually accompanied by the smell of gasoline and drips.
You can check the fuel line for blockages by removing the fuel hose from the inlet fitting of the fuel pump and blowing into it (with your mouth or through the pump) in the direction of the gas tank. The cap on the gas tank filler neck should be removed. The bubbling of the supplied air in the gas tank indicates that the fuel line is clean. Otherwise, you need to blow it out with a compressor.
Checking the fuel pump valves
— The fine fuel filter is clogged
Replace the filter with a new one or temporarily remove it from the system by inserting a piece of tubing in its place and securing it with clamps.
Fine fuel filter
— The fuel intake in the gas tank is clogged
You can remove it on VAZ 2108, 2109, 21099 cars by lifting the rear seat through the hatch in the body. First of all, you should pay attention to the intake strainer. It must be cleaned with a toothbrush, rinsed with gasoline and blown with compressed air. It is also necessary to blow out the fuel intake itself, since dirt accumulation may be present not only in its mesh filter, but also in it itself. A clogged intake and its filter can cause not only a stop in fuel supply, but also interruptions in engine operation, both at idle and while driving.
Fuel intake in the gas tank with a strainer
The cause of contamination of the intake may be silt deposits that accumulate over time in the gas tank. To prevent such a situation, you should carry out preventive cleaning (see “Cleaning the fuel tank”).
These are, perhaps, all the main reasons for the cessation of fuel flow into the engine on VAZ 2108, 2109, 21099 vehicles.
Notes and additions
To help when troubleshooting the fuel system, its diagram for VAZ 2108, 2109, 21099 cars is useful - “Fuel system diagram for VAZ 2108, 2109, 21099 cars.”
Twokarburators VK - More information on the topic in our VKontakte group, on Facebook Twokarburators FB and on Odnoklassniki - Twokarburators OK
More articles on the fuel system of cars
— Gasoline used on VAZ 2108, 2109, 21099 cars
— Fuel consumption of VAZ 2108, 2109, 21099 cars
— Malfunctions of the fuel system of VAZ 2108, 2109, 21099 cars
— How to increase the power of a car engine without tuning?
— Checking the floats of the Solex carburetor
The float touches the chamber walls
This is another popular reason. Nail Poroshin, in his numerous videos on setting up carburetors, always shows how to do it. Not everyone watches these videos and when adjusting the floats they do not pay attention to their position relative to the walls in the chamber. If adjusted incorrectly, the float will touch the walls of the chamber, and as a result, overflow.
Check the position of the floats as follows. You need to unscrew the screws on the cover and remove the cover. Then they look at how the floats are located. There is a gasket installed on the lid, and impressions of the walls are visible on it. The floats must be installed in such a way that there is a distance between them and the chamber wall. This can be seen from the print. It is also worth checking whether the float moves easily on the axis.
Acute delay and its features
The causes of its appearance are most often injuries, poisoning, diseases of the central nervous system, operations affecting the pelvic organs, inflammation or infection with pathogenic flora. It is characterized by suddenness and a sharp feeling of discomfort.
If the disease is associated with oncology or stones in the bladder, the consequences can be negative for neighboring organs and the entire body as a whole. Acute ischuria can be complete or partial
.
If the delay in emptying the bladder is complete, there will be no urine output at all. With partial or incomplete outflow of urine, it is released in small doses, which almost does not reduce the contents of an overfilled bladder. When this organ is not emptied for a long time, its walls become overstretched, muscle fibers become deformed, and the sphincter loses its elasticity. Then it begins to contract periodically, releasing urine in small quantities
, but this does not make it smaller in the bladder, because a new one gradually resides. Overstretched walls of the organ begin to cause discomfort.
How to flush a chainsaw carburetor?
To clean the unit from heavy contamination, it is best to use a product that is sold in pressurized cylinders. The cleaner comes with a dispenser and a long thin tube, which makes it possible to spray the product in any hard-to-reach places.
It must be remembered that cleaning the carburetor on a chainsaw is done using flammable chemicals. You need to work with them wearing a special protective mask and only in well-ventilated areas.
Read also: How does a magnet work on an antimagnetic filling?
To clean the carburetor on a chainsaw, the unit will need to be partially disassembled. The throttle valve, adjusting screws, body and other parts of the carburetor will need to be washed with the product from the bottle and set aside until completely dry. Once all the elements are dry, the assembly can be assembled and installed back on the chainsaw.
Screw quality
Most often, the fuel mixture is enriched with a quality screw to compensate for the suction of excess air. This prevents the mixture from becoming too lean. The screw is turned out more than necessary.
You should check the carburetor for possible air leaks and eliminate it. You can check it with a spray bottle. With the engine running, spray on the base of the carburetor, on the connection between the cover and the lower part. If the car starts to stall, then there is an air leak. You can also screw the quality screw back in. But then you can lose stable idle.
For what reasons is fuel not supplied to the cylinders?
So, the general scheme of operation of the power system involves taking fuel from the gas tank, after which the fuel enters the carburetor or injector.
Next, the fuel is supplied to the intake manifold, then the fuel-air mixture enters the combustion chamber through the intake valves.
Common problems with the supply of gasoline to the internal combustion engine
- If we exclude leaks, the next reason why gasoline is not supplied to the engine is various problems with the fuel pump. Note that on cars with a carburetor there is a mechanical type fuel pump and is located in the engine compartment.
What's the result?
As you can see, if you have certain skills and knowledge, you can determine why gasoline does not flow into the engine both on engines with a carburetor and on injection power units. However, many problems can be solved yourself. For example, it is quite possible to repair, clean and adjust a carburetor in a garage. The same can be said about cleaning injectors yourself.
Finally, I would like to note that timely replacement of fuel filters, regular cleaning of the injector or carburetor, as well as driving on good quality fuel are the key to the proper operation of the power system of a gasoline or diesel engine.
Also, driving with a half-empty tank in winter leads to the active formation of condensation, which accumulates in the gas tank. As a result, condensate (water) not only settles at the bottom and enters the combustion chamber, but also causes severe corrosion of the tank walls. As a result, rust appears in the tank, and in the case of through corrosion, active fuel leaks inevitably occur.
Diagnose faults that may indicate problems with the fuel pump. Self-check of the device, measuring the pressure in the fuel rail.
How to determine why the fuel pump does not pump or works poorly. Fuel rail pressure, pump diagnostics. Wiring, relays, fuel pump fuses.
Why is it necessary to clean the fuel pump mesh? When is it better to change and how to clean the fuel pump mesh? How to properly remove the fuel pump, subtleties and nuances.
What to do if the engine is “stupid”, does not pull, and there is a deterioration in engine response after pressing the gas pedal. Basic faults, diagnostics.
The causes of whistling and increased noise during operation of the fuel pump are overheating of the pump. How to diagnose and fix the problem yourself. Tips and tricks.
Airing of the diesel fuel system: signs of malfunction and diagnostics. How to find the location of the air leak yourself, ways to solve the problem.
Chainsaw carburetor design
The carburetor of any new chainsaw is an integral part of the engine, which continuously regulates the amount of air required for constant mixing with fuel and supplies the finished mixture to the internal combustion engine cylinder.
In most modern chainsaws, built-in carburetors initially have a similar design and almost the same principle of operation. There are certain differences only in the fuel units of Chinese models.
The main elements of the carburetors of all chainsaws include:
- float chamber - a small compartment whose main task is to maintain the optimal amount of fuel filled;
- atomizer is an important mechanism that is initially responsible for injecting fuel into the intake air flow;
- diffuser - located next to the standard inlet through which air enters the engine compartment of the chainsaw. The main function of the diffuser is to forcefully accelerate the suction of air masses;
- tube - required to supply air in small volumes - portions, the sizes of which depend on the needs of the fuel system.
The operating principle of a chainsaw carburetor is also quite simple. When the chainsaw is running, the engine throttle valve is activated, which, when open, allows air to flow through the factory rubber tube. With the gradual opening of the standard valve and the tube connected to it, the float located in the chamber with fuel is activated. Continuously passing through a standard diffuser, the air intensively mixes with fuel. After this, the used ready-made air-fuel mixture is sprayed through the factory intake channel into the working cylinder of the standard engine.
When spraying fuel, the pressure inside the float chamber of the chainsaw is almost identical to atmospheric pressure. At the same time, the pressure in the factory air tube is rarefied. Due to the difference in these indicators, air is continuously sucked into the tube. As engine speed increases, it requires more fuel. Accordingly, the tube should suck in more air. Thus, the ability of the engine to intensively gain speed required for sawing large wood largely depends on the carburetor.
How to log into Skype using username and password
To log in, you need to launch the application itself and click on the “Skype Login” item. Now you need to enter your data: login and password. After these simple steps, your account page will appear on your screen.
The corporation did not cancel authorization using such data, but, unlike before, it added login to the account through a Microsoft account. As a result, by linking it with Skype data, you can use any of this information to go to your own profile.
You, of course, can log into Skype without a Microsoft account, but the proposed option, in my opinion, is quite convenient.
Low pressure
Why doesn't the VAZ-2107 (injector) start? Problems may be hidden in low fuel line pressure. For normal starting of an injection engine, at least 2.8 atmospheres are required. You can check this by disconnecting the supply tube from the ramp. Use a pressure gauge for this. Malfunctions with the pump may occur due to frequent overheating. But how does this happen if it is submersible? The fuel pump is killed by driving on an empty tank. If the light comes on, do not delay refilling. The cost of a pump for an injection “seven” is 3 times higher than for a carburetor.
Reasons why Niva 4x4 does not start (the starter does not turn)
January 28, 2022 LadaOnline 135 776 Often, owners of a VAZ 2121 or 2131 SUV encounter problems with starting the engine. For example, when you turn the ignition key, the starter does not turn. Let's look at possible problems with the Niva 4x4 starter and ways to solve them.
Where is the starter relay located?
The starter relay is located under the auxiliary fuse box next to the ignition relay. On Niva 21214, the starter activation relay is attached to the injection system relay bracket.
Niva starter circuit 2121, 2131
1 – starter; 2 – rechargeable battery; 3 – generator; 4 – starter activation relay; 5 – ignition switch
Starter activation circuit: When the starter is turned on, the voltage from the battery through the auxiliary relay (No. 4 type 113.3747-10) is supplied to the windings of the starter solenoid relay (retractor II and retaining I). After closing the contacts of this relay, the pull-in winding is turned off.
Possible malfunctions if the starter does not turn
Possible malfunction Diagnostics Solution
| Battery is discharged | The starter clicks but does not turn. The voltage at the battery terminals with consumers turned on is less than 12 V | Charge or replace the battery |
| Oxidation of battery terminals or poor connection | The starter clicks but does not turn. When the starter is turned on, the voltage at its terminals drops much more than at the battery terminals | Clean the contacts, lubricate with Vaseline and tighten well |
| There are problems in the wiring of the starter traction (retractor) relay, ignition contacts 30 and 50 do not close. | When turning the key there is no click under the hood (the relay does not work). Check the presence of voltage at the control contact of the solenoid relay | Clean the contacts, lubricate with Vaseline and tighten well. Replace the ignition switch |
| The starter solenoid relay is faulty. | When you turn the key, there is no click under the hood (the relay does not work), but there is +12 V at the control contact of the solenoid relay. The starter spins when closed with a screwdriver. The starter does not turn only when it is hot (when the engine is warm) | Replace starter relay |
| Solenoid relay contacts are oxidized, poor ground contact | When you turn the key there is a click under the hood, but the starter does not turn. Using an ohmmeter, check the resistance of the “battery - starter” circuit, as well as the ground wire. If the circuits are OK, remove the starter and check the operation of its relay | Clean the contacts, lubricate with Vaseline and tighten well. Replace the solenoid relay |
| Open or short circuit in the holding coil of the solenoid relay | When the starter is turned on, a cracking noise is heard from under the hood. The battery voltage is within normal limits. The relay is checked with an ohmmeter or by its excessive heating | Replace starter relay |
| Burnt starter commutator, stuck brushes or severe wear | The starter does not turn or turns slowly. With the starter removed, check the pressing force of the brushes to the commutator, their residual height, and wear of the commutator | Repair the starter. If the commutator is very worn, replace the starter. |
| Open or short circuit in the starter armature winding | The starter does not turn or turns slowly. The serviceability of the winding is checked with an ohmmeter or by darkening of the insulation | Replace starter |
| Freewheel slipping | The starter spins, but the flywheel is stationary | Replace clutch or starter |
| The ring gear rotates on the flywheel | The starter spins, but the flywheel and crankshaft are stationary. There is a squeal, a howl from the clutch housing | Replace flywheel |
| The engine or attachments are jammed | Check the rotation of the crankshaft, alternator pulleys, coolant pump and power steering pump | Repair the engine or its attachments |
| The starter drive gear or flywheel ring teeth are damaged | Visual inspection after removing the starter | Repair or replace starter, replace flywheel |
Have you encountered the problem of starting the engine when the starter does not turn? What was the cause of your problem? Let us remind you that other instructions for the repair and operation of Niva 4x4 can be found in this category or by content.
Keywords: Niva starter | Niva engine | Niva ignition system | Niva power system | ECM Niva
9 2
Found an error? Select it and press Ctrl+Enter..
Similar materials
- Lada Priora relay and fuse diagram
- Why Lada Priora does not start, causes of malfunctions
- Why Lada Kalina does not start, causes of malfunctions
xn--80aal0a.xn--80asehdb
Needle valve leaking
In some cases, the valve gets stuck in its seat. To eliminate such a malfunction, lightly tapping the carburetor cover with a hammer is sometimes enough. Experts also recommend paying attention to the tightness of the valve body. There is an O-ring underneath on most carburetor models - you need to make sure that it is there.
To check the needle valve, it is necessary to create a vacuum by blowing with your mouth or a rubber bulb through a hose placed on the fuel supply fitting. A valve with a defect cannot withstand vacuum. If it is faulty, it should be replaced with a new, working one. It is better to choose spare parts for carburetors wisely - lately there have been a lot of defective products in stores.
Signs
If the principles of preparing the fuel mixture in the carburetor towards enrichment are violated, then problems with starting the engine are observed. A hot engine starts especially hard. If the engine does start, the speed is unstable (often increased in idle mode). It is impossible to adjust or somehow stabilize the speed using conventional methods.
If the fuel mixture is too rich, black smoke will come out of the exhaust pipe - the mixture burns directly in the exhaust pipe. When you press the accelerator pedal, failures are possible - the rich mixture burns very poorly. There will be a thick layer of black carbon on the spark plugs.
How to properly adjust the carburetor on a chainsaw?
To adjust the unit, place the tool on a hard, flat surface. It is best to adjust the chainsaw carburetor in a place protected from dust and moisture.
The node setup process should look like this:
- First you need to unscrew the mounting bolts and remove the protective housing of the saw. This will make it possible to inspect the carburetor and, if necessary, clean it;
- Next, you will need to remove the standard air filter of the instrument. If the saw is equipped with an additional foam insert, then it must also be removed;
- After this, you will need a screwdriver, which you need to tighten the bolts marked H and L clockwise until they stop. This must be done very carefully so as not to break the bolts;
- Then both screws should be unscrewed 1.5 turns in the opposite direction;
- Next, you need to start the chainsaw motor and let it run for about 7 minutes;
- As soon as the engine cylinder warms up, you will need to start turning the bolt L until the internal combustion engine begins to operate at maximum speed. Immediately after this, the bolt must be turned 1/4 turn in the opposite direction;
- Then you will need to adjust the engine to operate at high speeds. To do this, you need to connect an electronic tachometer to the engine and start turning the H bolt until the indicators on the instrument display coincide with the instructions for the recommended maximum speed in the instructions for the saw;
- In the end, all that remains is to adjust the operation of the saw’s internal combustion engine at idle speed. To do this, you need to slowly turn the T bolt counterclockwise until the motor runs stably and without failures. If the engine begins to stall, then bolt T should be turned in the direction of the clock hand.
To adjust the carburetor on a chainsaw, you should work with the adjusting bolts as accurately as possible. Over-tightening the screws will place increased stress on the engine and other important components of the garden tool.
How to properly adjust the carburetor on a chainsaw?
In order for self-adjustment of a chainsaw carburetor to bring the desired result, you need to carry out preparatory work. First of all, the operator must ensure that the engine is in good working order. To do this, be sure to remove the top cover of the protective plastic case and carefully inspect the engine cylinder-piston group for burrs, cracks and other defects. If they have formed, the surface of the assembly will need to be sanded. It is important not to damage the protective chrome or nickasil coating of the cylinder.
Next you need to inspect the spark plug. If a thick layer of dried carbon deposits forms on it, the part will need to be unscrewed and thoroughly cleaned. To do this, you need to heat the candle and carefully scrape off any remaining dried oil from its tip.
At the end, you will need to inspect the parts of the entire fuel system of the chainsaw. Clogging in the pipes, accumulated debris in the fuel and air filters, unstable operation of the diffuser - all this leads to the engine losing the required speed. As a result, the operator does not receive accurate information about the operation of the motor and cannot set the correct settings. To prevent this, you need to wash the carburetor parts, filter and tube. After they are completely dry, they can be installed in their original place.
No fuel is supplied to the gasoline engine: injector and carburetor
Let's start with the fact that during the operation of the car, drivers quite often encounter the fact that the engine does not start, runs intermittently, or suddenly stalls. In this case, diagnostics usually affect the ignition system (on gasoline cars) and the power system.
As practice shows, unstable operation of the power unit on gasoline cars is in many cases due to the fact that gasoline is not supplied to the engine. In this article we will talk about why this happens, as well as what the driver should do if there is no gasoline entering the engine.
Read in this article
Clicking noises when trying to start the engine
If all contacts and fuses of the Niva are normal, you should turn the ignition key to the “start” position and listen to see if the relay clicks. If clicking sounds are heard clearly, the problem may lie in the starter voltage relay, the solenoid relay, or the starter coil circuit.
In “male” car services, the serviceability of the solenoid relay is usually checked by closing its contacts with a large screwdriver until the starter begins to rotate. For safety reasons, this should not be done under any circumstances.
If the problem is in the intermediate relay, then it is quite easy to replace it on the Niva. It is enough to insert the new relay block into the terminal block, observing the sequence and polarity of the connection.
To check the serviceability of the solenoid relay, the starter will have to be removed. After this, holding the starter, you should connect it to the battery and apply voltage to the contact of the solenoid relay. If a click is clearly heard, then the solenoid relay is working properly.
Perhaps the cause of the malfunction is oxidized and burnt contact pads of the starter. To check them, you should disassemble the solenoid relay and clean the contact group. Sometimes the solenoid relay is non-separable and must be replaced along with the contact group.
If the solenoid relay works, but the starter rotor does not rotate, it is necessary to check the condition of its brushes, which may have worn out so much that they have lost contact with the winding. In this case, repairing the starter costs little money.
If the rotor is jammed or its winding is burned out, it is best to replace the starter assembly.
High fuel level
If the carburetor overflows, the reason may be due to an overestimated fuel level. When engineers created these carburetors, they expected that the level of fuel in the chamber would be strictly defined. But in reality the level is adjusted differently. There are templates for setting the fuel level for Solex and DAAZ, but few people use them. If the level is too high, the mixture will be enriched.
To check the fuel level, you must remove the carburetor cap. But before that you need to pump gasoline into the chamber. On models Ozone-2105, 2107, the correct fuel level is in the middle of the inclined plane on the front wall. On Solexes for front-wheel drive VAZs, the normal level is 29 millimeters to the bottom of the chamber.
If, as a result of the check, the level does not correspond, then it is necessary to adjust it. This can be done by bending the floats.
Vacuum valve does not hold
The reason why gasoline ends up outside its main path may lie in the vacuum valve. An electronic valve prevents gravity flow and excessive gasoline pressure.
To diagnose the malfunction, it is necessary to disconnect the valve from the main network and power it directly from the battery.
IMPORTANT: The valve must first be checked with a multimeter or meter for short circuits. Otherwise, the battery may be damaged and electrical injury may occur.
Chinese scooters are equipped with non-repairable vacuum valves. Repair is carried out by replacing the failed component with a new one. More serious devices use a split housing. In this case, repairs may be limited to a visual inspection of the diaphragm with a decision to replace it.