Replacement of silent blocks of VAZ 2107 Lada Master
This type of work is needed quite often on the “seven”. As a rule, the need is caused due to the rapid wear of the elements themselves. The rubber used in manufacturing does not tolerate temperature changes well, which causes the part to begin to deteriorate and does not fulfill its functional purpose. For this reason, experts advise replacing them once a year, and if necessary, more often. The workflow does not cause any difficulties; the simplest tools are enough.
- Preparing for work
- Required Tools
- Changing the upper silent blocks
- How to change the lower silent block
- Features of replacement on the rear suspension
Preparing for work
Replacing silent blocks begins with selecting the necessary parts. If you make a mistake at this stage, there is a possibility that the next repair work will be approaching.
Drivers often buy parts made of rubber. But they have certain disadvantages - they creak and collapse quite quickly. Experts recommend using polyurethane silent blocks. They cost more, but are more durable and have a longer service life.
This element should be changed as soon as a strong creaking or knocking noise appears. The need for replacement is determined visually. The occurrence of cracks, scuffing, and deformation are the main causes of failure. A silent block malfunction can have a negative impact on all suspension elements.
Required Tools
To carry out the replacement you will need:
- hammer, chisel and pry bar;
- liquid key and gas burner;
- You can’t do without a silent block and ball puller.
Before repair work, it is necessary to treat all threaded areas that need to be disassembled for several hours. The front part of the car should be jacked up and jack stands placed under the car. The wheel is removed from the side where it should be replaced.
Changing the upper silent blocks
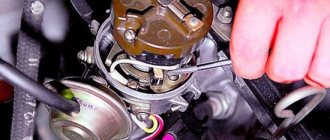
The event is simple, but has its own characteristics. Everything is done quite quickly. The nuts securing the bumper and ball joint are unscrewed, which is pressed out with a puller. The nuts of the upper arm are unscrewed and pulled out completely. We remove the silent blocks. We install new ones without using lubricants. The lever is put back, but the nuts are not screwed in tightly. The support is installed, then the wheel, and the car can now be lowered. And only now do we finally tighten the screw.
Sometimes difficulties may arise - the mounting screw will rust. It should be cut with a grinder and pulled out in parts.
How to change the lower silent block
Here everything is a little more complicated. All work will have to be done by car. Unscrew all the fastening nuts of the lever axle. A puller is screwed onto either side to use it to squeeze the silent block out of the socket. The same procedures are performed on the second side. We press-fit parts for replacement. The nuts are screwed on, but not tightened too much. The wheel is put on, the car is lowered to the ground. Now the mount can be tightened as much as possible. If there is no puller, then the entire lever with suspension elements is removed. In this case, the silent block is knocked out with a regular hammer.
Features of replacement on the rear suspension
The levers are removed one by one. They replace the hinges. To make the work easier, you should drive the machine into a pit or use a lift. The main difficulty may arise with the internal bushings, which become sour. But even in this situation, you can use an angle grinder.
If the mounting bolts can be reached without any problems, then replacement is easy. Before pressing in a new bushing, the seat should be cleaned of corrosion and remaining rubber particles. Next, the mating surfaces are coated with a soap solution. Do not use automobile oil and grease, as the rubber may be damaged from their impact. Now the bushing can be driven into the lever with one blow.
Repair work to replace silent blocks is familiar to every driver. This is due to the fact that this element is not reliable and often breaks down, requiring regular replacement. There is nothing complicated about it; even a novice driver can perform all the steps.
Purpose of silent blocks
Silent blocks are called hinges consisting of two or one metal bushings connected through a rubber insert. The part in question in the form of metal bushings serves to combine suspension units, and rubber materials serve as dampers of vibrations that occur when the machine moves, transmitted from one unit to another. Due to these small parts, the service life of the car suspension is extended, since all vibrations, deformations and vibrations are smoothed out using a silent block.
The design of the VAZ-2107 vehicle uses a corresponding number of silent blocks located in the front and rear suspension. In the design of the front suspension of the seven, the devices in question are used to fix the levers, and in the rear suspension they are used to connect the reaction rods connecting the axle to the body.
This is interesting! The design of the car in question uses silent blocks of different sizes, which depends on their location. These hinges are made not only from rubber, but also from polyurethane. Both materials have their advantages and disadvantages, but in any case, it is necessary to monitor the condition of the hinges and change them in a timely manner so that you do not have to repair the entire suspension.
Signs of malfunction of levers and silent blocks
Any part has its own service life. The more stress a part experiences, the faster it wears out. It is imperative to monitor the condition of the silent blocks, since over time the following consequences are observed: the rubber begins to tear, beating and vibrations occur at the joints. Moreover, rubber wear occurs not only when the machine is in operation, but also when it is idle, since rubber material tends to deteriorate under the influence of many factors.
The approximate service life of the devices in question is 90-100 thousand kilometers. Moreover, this only applies to hinges made of high-quality rubber or polyurethane. It is also worth noting that polyurethane products have a longer service life, unlike rubber ones, but at the same time they have such disadvantages as installation difficulties (it is almost impossible to install them without a special puller), and also the suspension with them becomes stiffer.
This is interesting! The need to replace devices sometimes arises much earlier, which is facilitated by the quality of the road surface on which the car is driven. Often, even high-quality hinges on “bad” roads can last no more than 50 thousand kilometers.
The need to replace hinges can be diagnosed by a number of the following signs:
- Lack of “responsiveness” of the car when the steering wheel is turned sharply.
- During the inspection, deformations of the devices are revealed.
- Knock from the suspension when driving over uneven surfaces.
- Backlash in the locations of parts.
If you are not sure that the devices should be replaced, you can visit a service station, where the technicians will carry out diagnostics and inform you about the need to replace the joints on the machine.
Replacing the upper arm joints
If there is a need to replace the devices in question, then it is worth mentioning that the parts cannot be repaired. After they wear out, you will need to buy a new set of silent blocks for the car and install them in place of the old ones. To replace silent blocks on a VAZ 2107, you will need to stock up on the following tools:
- Puller - this makes installing new parts much easier. Instead of a puller, you are allowed to use a homemade device, but how to make one is described in detail at the end of the article.
- Wrenches.
- Metalworking tools: hammer and chisel.
- Mount.
The first thing you need to do is find out how to replace the front control arms on a VAZ-2107. To do this, the machine is located on the pit, and then its front part is raised and the wheel is dismantled from the side where it is planned to replace the rubber seals.
This is interesting! It is recommended to change the devices in question for the upper and lower arms as a set, so that after some time you do not have to repeat the procedures for dismantling parts and replacing components.
The algorithm for replacing the upper arm hinges is as follows:
- First, unscrew the nut securing the front bumper bracket.
- Let's start unscrewing the upper ball joint.
- We unscrew the nut of the upper arm axle, holding the axle stationary on the other side with a second wrench.
- Now let's move on to removing the axle.
- We begin to dismantle the upper arm from the VAZ 2107.
- After removing the lever, we proceed to removing the old silent blocks and installing new ones.
- To dismantle the rubber hinge, you can install a puller and begin removing it. In order not to waste time, the device can be dismantled by cutting off the rubber ear with a knife. After this, the seal can be squeezed out by hand.
- Installation of a new seal is carried out with a puller. Before pressing in a new part, you first need to clean the inside of the bracket from corrosion (if any). Also, to simplify its pressing, the new rubber seal must be treated with a soap solution, but not with oil or other types of lubricants, as they will shorten the service life of the part by 2-3 times.
- Let's start pressing in the silent blocks. To do this, on the side of the larger diameter, install a large extension and the part itself.
- After this, we screw the nut onto the puller, which, as it moves, will act on the adapter, thereby pressing the rubber hinge into the installation hole.
Tie rod malfunctions
The jet thrust of the VAZ 2107, like any other car, takes on loads aimed at shifting or rocking the rear axle. If these parts fail, the car’s behavior on the road changes: handling deteriorates, braking distance increases, and even there is a threat of a sudden change in trajectory or the car overturning. What factors cause breakage or wear of steering rods?
- Static loads. It is impossible to avoid this factor, but you can reduce it without overloading the car.
- Torsional loads. They most often occur when hitting an obstacle. You can reduce them by reducing speed in front of an obstacle.
- Chemical effects of water and chemicals sprinkled on roads in winter.
Purpose of silent blocks
A silent block is a special hinge that is made of two components (rubber and metal). The main purpose of the parts is to neutralize shocks, noise and vibrations that inevitably arise during movement. The oil change in the VAZ 2107 engine is carried out every 15 thousand kilometers. Moreover, if the car is used in the city, it is best to reduce it. The parts themselves are installed in torque rods, shock absorbers, levers, supports, etc.
Failure of such components is very unsafe - the car loses maneuverability, tire wear increases, and wheel alignment is disrupted. In general, it creates a danger for upcoming traffic and there is a risk of getting into an accident. In such a situation, it is important to know how to change silent blocks on a VAZ 2107
, which new ones to buy and where to find time for repairs.
When to change jet rods on a VAZ 2107?
As we mentioned, only high-quality metal is used in the manufacture of rods (usually steel). The latter is able to withstand enormous loads over many years of operation.
The “weak link” of the part is the lugs, which are not a continuation of the rods, but are only welded to them. It is no secret that welding has its own service life. Over time, the joints may become damaged or even collapse.
To eliminate problems in movement and prevent breakage of rods, it is necessary to inspect the condition of the part from time to time.
If signs of destruction, cracks, deformation and other malfunctions appear, the VAZ 2107 jet rods must be replaced.
In this case, pay special attention to silent blocks - they often cannot withstand loads and break. As a result, the fixation of the rods deteriorates, they move relative to the base and cease to perform their functions
At the same time, you should not wait until the rubber bands fail. If knocking noises occur during movement, inspection, or detection of cracks on the rods, replace them immediately. To do this, you don’t need to go to a service station - you can do everything yourself, as it’s not at all difficult.
The procedure for performing repair work
Replacement of a faulty part of the steering mechanism is carried out in the following sequence:
- We clean the assembly from dirt using a brush, and apply a penetrating compound to the threaded connections.
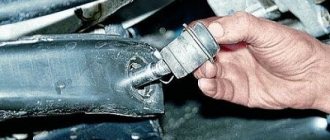
- Using pliers, remove the fixing cotter pins and, using a spanner wrench or a “22” socket, unscrew the nut on the pin.
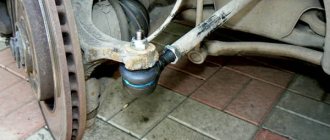
- The steering rods are detached from the steering knuckle using a special puller. The device is put on the assembly from above and using a bolt, the finger is squeezed out of the eye.
Helpful advice: if you first tap the joint using a copper or bronze drift, the dismantling process will be significantly accelerated.
The manufacturer of the VAZ 2107 recommends replacing worn steering rods as a set. The service life of these structural units from one batch installed on a vehicle is usually the same. Replacing only one of them does not fundamentally solve the problem; a little time will pass and the repair process will have to be repeated for the remaining elements of the system.
Malfunctions of the front suspension of the VAZ 2101
The service life of front suspension elements directly depends on the conditions and intensity of vehicle operation, as well as on the quality of the parts used. Since this or that malfunction manifests itself in different ways, it is worth dwelling on each of them in more detail.
Noises and knocks while driving
Extraneous sounds in the operation of the suspension can occur for a number of reasons:
- failure of shock absorbers. In this case, it is necessary to replace the damaged shock absorbers;
- wear of silent blocks. “Broken” hinges need to be replaced;
- development of the transverse stabilizer in the rubber cushions. Inspection and replacement of worn-out products is required;
- The shock absorber rod mount has come loose or the rubber cushions have become unusable. It is necessary to check the fasteners and, if necessary, replace rubber products;
- ball joint malfunctions. When a working appears, the failed supports must be replaced;
- increased clearance in wheel bearings. It is necessary to adjust the gap, and if the bearings are worn out, parts need to be replaced;
- wheel imbalance. It is necessary to check and, if necessary, balance the wheels;
- wheel rim damage. The disk needs to be restored or replaced;
- spring breakage or sag. The front suspension springs need to be replaced;
- damage to the bumpers. Rebound buffers that have become unusable require replacement;
- loosening of the upper or lower arms. In this case, it is necessary to check and tighten the nuts and bolts.
Video: causes of knocking in the front suspension
The car is pulled to the side
If the vehicle pulls to the side, then there can be no question of any safety of movement. There may be several reasons for this behavior:
- different tire pressures. The correct pressure must be checked and set;
- The front wheels are at the wrong angle. A visit to a car service center is required to adjust the wheel alignment;
- Excessive play in the wheel bearing. If there is a large gap, adjustment should be made;
- The front suspension arms or axle are deformed. Replacement of damaged parts is required;
- the springs have uneven subsidence. The front springs need to be replaced;
- The brake mechanism is not fully released. The brake mechanism should be checked and the malfunction eliminated;
- Tire tread has a big difference in wear. Worn tires need to be replaced;
- wheel imbalance. Eliminated in the same way as with knocking in the suspension.
Suspension breakdowns
Sometimes in the operation of the suspension characteristic impacts of metal on metal occur, which is called breakdown. This indicates that one or another part of the suspension does not fulfill its function. The reasons for this phenomenon may be the following:
- sag of front springs. Elastic elements need to be replaced;
- The shock absorbers have become unusable. If damping devices break or fail, they should be replaced;
- deformation of levers. Levers with changed geometry must be replaced with serviceable ones.
There can actually be many more faults in the front suspension. For example, the appearance of squeaks when driving over uneven surfaces may indicate the failure of silent blocks, oil smudges on shock absorbers indicate damage to the product and indicate the need to replace it, etc.
Signs of malfunction of the VAZ 2107 steering linkage
You can determine that the steering ends of a VAZ 2107 are worn out by the following signs:
- increased steering play;
- knocking in the steering;
- accelerated or uneven tire wear.
The latter can also be caused by bent steering rods. In addition, their deformation leads to the car moving away from the straight path.
Similar phenomena are observed when other elements of the front suspension are worn out and the wheel camber and toe angles are incorrectly adjusted. Therefore, before changing rods and tips, you need to make sure that the reason lies in them. To check the ends and tie rods of the VAZ 2107, it is necessary to provide access to the car from below - lift it on a lift or install it above the inspection hole.
It is better to start your inspection with the steering tips. Check the condition of the anthers, which should not have ruptures or cracks. The permissible play of the tip hinges is 1.5 mm. If you hear a knocking sound when the tip is pulled up and down, it should be replaced.
Unlike the tips, tie rods practically do not wear out. They can only bend as a result of an accident or due to strong impacts on the suspension (for example, when a car hits a pothole at high speed).
Note: In case of deformation, steering rods must be replaced. Trying to straighten them and install them back is unacceptable!
Purpose of thrust rods on the VAZ 2107
Tie rods provide protection against swaying and loss of control on the road, during sharp turns and obstacles. Even earlier versions of the car had similar problems. But inside the cars there were only ordinary springs; no one knew anything about the system with rods.
It is for this reason that the vehicle caused many problems when driving. Only over time the suspension was modified. A system was installed with several long rods. This part carried the main load.
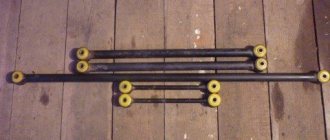
Classic VAZ 2107 cars and other models contain the following version of the torque rod kit:
- Long.
- Short.
- A large transverse one, which also serves as the basis for the entire system.
Installation location - near the car axle located at the rear. The system is visible only from the inspection hole, where repair work is usually carried out if the reaction rods are replaced.
What is a silent block
Front arm bushings made of polyurethane
These parts are typical hinges made of metal and rubber. They are designed to neutralize noise, shocks, and various vibrations that occur when driving on our roads, which are not always of the highest quality. These parts are installed in reaction rods, supports, levers, and shock absorbers.
Rubber and polymer silent blocks that have become unusable should be replaced as quickly as possible. Failure of parts of levers and other suspension components significantly worsens the vehicle’s maneuverability and increases wear on the rubber of the front wheels, resulting in camber and toe problems.
Before replacing silent blocks on a rear-wheel drive VAZ 2107, you need to prepare the following tool:
- devices to facilitate the pressing process;
- remover for VAZ 2107 silent blocks and control tips;
- jack;
- a set of open-end and ring wrenches for “22” and “13”;
- perfectly sharpened chisel;
- plumber's hammer;
- mount.
Without these tools, it is very difficult to replace worn parts. High-quality new rubber, or better yet polymer, silent blocks for VAZ will also come in handy. The products “Track” and “SEVI” have proven themselves to be excellent.
FakeHeader
Comments 7
Hello. Two years have passed. I just came across your story. Now I was tightening the upper silent blocks, the rubber bands on the outside stupidly came out from under the washers. And I didn’t make it to 60. I’m sitting here scratching my turnips. True, my graphics are blurry. But the lower ones were also lubricated, they were tightened for 80 minutes and did not come out.
Hello! Thank you for remembering) The range is 60-90 N*m because our rubber products are produced according to specifications. It’s not clear to anyone what specifications a particular manufacturer has. You shouldn’t pinch the rubber bands—that’s a fact. My silent blocks drove for 3000, then I swapped them as is with levers onto a friend’s car, tightened them by eye - and it’s still running.
About modernization of jet thrusts
Sometimes drivers decide to independently increase the reliability of the VAZ 2107 suspension and extend its service life. To this end, they are modernizing jet thrust. Typically, modernization of rods means two operations. Here they are:
- installation of dual jet rods;
- installation of reinforced jet thrusts.
Now a little more about each of the above operations.
Twin rods
Most often, drivers install dual rods on the VAZ 2107. The reason is obvious: for this procedure you don't have to do anything with the pulls. You simply purchase not one, but two sets of rods that are installed in a regular place near the rear axle of the “seven”. Plus, you purchase not ordinary, but elongated mounting bolts, on which this entire structure rests.
The obvious advantage of such modernization is the increase in the reliability of the suspension: even if one of the tie rods breaks while driving, the car is unlikely to lose control and the driver will always have a chance to notice the problem in time and stop (a break in the tie rod is almost always accompanied by a strong knock on the bottom of the car, which cannot be heard this is simply impossible). This design also has a drawback: the suspension becomes stiffer. If earlier it “eaten up” small unevenness in the road without any problems, now the driver will feel even small pebbles and holes while driving.
Replacing bushings and silent blocks on VAZ 2107 rods
Silent blocks with bushings are disposable parts that need to be replaced immediately. In a garage, restoring parts becomes impossible. To replace you will need to acquire the following things:
- The beard is 10 mm in diameter.
- Hammer.
- Press-fitting device. It may also be needed when the rear axle is being repaired.
Sequencing
Follow the above instructions when removing the traction. Parts must be pre-treated with WD-40. A wire brush helps remove dirt and dust. Further actions are performed according to the specified algorithm:
After removing the rod, the bushing should be removed without problems;
But this behavior is typical for parts without serious rust, with severe wear. Otherwise, you will have to use a hammer to knock the structure out of its place. The beard is inserted inside first.
They get rid of the silent block if the rubber part is damaged too much. Use a screwdriver or a mounting shovel to pry up parts that prevent everything from being freed; Using a sharp knife or sandpaper, carefully clean the surface of the eyelet inside. Remains of rubber and rust should then disappear completely; A new bushing is placed in the eye and pressing is carried out using new equipment; The beard helps with this part of the job.
The main thing is to act carefully to avoid damage.
Upper
Important! When working, the car should be placed on stands to prevent it from falling, and the rear wheels should be braked with a hand brake. Using a car jack, lift the side of the car where the worn silent block will be replaced, remove the wheel
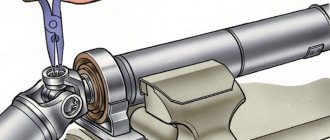
Now you should free the bipod from the upper ball joint. Unscrew the support nut with a 22mm wrench and press it out with a special puller. Experienced car enthusiasts use a heavy hammer to do this, hitting the protrusion on the bipod, after which the ball joint pin comes out of its socket
Using a car jack, lift the side of the car where the worn silent block will be replaced and remove the wheel. Now you should free the bipod from the upper ball joint. Unscrew the support nut with a 22mm wrench and press it out with a special puller. Experienced car enthusiasts use a heavy hammer to do this and hit the protrusion on the bipod, after which the ball joint pin comes out of its socket.
Now you can begin removing the upper arm. For the VAZ-2107, before this you need to remove the upper bumper mounting bolt. After removing the bolt, use keys 22 and 24 to unscrew the nut and knock out the bolt. After this, the part will remain in your hands. A puller is used to remove silent blocks from their sockets to press in new ones. If this fails, they are simply burned out.
Replacing the silent blocks of the upper arm of the VAZ-2107 must be done on a dry surface:
- They are pressed into the sockets of the upper arm of the VAZ-2107, after which they take their place.
- Do not overtighten the nut of the lever mounting bolt; this is done last.
- Now install the upper ball joint.
Replacement of the upper arm silent block is completed.
Diagnostics of rubber-metal joints
To check the condition of silent blocks, you need to use a pit or overpass. Without such amenities, it will be problematic to drive the seven, so there should be a pit in every garage. therefore, it can be repaired by hand without any problems. But you need to determine whether the VAZ-2107 silent blocks need to be replaced; the price of one is approximately 50 rubles. For a set of 8 silent blocks you will pay 400 rubles.
Carefully inspect the suspension on the lever, evaluate the appearance of the rubber-metal hinge. If the rubber has obvious damage - it has begun to become cracked, or there are any cuts at all, then all elements must be replaced. When carrying out repairs, try to do as much work as possible. Therefore, you not only change all eight silent blocks, but also, after assessing the condition of the balls, replace them if necessary. It is also worth looking at the condition and tightening the nut if necessary.
Diagnostics of silent blocks.
In order to identify the need to replace elements, it is necessary to understand their service life. As a rule, silent blocks last quite a long time. Subject to operating conditions, the devices can travel up to one hundred thousand kilometers. Unfortunately, our roads can hardly be called optimal operating conditions. In this regard, it is recommended to check the suitability of the elements every fifty thousand kilometers.
Extreme factors indicating the need to replace suspension silent blocks are:
- Deterioration in controllability of the VAZ 2107 car.
- Increased steering delay.
- Poor response to turning the steering wheel.
These factors indicate the emergency condition of the VAZ 2107 silent blocks. The above should not be allowed and malfunctions should be prevented at an early stage. To fully check the elements, you can contact a workshop or carry out diagnostics yourself.
Inspecting silent blocks does not require a lot of knowledge or special equipment. In this case, everything is quite simple. To carry out the inspection, you need to look at the car from below, so you will need an overpass. After installing the car in the pit, it is necessary to clean the silent block from accumulated dirt. Next, we carry out a visual inspection of the element. If you know what a new silent block looks like, identifying the faulty one will not be difficult. The rubber element must be intact and intact. If irregularities in the structure are detected, the element must be replaced. As a rule, the destruction of the rubber element leads to a violation of the camber - toe. If you are sure that the balance was previously at the required level and is now knocked off, most likely the rubber hinge has torn. If the rubber part is broken, the levers change their position.
If movement of the element is detected in the rubber part, it must also be replaced with a serviceable one.
Why is it necessary to timely replace the silent blocks of the front control arms of the VAZ 2107?
— If the rubber and metal elements are completely worn out, the car can randomly change directions at high speed. At the same time, the driver and passenger are exposed to considerable danger.
— One of the consequences of poor condition of the devices is uneven wear of the wheels resulting from improper balancing.
— To prevent the replacement of the front arm, it is also worth replacing the used hinge in a timely manner.
Installation of traction is done as follows:
- First, the rod is mounted in the front bracket. Before inserting the bolt into the desired hole, it is treated with nigrol;
- The reaction rod is placed in the rear bracket. Don't be surprised if the holes at the mounting location don't line up.
If the jet rod was broken, then the bridge would move all the time under load. This led to the shift.
To adjust the holes, you need to use a mounting spatula, resting it on the bracket, and unscrew the bridge until the fasteners align. When they match, you need to insert the bolt and secure it with a nut.
With the help of such manipulations, you will be able to replace the jet rods with your own hands and save money on visiting a service station.
I am glad to welcome you, friends, to the blog ""
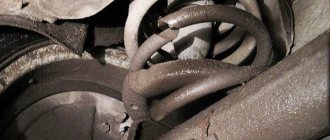
The knocking noise in the rear wheels of the kopeck, deuce and the next row of classic models of the domestic automobile industry appears from wear on the bushings of the reaction rods or, as they are also called, rods. Almost all classic VAZs in their layout contain these elements necessary for the rear axle.
Some car owners change the entire rod, but to eliminate knocking or other malfunctions, it is enough to change only the bushings, which wear out very quickly, unless, of course, the rod itself is bent or deformed. Naturally, changing a complete rod is much easier than knocking out a worn rubber band and then pressing a new one back in, but this process is more economical and not so complicated.
On the market today you can find many different repair kits, both for complete rods and for bushings separately
When purchasing, you should pay attention to the equipment, and more specifically to the number of large and small rubber spare parts. Most provide sets with 4 large and 6 small bushings. It is better to take a repair kit for the VAZ-2121 in which all the elements are of the same large size
Of course, you will have to tinker with them, but the resulting result will meet all expectations. In addition to rubber bushings, it will be necessary to purchase metal bushings, which in any case will also need to be replaced
It is better to take a repair kit for the VAZ-2121 in which all the elements are of the same large size. Of course, you will have to tinker with them, but the resulting result will meet all expectations. In addition to rubber bushings, you will also need to purchase metal bushings, which in any case will also need to be replaced.
The procedure for replacing rear torque rod bushings must be carried out in the inspection pit. First of all, you need to unscrew the nuts on the bolts that connect the rod to the car body and the bridge. Then remove the bolts and release the rod itself.
When using the machine for a long time, to carry out this operation, you may need special tools, for example, a metal spacer, with which you can knock out a rusted bolt. After removing the jet thrust, you can begin to knock out the worn bushings. To do this, it is better to clamp the eye of the rod in a vice, and use the same spacer and hammer to knock out the rubber. Once the bushing has moved out of its place, it can be easily removed by prying it off with a screwdriver. As a last resort, if it is already stuck to the metal, the bushing can be pulled out with pliers. After freeing the rod ear from the rubber bushing, its inner surface must be cleaned with sandpaper and the surface wiped with a dry cloth.
When installing a new bushing, you need to make sure that the inner surface of the ear is smooth and free of roughness. Next, the rod and the new elastic band are treated with soapy water in order to avoid much friction. The bushing to be replaced is inserted into the eye of the rod and, using a vice, is carefully and slowly pressed into place. After this, the metal part is installed in the same way. The same actions must be performed with the second part of the jet thrust.
In addition to replacing the bushings, you also need to take care of the bolts and nuts. It is advisable to change them too, because jet thrust is a moving element of the car. The seats of the car body and axle are pre-cleaned and lubricated with special oil. After this, the rod with the replaced bushings is screwed to the body. You can also lubricate the bolts themselves, thus protecting them from corrosion.
Knocks and shaking in VAZ cars mainly depend on the rear thrust rods, so attention should be paid to them, especially since solving the problem does not involve large financial investments and does not require more skill and experience. There were even cases when the rear rod simply burst in the area of the eye and the rear axle “drove” along the road, but the domestic car still kept moving
Replacing jet rods on a VAZ 2107
It is necessary to prepare a kit with tools and consumables in advance. Their main list is as follows:
- Hammer;
- Set with open-end wrenches. The reinforced double type parts are sometimes difficult to remove without additional tools;
- Blades for installation;
- WD-40 – this composition removes rust;
- A set with new reaction rods, including a transverse one.
When everything is ready, they begin the work itself.
Removing jet rods
Removing old parts is the first step where work begins.
The process involves the following sequence:
- A wire brush is used to remove rust and dirt from threaded connections. Then WD-40 is used for processing. You will need to wait some time before the work can continue. The instructions are also relevant for the classic model.
- Completely unscrew the nut, due to which the washer is held on the free side. This process is difficult, it is better to take a long wrench and, if necessary, re-treat the surface with WD-40.
- Dismantling the bolt and nut, moving to the other side. The rear parts are dismantled in almost the same way.
- Unscrewing the nut from the lower shock absorber mounting. The bolt with the spacer sleeve is also removed.
- Shift towards the shock absorber itself. Otherwise you won't be able to access the second bolt.
- Clean the bolt threads with a wire brush, then apply WD-40 again.
- Unscrew the nut and pull out the bolt. The elastic band also changes if necessary.
The bolt is simply cut off if the nut cannot be unscrewed. Removing the reaction rods involves using a spatula for installation. Remains of the fastening must be removed if the bolt had to be cut off.
Reverse welding of cracks will not help when they appear on the surface. The seam then still cannot withstand the load. Such parts can only be replaced in full.
Repair and installation of jet rods
Reuse is permissible only if the metal part remains intact. Rubber silent blocks must be replaced in any case. The old parts are removed from the lugs and then new ones are installed. Treating the surface with dishwashing detergent simplifies this process.
New rods are installed in the following order:
- The traction eye is mounted in the front bracket;
- The securing bolt is lubricated with nigrol, lithol. Everything is inserted into the bracket and tightened with a nut;
- The tie rod eye is inserted into the rear tie rod bracket;
- Insert the bolt with lubricant, then secure with a nut.
A situation is acceptable when the holes at the traction eye and the bracket do not coincide with each other. Then take a mounting blade and, if possible, correct the current position.
The lower part of the shock absorber at the rear is secured when the bulk of the work is completed.
When a VAZ-2107 needs to replace jet rods
As previously mentioned, rods are made of high-quality metal (mainly steel). This raw material can withstand heavy loads over many years of use.
The weak point of the rods is the eyes. These parts are welded to the rods and are not a continuation of them, and the welding has a certain service life. Over time, the solder joints may gradually become damaged or destroyed.
To avoid problems when driving and to prevent malfunction of the rods, you need to periodically check the condition of the spare parts. If deformation, cracks, or signs of destruction occur, the reaction rods must be replaced.
In this case, there is no need to wait for the rubber bands to fail. If knocking noises occur while the vehicle is moving, inspect and identify damage to the rods, change them immediately. To do this, you don’t have to go to a service station; you can do everything yourself.
Content
During the operation of the VAZ 2107, it may be necessary to replace silent blocks. Not every car enthusiast understands the function of these elements, and even more so, not everyone knows how to replace them. Let's consider the purpose of the elements and how to replace them.
The silent block is a pair of metal bushings with rubber gaskets. Silent blocks connect suspension parts and remove unwanted vibrations. Thanks to the rubber structure, mechanical stress between the suspension elements is avoided. The part in question prevents deformation of the elements of the suspended part of the car. The rubber structure is subjected to constant impacts and heavy loads. Subsequently, the VAZ 2107 part may fail and require replacement.
How to replace jet rods on a VAZ 2101-VAZ 2107?
Note! If you decide to replace all the rods, then think about replacing the bolts, what this will give you, firstly, it will be more pleasant to work with new bolts, and secondly, the nuts will be screwed much easier on the thread than will happen with old rusty bolts , and thirdly, in the future, if you have to work with the rods again, the new bolts will be much easier to unscrew and knock out (Nothing will rust because in a short time), but we recommend replacing the bolts only if the old bolts have already deteriorated and everything is rusty!
1. Absolutely all the links that are present in the rear suspension of a classic car are removed identically, so we will not show a separate photo about each link and explain how it changes, let’s take the central link as an example (Others are removed in the same way, but there are some nuances, we will we’ll indicate everything), in general, let’s get started, first of all, lubricate the bolts and nuts securing the torque rods with a penetrating lubricant (This can be WD-40), then let the lubricant soak thoroughly (5 minutes is enough) and after waiting for that, you can start working.
2. First of all, take two wrenches (One of which should be a spanner, and the other a knob and head, this is much more convenient) and holding the bolt from turning with one, unscrew the nut with the other, as soon as the operation is completed, knock out the bolt using the handle of a hammer or using something similar (the bolt can be completely knocked out with a drift or another bolt of a suitable size), then lift the rod to the top and clean the entire seat from dirt, if there is any dirt on the metal eyes (This is where the bolt is inserted that secures the rod, there are two eyes in total, on one end the head of the bolt sticks out, and on the other there is a nut) traces of rust are found, then in this case take sandpaper and clean it off, on the other side the central link (Where it is attached to the body) is disconnected in the same way, after disconnecting, remove completely traction from the car.
3. We have sorted out the central links, if you decide to remove the transverse rod, you need to unscrew it in exactly the same way (It is attached to the sides), but there is one problem in the installation, when the rod is removed, the angles of the rear wheels change (They collapse) and therefore when the new link If you bring it up, you will find that the hole for the bolt will not match (see photo below), but you can overcome this by inserting a powerful screwdriver into the hole and forcefully aligning these two holes and pulling it out, on the other hand immediately insert a bolt that will be hammered in later you will have to tighten the nut of this bolt, and the rod will be completely installed.
4. And let’s say a few words about the last links, they are the most difficult to change, because there you will also need to unscrew the lower part of the rear shock absorber (How to unscrew the rear shock absorber from below, read the article entitled: “”, paragraph 2-5), after To do this, fold back the lower part of the shock absorber so that it does not interfere and do exactly the same actions as with the other rods, that is, with one key, hold the bolt from turning, and with the other, unscrew the nut, knocking out the bolt, disconnect the rod from one end, it is completely disconnected from the body identically.
5. During all the replacement operations, you will only have problems with the bolts, namely, it will be very difficult to put them back in, especially you won’t be able to put them back in if you work with the rear wheels hanging, we will give advice, almost always when replacing the suspension tie rods should be loaded, sometimes it should be heavily loaded, sometimes even the wheels will have to touch the ground just a little. You take all this into account and, in connection with these features, adjust the height and degree of loading of the rear suspension of the car.
Note! And by the way, so that the bolts can be easily removed in the future and the threads do not turn sour, we recommend that you lubricate them with solid oil before installation, and then in the future they will easily come loose, even if you don’t want to change the rods yourself after a while but take the car to a service station, then for lubricated bolts will only thank you, so take this into account and there will be much fewer problems with bolts!
Additional video clip: A detailed video clip that explains the process of replacing all torque rods on a classic car is attached just below:
Replacing torque rod bushings — logbook Lada 2107 2006 on DRIVE2
Last weekend I decided to work on the car and bought torque rod bushings, regular rubber ones + pins (1000 tenge + 1000 tenge)
Bushings used BRT
Fingers I don’t know whose company it is
- the replacement process is not too complicated, but without tools it’s a pain in the ass... the car needed to be rolled backwards into a garage with a pit, I cleaned and sprayed all the nuts with WD-40, unscrewed and removed the rods (as well as the lower mount of the rear shock absorber) using: a ratchet with 19mm head and 19mm wrench
- and not without the help of some mother)).
Attaching reaction rods to the body
Because of the shock absorber bolt, it is impossible to get to the rod mounting bolt, there is also a spacer, I don’t have one, apparently so that the shock absorber has more travel
- Only 4 rods were removed (they didn’t reach the panhard, the car was backed up in front) Then, of course, it was possible to buy and install new rods,
- but I wanted to try my hand)) and it’s cheaper to change the bushings yourself!
The process of replacing the bushings began: it took us 2 hours (out of ignorance, and maybe it was our first experience). We knocked out the fingers using a bolt with a nut, a 2.5 kg sledgehammer, and a tree stump)) We knocked out 8 bushings in about 10 minutes. At first they cut the rubber bushings, tried to pull them out, We spent about 40 minutes)) then we got our hands dirty and managed to pull everything out quickly thanks to a large flat screwdriver.
Next, I cleaned the seats on the rods with sandpaper from the remnants of worn-out rubber, it took me half an hour... Well, that’s where the fun began)) The bushings for the small rods, generously lubricated with liquid soap, I was able to “install” with the help of my 95 kg of weight, jumping with my heel on the rubber band )))And I was able to install bushings on large rods only thanks to hammer blows.
Then, with the help of yews and a plumber’s “set,” the two of us somehow pressed the fingers in
(the movement of the yews was barely enough, the yews were not screwed in, everything was done on the floor)))
The photo is not mine, I skimped on Google))
- Pressed...
- We went to install I installed the rods quite quickly, but I had to conjure with the “position” of the body so that the holes on the body and the rods matched... we also used all sorts of iron rods so that the rods would fall into place, after 1 hour all the rods were in their places
- then tightened the bolts.
The next day I bought a device for pressing in jet thrust bushings. It cost me 1200 tenge.
This is it, the photo is not mine, I don’t know why the finger is there)
Panhard bar
with the Panhard bar, now we didn’t have to suffer so much, I drove the car backwards into the garage again: wd-40... unscrew, remove... removed. The bushings were pressed out using the proven technology: “sledgehammers, bolts and screwdrivers”, they were pressed in with a device quite easily and quickly, the bolt tightened the bushing , and there’s also a cone.
- The traction fell into place quite quickly.
- Disclaimer: all the photos were blatantly stolen from Google)) when I took it, I didn’t have time for a camera.
- Results: Some bushings were “average” broken, and after replacing the rear axle became less “chatty”, handling improved quite a lot, and the car began to ask for a skid less))
- But it became a pleasure to pile sideways, because... the car became submissive))
Yesterday (09.12.
2015) it was very snowy (20 cm fell per day), I drove from the secondary street to the main one, the main street has a rather sharp rise (15 percent hill), the secondary one adjoins the main one in the last quarter of the rise (25 meters left uphill) from the right Turning 90 degrees up a steep hill, I accelerated so as not to slide, a skid began, a couple of movements of the steering wheel, and it was successfully extinguished, + I didn’t roll down, only my mother got scared.
So don’t be lazy to watch your iron horses! If they don’t thank you, they will protect you!
Price tag: 700 ₽ Mileage: 15200 km
What links are included in the rear suspension?
The Chevy Niva bridge is held in place using five parts. To prevent longitudinal and transverse displacement, four longitudinal rods (two each: front and rear) and one transverse rod are used. At the ends of the products there are eyes into which silent blocks are inserted to prevent knocking in the suspension. One end of the rod is attached to the bridge, the other to the car body.
The parts have the same diameter and differ only in length. The longest is the transverse thrust. The length of the elements ensures vertical mobility of the rear axle. Thanks to this, the silent blocks do not twist, even if the suspension moves by the full stroke of the shock absorber.
Seven rear suspension design
The rear suspension design of the VAZ 2107 is quite simple, which is required by the presence of a rear axle. It is due to the presence of the rear axle that the rear wheels are rigidly connected to each other. The rear axle beam is suspended from the body using reaction rods, of which there are only 5 in the design - four longitudinal rods and one transverse rod.
The main purpose of the longitudinal rods is to prevent and prevent the beam from moving in two directions - forward and backward. Transverse traction is needed in order to prevent the beam from moving when lateral loads occur. You need to know all the suspension parts in order to identify faults and make correct repairs.
This is interesting! To combine the rods with the body part and the beam, special hinges are used, which are made of rubber material and are called silent blocks.
We continue to study the structure of the rear suspension of the seven, and it is worth highlighting another important element - the springs. The lower part of the springs is in contact with the bowl on the bridge beam. To soften contact and prevent squeaks, a thick rubber gasket is placed between the spring and the bowl. The upper part of the springs also rests against the body bowls through an insulating gasket.
Purpose of thrust rods on the VAZ 2107
Tie rods provide protection against swaying and loss of control on the road, during sharp turns and obstacles. Even earlier versions of the car had similar problems. But inside the cars there were only ordinary springs; no one knew anything about the system with rods.
It is for this reason that the vehicle caused many problems when driving. Only over time the suspension was modified. A system was installed with several long rods. This part carried the main load.
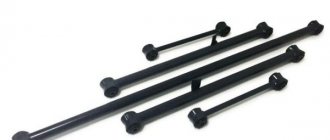
Classic VAZ 2107 cars and other models contain the following version of the torque rod kit:
- Long.
- Short.
- A large transverse one, which also serves as the basis for the entire system.
Installation location - near the car axle located at the rear. The system is visible only from the inspection hole, where repair work is usually carried out if the reaction rods are replaced.