Domestic production today is moving forward relative to its level of development and continues to improve every year. These efforts lead to more comfortable driving and greater driving pleasure. It is worth mentioning in a separate word the appearance of cars, which in domestic manufacturers such as VAZ has changed a lot over the past 10 years. These changes were more cosmetic than radical, but contributed to visible improvements. But there are ways to independently influence the appearance of almost any car, one of which is the procedure for painting it. Today we will cover this topic in detail and do this using the example of a VAZ 2107 car.
Problems of body iron "seven"
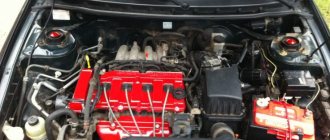
The VAZ 2107 is famous for its body, the simple geometry of which still attracts car enthusiasts today. This car model is a luxury version of the VAZ 2105 and was produced from 1982 to 2012 in various modifications and configurations, including a pickup body. The car body is a four-door sedan with rear-wheel drive. The frame has steel parts connected by non-contact welding.
Those parts on which a large load is distributed are additionally strengthened by arc welding. Do-it-yourself body repair of a VAZ 2107 includes several operations: modernization of the metal frame of the car, replacement of one or another spare part, painting, welding, etc. Over time, in the process of dynamic loads, the body hardware of the “seven” undergoes the following changes:
- some parts are deformed;
- the doors begin to sag;
- the design of the openings is disrupted;
- the integrity of the paintwork is destroyed;
- cracks appear at the junction of the body and the racks;
- welding points are destroyed, structural elements are disconnected;
- corrosion appears.
Replacing parts is not difficult, since spare parts for the “seven” are easy to find. Removable body hardware, such as the hood, front fenders, trunk lid, doors, etc., is much easier to repair with your own hands, since to do this you need to unscrew the necessary parts using a key and replace them with other spare parts.
Fixed body iron: rear fenders, inner door panels, grille and other welded elements are much more difficult to repair with your own hands. They must be carefully cut without damaging the structures to which they are welded.
Information! To install new spare parts yourself, you will need skills in working with a welding machine.
Repair of ball joints VAZ-2101–2107.
The lower ball joint, although considered more loaded, lasts longer than the upper one; it seems that more attention was paid to it during development. Once upon a time, ball joints were dismountable and had grease fittings for lubrication. Now it is not profitable for a manufacturer to produce an almost eternal product. Therefore, the balls are welded and there is no way to lubricate the rubbing part to extend its service life. But there is a way to independently extend the life of ball joints. To do this, you need to buy a repair kit for liners. Using a hammer and chisel, split the ball joint at the welding point; these are three points; they are not fully welded. If the body is deformed, straighten it. On the half without a hole for a finger, you can and should install a grease fitting; if you can’t do it yourself, turn to a mechanic for help. Replace the liners, lubricate them as if for yourself, and not like at the factory! When assembling by hand, it is impossible to compress the two halves of the supports; the liners do not allow it; this is done with bolts. After compression, you can put welding points (grab) for peace of mind, I just clamped them with new bolts with a control nut. Lubricated with refractory grease. The service life has increased significantly, definitely more than 50,000 km. The main thing is to periodically change the boots and lubricate the ball joints. Ideally, install a grease fitting on the new ball joint, because there is almost no factory lubricant in it, and lubricant is the key to long service life of the part.
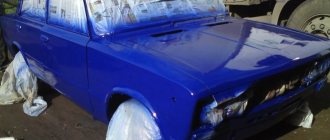
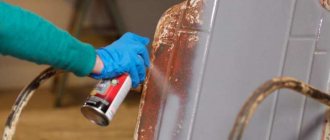
Garage painting
For most modern cars, the most critical areas of the body from this point of view are those that are subject to mechanical or chemical influence, that is, areas where moisture and dirt enter from under the wing, or where water can accumulate. These include doors, namely their lower parts and edges, sections of the wing located near the wheels, thresholds, and places under poorly fitting seals. However, taking into account the lack of anti-corrosion treatment and the poor quality of the paintwork for the VAZ 2107 body, there are much more such places.
As is clear from this, after a short period of operation of such a car, and perhaps immediately after purchase, painting will be required. In addition, this procedure is carried out to give the desired color to the car. This is especially true if it is impossible to choose it when purchasing.
Painting a car with your own hands allows you not only to change its color, but also to increase the anti-corrosion protection of the body.
Naturally, painting can be done to order in one of the many workshops. However, by doing such work yourself, you can save a lot. And taking into account the fact that the VAZ 2107 belongs to the segment of the most inexpensive cars, this car does not require complex technologies, expensive equipment and materials. Therefore, painting such cars with their own hands is very common among car owners.
Preparatory stage
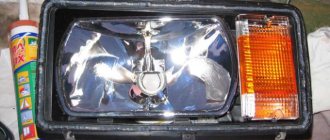
First of all, it is necessary to remove additional body elements presented for the VAZ 2107 in the form of bumpers, radiator grille, lighting fixtures (headlights, side lights, turn signal repeaters on the front part of the wing).
After this, the body is washed with water. Then the peeled off areas of the coating are removed with a spatula or brush. Next, wet grinding of the prepared surface is carried out with abrasive 55С 4-П or 68С 8-П. If there is no mechanical damage to the coating and its thickness is small, sand it down to the epoxy primer of factory paint. If the body has areas significantly affected by corrosion, or is painted with nitro enamel, it must be cleaned to bare metal.
To remove the complex coating, use SP-7 remover: it softens the material, after which it can be cleaned off.
The body is then cleaned by washing with water, blowing with compressed air and drying. Next, the surface is degreased with gasoline solvent BR-1 or white spirit. The joints of the replaced parts and welds are treated with Plastisol D-4A sealing mastic, and excess material is removed with a rag moistened with white spirit. Parts that are not to be painted are covered.
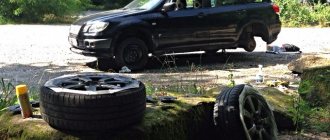
Ways to paint wheels yourself
Do-it-yourself painting of wheel rims can be divided into three stages:
- cleaning;
- primer;
- painting.
The more carefully the first step is completed, the longer the appearance of the disc will remain after painting. Of course, the paint used and the painting method also matter, but only in secondary roles.
Powder painting must be considered the best way to paint car wheels, but this method requires special equipment, which is not acceptable for garage conditions.
Another method of painting wheels with “liquid rubber”, for example “plasti dip”, essentially protects them and requires the same rules as painting from a spray can. Such processing would not be superfluous, but the price for it is high and in the case of stamped disks it is better to buy new ones.
At the first stage of cleaning, you can go not by mechanical treatment to remove rust and old paint, but by using chemical reagents, for example, “Tsinkar”. I used it too, although it’s impossible to do without mechanical processing.
You need to be prepared that the time that will have to be spent for quality work will be around 2-3 days.
DIY alligator hood
Expert opinion
Ilya Vyacheslavovich
Consultant for body repair at krasymavto.ru
Ask a Question
To gain greater access to the engine compartment, many car owners install other hinges and opening mechanisms on the hood, which visually resembles the mouth of an alligator.
It's quite easy to do it yourself. To do this you need the following parts:
- loops;
- fasteners (M8 bolts);
- locks;
- two pieces of corners 50x30 1.5 mm thick.
To install a part such as an alligator hood, you should follow these steps sequentially.
- Make 2-3 holes in the corners for fasteners to hold the hinges.
- Weld the bolts on the inside to prevent twisting.
- Attach the corners to the body, placing the clamps symmetrically.
- Place the new hood in place, marking the areas for the holes.
- For reliability, it is better to reinforce the place where the hinges are attached with metal plates.
- Install the locks and release cable. To install locks in a standard panel, make 2 holes, reinforcing the areas around with metal plates. Cut a hole for the fasteners that secure the spring.
Useful! The system works this way: pull the lever towards you from inside the cabin, the cable will pull the lock spring, and its cylinder will open the hood. If gaps form, use rubber seals.
Online auto parts store "AvtoPasker"
The online store "AvtoPasker" is one of the largest and most convenient catalogs of auto parts for Russian-made cars, such as VAZ, GAZ, Oka, Moskvich, as well as neighboring countries - ZAZ, RAF, LuAZ. You can easily find the necessary part for your car using our catalog with illustrations and explanations. The catalog also includes a search by spare part number or name. To order auto parts, simply add the required product to your online cart - it’s very fast and convenient.
The online auto parts store "AvtoPasker" is always happy to welcome new customers. Please note the system of discounts for customers through our network of stores.
Popular goods
Suspension of the chassis of the VAZ-2121 Niva
The Russian SUV VAZ-2121 has all-wheel drive. This was also reflected in the suspension design of the vehicle's chassis. It has its own characteristics and slight differences from other models.
Rear suspension of Niva 2121
The rear suspension of the Niva axle itself is identical to the design of conventional classic VAZ models. However, the moving parts have a little more freedom of movement and are made with a large margin of strength for confident movement in terrain where there is no road surface. A new design element is the brake pressure regulator device. Depending on the position of the vehicle and the rear axle, a lever attached to the axle adjusts the degree of opening of the rear brake valve. The rest of the suspension differs only in mobility and strength.
Front suspension VAZ-2121
The front wheel suspension is a little more complicated. The front wheels are both driving and turning. Here, too, a larger angle of free movement of moving parts is provided. Therefore, for stabilization, an elastic rod is installed, attached to the body. The upper and lower support arms of the suspension are made in an A-shape and are more reminiscent of paired suspension arms of a front-wheel drive car than a classic one. Despite the apparent fragility of the structure, its strength exceeds the strength of the “classical” structure due to the material and the thoroughly calculated form of rigidity. As with other suspensions, it is necessary to carefully monitor the condition of the rubber bushings and ball joints.
Determine how many liters of paint are needed to paint a car. Tips and approximate figures.
Whatever type of painting work you perform, be it a complete repainting of a car or a local type of repair, in any case you will be faced with the problem of selecting the necessary consumables. One of the most frequently asked questions that interests many is how much paint and varnish does it take to paint a car? After all, the final price of the work depends on the volume of these materials, and paint and varnish for cars are quite expensive, so no one wants to waste extra money. It is worth noting that you will not be able to guess the volume of material 100%, but it is quite possible to reduce the remainder.
Analysis of the main factors
The content of the article
Before you move on to choosing a material, you need to know what features affect the consumption of paint and varnish. There are actually several of them.
- Area of the treated area. Will it be a complete restoration of the car's paintwork, or only local repairs where a minimum of material is needed.
- Type and brand of paint. Different manufacturers produce paint with different component compositions, on which the covering ability of the material directly depends.
- Paint shade. The choice of color is also important, since, for example, white or green tones have a higher covering power, and you will need to apply fewer layers of paint. And, for example, red, blue and yellow shades require more layers, which in turn will affect the volume of consumables.
- The quality of surface preparation, especially the structure and color of the primer. Does the tone of the primer match the base paint? If not, then you will need to apply many layers to achieve a high-quality, rich shade.
- Spray gun parameters. The level of uniformity of the layer, the correct setting of the equipment and the remaining material in the device itself will also determine how much material is needed to paint the car.
This also includes such a parameter as skill. It is also important, because if you have already done painting work with your own hands more than once, then you have probably become skilled in the technology of applying layers of paint and will be able to use material more economically.
Taking into account the viscosity parameter
Viscosity is one of the basic parameters of paints and varnishes. If you dilute the paint too thickly, you will end up with a layer defect in the form of an “orange peel”. If you dilute the material too much with a solvent, then smudges may form during application.
To avoid these defects, and this, in turn, is an overconsumption of material to eliminate them, you must strictly follow the instructions given by the paint manufacturer regarding the proportion of material and solvent. To maintain the dosage, you can use the tool as a viscometer, but if you don’t have one in the garage, you can use any containers with marks corresponding to the volume of the substance. You can also use a ruler as an indicator.
Also, the viscosity parameter may depend on the temperature conditions observed in the working area.
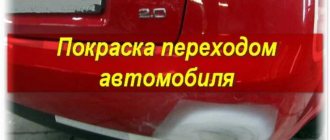
Do-it-yourself airbrushing on a car body
To make their car stand out from the faceless mass, many owners resort to this type of tuning such as airbrushing. This is a special technology for applying a pattern to any type of 7 body using special equipment - an airbrush. Using this device, experienced craftsmen transfer various images or entire paintings to the surface of the car body.
Among the attached elements of a car, which are most often airbrushed, are the following parts: hood, doors, trunk lid, bumpers. By choosing image options, you can realize any of your fantasies in a sketch of a drawing (various elements, images of animals, flowers, etc.). Airbrushing is performed in specialized salons.
Expert opinion
Ilya Vyacheslavovich
Consultant for body repair at krasymavto.ru
Ask a Question
This “pleasure” is not cheap. Therefore, if you have some skills in working with an airbrush, then you can make a simple stencil image with your own hands.
Prepare paints of the required color; for beginners, universal paints and paints are better suited. You can choose stencils for designs yourself or order them at the salon.
- Prepare the surface of the car: clean from dust, dirt, degrease.
- Cover with film those parts of the body surface that will not be airbrushed.
- Secure the stencil and, using an airbrush, begin applying layers. Painting should occur smoothly, without sudden movements, starting with the base layer, gradually drawing out the entire pattern. After one color has dried, you can begin applying the next one.
- The airbrush should be held at a 90 degree angle to the surface.
- Cover the finished image with varnish and polish.
It is important to remember that light colors are applied first, as dark ones will be difficult to paint over.
Tinting will also give a more modern look. Today there are many technologies for tinting car windows. The most common method is removable tinting. It can be on a rigid basis, silicone, gel, mesh, hybrid. Each of these types has its own advantages and disadvantages.
When choosing darkening so as not to risk traffic safety, remember that the film cannot be clouded.
Important! Removable tinting must have light transmission that complies with technical safety regulations.
Factors affecting paint consumption
In addition to the quality characteristics of the selected material, specific conditions can affect consumption. It is not difficult to guess that thick enamel will require a larger volume, but the working viscosity of the paint may depend not only on the manufacturer’s instructions, but also on the ability of the master to control the process. An attempt to fill the surface with enamel diluted to the limit will lead to the appearance of smudges, but temperatures above normal will require a liquid material. The solvent should completely evaporate from the car enamel during the drying process, but the air temperature and the viscosity of the substance make serious adjustments to the car painting process.
The amount of hardener should not depend on temperature, but the volume of solvent is indicated by the manufacturer for a temperature of 20-23 ˚C. The selection of viscosity should not be done by eye, otherwise it will be difficult to avoid not only increased material consumption, but also obvious defects. The technology for controlling viscosity with a viscometer is to determine the viscosity of a substance by measuring the time of pouring the required volume of liquid through a hole of a certain diameter - you will need the viscometer itself and a stopwatch.
Surface preparation also has its share in quantitative costs. Surface treatment for different types of materials differs, and this difference is most noticeable in the grain size of the abrasives. It is difficult to coat a primer sanded with P400 with acrylic, but preparation for the primer itself involves working with coarse grains. For standard enamels, matting the primer or metal with P800-P1200 abrasives is required: finer-grain sandpaper will lead to worse adhesion, coarse grain will require a larger volume of substance and will cause defects.
Why us?
Masters with 5 years of experience
All our employees undergo annual advanced training courses. They have all the necessary certificates; basically, they all previously worked in dealerships.
Lots of variety from different brands.
We are representatives of many paint and primer brands, so we can offer the best conditions and prices.
Comfortable receptions
Our recreation areas are equipped with all the necessary equipment for comfortable relaxation: sofas, TVs, coffee/tea and, of course, cookies and coffee makers.
We work with legal entities and conclude contracts
We have been in the automotive painting and body repair market for over 10 years, so we can offer you a discount on servicing your commercial vehicle. We serve some of the city's leading businesses
Free tow truck
We provide a free tow truck to our car service center if you are involved in an accident. The only thing you will need to do is leave your car with us for repairs or pay for a tow truck if you suddenly change your mind.
Services of our organization
If you are looking for a place where you can paint a car like VAZ 2107, then feel free to contact our organization. Here you will get excellent quality painting in the shortest possible time. Often, complete painting with the preparation process takes about a week. At the same time, you will be issued a warranty document that will allow you to receive full technical support in the event of defects occurring after painting, which is very rare. In any case, the advantages of using our organization are obvious, and the quality of work has already been appreciated by many drivers.
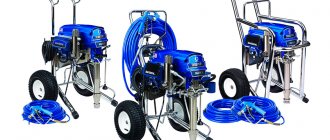
Selecting the type of spray gun
This equipment greatly influences how much paint is consumed. HVLP spray guns are perhaps one of the best choices for painting today. Their popularity is primarily due to the fact that they have a high rate of paint transfer to the painted surface of your car body. Remote controls of this type have this indicator of more than 75%, which is very good. That is, when using equipment of this type, you will achieve a result when the paint gets directly onto the part being painted, and does not fly to the sides, being wasted aimlessly.
Tools and materials
Painting a car bumper requires the proper tools and material. To complete the work you will need:
- Putty and primer;
- orbital sander for polishing (it can be replaced with an electric drill with attachments);
- high power soldering iron;
- sandpaper or sandpaper;
- solvent or white spirit;
- bumper paint. Black matte and elastic hi gear will do;
- painting tool - spray gun or spray can.
Do not forget about safety rules, prepare a protective breathing mask and gloves.