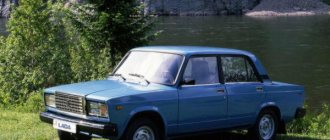
Today, for many, local painting with your own hands is not a problem; in your own garage, you can correct any damage to paintwork in literally an hour or two. And the price of do-it-yourself repairs is several times less than in a body shop.
After all, the main advantage of local painting is not even that it saves money on all materials (varnish, paint and labor), but that everything is done quickly - the process takes place literally within a few hours without removing parts. In addition, if the local painting of the bumper and other parts was done correctly, the color match will be 100%, then the boundaries of the transitions between the repair and factory coatings (spots) after final polishing will be impossible to find.
Useful! During a precision body repair, there is no need to dismantle parts, and the quality of the body assembly will not be compromised, and therefore no corrosion will occur.
That is, the factory coverage is preserved as much as possible, which allows you to “silence” the biography of a given car and sell it more successfully.
When a car needs partial local repairs with painting, choosing the right tone for dark colors is much easier than for light ones.
That is why silver, beige and bright shades are always painted “in transition” - in the process, a smooth step is made from new paint to old, during which not only the leveled or darkened part is painted, but also partly adjacent to the factory coating.
And the difference in colors when painting in this way is almost imperceptible - the transition in the form of a slight darker or lighter spot is barely visible only on silver colors and only in cloudy weather.
Partial painting of individual areas of the car: why do you need local repairs?
Partial painting of a car element is “transition”, “spot” and “local” painting. Basically, it's the same thing. Why is it so necessary if the damage is very minor? Even a currently small paintwork defect, with an area of only a fraction of a centimeter, will begin to grow in the near future, because corrosion will find a weak spot in the protection of the car body. That’s why it’s so important to promptly repair even very minor damage to your car’s paintwork.
Methods for eliminating defects in the paintwork of a body or plastic elements of a car are conventionally divided into two types. Their choice depends on the level and volume of damage.
- Retouching of car parts is used if the scratches and chips of the body are very minor. This is exactly what spot painting a car from a spray can is. What does that require? A special “pencil” consisting of a container with a brush at the end, which is built into its lid or an aerosol can with paint and varnish. You must select the color of the device according to the paintwork number of your car. The retouching method is very simple and will take you very little time.
- Local repainting of the car body element is carried out when the damage is quite significant. This procedure is much more serious. It requires certain manipulations, for example, careful preparation of the damaged area for painting. It also requires reusable tools – a spray gun and a compressor. Less often, a can of spray paint is enough.
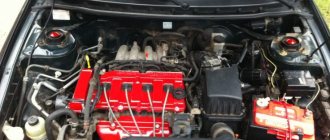
At the beginning of glorious deeds...
Considering the location of the damage, we will need to perform two transitions: one along the base, the second along the varnish.
First of all, you should determine where the border of the varnish transition will be located. Firstly, it should always be further than the transition along the base (this is understandable). Secondly, to go over the varnish, it is best to choose those areas of the part that are least noticeable. For example:
If it is not possible to make a transition over the varnish in an inconspicuous place, it is better to varnish the entire part, since making a transition in a “visible place” and its further polishing is a more labor-intensive and expensive process than varnishing the entire element.
In addition, there are no guarantees that during further use, for example, after several mechanical washes, a visible boundary, a “step” between the old and new varnish will not appear. Over time, this may well happen.
This is due to the fact that any paintwork has maximum strength in its upper part, while in depth the strength of the layer becomes lower. It is because of this circumstance that each subsequent “deep” polishing of the paintwork becomes less and less durable. Likewise, when polishing a transition area, when we file away the toughest “top,” there is an increased risk that further mechanical stress on the remaining finish will reveal a visible repair margin.
However, in certain cases, varnishing the entire part makes absolutely no sense. For example, when fixing a small scratch on a bumper. Or, as in our case with the wing, which does not have a distinct border with the pillar and roof. Varnishing the two rear wings, pillars and roof is an unaffordable luxury even for such a luxurious car as our “German”, so in this case the transition to varnish cannot be carried out, but it is necessary: the risk pays off with big savings. And the ideal place for the transition in this case is the narrowing on the counter.
Thus, we have three sections:
It is important to identify these areas as they will be prepared for painting slightly differently.
When is transition during coloring irreplaceable?
Car transition painting is a set of techniques with the help of which, during repairs, an almost invisible combination of the old, factory paint coating with a completely new one is created.
Moreover, on any body there are always two old coatings - paint and varnish, and therefore there are also two transition boundaries - “by paint” or “by varnish”. And they should not coincide with each other - this is important. Both transitions - paint and varnish - can be done separately or in combination.
Almost any part of the body can be painted using this method. The transition is also made with varnish, which is then polished especially carefully, and therefore is practically invisible - the transition polishing zone can be seen only when its localization is precisely indicated. The transition painting technique itself is usually used in cases where:
- the car's original paintwork is worn out in places and or severely faded;
- there is a defect on one of the large parts;
- It is difficult to choose a paint tone for painting doors or a large area of the body such as a hood or roof.
The most common transition points are the bend on the car door and fender, the edge of the hood or body. The doors themselves are traditionally painted up to the molding, and then the transition is done. In the grooves, the varnish pitch can be either with sharp boundaries or sprayed.
By the way, on light colors the paint transition is more noticeable, but on dark colors the varnish transition is more noticeable. But you can also look for non-factory paint by looking at the appearance of the new varnish - it will not have the dullness that is inevitable in used cars.
This painting method is also indispensable for using paints that tend to change their shade depending on the thickness of the layer and spray pressure. This technology also eliminates discoloration after previous unsuccessful repairs. And the costs of the material itself are significantly reduced - very little paint is needed.
But preparing the car for such painting is somewhat more difficult. Also, if the transition needs to be done on adjacent parts (for example, a door), then the material consumption will also increase. But thanks to the color transition, it became possible to avoid different colors as much as possible and significantly save energy and time on color selection.
Definition and Application
Transition painting is a technology for applying light-colored paint material with a partial transition to the original coating to minimize the differences between layers.
The technology under consideration is used in the following situations:
Instead of completely repainting the part, which in these cases is the most rational way, painting with a transition is used mainly for the following reasons: in order to save time, money and simplify the work, and when it is impossible to select a paint material that matches the original color.
The nuances of spot painting: polishing the transition and repairing without removing parts
Any job has its own nuances and secrets. Therefore, in order to learn the science of partial painting of car elements with your own hands, you need to be attentive and patient. And the first thing you need to do is learn the theory of such repairs, and then be sure to practice on old parts in order to learn to feel the process. Your actions when spot painting will depend on a combination of many factors. First of all, this is the location of the damage and the shape of the element. If normal access is not possible, repairs often have to be made by dismantling the part. When the defect is located near a molding, edging or recess, this is a strong argument for spot repairs. In this case, polishing will not be necessary. If the defect is located near the edge of the element, then only part needs to be polished. However, when the surface in the middle of a body part is damaged, it will have to be polished completely, which will affect the cost of time and material. Local painting of the car helps to avoid partial or complete removal of parts. This will make your task much easier.
Communities › All about Paint and Painting › Blog › Local painting of cars with spray cans.
Recording for those who have a lot of time, but no tools, garage, or money for professional painting. For those who want to paint a part or car themselves, but are afraid of mistakes or failure.
I will say this, everything is real and achievable. The main thing is to believe in yourself and properly prepare the car for painting.
So, we started this adventurous idea, where to start? 1. We watch YouTube and the correct videos on preparation, shelter, transitions and their options. There are videos directly on painting from cylinders, but there is little practical information. It took me about 3 months to study and understand the essence of the process. 2. We collect information about the preparation of the body with materials. Which is better price-quality, which is less hemorrhoids and which will not cause problems in the future. 3. We carefully study all the information about 1k materials and their compatibility. I will say more, here I missed. Of the entire body, the paint was only damaged on the hood. I still wonder why. Maybe the materials on which I laid the base may have been overlooked somewhere. 4. Experimenting with plastic. This means the primary primer for plastic and the plastic material. In my case, the Primer did not work on plastic. My experiments came off the bumper in pieces. I found an unusual solution. Instead of Primer, I first blew out the paint with Montana, and then applied everything else to it. Google will tell you more about what Montana is than I can. I will say this, she falls on everything and everything falls on her. It's difficult to rip off.
It was all practice and preparation. We already know how to do, what to do and what to do. All that remains is the matter of purchasing materials.
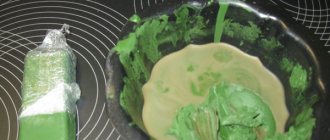
What was bought, in my example: 1. Sandpaper, strips and circles from 80 to 320 in increments of 100 2. Sanding block and a sole with Velcro for the circles 3. Putty with fiberglass and finishing Novol 4. body anti-silicone, degreaser, I don’t remember Which. 5. Sticky wipes 6. Covering polyethylene 7. Scotch tape 8. Gray kudo primer in a can 9. The base is slightly darker than the mobihel base in a can 10. Base, selection by code and comparison by hatch, in a can 11. Motip varnish in a can
Priming. Don't pour too much. In general, the basic rule for working with cylinders is not to try to pour and cover the area with one and the first layer. The first layer is semi-dry, the second is slightly oilier. Do not keep it in one place (there will be smudges) and do not move it too quickly (there will be stripes and bald spots). Where they messed up, sand three times until the transition is smooth. We erased the primer and painted it again.
Substrate. A necessary option for large painting areas. Because paint from a container is expensive and it only contains 100 grams. paints. Therefore, we select the most similar color for the base by eye. And after the primer, we cover it with a substrate. Also, the first one is semi-dry, the second one is oilier. We need to find that golden mean of metallic coverage.
Varnish. Nothing complicated. All the same recommendations as before. One thing, layer 3 must be blown above average. Those. something between medium dry and almost glassy.
This is the basis. Of course, different colors will have different results, but in general, everything is real.
Will I do this again? Probably not. It takes a lot of time to prepare a car for almost 50% of painting. Metallic is a very capricious paint. It's very easy to mess up. Next is my choice of nitro and the Montana black series. It's a pleasure to work with her. Well, a photo. What was, what became.
There are enough jambs, but for the first time, I think it’s normal.
Source
The main difficulties of painting a car with a transition
So, this is what painting a car with a transition using modern methods consists of: if the car is partially painted, then its closest parts will differ from the painted area, and primarily at the joints. And the difference in tones is especially depressingly visible on nitro enamels. That is why, in order to achieve an impeccable result, it is necessary to paint the car with the transition to the nearest part.
The main problem in car dealerships where professional painting is carried out using the transition method is the coordination of the work of the colorist and painter. The first one, using a special computer program, selects a tone that would ideally match the existing paint of the car, and the second one carries out the repair itself. But the problem is that the paint color, even if it was chosen according to the exact code in the documents, can vary depending on the technique used to apply the paint tone.
Important! Pressure, scope, tools - all play a decisive role in whether the transition will be visible or not.
That is why the colorist always gives instructions to the painter regarding the pressure and spray force. But the latter does not always listen or simply cannot, due to inexperience, follow all the colorist’s recommendations.
As a result, the transition is noticeable, the tones do not match, but the colorist is still blamed - if the paint was chosen correctly, then, in the painter’s opinion, the technique of applying it cannot change the color. That’s why the ideal option is to entrust transition painting to a master who will select the paint and apply it himself.
Unfortunately, there are not very many such specialists. Therefore, it is best to consider in advance, if possible, how the car transition painting is carried out by the master himself - videos of the work process are available on the websites of car repair shops.
The most difficult transition to make is acrylic, but it is doable. The main difficulty here is proper preparation of the surface for painting, because the transition will be done on the final coating itself, which will be the top layer. That's why experts recommend matting the part completely , and then carefully marking it.
In general, working on acrylic as a single-layer coating is similar to working with a transition over varnish in two-layer and three-layer ones: the new paint is applied in drops, which is difficult to make unnoticeable, and the possibilities of high-quality watering on single-layer coatings are much more limited. For example, when removing a defect, it is easy to cut off the entire layer of paint, especially if you have to work on edges and bends. And two-layer coatings dry much faster, which cannot be said about acrylic.
Also, for example, low-opaque paints, which are light and silver tones, always form a dark, noticeable halo when sprayed in several layers. In this case, an inexperienced master will cover the repair area and fight this halo, spraying paint further and further until he reaches the edge of the part. This is where his mistake will be - each individual layer needs to be applied only with a smooth transition.
Self-painting with transition
Transition painting, the technology of which is described above, should not cause problems for an experienced craftsman. If you have the skills to paint body parts in a garage and have the necessary tools and conditions for this, then using transitional technology should not cause difficulties.
With any method of painting parts, the most difficult moment is choosing the right shade and knowing the features of applying a particular paint. Combining the skills of a colorist and a painter usually gives better results than separating these professions, so if you have enough experience, you can without any doubt try out this wonderful technology that gives excellent results.
Preliminary work for spot repair of paintwork: step-by-step instructions
- Car wash. This operation must be performed extremely carefully. Do not forget that dirt and dust accumulated on surfaces that will not be treated can easily enter the work area. Unnoticeable during painting, they will cause defects that will appear later. Keep in mind that the quality of the repair performed will depend 90% on the correct preparation of the surface of the part. The best option is to use special car detergents. It is advisable to clean the room in which you will work as much as possible from dust.
- Choice of color and tone. Using the color fan, you can choose the desired tone. Knowing the color number of your car, you can easily select the one you need using a special computer program. If you have no experience at all in this area, then it is best to delegate the preparation of the coloring composition to a specialist. This process is quite specific and mistakes cannot be made with it.
- Degreasing the damaged area. This operation must be performed, because particles of technical oils and compounds can lead to the formation of defects in the paint layer. This can be done using white spirit or a special automotive solvent.
- Cleaning and polishing the damaged area . Next you need to remove the old paintwork. For this purpose, use a grinding machine and P80 abrasive. There may be rust and moisture underneath the paint layer. You definitely need to get rid of them. When determining the age of the old paintwork, you may decide that you only need to polish this element.
- Puttying the surface of the defect. After sanding, degrease the damage again, and you can begin to putty it. This operation is needed to smooth out all the irregularities and remove small dents. The putty composition is selected depending on the degree of damage caused. It is better to use material modified with special additives, which significantly increase its heat resistance and strength. Small scratches can be covered well with thinly diluted putty; if the damage is deep enough, it is best to choose fiberglass material. Apply the compound with a rubber spatula across the damage, and then level it along the length. Wait until the putty is completely dry before starting any further work. Otherwise, it will settle, and instead of a leveled surface you will get a noticeable depression. After drying, sand the surface successively with abrasive P80, then P180, P220 or P240.
- Primer. After re-treating the damage with white spirit, cover the surfaces around it with a protective film. Next, start priming.
It should be said that the color of the primer significantly affects the tone of the dried paint. Based on this, choose the color of the material as close as possible to the tone of the substrate.
Anti-corrosion primer can be applied using a paint sprayer. The technology of this process is the same as when applying the paint itself. When the composition dries, it also needs to be sanded and degreased.
The damaged area is sequentially treated with abrasives P320 and P400, and then P500. To create risks for better adhesion, treat the work area with gray Scotch Brite. Degreasing is best done with a sticky cloth. In addition, it will remove all dust that has settled on the defect after preliminary work.
How to prepare a car body for spot painting?
Before you paint any parts of your car with a transition, you should prepare the body. To do this, you will need to matt the spot around the damage area of about 10-15 centimeters using sandpaper with the finest grain. Sometimes you have to process large surfaces. It is important to stick masking tape around the treated spot and protect the rest of the body from paint. Next, it is important to perform the following processes:
- wash the area of paint that will be painted during the procedure;
- treat the part to prevent corrosion (this can simply be a primer);
- carry out perfect leveling of the surface with putty and other materials;
- degrease the area to avoid unpleasant paint effects in the future;
- apply the paint correctly, which will make the procedure effective.
Applying metallic paint to the car body is the penultimate stage of all work. It is this that is given the most attention in most instructions. But in reality, doing the preparation matters more. You can perform these tasks with your own hands even without extensive experience, so you can get the necessary results even without using the services of specialists.
Remember that any mistakes during preparation will have their effect. For example, leveling and washing only the damaged area without its surroundings will make the repair area smoother than the surrounding parts of the body.
Features of the method - transition through the base and varnish
Today, a material called “Colorless Base” is often used for transition painting. There is no pigment in it, but in itself it resembles a base paint, although it does not need to be diluted with a solvent. This material is completely transparent and is similar in composition to metallic car paint, only without color. It is absolutely indispensable for smooth painting when you need to achieve the most correct arrangement of metal particles. For example, painting with a metallic transition without this base is generally impossible. Because the chips, which are contained in the paint itself, can no longer sink into a too thin layer of the new coating, and therefore are distributed ugly over the entire surface in “pieces”, which, in turn, invariably leads to a change in shade. But the “Colorless Base” gives that full-fledged wet layer over which metal shavings can be distributed evenly. You need to apply the material, like paint, to a clean, grease-free surface in a full layer from a spray bottle. It dries very quickly, and therefore the base coat of paint must be applied immediately.
Features of the technology
Ombre on walls means a smooth transition from one color to another, without indicating clear boundaries. Transitions can be used not only on walls, but also in furniture decoration, color design of curtains and other interior elements. When painting with a transition, it is possible to visually enlarge the space by boldly combining all kinds of shades.
In order to clearly know and understand how to paint with a transition, it is worth considering that application can be done horizontally, vertically, diagonally, and painting can also be of divergent or mixed type. The transitions themselves can be made both smooth and quite abrupt.
Local body painting with metallic silver color
The local painting of the car, the color of which is metallic silver, deserves special attention. Restoring the wonderful appearance of such a car is not an easy task. So, here's what you'll need to do:
- Initially, it is necessary to cover the repair area with a covering material: film, paper and a roller;
- Using gray scotch-brite and matting paste, you need to apply a matte mark to the part of the surface of the part that will need to be repaired;
- After the entire part has been dried and degreased with alcohol-containing products, you need to apply a binder - a colorless binder for the base coat. It must be applied to the area to be repaired so that the border extends beyond the boundaries of the next application of the sprayed base. By the way, you need to use a binder only when working with a metallic coating, because without it, when you spray paint on the old one, a dark border will immediately form. And the binder layer perfectly creates the necessary transparent base in which the particles of aluminum powder “sink”, and such local painting of the body will make the reflection uniform and natural;
- Now you can apply paint. There will be three layers in total, and each subsequent one must go slightly beyond the boundaries of the previous one. But some metallic colors sometimes require five layers. In any case, the principle of operation is this: each layer needs to be stretched, as it were, by only lightly spraying it onto the old factory coating, but at the same time always remaining in the binder zone. Only in this way will the transition ultimately be completely invisible. Between layers you need to maintain a time interval of 20-30 minutes so that the previous layer has time to matte;
- After the last layer has matted, you can apply varnish. In general, this option is called “with a transition over the varnish.” Moreover, if the surface to be painted occupies more than a third of the area of the entire part, it must be varnished entirely.
To simplify the process, the varnishing itself can be divided into three stages:
- Preparing the varnish and applying the first matte layer to the area is a half-coat.
- After a few minutes, a second coat of gloss is applied, and it should cover both the paint area and the binder area. To understand exactly how such local painting is done, there are videos and photos on the website.
- All the varnish that remains in the spray gun must be diluted with solvent in a ratio of 1:1 and covered with it the area where the new varnish ended and the factory one began - in this way, the step that was formed due to the new layer of varnish is smoothed out. You need to pour clean solvent into the spray gun and cover the transition from the new varnish mixture to the factory one. After which you can cover the transition with it.
Question: How to apply a light metallic base?
Answer: A preliminary dance with a tambourine will be just right 
But if there is no tambourine and you need to paint, then you need to do the same thing, but with a spray gun, or better yet, with two at the same time. One of them will contain paint, and the other will contain a transparent binder or a binder half filled with paint. This applies primarily to light metallics; with dark colors and solids of any color, everything is much simpler.
Apply the first layer of base as usual to the primer stain with minimal penetration into the transition zone. If the hiding power of the paint is low, you can also apply a second layer after the usual intermediate drying.
Before applying the next layer, you need to first apply a transparent binder or any version of Color Blend to the transition zone with a second spray gun, without blowing to the pocket about 5-10 centimeters and reducing the thickness of the layer closer to the edge of the applied base. The binder combined with the base should give a full wet layer, but not one and a half or two layers, otherwise it will run!
Next, we apply the base to the repair area with a smooth descent onto the just applied wet binder so that the grain is correctly positioned and does not become a “cancer”, as is usually the case with dust on a dry surface. In any case, we do not blow the base to the end of the applied binder.
We repeat the next layer or two layers in the same way until the repair zone is completely covered and the transition along the base in the transition zone is leveled. Each subsequent base layer should be stretched along the binder several centimeters further than the previous one. When working with a complex color, the last one or two layers can be applied with a base diluted halfway with a binder.
Be sure to give a normal interlayer after each layer before matting so that you can see the real picture - it’s much worse when wet. After applying the dust layer, we give it standard drying before varnishing. I recommend that in garage conditions, in the absence of intensive ventilation, drying should be allowed not for 15 minutes, as in OSK, but for 40-60 minutes at an air temperature of 18-23C and 25-30 minutes in the summer at temperatures above 25C . An under-dried base will remain under the varnish like plasticine and may cause the varnish to peel off in places. But you also can’t overdry it - the external effect will be the same, loss of adhesion and peeling of the varnish.
How to correctly perform a transition with a base and varnish with your own hands
You can also paint your car with a transition at home - in your own garage, for example. The most difficult thing will be to choose a color, because even a computer program does not provide 100% color compatibility.
That’s why it’s best to paint a car using this proven method – moving on to the closest parts, because this is the only way to get an almost perfect result. But painting a car using this method is not too complicated in its technology, and even a novice car enthusiast can master it. The main thing is to strictly follow all the rules and do everything accurately and accurately.
So, for painting yourself, you will need a special “transition thinner”, which is sold at any car market or paint store, and a spray gun with a round torch and a nozzle size of 0.8.
- It is necessary to reduce the gloss from the transition piece by 70%. For this you can use sandpaper No. 1500. It would be best to make the transition in the middle, but if placing the transition border in this way does not work, then it is advisable to matte the entire part - after all, the new paint will not last long on a glossy surface.
- Now you need to degrease the prepared area and you can start painting. And, when the last layer of enamel is applied, a trace will remain clearly visible - not the spilled paint on the border.
- To remove the transition after painting the car, you need to take a transition solvent. First, it should be applied from a distance of 40 cm, wait 30 seconds and apply again until the paint on the border has completely spread. It is important not to overdo it, so that the solvent itself does not start to drip. But even if this happens, you should always have an ordinary hairdryer at hand, whose air jets dry all unnecessary drips.
- As soon as the applied paint has dried, you need to go over the entire surface with the same sandpaper and polish it well.
By the way, traditionally when painting a car with a transition, acrylic paints are used, which have excellent characteristics and heat resistance. Usually they are supplied immediately with the hardener - in one set. The transition painting technology is slightly different if nitro paints are used.
- the gloss must be removed from the entire part;
- nitro enamel is applied by smooth spraying to the middle of the part or a little further. The main thing is that there is no clear boundary;
- Now you need to let the painted surface dry and go over it with a grease-breaking cloth;
- The transition piece should be completely varnished.
If everything was done correctly, the result should be perfect.
Expert opinion
Ilya Vyacheslavovich
Consultant for body repair at krasymavto.ru
Ask a Question
To prevent the transition border from being visible, paint can only be applied diagonally, in one direction or the other, because vertical stripes always catch the eye. Moreover, each subsequent layer of paint during painting must extend slightly beyond the edges of the previous one. The most important thing is that the difference between unpainted and newly painted parts is not noticeable in the end.
Step-by-step process for creating a horizontal transition
Horizontal ombre is the most popular, great-looking room design. It is possible to paint a wall with such a smooth transition from one tone to another using a brush or roller. But when using them, you will also have to solve the issue of polishing the shade transition, and this will take a lot of time and labor. In the absence of good construction skills, the result will not be as neat as we would like.
The best quality results can be achieved by using a spray gun. It has a function for adjusting the intensity of the supply of coloring compounds, which allows you to create a natural “halo” of a lighter tone on the treated area. It can be used as a border between different colored areas. That is, this tool is functional and easy to use, so we will consider the process of painting walls with graduation using it.
The ombre technique using it includes the following steps:
- First, the paint (according to the type) of the main color is diluted with a viscometer to the desired consistency.
- Next, paint of the same brand is diluted in the same way, only white.
- In the next step, colored and white paints are mixed together until they are homogeneous and as light as possible.
- Then the resulting composition is poured into a spray gun, after which the entire area is painted. This will be the base color. After completion of work, the tool should be washed thoroughly.
- At the next stage, unlightened paint is poured into a clean spray gun, after which you will need to apply a dark stripe at the bottom of the wall. The painted area should not exceed one-fourth of the entire wall height. When the upper part of the strip is created, in order to smooth out the boundaries for a soft transition of tones, you will need to move the spray nozzle away from the plane to the required distance. Also at this stage, a smaller supply of coloring composition can be achieved by reducing the passage on the locking needle.
- Then the spray gun is washed again and refilled with lighter paint. To avoid damaging the wall at this stage, you first need to work on the cardboard with the sprayer. The purpose of this is to achieve this by adjusting the paint supply or changing the distance of the sprayer relative to the plane of a lighter color than it is at the upper border of the first dark stripe applied. After selecting the desired tone from the cardboard, you can move on to painting the walls directly. In this case, you need to apply a lighter stripe over a darker layer up to half its height. The upper edge of the second stripe is also made lighter, as is the “halo” of the first.
- The next, final stripe should be applied in the same way. In this case, the paint should be slightly darker than the base color in which the wall was originally painted. At its upper boundary, you will also need to create a “fog” by adjusting the distance of the nozzle from its surface. It should smoothly transition to the base color towards the ceiling.
Using the same principle, color transitions are created horizontally and diagonally. Of course, painting with this technique may not work the first time. To perform correctly, you need to get good at it. That is why it is advisable to first repeat all the steps described above on a large piece of cardboard that imitates a wall plane.