01/25/2022 26,998 Diagnostics
Author: Victor
Thanks to equipping domestic cars with on-board computers, it has become easier for car owners to find faults in the operation of their cars. To identify the problem, a person just needs to carry out diagnostics, which will show error codes. This material will allow you to find out what errors can occur in the VAZ 2114 and how to deal with them.
[Hide]
Car self-diagnosis
It should be noted right away that diagnostics on your own and at a service station are slightly different things. A specialized service has the necessary equipment that will allow you to fully identify all existing errors in the operation of your vehicle’s on-board computer.
VAZ 2114 car
Self-diagnosis is also a useful thing, but it is unlikely that you will be able to fully detect all errors if you check it yourself. It is also worth noting that the fault codes in both cases will be different, so we will consider both options separately. So, how is the dashboard diagnosed to identify faults without the participation of the on-board computer? This method is not known to all VAZ 2114 owners, but we will tell you about it.
- Sit in the driver's seat and hold down the odometer button.
- After this, turn the ignition key to the first position.
- Then release the odometer button: you will see the arrows begin to move.
- Press the button again and release it, so you will see the firmware version.
- Finally, press and release the button a third time and if there is a fault, you will see an error code on the screen.
Unlike diagnostics using specialized equipment, in our case you will only be able to see two-digit fault codes, not four-digit ones. Let's look at the most common failures found in VAZ cars.
| Code | Description |
| 1 | Microprocessor malfunction. |
| 2 | Malfunctions were detected in the gasoline level indicator sensor circuit in the fuel tank. |
| 4 | Too much voltage has been detected in the electrical circuit. |
| 8 | Voltage detected too low. |
| 13 | There is no signal from the oxygen indicator. |
| 14 | The antifreeze temperature indicator signal level is too high. |
| 15 | The antifreeze temperature indicator signal is too low. |
| 16 | Excessively high voltage level in the on-board network. |
| 17 | The voltage level in the on-board network is too low. |
| 19 | Incorrect signal from the crankshaft position lock element. |
| 24 | The vehicle speed sensor is not working. |
| 41 | Incorrect phase sensor signal. |
| 51 | Malfunctions have been detected in the operation of the permanent storage device. |
| 52 | Malfunctions have been detected in the operation of the random access memory device. |
| 53 | The CO potentiometer has failed. |
| 61 | Malfunction of the lambda probe. |
Laptop for vehicle diagnostics
It is necessary to take into account the fact that errors can add up, that is, if you have malfunctions with codes 1 and 4, then the number 5 will appear on the screen. It should also be noted that all malfunctions will be stored in memory until until they are reset manually. To do this, with the ignition on, disconnect the terminals from the battery and wait a few seconds, then connect them back. This way, errors will be reset manually and you won’t have to pay your hard-earned money to specialists.
About notOshibka.Ru
Consent to the processing of personal data
I hereby confirm and give my voluntary consent to the website neoshibka.ru (Internet address https://neoshibka.ru/) in accordance with Article 9 of the Federal Law of July 27, 2006 N 152-FZ “On Personal Data” for processing and the use of my personal data specified during the registration process, commenting, or when filling out any other contact form on this site, with or without the use of automation tools, including collection, recording, systematization, accumulation, storage, clarification (updating, changing ), extraction, use, transfer (distribution, provision, access), depersonalization, blocking, deletion, destruction of personal data in order to collect statistics and improve the services provided by the site. The processing of personal data is also carried out for the purposes of my information notification (distribution of information, if desired, there is an unsubscribe function) and for conducting analytics and statistics.
I am aware that:
- This consent to the processing of my personal data specified during registration on the Site, sent (filled out) using the Site, is valid for 20 (twenty) years from the date of registration on the Site;
- Consent can be withdrawn by me based on a written statement in any form;
- Providing personal data of third parties without their consent entails liability in accordance with the current legislation of the Russian Federation.
Decoding codes
Next, we will look at the most common codes encountered during diagnostics of on-board computers of VAZ 2114 cars. Of course, on-board computers are also electronics, and they can cause certain failures, such is the specificity of their operation. However, often the fault codes displayed by the on-board computer are still true.
Description of the error
We will not consider all codes without exception, but especially for our readers we have selected errors that occur most often when diagnosing VAZs.
| Codes | Description |
| 0102, 0103 | Incorrect signal level of the mass air flow control indicator. |
| 0112, 0113 | Incorrect signal from the intake air temperature indicator - the element needs to be replaced. |
| 0115 — 0118 | Incorrect signal from the antifreeze temperature measuring element - the indicator needs to be replaced. |
| 0122, 0123 | Interference or incorrect signal from the throttle position control indicator - it is advisable to replace the element. |
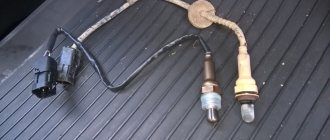
| 0130, 0131 | The oxygen sensor is faulty. |
| 0135 — 0138 | The oxygen sensor heating device has failed - the component must be replaced. |
| 0030 | Failures in operation or a break in the circuit of the oxygen sensor heater to the converter were detected. |
| 0201 — 0204 | An open circuit was detected in the injector control circuit. |
| 0300 | The on-board computer (BC) has detected random or multiple misfires - in this case, the car may not start immediately. |
| 0301 — 0304 | Misfires were detected in the engine cylinders. |
| 0325 | The on-board computer detected an open circuit in the detonation device. |
| 0327, 0328 | The knock sensor is malfunctioning—the device needs to be replaced. |
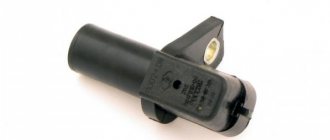
| 0335, 0336 | A breakdown in the functioning of the crankshaft position sensor has been detected - it needs to be replaced. |
| 0342, 0343 | The car's BC has detected a failure of the phase sensor - the device needs to be replaced for optimal operation. |
| 0422 | The neutralizer device does not work. |
| 0443 — 0445 | The canister purge valve has stopped working - it needs to be replaced. |
| 0480 | The cooling fan has stopped working - the element needs to be replaced. |
| 0500, 0501 , 0503, 0504 | The car's BC has detected a malfunction in the speed sensor - the indicator needs to be changed. |
| 0505 — 0507 | There are malfunctions in the functioning of the idle speed controller, which affect the number of revolutions (lower or higher). If this code occurs, the regulators must be replaced. |
| 0560, 0562, 0563 | During diagnostics, the BC detected failures in the supply of mains voltage. A more thorough diagnosis is needed that will identify the exact areas in the circuit that need to be replaced. |
| 0607 | The detonation channel is not functioning. |
| 1115 | Failures in the operation of the oxygen sensor heating circuit were detected. |
| 1135 | An open circuit was observed in the heating circuit of the oxygen sensor; a short circuit may have occurred. It is better to replace the sensor. |
| 1171, 1172 | Incorrect potentiometer gas level. |
| 1500 | The BC detected an open circuit in the fuel pump device. |
| 1509 | The electrical control circuit for the idle control element is overloaded. |
| 1513, 1514 | The on-board computer detected an open circuit in the idle speed device. |
| 1541 | When this code appears, there is an open circuit in the fuel pump relay adjustment circuit. |
| 1570 | A break was detected in the traction control system. |
| 1600 | The BC reports that communication with the traction control system has been lost. |
| 1602 | It is one of the most common codes when diagnosing fault codes. Indicates a loss of on-board power supply voltage to the electronic control unit. |
| 1606, 1616, 1617 | During diagnostics, a breakdown of the uneven road surface detection device was identified. |
| 1612 | A fault was detected in the electronic unit reset. |
| 1620 | Problems with the permanent storage device. |
| 1621 | Failure of the random access memory device. |
| 1689 | If this combination of numbers appears during diagnostics, the on-board computer may show incorrect error codes. |
| 0337, 0338 | Errors in the functioning of the crankshaft position control element or an open circuit. |
| 0481 | The second cooling fan has stopped working - it needs to be replaced. |
| 0615 — 0617 | During the diagnostic process, breaks or short circuits in the starter relay circuit were identified. |
| 1141 | The heating device for the first oxygen sensor after the neutralizer has left the working row. |
| 230 | This error code means the fuel pump relay is broken - the device needs to be replaced as soon as possible. |
| 263, 266, 269, 272 | These codes indicate a breakdown of the driver of the first, second, third or fourth injectors - the elements need to be replaced. |
| 640 | This combination indicates an open circuit in the lamp circuit. |
Crankshaft and camshaft
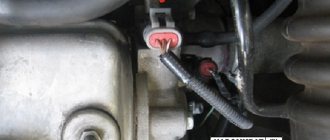
- code 0335 indicates a malfunction of the crankshaft position sensor. Therefore, when you see 0335 on the computer, you need to check whether the signal is coming from this sensor. If you find that the signal is weak, you can help by changing the air flow if it is excessive (above the maximum). After this, error 0335 should disappear;
- When you see error 0340, you know that the camshaft position sensor is most likely faulty. Although in fact, even if 0340 is displayed, the camshaft itself may be in good condition, the car is working as usual. But when the numbers 0340 do not disappear while the engine is running, this unit should be carefully inspected.
- Loose or damaged terminals on the generator.
- ECU failure.
- Loose or worn alternator drive belt.
- Corroded, broken or chafed wiring.
- Insufficient charge or faulty battery.
- Poor wiring connection.
- Faulty generator.
- Weak positive or negative battery terminal.
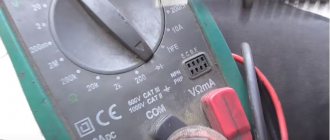
To track down the P0562 code problem, the most useful tool is a digital multimeter.
Visual inspection
A simple visual inspection is the best place to start troubleshooting. With the engine off, look under the hood for signs of a bad alternator, loose connections, and a loose belt.
Press on the alternator drive belt to check that it has sufficient tension. Check for signs of generator blockage. Replace a stretched belt or loose tensioner before proceeding with further diagnostics.
Rock the terminals on the battery - check that they are well tightened and motionless by hand. Watch for corrosion on the battery terminals and cracks or wear on the cables.
Checking the charging system
With the engine running and all consumers disconnected, measure the voltage at the battery terminals using a multimeter. The reading should be between 12.6 and 15.0 volts.
If the voltage is below 12.6 V, the battery is not receiving a charge from the generator. This condition is usually associated with a faulty alternator and will be accompanied by hard starting, dim lights. Windshield wipers and power windows will work more slowly or not work at all.
If the voltage reading is within the normal range, you may have a wiring problem.
Checking the electrical wiring
Make sure all connections on the generator are properly installed and tightened. Check for loose contacts, cracks in wire insulation, signs of corrosion or water in the connectors. Make sure the latches on all generator connectors are fully seated.
With the engine running, carefully trace the wiring from the alternator to the control unit, keeping an eye on the belt, pulleys, and other moving parts.
Move each wire, watching for voltage changes as you do so. If the voltage in a particular area drops significantly or rises sharply during the test, repair the open and retest.
Check the connection at the ECU. Make sure there is no corrosion or moisture on the corresponding pins, then make sure the connector is fully inserted into the module.
Battery test
With the engine off, check the battery voltage. It should be between 12.0 and 12.6 V and not decrease. A significant drop in voltage indicates either a faulty battery or large stray currents. Both reasons can cause DTC P0562 to set.
You can also check that the voltage on the alternator is correct. Measure the voltage between the generator positive terminal and ground.
The voltage must match the battery voltage. If this is not the case, the plus on the generator needs to be restored.
0 0 votes
Article rating
Nuances of self-diagnosis of the VAZ 2114
When carrying out diagnostics at specialized service stations or independently, various results and error codes can be obtained. Not all drivers know that faults can be identified without an on-board computer. An odometer is used for this. A significant drawback of such diagnostics is the addition of error numbers into a single sum. For example, if an error of 8 and 1 occurs, the odometer will display the number 9. The device's memory is not automatically cleared, so error codes will be displayed until manually reset by disconnecting the battery terminals for a few seconds.
Resetting the "checkengine" error
As you can see from the video, the error can be reset by following these steps:
- Turn off the engine, but leave the car's ignition on.
- Disconnect the car battery terminal and wait a few seconds.
- Reinstall the terminal and start the engine.
The error will be reset after these steps, but if it is caused by serious malfunctions in the engine, it will occur again. In this case, the best option would be to contact a service station.
How to diagnose a VAZ-2114
How to use the self-diagnosis function without taking into account the on-board computer?
- Press the car daily mileage reset button.
- At the same time, turn on the ignition with the key in the first position.
- Remove your finger from the key responsible for operating the odometer - the arrows should start moving.
- Press the key again and release - this simple method will fix the firmware version.
- All that remains is to press the button a third time, then release it; If there is a malfunction, an error code will appear on the screen.
Reasons for the failure
If error code 0327 is registered in the ECU, you should first reset it and operate the car again. Perhaps it was a simple glitch. If it appears again, you should:
- check the mounting of the block on the sensor;
- inspect the wires for breaks;
- inspect the power circuit to identify a short circuit;
- check the sensor with a multimeter up to 200 mV.
Sometimes error code p0327 appears due to poor contact between the motor and the engine block. Soot or rust appears on the mating surface, which deteriorates the quality of the transmitted signal.
How to decipher error codes
If you have ever seen how a VAZ-2114 is diagnosed using special equipment in a service station, you probably noticed that the error code has 4 digits. In our case, during self-diagnosis, the code includes only 2 numeric characters. In general, the codes mean the following:
- if the number 1 appears, it means the microprocessor is malfunctioning;
- 2 – the operation of the sensor circuit indicating the fuel level in the tank leaves much to be desired;
- 4 – there is too high voltage in the electrical circuit;
- 8 – the voltage, on the contrary, is too low, it is not enough for the VAZ-2114 to operate properly;
- 13 – there is no signal from the indicator of available oxygen;
- 14 – high signal value of the coolant temperature indicator, filled in for efficient operation of the car’s cooling system;
- 15 – this signal, on the contrary, is too low;
- 16 – voltage units in the on-board network are off scale;
- 17 – low voltage values of the on-board network;
- 19 – the signal from the locking component regarding the position of the crankshaft is received incorrectly or untimely;
- 24 – the sensor that records the vehicle speed is faulty;
- 41 – the phase sensor signal is received incorrectly;
- 51 – there are problems in the functioning of the operational product responsible for memorization;
- 53 – it’s time to repair the CO potentiometer;
- 61 – lambda probe does not work.
Lada is not the latest generation car, so sometimes VAZ-2114 errors can add up, and then decoding becomes a real skill. For example, if there are errors 1 and 6, then the total on the screen shows 7. All these numbers are recorded in the memory of the VAZ-2114, they can only be reset manually. How to do this correctly?
- Take the driver's seat and turn on the ignition.
- Without turning off the ignition, disconnect the terminals from the battery device and wait a few seconds.
- Reconnect them.
Self-diagnosis at service stations and in garages
Diagnostics can be performed without the involvement of specialists or as a result of contacting a service station. In this case, the driver will have to be content with different results.
This is explained by the fact that car services use a whole range of equipment that allows you to determine the full list of error codes BK of a VAZ 2114 car. Practice shows that self-diagnosis allows you to achieve a certain result, but, unfortunately, it is possible to find all errors in exceptional cases.
How to decipher error codes during self-diagnosis of VAZ 2114?
When contacting a car service center and performing work on their own, the driver will see different error codes. For this reason, both options need to be considered.
Not every car owner operating a VAZ-2114 knows that it is possible to diagnose problems without using a BC. To use this technique you will need to do the following:
- take the driver's seat and hold down the odometer button;
- The ignition key must be set to the first position;
- You can now release the odometer button. The arrows on the instrument panel will begin to move;
- Pressing and releasing the odometer button again will display the firmware version;
- the next pressing and releasing the button will allow you to see codes that will indicate malfunctions in the operation of the vehicle systems.
Since the diagnostic process does not use special devices and equipment, codes are issued by the system in a 2-digit format. Let's look at the errors of the VAZ 2114, the explanation of which is presented in the table (below in the text).
The table also provides a description of problems and malfunctions.
For example, code 13 indicates that there is no signal from the oxygen sensor. 17 informs the driver about low voltage in the on-board network, and 24 - failure of the vehicle speed sensor. Codes No. 51 and 52 indicate problems with the permanent and random access memory device.
How to decipher the codes of VAZ-2114 on-board computers
What codes can you look for when diagnosing the Lada 2114 in relation to on-board computers? These devices are exactly the same electronics as those on foreign cars, but the problem is that VAZ-2114 they are capable of malfunctioning, but this does not mean at all that you should avoid diagnosing the car yourself using this product.
So that you do not have to study the full list of errors and their explanations, experts have selected only the most common ones:
- 0102, 0103 – the indicator responsible for regulating the mass flow of air flow gives an insufficient level signal;
- 0112, 0113 – the signal from the sensor recording the temperature regime of the incoming air is faulty;
- 0115-0118 – the condition of the VAZ-2114 coolant temperature meter leaves much to be desired; to eliminate the breakdown, a complete replacement of the indicator is necessary;
- 0122, 0123 – interference or an incorrect signal is coming from the indicator that controls the throttle position; the component requires immediate replacement;
- 0130, 0131 – the device indicating the oxygen level is faulty;
- 0135-0138 – the equipment heating the oxygen meter does not work, so it is worth replacing the element;
- 0030 – there are malfunctions in the functioning or a break in the entire chain of control and regulation of the oxygen meter heater up to the neutralizing mechanism;
- 0201-0204 – a break in the injector control chain has been detected;
- 0300 – there are misfires in the on-board computer, this is obvious – the VAZ-2114 is difficult to start right away;
- 0301-0304 – misfires were detected in engine devices;
- 0325 – the on-board computer detected an open circuit in the detonation mechanism chain;
- 0327, 0328 – malfunction of the detonating sensor; the situation can only be saved by replacing the equipment;
- 03335, 0336 – malfunction of the crankshaft position sensor;
- 0342, 0343 – the on-board computer indicates a breakdown of the phase sensor;
- 0422 – the neutralizer refuses to work adequately;
- 0443-0445 – the valve that bleeds the adsorber does not work;
- 0480 – the fan cooling the VAZ-2114 is faulty;
- 0500, 0501, 0503, 0504 – the vehicle speed sensor requires repair;
- 0505–0507 – the idle speed controller, which is responsible for the speed, is faulty;
- 0560, 0562, 0563 – the voltage is poorly supplied, which requires more thorough checking and testing; this is the only way to identify areas of the chain that need to be replaced;
- 0607 – detonation channel does not work;
- 1115 – the heating circuit of the oxygen level meter is not functioning properly;
- 1135 – a break in the heating circuit of the oxygen sensor has been detected, there is a high probability that a short circuit has occurred;
- 1171, 1172 – the level of the gas component of the potentiometer leaves much to be desired;
- 1500 – the control circuit of the fuel pump device is broken;
- 1509 – an overload of the idle speed component has occurred;
- 1513, 1514 – the computer has detected an open circuit in the idle mechanism chain;
- 1541 – the regulation and control circuit of the relay suitable for the fuel pump is broken;
- 1570 – the integrity of the traction control system is broken;
- 1600 – there is no connection with the system responsible for the car’s traction control;
- 1602 - occurs very often during diagnostics, means insufficient voltage on the on-board network or its complete absence on the electronic control unit;
- 1606, 01616, 1617 – the mechanism for fixing uneven road surfaces is broken;
- 1612 – faulty reset of the electronic part of the control;
- 1620 – it’s time to change the memory part;
- 1621 – the state of the random access memory sensor is affected;
- 0337, 0338 – the component that controls the position of the crankshaft is not working correctly, a circuit break is possible;
- 0481 – cooling fan does not work;
- 0615, 0617 – the relay circuit is not working adequately, there are breaks and short circuits;
- 1141 – the heating mechanism of the first oxygen sensor, next after the neutralizer of the oxygen level meter, is not functioning correctly;
- 230 – it’s time to change the fuel pump relay;
- 263, 266, 269, 272 – the driver of injectors No. 1-4 does not work, you cannot do without replacing the components;
- 640 – the Check Engine lamp circuit is broken.
