How does a mechanic diagnose a P0342 code?
First, the mechanic reads all stored error codes using an OBD-II scanner. He will then check and, if necessary, repair or replace all damaged wires, connectors and other electrical components of the system. The mechanic will then clear the error codes from the PCM memory and recheck the system. If the error code appears again, the mechanic will check the battery charge and also inspect the starter motor. It will then clear the error codes from the PCM memory again and check the system to see if P0342 appears again. This procedure must be performed every time after repair work is performed. This will help determine if the problem is resolved.
Motor Master Club
- ANNOUNCEMENTS, INFORMATION
- ↳ RULES
- ↳ Announcements
- ↳ Articles
- TECHNICAL SUPPORT
- ↳ Installation and update of “Motor-master” software
- ↳Motor-scan (scanner)
- ↳ Archive (questions about the scanner)
- ↳ Motor-Loader (loader)
- ↳ DiSco, DiSco-Express, Motor Tester, Test Master
- ↳ History of changes
- ↳ Other devices and sensors
- ↳ Alphameter ALC
- ↳ Archive (Questions to the manufacturer)
- MOTOR-MASTER
- ↳ Disco (oscilloscope, recorder, etc.)
- ↳ Motor-Tester (ignition systems)
- ↳ DiSco-Express (express diagnostics)
- ↳ Test Master (testing sensors and MI)
- ↳ Motor-Loader (loader)
- ↳ General questions
- ↳ Chip tuning VAZ, GAZ, UAZ
- ↳ Chip tuning of foreign cars
- ↳ Odometers (odometer programmer)
- ↳ General questions
- ↳ Removal and disassembly of instrument panels
- ↳ Help for newbies
- DIAGNOSTICS
- ↳ Diagnostics VAZ, GAZ, UAZ, ZAZ
- ↳ VAZ
- ↳ GAS
- ↳ UAZ
- ↳ ZAZ
- ↳ Diagnostics of foreign cars
- ↳ Europe
- ↳Japan
- ↳ Asia
- ↳America
- ↳ Diagnostics of diesel engines
- ↳ “Iron” questions
- ↳ Engines
- ↳ Power systems (hardware)
- ↳ Chassis
- ↳ Transmissions
- ↳ Body
- ↳ Exhaust system
- ↳ Lubricants
- ↳ Tools and consumables
- ↳ Selection of spare parts and components
- ↳ Diagnostic devices
- ↳ Electrical and electronics
- ↳ Autoelectrics
- ↳ Alarm and music
- ↳ Repair of ECU and other units
- ↳ Miscellaneous
- ↳ Section for beginners and car owners
- AUTHOR'S MATERIALS and PROGRAMS
- ↳ Section information
- ↳ Vijar
- ↳ kdv
- ↳SAW
- ↳ DataLook (program for configuring firmware)
- ↳ sts1968
- COMMERCIAL FIRMWARE
- ↳ About the Motor-Master Chip firmware store
- ↳ Articles and materials for beginners and more…
- ↳ Chip tuning
- ↳ Diagnostics
- ↳ Devices and accessories
- ↳ Information materials
- ↳ Representatives of Motor Master
- ↳ VAZ
- ↳ UAZ
- ↳ KOREA
- ↳Kefico 797
- ↳ Kefico M(G)798 Kia-Hyundai
- ↳ Bosch ME17911(12) Kia-Hyundai
- ↳Bosch ME17921
- ↳ RENAULT
- ↳EMS3132
- ↳ Valeo 40/42
- ↳EMS3120
- ↳EMS3125
- ↳CHEVROLET
- ↳ Simtec 7.6
- ↳ Announcements
- GENERAL ISSUES
- ↳ General questions
- ↳ Site operation
- ↳ Communication
- ↳ Flea market
- ↳ Car services (offer of services)
- ↳ All about our work
- ↳ Computers, laptops, etc.
- Moved topics
Additional comments for troubleshooting P0342
The camshaft position sensor is an integral part of the system that allows the vehicle to operate reliably, smoothly and quietly. If the sensor does not operate properly, symptoms will occur indicating a problem. If the problem is not solved for a long time, it can lead to more serious problems. Therefore, if a P0342 error is detected, it is recommended that you contact a qualified technician as soon as possible to diagnose and resolve the error.
It should also be noted that if this error code is stored in the PCM and the Check Engine Light illuminates, the vehicle will most likely fail an emissions test.
Symptoms of malfunction
The main driver symptom of P0342 is the MIL (Malfunction Indicator Light) illumination. It is also called Check engine or simply “check light”.
They can also appear as:
- The “Check engine” warning light on the control panel will light up (the code will be stored in the ECM memory as a malfunction).
- Decrease in engine power.
- Possible misfires in the engine cylinders. The car engine may also become unstable.
- Floating speed, as well as attempts to stall at idle.
- The engine stalls or has trouble starting.
- Increased fuel consumption.
The vehicle will most likely run with this trouble code. But it may be difficult to start, and there may also be a drop in power and unstable engine operation. To avoid damage to other engine components, if this code is detected, it is recommended that the problem be repaired as soon as possible.
DESIGN FEATURES AND OPERATING PRINCIPLE
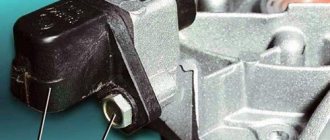
The VAZ 2114 FAZ sensor is an integrated device, the main function of which is to receive information about the current operating cycle of the power unit and transmit it to the ECU via pulse signals.
Structurally, the DF consists of two parts - a sensitive element and a pulse signal converter, which in turn consists of an operational amplifier, a bridge circuit and an open-collector type output stage.
The DF sensitive element operates according to the Hall principle; it is a microcircuit that responds to fluctuations in the magnetic field, which gains the ability to transmit an electrical signal only when there is a magnetically conductive material next to it, which is the steel head of the valve.
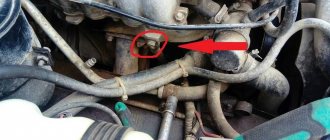
The location of the VAZ 2114 camshaft position sensor is as follows: it is located on the end of the cylinder block, not far from the air filter.
There is a lot of discussion on the Internet about which phase sensor is best to buy from which manufacturer. We recommend giving preference to devices from the German company Bosch. It is she who has the license to manufacture sensors operating on the Hall principle, so, in essence, you get a reliable and durable device produced by the direct owner of the technology by which it is made.
Re: 2114 high signal level of the phase sensor
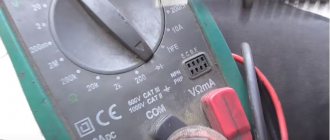
A high level is, as you were correctly told, a cliff. When the sensor is disabled, the level will be “High”. The sensor is checked very easily: remove the connector from the sensor, find 1 contact of the connector (wire white/black) - this is ground (GND), on the next contact (pink/black, I think) - +12V (power supply to the sensor, this is constant power from the output of the main relay ), on pin 3 (pink wire, I think) when the sensor is disconnected there should be 11.8-12.2 V, this is the signal power supply from the ECU. If all these voltages are present, then we proceed to checking the phase sensor itself: pull out the sensor, connect it to the connector, use a tester to test the negative probe on 1 contact, the positive probe on 3 contact. The voltage should be 11.8-12.2V, now bring a knife, screwdriver or flat metal plate to the end of the sensor (where type 13K is written) - the voltage should drop to 0V, removing the plate the voltage will rise to 11.8-12.2 volts. If all these conditions are met, the sensor is operational.
Re: 2114 high signal level of the phase sensor
I couldn't find a topic for my question, so I'll ask it here. The essence of the question: VAZ 2115 error: low signal level from the phase sensor. The client has already changed 3 sensors. This car came to me with a request to turn off the 2nd DC (leave the 1st DC partially). I did my job, but the client came with a complaint “the check light is on”, I connect the scanner and take a look. I say that there is an error in the phase sensor, but he tells me that he has already changed 4 sensors, but the result is the same. The sensor that was on his car was really “dead”, the voltage at the output “C” of the connector was really 0V. He replaced the sensor with another (which he was told was faulty) - the voltage rose to the required 11.8 V, installed it on the machine, the oscilloscope showed the pulses, even, with the marks in place. Released the client. Yesterday he arrived - the check light is on again, the error is again low signal level from the phase sensor. I connect, look, it’s really 0v. I disconnect the sensor (on the connector) 11.8 V, connect it to 11.8. I start the car - it works, the pulses go. (!) BUT the pulses go until you turn off the ignition and the main relay turns off, after which 0.43 V hangs at terminal “C” for some time, and then the voltage rises to 1, 35c. After this, turning on the ignition, the sensor displays 0.38V, which does not rise when starting. If you disconnect and connect the sensor connector, the voltage is restored to 11.8 and the sensor starts working. Again until the ignition is turned off. That's the problem. Today the client will bring another phase sensor, I'll try it. But for some reason I’m sinning on the ECU (it has a Bosch M7.3). If all else fails, I will reflash it without a phase sensor. Has anyone encountered this problem?
DTC Engine or automatic transmission error P1304
On our resource you can ask questions and share your own experience in troubleshooting problems associated with error P1304. By asking a question within a few days you will be able to find the answer.
Taking into account the fact that OBD2 errors in the operation of the engine or other electronic systems of the car do not always directly indicate a non-functioning element, and the fact that for different brands and models of cars the same error can arise as a result of a malfunction of completely different elements of the electronic system, we have created this algorithm for assistance and exchange of useful information. We hope, with your help, to form a cause-and-effect relationship for the occurrence of a particular OBD2 error in a specific car (make and model)
As experience has shown, if we consider a specific make and model of a car, then in the vast majority of cases the cause of the error is the same.
We hope, with your help, to form a cause-and-effect relationship for the occurrence of a particular OBD2 error in a specific car (make and model). As experience has shown, if we consider a specific make and model of a car, then in the vast majority of cases the cause of the error is the same.
If the error indicates incorrect parameters (high or low values) of any of the sensors or analyzers, then most likely this element is working, and the problem must be looked for, so to speak, “upstream”, in the elements whose operation is analyzed by the sensor or probe.
If the error indicates a constantly open or closed valve, then you need to approach the issue wisely, and not thoughtlessly change this element. There may be several reasons: the valve is clogged, the valve is jammed, the valve receives an incorrect signal from other faulty components.
Errors in the operation of the OBD2 engine and other vehicle systems (ELM327) do not always directly indicate a non-functioning element. The error itself is indirect evidence of a malfunction in the system, in a sense a hint, and only in rare cases a direct indication of a faulty element, sensor or part. Errors (error codes) received from a device or scanner require correct interpretation of the information, so as not to waste time and money on replacing working elements of the car. The problem often lies much deeper than it seems at first glance. This is due to the fact that information messages contain, as mentioned above, indirect information about the disruption of the system.
Here are a couple of general examples. If the error indicates incorrect parameters (high or low values) of any of the sensors or analyzers, then most likely this element is working, since it analyzes (produces certain parameters or values), and the problem must be looked for “upstream”, so to speak, in elements whose operation is analyzed by a sensor or probe.
If the error indicates a constantly open or closed valve, then you need to approach the issue wisely, and not thoughtlessly change this element. There may be several reasons: the valve is clogged, the valve is jammed, the valve receives an incorrect signal from other faulty components.
Another point that I would like to note is the specifics of a particular brand and model. Therefore, if you recognize an error in the operation of the engine or other system of your car, do not rush to make hasty decisions, but approach the issue comprehensively.
Our forum was created for all users, from simple car enthusiasts to professional auto electricians. A drop from each will be useful to everyone.
Decoding Vesta errors related to the data bus (U)
- 0001 – pin failure at the physical level;
- 0002 – block wiring is damaged;
- 0009 – short circuit of lines touching the on-board circuit or body;
- 0073 – diagnostic output disabled;
- 0121 – there is no signal from the ABS unit;
- 0122 – ESP controller does not respond to the request;
- 0155 – open circuit of the control panel;
- 0167 – the immobilizer does not respond to the diagnostic scanner request;
- 0415 – standard error of ABS Vesta;
- 0416 – similar for the ESP system;
- 0426 – the immobilizer transmits incorrect information to the on-board computer system.
On which cars is this problem most common?
The problem with code P0342 can occur on different machines, but there are always statistics on which brands this error occurs more often. Here is a list of some of them:
- Cadillac (Cadillac CTS)
- Chery (Chery A15, Amulet)
- Chevrolet (Chevrolet Aveo, Captiva, Lanos, Lacetti, Optra, Rezzo, Spark)
- Chrysler
- Citroen (Citroen C4)
- Daewoo (Daewoo Lanos, Leganza, Matiz, Nexia, Nubira)
- Ford (Ford F-150)
- Hyundai (Hyundai Accent)
- Opel (Opel Corsa, Frontera)
- Peugeot (Peugeot 308, 3008)
- Skoda (Skoda Octavia, Fabia)
- Toyota
- Volkswagen (Volkswagen Passat)
- VAZ 2110, 2112, 2114, 2115
- Gazelle
- Lada Vesta, Kalina, Niva, Priora
- UAZ
With fault code P0342, you can sometimes encounter other errors. The most common ones are: P0008, P0022, P0335, P0340, P0341, P0343, P0345, P0346, P0347, P0348, P0349, P0365, P0366, P0367, P0368, P0369, P0390, P0391, P0392, P039 3, P0394, P1133, P1396 .
Source
Self-diagnosis
The easiest and most common way to diagnose error codes on a VAZ Kalina is to search using the on-board network. The procedure looks like this.
Insert the key into the lock cylinder. Next, hold down the RESET key and, without releasing it, turn on the ignition. In this case, the device will automatically switch to diagnostic mode. At the same time, all the indications will light up, and the instrument arrows will make a full circle.
You should pay attention to the arrows and indicators - if any diode does not light up, you need to check the device for which the element is responsible. On the right steering column lever there is a button for scrolling through the options - you need to scroll to the required position (error codes). Next, the display will show the general error number; to reset the index, you need to hold RES for three seconds.
Note! The indicated sequence is relevant for Lada Kalina of the first and second modifications.
The position of the error codes will show one of the indices on the display:
- “2” – there is a surge in the BS power supply – a possible short circuit in the wiring;
- “3” – rupture of lines, or failure of the float inside the gas tank;
- error 4 Lada Kalina says that the coolant temperature sensor is broken or malfunctioning;
- “5” – the thermometer has gone astray, the element may be damaged or the circuit may be broken;
- “6” – exceeding the maximum permissible temperature of the internal combustion engine block, while the acoustic alarm is working;
- “7” – exceeding the permissible pressure thresholds inside the oil line;
- “8” - on a Lada Kalina car, error 8 appears when there is a malfunction of the calipers or a breakdown in the hydraulic drive line;
- “9” – critical voltage drop in the battery;
- “E” – incorrect reading or display of the EEPROM information module.
To return to the original part, it is enough to hold RES for 30 s. The disadvantage of this method is minimal accuracy - the procedure shows in which direction to look for a breakdown, but not a specific node. So, it is possible to understand exactly where the failure occurred only by the following method.
Diagnostic methods
If error P2135 is recorded in the ECU memory, you should check the functionality and serviceability of the sensor. After all, it is the controller that determines the position in which the throttle assembly, that is, the damper, is located, is the culprit in this situation.
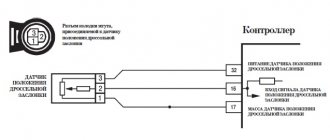
The whole point of diagnosing error P2135 comes down to checking the position sensor. To do this, it is recommended to perform the following operations:
- Arm yourself with a multimeter, select the dialing mode and connect to the contacts on the position sensor connector.
- By simulating the movements that the throttle makes, you should check how the sensor will react to these changes. The damper should be moved to its extreme positions. If wheezing appears on the multimeter, this indicates a malfunction.
- Additionally, the resistance of the sensors should be checked. Each car has its own optimal performance. They are specified in the technical documentation. Most often these values are around 10 kOhm.
- The resistance can be checked without removing the sensor from the throttle assembly. Here you need to disconnect the controller block and turn on the ignition. Now the plus of the multimeter is connected to the power wire in the sensor harness block, and the minus is placed on engine ground.
- In this case, numbers in the range from 4.8 to 5.2 V should appear on the measuring device (multimeter).
- Turn off the ignition and perform the same resistance test as suggested with the sensor removed.
- When the damper closes, the resistance should be less. When the damper is fully opened, the resistance increases.
- To check the sensor on a car with an electronically controlled throttle, the gas pedal is pressed to the floor, and then the voltage readings are checked with a multimeter. The sum of the readings from the first and second sensor should be about 5 V. This is considered a reference value indicating that the sensor is working.
If the sum values differ, this indicates a malfunction. It is also believed that the difference between the readings on two sensors when the gas pedal is held down should be about 2 V. For example, when one sensor has 4.2 V, the second sensor will have 2.1 if the unit is working properly.
This is possible in case of damage to the wires and violation of the integrity of the insulation. Usually a damaged wire can be noticed by visual inspection.
Deciphering codes, checking devices
Mistake No. 2. Overvoltage. Error No. 3. An error has been detected in the fuel sensor level; it occurs if the circuit is broken.
Error No. 4. Coolant temperature sensor error. Error No. 5. The outside temperature sensor has failed. Error No. 6. The motor has overheated. This happens if the engine overheating alarm is triggered. Mistake No. 7. Oil pressure is in poor condition. Happens if the alert bell is triggered. Mistake No. 8. Problems with the brakes. Happens if the alert bell is triggered. Mistake #9: The battery is dead. Happens when the alert bell is triggered.
To reset all types of errors, press and hold the reset button until all data on the display is cleared. Testing of devices and their combinations is carried out in accordance with technical specifications using special equipment (pulse generator, from a stable power source, etc.). If a short circuit suddenly occurs in existing devices (less than 40-50 Ohms), the maximum temperature indication must prevail.
Before buying a car, I recommend checking the errors of the on-board computer to be sure of the iron horse. If you have identified any problems, we give you the opportunity to familiarize yourself with the error code of the on-board computer.
First of all, you need to watch the video.
The process of launching the instrument panel diagnostic mode, I think, became clear from the video, and below we will now look at the main error codes that may appear on your on-board computer display: Lada Kalina on-board computer error codes
2
- increased voltage of the vehicle's on-board network
3
- error in the fuel level sensor (if an open circuit of the sensor is detected within 20 seconds)
4
- error in the coolant temperature sensor
5
- error in the external temperature sensor
6
- engine overheating (the criterion for triggering the acoustic signal is met)
7
- emergency oil pressure
8
- brake system defect
9
- battery discharged
In the video above, it was clear that I was displaying errors 4, 6 and 8. With four, everything is clear, as I read many reviews, this error always appears on a cold engine. As for number 6, here most likely there is data in the memory of the on-board computer about the engine overheating alarm that once tripped. If my memory serves me correctly, this happened when I had to trail behind a scraper at a speed of 10 km/h for a couple of kilometers in 40 degree heat. But fortunately, immediately after the signal went off, I was able to drive onto a repaired section of the road and quickly cool down. Regarding the defect in the brake system, I can say the following: the warning lamp for insufficient brake fluid level came on quite often at the same time, and I wrote about this problem here: the brake fluid level lamp is constantly blinking.
Fortunately, my Kalina did not have the rest of the errors listed above. Resetting the readings is very simple, again by pressing the daily mileage button.
Attention! If you decide to buy a used Kalina, then be sure to go through the diagnostic procedure and look at the errors that the computer shows. Surely not every owner knows about this and will reset them
And the information may be very useful for you. For example, the car’s engine has already overheated or the engine pressure warning light has tripped, and this is already a serious reason to refuse to buy such a car.
If you decide to carry out maintenance on your car, I advise you to read the article about replacing the fuel filter on a Lada Kalina with your own hands.
