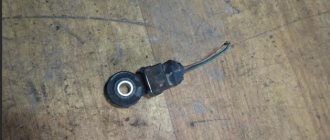
Why do you need DPKV?
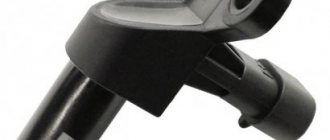
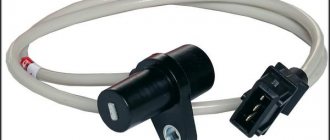
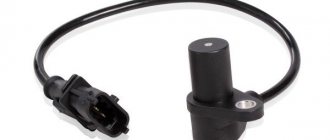
The crankshaft position sensor is necessary to determine the location of the pistons, namely when they are at TDC. This is necessary to supply a spark to the combustion chamber and ignite the fuel-air mixture.
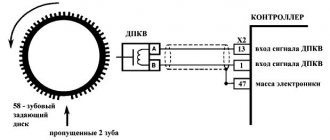
The sensor operates on the Hall effect. The DPKV is connected to the crankshaft pulley, which has a crown with one missing tooth and helps determine the TDC sensor.
There is a magnet inside the sensor, which is a sensitive element and helps to read readings from the pulley. As soon as the magnetic connection between the sensor and the pulley is lost and the ECU receives a signal that it is necessary to apply a spark to the cylinder, which is now at TDC.
Kinds
Depending on the design and operating principle, there are three main types of crankshaft sensors. Let's look at the features of each of them in the table.
| Sensor type | Design Feature | How does it work |
| Inductive | Inside it is a metal rod with a magnet at the outer end. It magnetizes the rod. There is a copper winding around the rod, and its ends are connectors for connecting wiring | When a steel object is near the rod, signals appear on the terminals |
| With Hall sensor | The internal design of this type of sensor includes a Hall sensor | When a metal object approaches it, the state changes from zero to one and vice versa |
| Frequency | The design is based on reading pulse frequencies that are generated by the ECU | Pulses of a certain frequency are supplied to the sensor. When you bring a metal object, the generation frequency changes. By changing frequencies, the DC determines the presence of objects near it. The reaction occurs due to the metal teeth of the crankshaft crown |
Reasons for failure
Sensor failures can be attributed to several reasons due to which the sensor most often fails.
- Time factor;
- Mechanical damage;
- Damage to the power circuit;
- Magnet contamination;
- Pulley damage;
Now more about each reason.
- Time factor. The main reason for the failure of the DPKV is its aging; the sensor is located very low, which quite often exposes it to humidity, dust and dirt. Such impacts damage the sensor connector and its magnet.
- Mechanical damage. As mentioned above, the sensor is located very low, which exposes it not only to contamination, but also to damage. When driving on country roads, stones or the like may enter the sensor. items. The sensor can also fail due to damage to the crankshaft pulley.
- Damage to the power supply. A special shielded wire is used to power the sensor, which helps remove interference generated during engine operation. Quite often, the sensor’s power cable becomes frayed or its insulation dries out over time, which leads to interference in the power circuit or even to its breakage.
- Magnet contamination. A magnet tends to attract any metal shavings, and when working with rubbing parts, these shavings are inevitable. Quite often, a large amount of metal shavings adheres to the sensitive part of the sensor, which dulls the sensitivity of the sensor.
- Pulley failure. The pulley is involved in the operation of the sensor and its curvature or separation from the damper can lead to improper operation of the sensor.
Repair of wiring connector of the Crankshaft Position Sensor (CPS) VAZ.
Quite often, the cause of the car jerking and its complete stop is an open circuit of the DPKV (error P0335 or P0336)
A wire break most often occurs at the base of the sensor connector. The connector needs to be replaced with a new one. In the article we will look at how to do this most correctly, and you will also learn how you can repair the old sensor connector if you suddenly cannot purchase a new one.
Everything was done indoors, so the part with attaching the restored connector to the car wiring is for demonstration, that is, you need to do everything the same, only not on the table, but on the car).
We cut off the connector from the car wiring at a distance of 3-5 cm from the connector. We remove the plastic wire retainer (to be honest, it doesn’t really prevent the wires from breaking at the root - so you don’t have to put it back if you’re too lazy...)
Using a wire with a diameter of 0.8 mm (we used a piece of welding wire from a Kempy semi-automatic machine) we press the fixing stops of the contacts through a special groove (it’s enough just to insert the wire until it stops).
Use the remaining wires to pull the contacts out of the connector. They come out quite tightly due to the rubber seals. We open the contact petals around the rubber seals and break off the old wires at the root.
We find a couple of pieces of wire 10-15 cm long, suitable in cross-section and color. Don't forget to put rubber seals on the wires.
We strip the ends of the wires by 3-4 mm and carefully solder them to the contacts. We used a 25-watt soldering iron, POS-61 solder and active flux based on zinc chloride.
We clamp the rubber seals with the contact petals, slightly bend the contact latches....
We insert the contacts with the wires into the connector until the latch lightly clicks. We put the plastic wire clamp on the back of the connector. The connector has been restored!
Next, let's move on to the car. We strip the DPKV wire - no more than 5 cm. We bend the screen back, strip the white and green wires by 15 mm.
We put heat-shrinkable tubes on the connector wires and twist the corresponding wires with electrical twist.
We stretch the heat shrink onto the twists and heat it with whatever comes to hand - we came across a lighter. But if you have a hairdryer on hand, it will be better... at least according to Feng Shui, that’s how it’s supposed to be.
We twist the restored wires slightly together and wrap them with electrical tape, starting from the connector. We wrap the electrical tape with an overlap of at least 50% over the previous layer. The result is in the picture below - the twisting area is quite well protected from moisture and looks neat. All that remains is to connect the connector to the sensor and ALWAYS fix the DPKV wire on a special bracket on the lower bolt of the timing belt cover.
Of course, the reliability is lower than that of solid wires - but such a connection has worked for years - it has been tested. Not a single return in 5 years.
Source
Pulley failure
The pulley affects the operation of the sensor and, therefore, the operation of the entire engine as a whole. Its curvature can lead to incorrect readings and, as a result, improper operation of the engine.
There are two types of pulleys: cast and with damper. A cast pulley is more reliable and durable, but the second type of pulley with a damper rubber insert is often damaged.
One of the most common failures of this pulley is the rotation of the crown relative to the crankshaft. Such a breakdown leads to displacement of the crown and incorrect determination of TDC by the sensor.
Comprehensive check for Opel Vectra B
Now let's take another car and use it to consider the last of the verification methods - comprehensive.
This test is much better than with a conventional multimeter, but in terms of accuracy it is not as accurate as an oscilloscope.
The problem car will now be the Opel Vectra B. We leave the symptoms the same.
The initial work is also no different from the VAZ-2110: the sensor is removed, inspected, thoroughly washed, and only after that you can start checking the condition.
But for a comprehensive check you will need more equipment:
- Multimeter;
- Megaohmmeter;
- Device for measuring inductance.
It is better to take all measurements in a heated room so that the readings are correct.
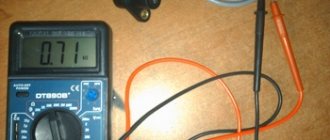
First, the coil resistance is measured, as described above. Resistance readings must be within the range specified in the technical documentation.
The next check is to measure the winding inductance, for which a device is used to measure it. A working DPKV inductance should be in the range of 200-400 mH.
The devices are pictured below.
The insulation resistance is also checked with a megohmmeter. When a voltage of 500 V is applied, the resistance value of the sensor should be no more than 20 MΩ.
Based on these measurements, it is determined whether the DPKV is working or requires replacement.
Photos of the devices are below.
Examination
The check must be carried out both externally and using diagnostic devices. Sometimes just a visual inspection is enough to determine the problem, so let's start there.
Sensor check
This is done by checking the sensing element for contamination. If the sensor magnet has a lot of chips on it, this indicates that it is not working properly. The sensor must be cleaned and reinstalled.
Next, the connector and power circuit are checked and there should be no traces of carbon deposits, rust or other types of damage.
Pulley check
The pulley must be inspected for its integrity and evenness.
Instrument testing
Such a check can only be carried out using special diagnostic equipment. Diagnosing DPKV in this way will be effective only when the check light on the car’s dashboard is on.
How to change the crankshaft sensor
Once you know how to test the crankshaft sensor, don't rush into purchasing expensive measuring gadgets. Such a part is inexpensive, and it is usually much easier to immediately remove and install a new one than to find out whether there really are problems with it.
Replacing the VAZ 2114 crankshaft sensor will only require a ten-size ratchet wrench. Sometimes it’s worth getting an extension cord for it to make dismantling more convenient.
- You need to turn off the ignition and open the hood of the car. To avoid any trouble, it is advisable to securely fix it.
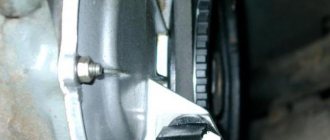
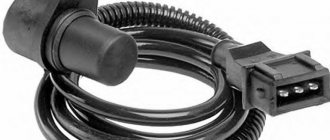
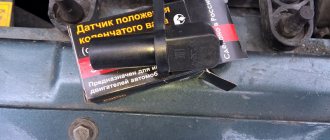
- Under the hood, the DPKV is located at the generator pulley, holds its bolt, connecting the device to the oil pump cover. You can recognize it by its long wire and characteristic shape.
- If contamination is found around, it must be removed first.
- First you need to disconnect the chip that provides connection to the wiring.
- After this, use a ten-millimeter wrench to unscrew the fasteners.
- Next, the device can be easily removed from its seat.
After dismantling the sensor, you need to pay attention to the toothed pulley. If there are any damages that interfere with the correct operation of the device, they must be repaired. The absence of defects means that the sensor is responsible for the problem. The new one is installed in the same way; nothing complicated is expected in the process.
After installing the device in place, attach and screw in the mounting bolt. It is not recommended to exceed the tightening torque. Optimal - 12 Nm.
Having secured the device in its intended place, you need to make sure that the gap remains at least a millimeter; its error cannot exceed 0.41 on the larger side.
Computer diagnostics in a service center helps to more accurately determine the need to replace a device and evaluate its performance. Most often, sensors need to be cleaned or replaced.
When characteristic symptoms are observed, even a beginner can determine whether the crankshaft sensor 2114 8 valves is working properly. If there is even the slightest suspicion, it is worth ordering a new device.
Replacement
Replacing the sensor is a fairly simple job that even the most distant person from cars can handle. The job involves unscrewing one screw and removing the connector from the sensor.
It is best to carry out work from the inspection hole, but if there is none, then replacement can be done by removing the front right wheel.
Let's start replacing
- Remove the connector from the sensor
- Unscrew the fastening bolt using a 10mm wrench
- We take out the sensor. This may be difficult to do, but since we no longer need the old sensor, we can take it with pliers and turn it in the mount.
- Install the new sensor in reverse order.
ERRORS AND SYMPTOMS OF PROBLEM
The fact that problems have arisen with DCPV is indicated by the appearance of errors 0036 or 0035 on the on-board computer screen.
- Error no. 0035 appears when the device sends an incorrect signal to the car's brain;
- Error no. 00436 occurs when the ECU does not receive a signal from the sensor.
If the fourteenth does not have an on-board computer and you do not see possible errors, pay attention to the signs of a malfunction of the VAZ 2114 crankshaft position sensor:
- Firstly, if there is a malfunction of the DCPV, the engine may simply not start, there can be many reasons for this, besides the sensor itself, but you need to check the device one of the first;
- Also, if the sensor is not working, dips are observed during a series of laps during acceleration, or vice versa, the laps can grow on their own;
- Typical problems are minimized: speed fluctuations or vehicle stalling;
- Engine thrust is significantly weakened;
- The "Check Engine" light is on."
In general, all DKVP faults can be divided into three main groups:
- Mechanical damage to the device: cracks in the case or torn threads of the case, damage to the core or contact block;
- Damage to the sensing element due to wear;
- Damage to the winding, as a result of which the frequency of pulses supplied to the controller changes (their ECU cannot decode the signal).
We remove the sensor, observe external deformations and test - everything will become clear
How does he work
Let's figure out how this element works. The regulator reads data on the crankshaft speed and also reports its current position using magnetic pulses.
Location
Since the engines installed on the VAZ 2110 differ from each other, different PCV sensors are used. Therefore, when replacing, be sure to choose a similar device, since a regulator with other characteristics simply will not work, so the system will still not work even if you have a high-quality, serviceable sensor.
