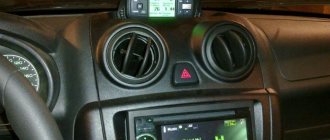
It is difficult to imagine a modern car without an on-board computer (alternative names: “BC”, “carputer”, “onborder”), which allows you to increase engine efficiency, reduce gasoline consumption, optimize the operation of the gas distribution system and synchronize the interaction of all units and other other important functions. In addition to the above, BC reduces the concentration of harmful emissions. The onborder performs the functions of cruise control, climate control, and displays the information necessary for the driver, allowing him to make the right decisions on transport management and optimal movement along the chosen route. That is why all modern Lada Vesta models are equipped with BCs that successfully perform the functions assigned to them.
Parameters of the standard Lada Vesta onboarder
Depending on the model, the Lada Vesta on-board computer can perform a wide variety of functions and display relevant information on the screen display. In the standard version, the monitor displays:
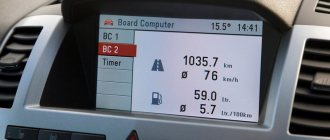
total vehicle mileage in kilometers; distance in kilometers traveled by the car in one trip; Digital Watch; travel time: hours, minutes; speed in kilometers per hour; recommendations for gear shifting; voltage in the on-board network in volts; current fuel consumption in liters per 100 kilometers; fuel consumption per trip in liters per 100 kilometers; fuel costs per trip in liters; indicator of how many kilometers of fuel remain; number of the included gear; speed limit indicator; outside air temperature. The display can also display other useful indicators that make driving much easier. For example, data from the parking sensors of the Lada Vesta, which ensures reliable parking of the car by generating sound and light signals. On-board computers are installed on the entire line of Lada cross, station wagon and on all luxury AvtoVAZ models.
Standard electronic devices also work successfully with additional equipment, which can be installed either with your own hands or at service stations. For example, the standard cruise control on the Lada Vesta “gets along” comfortably with the additional on-board computer.
The most modern BC models have extensive functions: they are integrated with a satellite navigation system, with their help you can watch TV, listen to DVDs, and connect to the Internet.
On-board computer control algorithm
1. Selection of on-board computer functions (carried out using the keys on the right steering column switch).
2. Selecting trip meters and switching between clock and temperature.
3. Enter parameter setting mode, select parameter.
3.1. Setting the time.
When you exit the time setting mode, the seconds counter is reset to zero (reset without rounding). If there are no button presses within 60 seconds, the time setting mode will exit automatically.
4. Display mode of parameters of the “Cruise control” or “Speed limiter” functions.
In the mode of displaying the parameters of the “Cruise control” or “Speed limiter” functions, it is possible to switch the displayed function of the on-board computer (point 1) and the total and daily mileage counters (point 2), the indication of outside air temperature and time is not available, parameter setting modes (point 3 ) are not available.
- “short” – press for less than 1.5 seconds, triggered when released.
- “long” – press for more than 1.5 seconds, triggered by time.
- yellow color – the segment is blinking (square wave, 1 Hz).
- When resetting the route parameters (clause 3(d)), the following parameters are reset to zero: average fuel consumption, fuel consumed, travel time, average speed.
Bookmaker settings are also shown in the video:
To change the sound of the turn signals, you need to go to the secret menu (it does not work on the instrument cluster). To do this, press two BC buttons at the same time. More detailed instructions in the video:
Are you satisfied with the functions of the Lada Vesta on-board computer? Let us remind you that other operating instructions for this vehicle can be found in this section.
Keywords: Lada Vesta on-board computer | dashboard of Lada Vesta
Found an error? Select it and press Ctrl+Enter..
- Choosing the best on-board computer Lada Granta, Kalina, Priora
- Description of the standard on-board computer Lada Largus
- Decoding error codes Lada Kalina, Priora
Information
Visitors in the Guests
, cannot be posted on this publication.
Setting up and operating a car computer
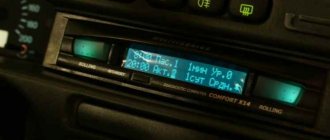
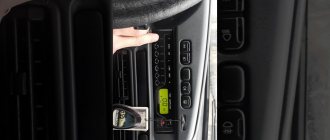
The standard BC and display reflecting the necessary information turn on simultaneously with turning the ignition key. The computer is controlled and configured using two buttons located at the end of the switch to the right of the steering wheel (Fig. 1). By pressing the buttons simultaneously, you can adjust the time, route mileage, reset the readings, and perform other actions.
How to configure
To set the clock, you need to press the top key and hold it for a while. By briefly pressing, you can scroll through the menu, selecting the desired options, and update the readings. The first section shows the total mileage along the route, the second shows the time (hours and minutes), the third tells you which gear to switch to, and so on, in accordance with the list above. You can exit the menu at any time by pressing the bottom key.
There is also a secret menu in the bookmaker, which is not in the manual. You can get into it by pressing both buttons. In these options, you can change the level and tone of the turn signal or hazard warning signal: to increase the sound, you need to press the upper button, to decrease it, press the lower button. When you hold down both keys on the SET inscription, the settings will return to their normal position.
Despite all the advantages of a standard on-board computer, it also has disadvantages: firstly, there is no information about emerging malfunctions or error codes, and secondly, the weak contrast of the information displayed on the display makes it difficult to read in bright sunlight.
Direct time setting
The time is set according to this scheme.
You need to enter edit mode . To do this, you need to press and hold the “up” arrow for about three seconds. At this moment, only the numbers “0.0 km” in the second line from the left of the display will start flashing on the screen. While in edit mode, you need to press the same arrow once. The clock indicator on the screen will blink, for example, “08:35”.
You will need to hold down the top key again for a few seconds to start changing the clock.
Only the first digit “0” from “08:35” will begin to pulsate. Now you can use the arrows to change the readings of tens, of which we only have two. To go to the hour units, hold down the “up” button again for a couple of seconds, after which “8” will begin to pulsate. Using the joystick we set the numbers we need from “0” to “9”.
Options for replacing the standard BC
There are many models from different manufacturers on the car computer market. Unfortunately, most of them cannot be used for Lada Vesta due to incompatibility. But there are BC models that are adapted to various AvtoVAZ models and have proven themselves well. Such brands include Multitronics. The company produces on-board computers for a wide range of cars, with advanced diagnostic functions, navigation, audio and TV systems.
The models produced have various mounting options, and at the owner’s request they can be placed on a dashboard or secured in other convenient places. Below are Multitronics BC models with different types of mounting.
Multitronics VC730
Multitronics TC 750
In addition to the above functions of a standard computer, Multitronics has very useful additional ones:
Displays information about vehicle malfunctions, errors, their codes, and also duplicates this message in voice mode. Sends a voice notification to the driver about the need to refuel the car. Conducts quality control of the filled fuel and displays an alert on the screen. Reminds the driver to turn off the lights or low beams. It is a full-fledged navigator. Allows you to use multi-channel television. Automatically maintains the set temperature in the cabin. The Multitronics on-board computer has a fairly large convenient screen, simple controls and a user-friendly interface. For owners of domestic cars and, first of all, for owners of various modifications of the Lada, a special model “Multitronics Comfort” has been developed.
Along with the BC models presented above, there is also computer equipment of the domestic brand "STAT" (Tolyatti), widely used on AvtoVAZ models. All of the company's products are adapted for installation on domestic cars, primarily Lada. The SHTAT brand BC has a backlit liquid crystal display and a convenient mount on the car dashboard. Below is a model of an onboarder from this company.
What does the model look like?
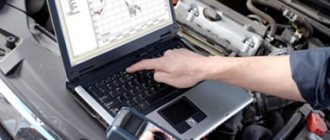
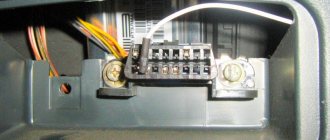
Connection of on-board computers is carried out by connecting the standard cable of the electronic control unit (ECU) to the OBD-II diagnostic connector in accordance with the instructions. After successfully installing the BC and connecting it to the ECU, you need to configure the onborder.
To do this, you need to start the engine and select a “custom” mode from the two offered on the display so that the type of ECU unit is automatically detected. To read sensor readings, you need to set “automatic selection” in the menu, and the computer will begin to receive information about all components of the car. Diagnostics will be carried out in accordance with the protocol corresponding to the machine model. The next stage is entering data into the BC that allows the computer to fulfill its functional purpose: the desired temperature in the cabin, the route and other parameters according to requests that will be displayed on the screen.
Where is the air temperature sensor located?
The measuring device is located in the cavity of the front bumper, in the center. In the Lada Vesta model range, the “thermometer” was installed to the left of the radiator in the direction of travel. You can find out more about the location of the DTOS in the article “Diagram of all Lada Vesta sensors.” Recommended reading.
Possible errors and methods for correcting them
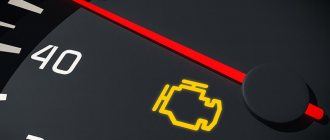
During the operation of the vehicle, various malfunctions may occur. Information about breakdowns is displayed on the on-board computer screen in the form of digital error codes. The most common of them are: engine overheating, 0217; fuel pump does not work, 0230; incorrect ignition operation, 0301; ignition coil faulty, 0351; tachometer faulty, 0654; bad road, 1617. In addition to malfunctions in the operation of individual vehicle components, errors may also occur in the BC itself. This is easy to check: if no information is displayed on the screen when the ignition is turned on, you should check the connector connecting the computer to the computer. Obviously incorrect information is displayed on the screen when the protocol fails. To correct the situation, you need to reboot the BC, select the protocol corresponding to the characteristics of the car in the menu and install it. In case of more serious damage, you must contact the warranty workshop. It should be borne in mind that when storing the car outdoors for a long time, especially in severe frost, it is necessary to remove the on-board computer. Also, you must not allow water to enter the BC unit or operate it with faulty electrical equipment.
The on-board computer greatly simplifies the operation of the car, helps the driver navigate difficult situations, warning about dangers and malfunctions. The information displayed on the device screen is essentially a vehicle logbook, the analysis of which allows the driver to make the necessary decisions.
Installing standard BCs on the Lada Vesta is significant progress, as they greatly facilitate management and minimize operating costs. In addition to its undeniable advantages, the standard device also has a number of disadvantages that can be easily eliminated by installing an additional on-board computer.
What malfunctions occur?
For some motorists, the Lada vesta sw cross control panel stops functioning over time and works intermittently. Such problems arise if the following malfunctions appear:
- The contact between the on-board network and the instrument panel is deteriorating. Such problems arise if the contacts or connectors have certain damage.
- Indicators and sensors fail. Inaccurate information is displayed on the dashboard if the fuel level indicator, speed sensor, etc. have failed. This causes the master data to fail.
- The integrity of the shield is compromised due to strong vibration or mechanical stress. The front shield is being replaced. This procedure is performed by masters.
- The included electronic board is faulty. Its functionality is restored by specialists. No backlight indicates that certain bulbs have burned out.
Chip tuning of LADA VESTA, LADA XRAY and LADA GRANTA ECUs with manual transmission
The wizard configures engine start maps, fuel supply parameters, fan temperature and other systems. Thanks to this, the dynamics improve, jerks during acceleration disappear and the car becomes more comfortable.
- The engine starts faster and easier;
- The dynamics during acceleration are noticeably improved;
- Jerking disappears at low speeds;
Changes in engine torque and power do not affect fuel consumption. It remains the same as it was, or decreases insignificantly. Provided that your driving style has not changed.
Description of functions
A review of the Lada Vesta on-board computer shows which parameters are displayed on the display or front panel display. This makes the life of a Lada car enthusiast much easier. On Vesta, the standard on-board computer shows the following information, in addition to error codes:
- The magnitude of the vehicle network voltage;
- Cruising range on fuel in the gas tank;
- Current and average fuel consumption;
- Remaining fuel in the tank;
- Travel time along a specific route;
- Average speed;
- Watch;
- Total mileage;
- Controls the outside air temperature;
- Gives gear shift hints (with or without sound);
- On a Lada with cruise control, information about the installed parameters is displayed;
- If there is an AMT, the gear engaged or the auto - manual mode is displayed.
Contents of the Vesta operating manual
FOR YOUR ATTENTION!……………………………………………………… 5 Getting to know the car ………………………….. 8 Car keys ………………………… ………………….. 8 Remote control system ……………………….. 10 Electronic engine immobilizer system (immobilizer) …………………………………………… ………. 12 Locking and unlocking doors manually……………………. 13 Light signal switch…………………….. 16 Windshield wiper switch……………………………. 16 Pedal area…………………………………….. 17 SEATS…………………………………………………………………………………. 18 Front seats……………………………………………………… 18 Head restraints……………………………………………………… 19 Rear seats ………………………………………………………. 20 PASSIVE SAFETY SYSTEM………………….. 20 Seat belts………………………………………………………………. 21 Airbags…………………………………………… 24 Installing child restraints……………….. 29 Instrument panel………………………………… ……………. 32 Controls and instruments …………………………………. 33 Display and indicators ………………………………………………………….. 36 On-board computer ……………………………………………. 37 Steering wheel………………………………………………………. 39 Rear view mirrors…………………………………………… 40 Fuel tank……………………………………………………….. 41 Driving car……………………………………. 43 Basics of safe car operation…………… 43 Operating a new car…………………………… 44 2 Preparing the vehicle for movement…………………………….. 44 Starting the engine……… ………………………………………………………….. 45 Driving a car …………………………………………….. 49 Driving in winter …………… ………………………………………… 50 Driving in mountainous areas………………………………….. 51 Braking and parking………………………… …………………… 51 Parking brake …………………………………………….. 52 Correction and driving assistance system .. 52 Electronic stability control system ……… . 52 “Cruise Control” and “Speed Limiter” systems… 54 Safe Parking System……………………………….. 54 Features of operation and operation of the UPS…………………. 55 Rear view camera……………………………………………. 56 HEATING, VENTILATION AND AIR CONDITIONING. CONTROL OF THE CLIMATE SYSTEM.. 56 Climate system “Classic” without air conditioning … 59 Climate system “Comfort” (with air conditioning, with manual control) ……………………………………………………… 61 Climate system “Lux” » (with air conditioning, with automatic climate control) ……………………….. 64 INTERIOR LIGHTING ………………………………………………………. 68 In-vehicle emergency call system ………… 69 Socket for connecting additional electrical equipment ……………………………………………………… 71 Cigarette lighter……………… ………………………………………… 72 RADIO RECEIVER AND SOUND FILE PLAYER AND MULTIMEDIA NAVIGATION EQUIPMENT…………………………………………………… …………. 73 Brief description ……………………………………………………… 73 Multimedia navigation equipment ………… 74 CAR CARE ……………………………………………………… 76 VEHICLE SPECIFICATIONS……. 101 Hood ……………………………………………………………….. 76 Engine lubrication system ………………………………………………………. 76 GEARBOX ……………………………………………………………… 77 Manual transmission …………………………….. 77 Instructions for using an automated transmission (AMT) …………………………………………………………….. 77 Automated gearbox ……………………… 80 Gear shift lever for automated gearbox ……… …………………………………………….. 80 ENGINE COOLING SYSTEM ………………………. 81 BRAKE SYSTEM…………………………………………………………… 81 Fluid level in the windshield and rear windshield washer reservoir……………………………………………………… .. 82 Battery ……………………………………………………… 83 Replacing the remote control battery ………………………………………………………… …………. 84 Replacing lamps ……………………………………………………….. 84 Headlights ……………………………………………………………… ………….. 85 Rear lights ………………………………………………………. 85 Rear fog lamp …………………………….. 86 Side turn signal in the rear view mirror ….. 86 Additional brake light …………………………… 86 License plate light ……… ………………… 86 Fog lamp…………………………………………. 87 Vehicle identification plate…………………. 101 General technical characteristics of the vehicle………… 102 APPENDICES……………………………………………………….. 109 Appendix 1………………………………… ………………………. 109 Appendix 2………………………………………………………. 111 PRACTICAL TIPS……………………………………………………….. 93 Tires and wheels……………………………………………………….. 93 Replacing wheels …………………………………………………………. 94 Towing a vehicle……………………………………….. 95 Load securing net……………………………………………………….. 95 Towing device……… ……………………………… 96 Body……………………………………………………………………………….. 97 Car storage…………… ………………………………… 100
