Modern cars are equipped with different types of transmissions. It can be automatic with the well-known “donut torque converter”, continuously variable transmission, DSG (Audi concern), tiptronic and so on. But no matter how much gearboxes are improved, the classic “mechanics” is rightfully considered one of the most reliable. All domestically produced cars are equipped with this. The exception is the latest generations of Kalina and Vesta in top trim levels, where an automatic transmission is installed. The VAZ-2114, regardless of the year of manufacture and configuration, was always equipped with a manual transmission. Well, let's look at its design, operating principle and operating features.
Device
The design of the VAZ-2114 transmission assumes the presence of the following elements:
- Box gears.
- Shafts. There are several of them. These are primary, secondary and intermediate.
- Synchronizers.
- Reverse gear. It consists of an additional gear and shaft.
- Gear shift lever.
- Transmission housing.
- Drain and filler hole for oil.
- Dipstick and breather.
The gear shift pattern is located on the lever.
As you can see, everything is quite simple and clear. By the way, the first generations of Samara used 4-speed gearboxes. But now they are rarely seen. So, let's take a closer look at the design of the VAZ-2114 Samara-2 gearbox. All main transmission components are contained in the crankcase. It is securely attached to the car engine. It also contains oil. When the gears operate, the gearbox teeth become very hot. Without lubrication, their service life is significantly reduced. Therefore, the crankcase contains from two to four liters of oil, depending on the type of car. For the VAZ-2114 gearbox, it is recommended to use 3.3 liters of gear lubricant. So, let's continue to study the device. As for the shafts, during operation of the unit they rotate in bearings and have a set of five gears with different gear ratios. To ensure that each gear is engaged clearly and smoothly, synchronizers are provided. They smooth out the shock from rotating gears when turning on a certain speed. Gear shifting is performed by the gearshift lever connected to the rocker. It is fed directly into the box. Also in the design of the transmission there is a locking device that prevents spontaneous switching off of the gear and a locking mechanism. It prevents several speeds in the box from turning on at once.
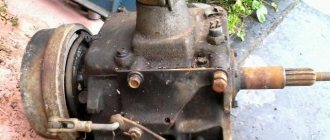
Dismantling
To dismantle the box, we recommend that you rely on the instructions, strictly follow the sequence and reinforce your skills with visual videos.
- Disconnect the negative terminal from the battery and drain the oil from the gearbox system.
- Unscrew the bolts that hold the crankcase guard in place and remove it.
- Disconnect the ground (wire) from the clutch housing.
- At the end of the clutch cable, loosen the tension on the nuts slightly.
- Remove the cable end from the clutch lever.
- Disconnect the block from the traction relay.
- Disconnect the wire going to the starter traction relay.
- Dismantle the starter itself directly.
- Disconnect the drive rod from the joint tip. We are talking about traction, which switches gears.
- Disconnect the cable from the car's speedometer drive.
- Unscrew the tie rod ball joint.
- Remove and press the steering rod hinge pin out of the strut swing arm.
- The shank of the inner CV joint of the front wheel drive should be pressed out and moved to the side.
- Disconnect the second CV joint.
- Remove the clutch housing shield.
- Release the gearbox from the fasteners holding it to the engine.
- Remove the box.
Carefully remove the gearbox
Be sure to move it horizontally away from the engine before directly removing the gearbox. Then disengage the input shaft. Be careful not to damage the clutch spring petals.
Gear operation algorithm
Thanks to these parts, torque is received and transmitted from the engine flywheel further to the wheels. Each gear has a different number of teeth and gear ratio. With each subsequent transmission it decreases.
Thus, the lower the gear ratio, the higher the wheel speed. In this case, the torque decreases. That is, the most high-torque gears can be called first and reverse gears.
Rear
As for the latter, its gear ratio is 3.53. Reverse speed ensures that the transmission shaft rotates in the opposite direction. To do this, it needs an additional shaft with a separate gear. As a result, the number of gear pairs changes to an odd number, and the torque changes its direction. Also, this transmission does not have a synchronizer - it will not be possible to turn it on at speed. The VAZ-2114 gearbox has a gear with an equal gear ratio, which is 0.941. This is fourth speed. Thus, the transmission output shaft rotates with the same force as the secondary one. That is, the angular speed of rotation of the two elements is the same. Motorists call it “straight”.
The gearshift lever and the rocker on the VAZ-2114 are rattling, what should I do?
As you know, the gearbox is the main, and most importantly, irreplaceable link between the engine and the wheels of the car, because it is only because of it that the nature of the torque changes.
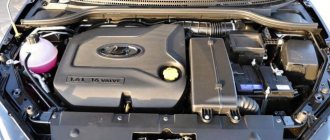
What gearbox is installed on the VAZ-2114?
Since the VAZ-2114 is equipped with a mechanical gearbox, the driver personally selects which gear to engage at what point in time (by changing the position of the driven gear relative to the driving gear - approx.), thereby ensuring the correct position of the lever in the cabin. However, during operation it happens that the handle begins to rattle, causing only discomfort to the car owner.
Below, in our article, we will look at the main causes of this problem, as well as ways to fix them.
Gearbox device
Diagram of the gear selection mechanism with decoding
First of all, before we undertake the repair or alteration of the gearshift knob, we need to learn more about its design (to figure out where the vibration comes from and how dangerous it is for the operation of the car as a whole - approx.), and also become familiar with its main elements.
It’s no secret that the VAZ-2114 is a front-wheel drive car, with front drive wheels; accordingly, the gearbox itself is perpendicular to the direction of movement of the car (this means that the “box” lever does not enter the cabin directly from its body, but through the rocker – approx.) . The same cannot be said about representatives of the “classic” AvtoVAZ family, where the rattling of the gearbox lever may indicate problems with the transmission itself.
Causes of gearbox bouncing
- The connection bushing is the wrong size.
- The handle gasket is missing.
- Inconsistency of parts that border each other.
All of the above problems can be caused by one small metal bushing that connects the rods under the lever. Therefore, the rattling of the handle may appear due to the appearance of a gap in it, or poor contact between two connections. All this leads to impacts of the bushing against the metal of the body, which contributes to the appearance of noise and rattling of the handle.
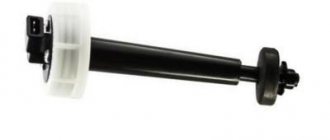
This is what the old bushing looks like.
On some VAZ-2114 models, such connections were wrapped with a rubber gasket to avoid such malfunctions.
Removing the gearshift lever
Before you begin dismantling the handle, you need to carefully examine the entire space next to it and understand how it comes apart. There is nothing complicated about this, the main thing is to follow our instructions exactly:
- If there are additional armrests and other elements installed independently, we dismantle them so as not to damage them during the work.
- Carefully remove the casing (plastic or leather - approx.) so as not to tear or break it.
Dismantling should be carried out carefully so as not to break anything. - Now that all the interior decoration is visible, let's move directly to the backstage.
To do this, using a key set to “13”, unscrew the nut securing the lever. If the lever does not budge, you can treat the surface with WD-40. - After this, you can dismantle the lever with the same bushing, and carry out work to eliminate rattling and vibration.
The old bushing is marked with a red marker.
Vibration Elimination Process
After you have the bushing with the lever in your hands, carefully inspect it visually for visible damage and signs of wear. Because if they are available, you may have to buy the same spare element, so that a little later you won’t have to do the work of dismantling, repairing and adjusting it.
The new bushing looks much better
The procedure for repair work with the bushing
- First of all, we dismantle the plastic cover on the bushing in such a way as to free its metal base.
Disassembled gear lever bushing - We inspect it for traces of friction, which will indicate a discrepancy in its size (when the bushing is several millimeters longer, usually 2-3 mm - approx.).
We went to the store and measured the new bushing there and compared it with ours! - If the above facts are confirmed, then this reason can be corrected by simply grinding off the excess by hand using a file.
- Next, we move on to repairing the lever itself, and if there is any damage, friction, etc. on its body, we simply wrap this area with ordinary electrical tape in order to fix it more tightly in place and provide it with the tightest contact.
conclusions
Thanks to such simple and simple procedures, vibrations and rattling of the gearbox lever can be eliminated in no more than half an hour of your time, and the result of the work performed will please you for a much longer time.
carfrance.ru
Gear Features
The highest torque of the car is at first speed. It is not difficult for the engine to rotate the wheels, but the speed of the car will not exceed 40 kilometers per hour. When such a speed is reached, the tachometer needle is usually in the red scale. Therefore, for further movement it is necessary to switch to a weaker but faster gear. Then to the third, quadruple and so on. All switching must be done sequentially. The engine power is not enough to confidently accelerate the car at 20 kilometers in 3rd gear. Unless, of course, it's a 5.0-liter V-8.
In our case, this is a VAZ 14th model, and for normal acceleration dynamics you need to sequentially switch speeds, reducing the gear ratio. The fastest is “fifth”. The load on the engine is minimal here, hence the low fuel consumption. If a car spends 11-13 liters in the city, then on the highway this figure will not exceed seven. But this transmission has one drawback. It has virtually no torque. It will take a long time for the engine to gain speed further. Therefore, when overtaking, it is better to use a “reduced” speed, in our case it is “straight”, fourth speed.
Signs of failure
All bearings, of which there are quite a few in a car, have approximately the same signs of failure. But since you know the location of the input shaft bearing, it will not be so difficult to determine that the problem arose with it.
There are several characteristic signs of its breakdown.
Read also: Mini Cooper fuses diagram
Sign
Peculiarities
Howling when the clutch is released in a parking lot
The element has failed and needs to be replaced. The howling is usually caused by the formation of chips, cracks, or the destruction of 1-2 rollers
Whistle when driving
The bearing is partially damaged or there is no lubrication. The problem in the absence of lubrication can only be determined by dismantling and visual inspection. To solve the problem, sometimes it is enough to simply lubricate the element and return it to its place
Clutch won't engage or disengage
Most likely the bearing is stuck. If the damage is serious, the input shaft may need to be replaced.
Knock in the area where the element is located
The bearing knocks only when the part is completely destroyed. If you do not replace it in time, the bearing will be welded to the shaft, so you will also have to replace the shaft itself
If you notice the first signs of a malfunction of the input shaft bearing on your gearbox, you should immediately check the condition of the element and, if necessary, replace it.
Operation, repair and maintenance
To avoid repairs to the VAZ-2114 gearbox, the manufacturer recommends regular oil changes. In general, most manual transmissions are maintenance-free. That is, the period for replacing the lubricant is the resource of the gearbox itself. But this applies to imported cars. Regarding “Samara”, we can say that for normal operation of the gears you need to change the oil in the gearbox. VAZ 2114 is no exception. The manufacturer allocates a period of 60 thousand kilometers. It is also recommended to change it after a long period of inactivity. For example, after “wintering” a car in a garage or on the street. Unlike motor oil, gear oil has a higher viscosity. For a VAZ-2114 car it is 80W-85.
If the oil is changed according to the regulations, this is reliable protection of the gearbox from repairs. But it also happens that the box starts to hum. In this case, the gears are changed. Due to wear, the gap between the teeth increases. There is a backlash during rotation, which is accompanied by a hum. It can be in one or several gears at once. After such repairs, the noise in the box disappears. By the way, some motorists use a thicker lubricant to eliminate hums. But it is worth remembering that this is only a temporary solution and will only delay transmission repairs for a short time.
Which wheel bearing to choose for replacement
The front wheel bearing is of both domestic and foreign production. As they say, there will be something to find for such a car. But it’s better not to buy Chinese spare parts to replace the front wheel bearing on a VAZ 2114. They are inexpensive, but hence the quality is not very good, and you won’t go far with them.
Which wheel bearing to choose for replacement
It is better to pay attention to imported spare parts, especially from Europe. Although they are more expensive, their quality speaks for itself. When purchasing, be careful not to confuse them with Chinese counterfeits, there are many of them now.
It is also worth looking at domestic manufacturers, such as those from Vologda or Samara. Excellent quality at a reasonable price. They also include instructions for installing the bearing, which makes the task even easier.
How to buy original bearings
In order to distinguish an original bearing from a fake, look at the box; it must have proper presentation. The rotation of the bearing is tight, but the fake bearing rotates very easily, no effort is required. The inner holder of the original has all the necessary numbers and inscriptions. But on fakes they are located both inside and outside. The differences between them are minimal, there may be a different brightness of color on the bearing, or a slight difference in shape.
- Wheel bolt wrench;
- Two jacks;
- Car stands;
- Power wrench;
- Thirteen two head;
- Wheel chocks;
- Open-end wrench for ten, seventeen (2 pieces), nineteen;
- Ratchet driver;
- Socket head for eight, thirteen, fifteen, seventeen, nineteen;
- Head with E12 profile;
- Extension;
- Phillips and slotted screwdrivers;
- Penetrating lubricant;
- Hammer;
- Extension;
- Oil collection container;
- Lithium grease.
- Place wheel chocks and loosen the wheel nuts on the right and left. Thirty-two head nuts.
- Loosen the wheel bolts, jack up and remove the front wheels. After removing the wheels, place stands under the sills and lower the car on them.
- Loosen the fastening nut and remove the negative terminal of the battery.
- Remove the air filter housing. To remove, unscrew the two bolts securing the front panel, disconnect the power connector for the mass air flow sensor and loosen the clamp securing the pipe to the body. Next, remove the pipe fitting to the filter housing and then lift the housing and disconnect the air intake pipe. After completing the procedures described above, the case no longer holds anything, remove it. The mounting bolts are for a thirteen head, and the clamp is for a Phillips screwdriver.
Apply penetrating lubricant, loosen the clutch cable to the box and remove it from the bracket. In order to loosen you need two seventeen keys.Remove the clutch cable from the fork and place it to the side.
Remove the small terminal from the starter and unscrew the nut securing the positive wire. Head nut for thirteen.
Unscrew the ignition coil bracket mounting bolt. Thirteen head bolt.
Unscrew the upper starter mounting nut. Fifteen head nut.
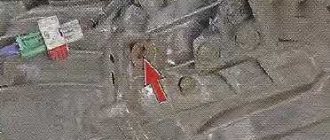
Unscrew the two upper bolts securing the box to the engine. Nineteen head bolts. The location of the first bolt is in the photo below, and the second bolt is located under the thermostat.
Changing the oil in a manual transmission
First you need to prepare the required amount of oil and an old container for “working off”. The standard volume for five-speed gearboxes is 3.3 liters. The oil change procedure is not difficult; you can do it yourself. It is poured through the dipstick. It is recommended to “warm up” the box first so that the oil becomes more liquid (especially in winter). We first clean the surface of the drain and filler (as a rule, this is a screw-on dipstick) from dirt. Then remove the rubber plug and use a wire to clean the hole itself. We substitute a container for old oil. It can be made from an unnecessary plastic canister by cutting out its side with a knife.
Next, unscrew the drain bolt and wait for the waste to drain.
Usually it is black. Then we tighten the plug, take out the dipstick and pour new oil through the hole. You need to pour until it flows out of the “hatch”. Then we tighten the neck, start the engine and check for leaks. There is no need to tighten the bolts too much, as the threads can be stripped later. If, after the oil change procedure, the gearbox lever does not stop “kicking” and the transmission hums, then a complete diagnosis of the transmission is necessary. Usually these are synchronizers or gears.
Preparing for removal
Preparatory work includes the removal of all parts that block access to the gearbox. You can begin removal when you have a board or other hanging equipment, a set of wrenches and sockets, different types of screwdrivers, and WD-40 lubricant at hand. It is also recommended to carry out work in a garage where there is a car pit. Now you can proceed to the analysis:
- It is necessary to remove the terminals from the battery and then remove it. The next step is to completely remove the working fluid from the gearbox and remove the starter. Some bolts may not budge, in which case WD-40 must be used;
- Now the VAZ 2114 needs to be placed on the pit and the crankcase protection, which is attached to the bottom with three fasteners, removed;
- There is a cable coming from the clutch fork - it should be disconnected from the fork and then removed from the gearbox bracket;
- Next, you need to hang the motor to gain access to the lower parts. After this, all wires must be disconnected from the speed sensor. A spring is used as fastening here.
How to extend service life?
To increase the life of the gearbox, it is necessary not only to change the oil regularly, but also to switch it correctly. Do not pull the gearshift lever - when moving from “first” to “second”, stick to short pauses.
This way you will preserve the synchronizers and reduce the stress on the gears. Regardless of what gear shift pattern you have, you don't need to keep your hand on the gearshift lever for a long time. Some people use it as an armrest. It is not right. We changed the speed and released our hand. This way you will delay the repair of the box and eliminate the occurrence of a hum when driving.
General symptoms
Symptoms are manifested by seven signs, which include:
- When you shift gears, a crunching sound appears;
- the sound of knocking in the box;
- oil leak;
- there is no speed fixation;
- tight lever movement during switching;
- The control room is buzzing;
- noise in the gearbox.
Each of the listed symptoms has its own etymology and an exact picture of its manifestation, which objectively characterizes the root cause of the malfunction.
Crunch in the gearbox
This type of repair requires disassembling the gearbox structure.
The main reasons, a sign of which is a crunching noise during gear shifting:
- faulty gearbox synchronizer (definitely requires replacement of the synchronizer);
- malfunction of the clutch basket (during operation of the vehicle, the “petals” may fly off). The violation is eliminated by replacing the part, and a new clutch disc is also installed;
- Damage to the clutch cable is classified as an indirect cause of gearbox malfunction, but if the cable breaks, the vehicle cannot move;
- factory defect of the gearbox shaft.
Knocking at the checkpoint
The sounds of gearbox tapping are ambiguous due to their multiplicity. Therefore, the picture of the malfunction is accurately established by diagnosing the vehicle.
The box starts knocking if:
- The oil level is not set correctly. An indirect indicator is the amount of oil being poured;
- the distance between the brakes and clutch packs is either too small or, conversely, too large;
- sagging appeared in one of the valves in the box;
- The solenoid has failed.
Oil leakage
If there is an oil leak, the repair task is facilitated by the ability to determine the location of the leak, but most often in practice this is impossible to determine.
Faults that cause oil leakage are the following:
- the seals are worn out;
- the shafts are worn out;
- there was a malfunction in the gearbox input shaft play;
- parts are depressurized: formation of cracks, microholes, etc.;
- The speedometer drive shaft seal is worn out.
Speeds are flying out
This kind of phenomenon occurs during gear shifting. The main reason for the appearance of such a malfunction is wear of the teeth on the gears and coupling. A factor contributing to the development of weakening speed control is a violation of the rules of gear shifting technique, which occurs when the speed limit is not observed. Replacing the gears of the specified parts eliminates the described problem.
The handle is tight
Factors under the influence of which the movement of the handle is difficult are damage to the locking teeth of the lever itself, wear of the jet thrust, and violation of the integrity of the gearbox drive parts.
The box is humming
This sound appears mainly during neutral transmission. The main reason is the low quality of lubricants. Therefore, the first action that must be performed when this type of technical problem occurs is to check and, if necessary, add oil. If the box continues to hum, then it is necessary to perform diagnostics, since the bearing on the input shaft may be worn out.
Noise in the CP
The box begins to make noise when the oil level is insufficient. This situation can be resolved by adding oil. If the noise does not stop, then it is caused by wear of the seals and mechanisms. This can be eliminated by installing new parts to replace worn ones.
Upon completion of the process of identifying the malfunction, its cause and source, as well as the factors influencing the occurrence of malfunction of the gearbox, it is necessary to become familiar with its structure and the structural features of the mechanism.