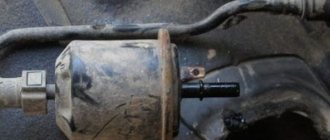
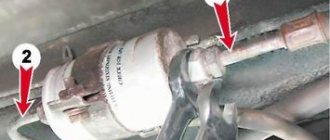
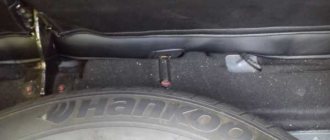
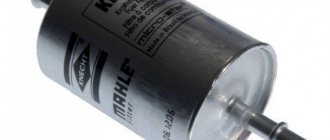
A car fuel filter is an important element that is used to clean gasoline or diesel fuel from foreign impurities and condensate, helping to extend the life of the engine and related systems. The filter on a Toyota Corolla requires replacement due to both natural wear and premature clogging, and it is important for the motorist not only to carry out the procedure itself correctly, but also to choose the appropriate spare part. This part has its own characteristics depending on the year of manufacture of the car and the type of body: for example, filters for Corolla 120 and 150 have a different design. Despite this, the replacement process does not differ significantly.
Return to contents
Toyota Corolla in the back of E120
To replace you will need the following:
- Phillips screwdriver
- flat screwdriver;
- clean cleaning material;
- 8 mm head with crank (optional);
- vacuum cleaner.
Detailed replacement instructions:
- Removing the rear seats. We lift the seats (without touching the backs) and, using a little force, remove their supports from the grooves of the body;
- Closer to the left side of the body is the fuel tank hatch. Carefully lift it up, using a flat-head screwdriver to help in a circle if you do not remove it manually;
- Under the hatch, by pressing the lock button, remove the power chip and put it aside;
- Remove dust or vacuum the area under the lid;
- Relieve pressure from the system. To do this, with the fuel pump chip turned off, start the engine and let it run until it stalls.
- Disconnect the return pipe. To do this, pull out the yellow bracket (if you can't pull it up and out the first time, you can spread the ends with a flathead screwdriver to make it easier to remove) and with a little force, pull it up and disconnect it. Wipe up spilled gasoline with a clean cloth.
- Disconnect the supply hose. To do this, press on the mounting brackets on the sides of the end of the tube and disconnect. Clean up spilled gasoline using a cleaner. It can be much greater than in the previous case if the pressure is not relieved;
- Using a Phillips screwdriver (or an 8mm socket with a handle), remove the 8 screws that secure the fuel pump cover;
- Remove the cylinder carefully so as not to damage the fuel level sensor float;
- Disconnect the fuel level sensor terminal;
- By pressing the clamps in a circle, disconnect the top of the case;
- Disconnect the fuel level sensor. To do this, press on it until the fasteners come out of the grooves.
- Disconnect the fuel pump connector (from the pump itself, not from the upper part of the housing);
- Similarly to the upper part of the housing, disconnect the lower part where the pump is located. We will not lose the lower bushing;
- We take out the fuel pump along with the seal;
- Remove the primary fuel filter. To do this, use a screwdriver to carefully pry the fixing cap at the point of attachment to the pump, then remove the filter;
- Disconnect the outlet return fitting (at the bottom of the body) and the o-ring with the valve (at the top);
- We take a new fuel pump and install all the elements on it in reverse order.
Replacing the main filter - follow the instructions
Replacing the fuel filter in a Toyota Corolla is a completely feasible task for every driver. Automotive stores generally only have an additional filter, which is located under the hood, so worry about ordering the main device in advance. There is no need to save money on your purchase and it is better to purchase only the original. It will serve you much longer than the Chinese fakes that are now saturated in the auto parts market.
Before replacing, you will need not only the part itself, but also additional tools: a pair of screwdrivers and sealant, as well as open-end wrenches to replace the second filter. The main fuel filter in a Toyota Corolla is located under the rear seat in the fuel tank. This type of filter is commonly called submersible. To replace it, you need to lift the rear seat, or even unscrew it for a while. Under the seat you will see a metal cover, the so-called hatch. Using a screwdriver, carefully pry it out, as it is attached to the sealant. When doing this, be careful not to damage the electrical wires.
Opening the lid, you will see a fuel pipe and a chip with wires. First of all, turn off the power supply. The next step is to disconnect the fuel pipe. There is an arrow on its plastic lock that indicates the direction in which you need to turn it - do this carefully so as not to break it. After disconnecting, gasoline may spill out, so use a cloth or bottle. To prevent gasoline from spilling, before starting all work, you must remove the pump fuse from the mounting block.
The engine must be turned on. You need to wait until it stalls. These actions will cause all the fuel in the tube to burn. Before removing the pump and filter, pay attention to its correct location in the tank - you will also need to put the new part back in the same way. Unscrew and remove the clamping ring, then carefully remove the pump with the filter - it is important not to damage or move the level float with the fuel grid.
The next step is to remove the part itself. To do this, turn the entire body over and carefully move a few rivets, then remove the cover. There will be a rubber gasket under the cover, which also needs to be removed. Then remove the metal corkscrew ring that holds the fuel grid in place. If possible, replace it with a new one or, at a minimum, rinse it well in water and let it dry.
Then disconnect the pressure regulator - this will be quite difficult, since it is located in the sealing rubber. After this, disconnect the fuel pump and o-rings. Now take a new filter and assemble everything in reverse order. Before assembly, you can lubricate all rubber sealing joints with oil, this will greatly simplify the assembly process. Clean the hatch cover from the old sealant and apply a new one. You will need to hold it under a load for 10-15 minutes for the sealant to harden.
Fire safety during work
When working with the power system, compliance with fire safety procedures is mandatory. The penetration of gasoline vapors begins a few seconds after removing the fuel tank cap. The mixture of air and fuel is very explosive, so there should be no open sources of fire nearby!
After removing the pump unit, when working somewhere on a table, the opening of the gas tank neck should be temporarily covered with a layer of dense material - a clean film or cloth. In this case, you should not close the car doors, as the interior will be ventilated through them. By the way, it is much better if the work on replacing the fuel filter is carried out outdoors.
Safety regulations
Gasoline vapors are a strong poison for the human body. Chemical poisoning may cause headache, weakness, nausea, and dizziness. In the long term, with constant contact with gasoline, it can act as a carcinogen. Gasoline is also explosive and flammable.
Therefore, the following safety rules must be observed when replacing the fuel pump:
- Do not work in a closed or poorly ventilated area;
- Eliminate any possibility of contact with open flames (do not smoke, do not illuminate the work area with fire);
- To minimize gasoline leaks, before disassembling the flask, drain all the gasoline that is possible into an airtight container;
- If a leak occurs, use cleaning material immediately. After use, to avoid the spread of toxic fumes, place in a sealable container;
- If signs of poisoning occur, immediately leave the work area and go into the open air. If the condition worsens, seek medical help.
When to change filters - expert recommendations
The fuel filter in a car is used to clean the fuel tank, which may contain various debris that has accumulated during refueling, as well as solid particles and impurities in the poor-quality fuel mixture. The operation of your engine, as well as its spark plugs, depends on the timely replacement of this part. Therefore, you should not save on purchasing high-quality spare parts - the cost of engine repair will be much higher.
If the main Toyota Corolla filter is connected to the fuel pump in the gas tank, then the additional filter is located under the hood of the car. The device is designed to completely filter various impurities that enter along with gasoline through the fuel lines. Car manufacturer Toyota Corolla recommends replacing the filter every 70–100 thousand km.
As practice shows, given the low quality of our fuel, it is better to do this once every 50 thousand km. Fuel filter contamination occurs gradually, and changes in vehicle performance will not be noticeable initially.
However, when the fuel filter ceases to perform its functions, it will inevitably begin to affect the performance of the car. It pulls poorly, does not start the first time, and accelerates poorly. This significantly increases fuel consumption. If the filter is not replaced in time, the fuel pump may fail. This happens because the fuel pump is constantly pumping the amount of fuel needed to run the car, and a clogged filter prevents this from happening.
When is it necessary to replace the fuel filter on a Toyota?
Modern gasoline and diesel engines place high demands on fuel purity. Two-stage and three-stage filters capture fine suspended matter and retain water, but their efficiency gradually decreases as they are used.
The results of clogging and untimely replacement of filter components are:
- Specific dips when gaining speed.
- Difficulty starting the engine in sub-zero temperatures.
- Premature wear of the associated parts of the fuel system, in the gaps between which there are mechanical particles.
- Water entering the power system, which can cause water hammer.
Replacing the filter in Toyota cars is carried out according to the regulations - when an indication appears on the dashboard or after 80 thousand km. This guarantees optimal fuel purification, engine and injection system protection throughout the entire service life.
Procedure
The procedure should be carried out in several stages. First, remove the negative terminal from the battery to de-energize the power system. Then provide access to the part: to do this, you need to remove the bottom trim under the left rear seat in the cabin, this allows you to open the tank cavity cover.
Removing the fuel pump cover
The cover must be removed. Since it is attached to the caulk, you will need to pry it off with a screwdriver. Before you start replacing the filter, you need to vacuum the points under the bottom liner and the container itself.
Next, you need to open the connector that powers the fuel pump. To relieve pressure in the fuel system, you must try to start the engine several times. Otherwise, when you try to disconnect the hoses, gasoline will spray out under pressure. Open the fuel tank. Disconnect the fuel supply and return pipes. To remove the return, you will need to use a screwdriver and use it to remove the stopper; easy to recognize, yellow in color. Then you need to unscrew the 8 screws with a Phillips screwdriver and remove the pump unit.
Remove the terminal and disconnect the pipes
The float is disconnected, for which it is necessary to move the latch, after which the upper part is detached: to do this, you need to press the clamps, which are placed in a circle. The fuel pump must be removed and then inserted into the new filter housing. The mesh must be washed and blown with air to remove dirt, then reassemble the structure in the reverse order, not forgetting to install new gaskets.
Old and new filters
These instructions are suitable for replacing the filter on a Toyota Corolla in the 120 body. If we are talking about modifications in the 150 body, then instead of a metal gas tank cap, you need to put a plastic ring on the neck, which is equipped with a rubber seal. To remove the block, you need to turn the ring counterclockwise, loosen the rubber insert, and disassemble the pump block. To unscrew the part, you can use a hammer; they need to strike accurately through the wooden pegs. The filter for cars in the 150 body has a slightly different design - it has a different intake network, and the fine filter comes separately.
Step-by-step steps for removing and replacing the filter element
- The Toyota Corolla 120 fuel filter is accessible from under the rear seat on the left side of the cabin. We remove the underbody trim under the rear seat on the left and gain access to the gas tank cavity cover.
Photo 1. Gas tank cavity hatch under the seat on the left.
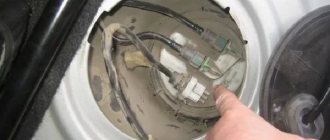
Photo 2. Open cavity above the gas tank. The cover of the Toyota Corolla fuel block with gas lines and an electrical connector is visible.
Photo 3 Disconnecting the direct gasoline supply and return hoses
Photo 4. Removed pump block. Below you can see the L-shaped mesh of the fuel intake filter.
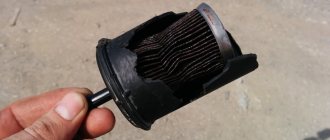
Photo 5. Sawn housing of an old fine fuel filter. Traces of severe contamination are visible.
If the replacement is done correctly and the rubber O-rings are not forgotten, the engine will start without problems and will work better than before.
In other Toyota Corolla models, for example with the 150 body of 2008, instead of a metal fuel block cap with screws, a large plastic ring with a rubber seal is screwed onto the tank neck. To remove the block, you need to turn the ring counterclockwise, loosening the seal, and then remove the entire pump block.
Photo 6. Another design of the pump block cover for models with access from the right side under the rear seat.
You can unscrew the ring lid by carefully hitting the ribs of the lid with a hammer through the wooden inserts. Upon further disassembly, something differs from the design of the Toyota Corolla with a 120 body until 2008. For example, the intake mesh looks a little different; a fine filter may be a separate part, but the rest is almost the same.
Selecting a filter for Corolla
Before replacing a part, it must be selected correctly. When purchasing, you should pay attention to the article number and compatibility of the filter with a specific modification of the car. The following original spare parts can be found on sale:
- For Toyota Corolla 180. Part number 23300-28040, also fits Corolla Verso. The cost is in the range of 1300-1700 rubles.
- For Corolla 180 and Avensis. Number - 77024-02320, the product is assembled with a pump and costs more - from 8500 to 9000 rubles.
- An original product with article number 77024-12050, suitable for most modifications of the Corolla. The cost is approximately 5400-5600 rubles.
- For a car with 120 rear, a coarse filter with number 23217-0D090 is suitable, price 400-600 rubles.
- Modifications with the same housing have an upper fuel injection pump housing cover with article number 77024-02040.
- For Toyota Corolla 150 part number is 77024-12030. Price approximately 4300-4500 rubles.
You can also buy high-quality Korean or Chinese analogues - the most popular are SAT ST-77024-05010, JS Asakashi FS21001, JAKOPARTS J1332100. Their cost varies from 500 to 1000 rubles, which allows you to save significantly.
When choosing spare parts for a car (including consumables), it is best to use the VIN number, so the likelihood of error can be reduced to almost zero.
Toyota Corolla fuel filter disassembled
Features of selection and replacement
On the auto parts market, the owner of a Corolla, both 2008 and newer, can be offered at least three types of filters: Chinese and Korean analogues and originals. Original products usually cost an order of magnitude more, but are of high quality and reliable. How much a Toyota owner is willing to pay for a new filter element depends on his budget.
After 2008, Toyota Corolla began to be equipped with fuel filters that can be replaced if clogged, regardless of the fuel pump, without the need to replace the entire module responsible for supplying fuel to the gas tank.
You should always be very careful with the selection process and buy the right Toyota Corolla fuel filter for your specific vehicle year and body type.
Replacement in cars produced in 2007–2008 with a 120 body
The average time during which the element effectively filters fuel on Corolla E120 cars is 50 thousand km. But it should be borne in mind that this parameter is designed for Japanese streets, the quality of which is much higher than domestic ones. Therefore, if you use a car in our country, the filter must be changed every time after 25-30 thousand kilometers.
In order for the replacement procedure to go quickly and without problems, you need to prepare the following set of tools and other necessary items:
- a new fuel filter, which will be installed to replace the old one (preferably original, although sometimes you come across well-functioning Chinese consumables);
- new O-rings (2 pcs);
- Phillips and flat screwdrivers;
- rags;
- tools for draining excess fuel.
First you need to remove the rear seats and remove the interior trim. Below is the fuel pump cover.
Using a flat screwdriver, carefully, being careful not to damage anything, you need to remove the fuel pump cover.
Next, disconnect the hose and use a Phillips screwdriver to unscrew the 8 bolts.
Once all this is done, you should start the car a couple of times and let it stop to drain any gasoline that may be in the system. Then you need to remove the battery terminals. After this, the pump itself is removed and inspected, and the condition of the mesh is assessed for rough cleaning.
it is necessary to disassemble the float and remove the coarse fine elements, which we replace with new ones.
After installing the new elements, reassemble in reverse order and reinstall the fuel pump.
Replacement in a car with a 150 body
To replace the fuel filter on a Toyota Corolla 150, you will need the same set of tools, as well as a new filter and o-ring. In this modification, the fuel pump cover is made of plastic and equipped with a rubber seal. To remove the fuel pump, you need to turn the ring counterclockwise and loosen the gasket. The further replacement process is the same as for the 120 body.
Our advantages
- Specialization only in Toyota cars
- Special equipment
- Original spare parts
- Direct acceptance
- Coordination of all additional work
- Opportunity to monitor the progress of work
- Friendly staff
- Enjoy your time at the dealership
- Special promotions and offers
Changing the fuel filter on a Toyota Corolla is quite difficult. You can make the replacement yourself, but you will have to tinker a lot.
DIY fuel filter replacement for Corolla 150
Although Japanese cars are famous for their technical reliability, replacing the fuel filter is also necessary for the legendary Toyota Corolla 150, since its service life depends on the quality of the fuel supplied to the engine. The design is installed in the gas tank and is a standard installation in cars.
The fuel filter is quite simple in design and includes the following elements:
- Coarse filter - protects the engine from excessive humidity and large foreign impurities in the fuel;
- Fine filter element: prevents elements invisible to the human eye from entering the engine;
- Gasoline pump;
- Fuel level sensor;
- Fuel line.
Any owner can independently replace the gas filter or replace the entire fuel module at once.
How often should the fuel filter be changed?
The manufacturer claims that it is recommended to replace this element every 80,000 kilometers under normal vehicle operation. Some Toyota owners delay replacement, almost twice the interval specified in the instructions, as a result of which they have to repair the engine much earlier. In addition, in difficult conditions, it is advisable to change the fuel filter more often, especially in regions with unstable fuel quality. Workshop and service station specialists recommend carrying out the procedure every 50,000 kilometers or more often. In addition, replacement may be required if foreign particles enter the fuel, which severely clog the mesh and contribute to accelerated wear.
Return to contents
Symptoms of clogging
It is quite difficult to detect obvious symptoms of a clogged filter element. This is due to the fact that the filter capacity gradually decreases. Therefore, its clogging can only be judged by indirect symptoms. The most common manifestations of the need to pay attention to the fuel filter are:
- the motor is unstable under load;
- the car's dynamics are gradually deteriorating;
- the power unit stops periodically, especially during intense acceleration;
- the engine does not start the first time;
- The sound of the fuel pump has changed, you can hear that it is working hard.
About changing the filter element on the 120th Toyota Corolla body
I would like to immediately warn you about strict adherence to fire safety rules when performing this operation. Before starting work you need to prepare:
- Empty container for remaining fuel.
- Rags or rags.
- New filter element.
- Seals.
- A flathead screwdriver and a Phillips screwdriver, as well as a vacuum cleaner.
To continue disassembly, you must lift the rear passenger seat of the vehicle and then remove the underbody cover. It is secured with two screws and a piston. To release them, you will need a 10" wrench and a screwdriver.
The mattress is raised on the seats and secured with seat belts so as not to interfere with further operations. Remove the layer of foam under the rug. After this, the fuel pump cover will become visible, which can be easily removed if you pry it off with something sharp. Do not begin replacement until the vacuum cleaner has removed all accumulated debris.
The pipes are removed from the fuel pump and the remaining gasoline is poured into an empty container. You must then start the Toyota Corolla engine to completely exhaust the fuel in the fuel system. After stopping the engine, turn it several times with the starter and remove the terminals from the battery.
After this, you can begin to remove the unit with the pump. You will need a Phillips screwdriver and an 8" wrench, as well as rags or rags for pouring gasoline. After removing the unit with the pump, you can begin to disassemble the filter element.
It is necessary to release two latches on the body and several latches. Thus, it can be easily removed from the housing without much effort. Remove the old one and insert a new fine cleaning element into the fuel pump housing. At the final stage, the fuel intake grid is washed and purged, and assembly is carried out in the reverse order.
Required Tools
In order to successfully replace the fuel filter on your Corolla 120, you will need the tools from the table below. Table - Tools required to replace the fuel filter.
| List of tools | Note |
| Screwdriver | With flat and cross blades |
| Vacuum cleaner | To clean dirt |
| Capacity | To drain remaining fuel |
| Pliers | Can be replaced with pliers |
| Technical hair dryer | Required for vehicles in which the service hatch is secured with bitumen |
| Brush | To reduce the risk of contaminants and foreign particles entering the gas tank |
[custom_ads_shortcode3]
Replacing the TF in the 150th body
Replacing the fuel filter on a 2008 Toyota Corolla (or any other) in the 150 body has some differences from a similar procedure on the 120 body. When replacing, make sure the O-rings are in the correct position as they maintain pressure in the fuel system. Since 2010, a safety system has been used, the essence of which is that the fuel pump operates only when the crankshaft rotates. If there is no residual pressure in the system, the starter must crank the engine much longer until the pump creates pressure in the fuel line.
Preparation
Since the design of the modules is similar, there are no special requirements for tools and workplace equipment. You will need the same tools and materials as when replacing the filter on 120 body cars.
Stages of work
When replacing the filter on the 150th case, a number of points should be taken into account:
- The fuel module is attached to the tank with a plastic threaded ring with a rubber seal. The ring rotates counterclockwise. To remove the ring, you can use a wooden rod, which is attached to the edges of the ring with one end and lightly struck with a hammer at the other. The second option is to use gas wrenches that attach the ring to the ribs.
- The module has additional fuel lines for ventilation of the tank cavity. Disconnecting the hoses is similar.
- The module has two seals. Rubber O-ring 90301-08020 is located on the fuel pump where it is installed in the filter housing. The second ring 90301-04013 is smaller and fits into the check valve fitting at the bottom of the filter.
- When reinstalling, carefully install the nut spacer. Before screwing the nut back on, first install it by aligning the marks on the nut and the housing (next to the fuel line to the engine) and then tighten it.
The main points of the process are explained in photographs.
Module cover with sealant
Tubes on the module cover, in the red ring - fuel supply tube to the engine
Module removed
The coarse filter is clogged
New filter
The filter is washed
Replacing the fuel system filter on Corolla 120, 150
A car fuel filter is an important element that is used to clean gasoline or diesel fuel from foreign impurities and condensate, helping to extend the life of the engine and related systems. The filter on a Toyota Corolla requires replacement due to both natural wear and premature clogging, and it is important for the motorist not only to carry out the procedure itself correctly, but also to choose the appropriate spare part. This part has its own characteristics depending on the year of manufacture of the car and the type of body: for example, filters for Corolla 120 and 150 have a different design. Despite this, the replacement process does not differ significantly.
Consequences of untimely replacement
Neglecting to replace the fuel filter can result in various damage to fuel system elements, which will require expensive repairs. If the filter is slightly dirty, the fuel supply at high speeds deteriorates, which is reflected in a decrease in the overall dynamics of the Toyota Corolla and an increase in fuel consumption. Increased fuel consumption causes overheating and failure of the catalytic converter.
Dirt particles can get into the fuel lines and injectors and inject fuel into the cylinders. Cleaning clogged injectors is a rather expensive procedure, and it does not always help. If the injectors are damaged or severely clogged, they must be replaced.
Choosing a filter on Corolla
Before replacing, you need to carefully select a new filter. Please pay attention to the part number and compatibility with your vehicle. The auto parts market offers the following options:
- for Corolla 180 body part number 23300-2040. Price - one thousand five hundred rubles;
- for Corolla in the 180 body and the Avensis model - 77024-02320, price - from 8 to 9 thousand rubles, since the filter is supplied complete with a pump;
- the original Toyota 77024-12050 is compatible with most modern Corollas and costs 5,500 rubles;
- for body 120, a part with article number 23217-0D090 is suitable, for which you will have to pay 500 rubles;
- fuel filter for Toyota Corolla version 150, body number 77024-12030, priced at RUB 4,500.
Sources
- https://SmotriAvto.ru/obsluzhivanie-i-remont/toyota/zamena-toplivnogo-filtra-korolla.html
- https://CreativAuto.ru/avtoservis/toplivnyj-filtr-toyota-corolla-e150.html
- https://r-min.ru/toplivnyy-filtr-toyota-korolla-pravila-vybora-i/
- https://toyota-camry-corolla.ru/corolla/corolla-150/zamena-svoimi-rukami-toplivnogo-filtra-korolla-150/
- https://mazda22.ru/servis/toplivnyj-filtr-tojota-korolla-2014.html
- https://AvtoStandart-m24.ru/avtomobili-drugoe/toplivnyj-filtr-tojota-korolla-150.html
- https://auto-metal.ru/stati/zamena-toplivnogo-fil-tra-toyoty-korolly-120-i-150.html
- https://overs-energy.ru/menyaem-toplivnyy-filtr-toyota-korolla-150-kuzov/
- https://avtonomnaya-gazifikaciya.ru/dvigatel/toplivnyj-filtr-korolla-150.html
- https://zapchasti.expert/toyota/corolla-150/toplivnyj-filtr-toyota-corolla-150.html
- https://auto-nix.ru/diagnostika/provodim-zamenu-toplivnogo-filtra-v-toyota-corolla-poshagovaya-instruktsiya.html
- https://gk-glass.ru/zamena-toplivnogo-fil-tra-toyota-korolla-ye150-svoimi-rukami/
Replacing fuel filters at an authorized service center
- Replacement of fuel filters during scheduled maintenance in accordance with the interval and as part of preventive maintenance.
- Installation of original components recommended by the manufacturer for specific engines.
- Professional approach of trained personnel and accurate diagnosis of faults.
With the new filtration system, cavitation effects, mechanical damage, corrosion, fuel system and engine failures will be a thing of the past.
Send an application and leave your contacts.

