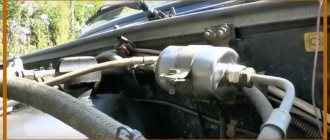
Timely maintenance of your car is the key to its long service life. Regular changes of fluids and oils, consumables and worn parts reduce the risk of sudden breakdowns on the road. Changing the fuel system filter element is a mandatory procedure on any car. Timely replacement of the fuel filter on a VAZ 2114 can reduce fuel consumption, increase the “responsiveness” of the gas pedal and give the engine a more even tone of operation.
Useful video:
Signs of a clogged fuel filter
Rarely changing the filter element and low quality fuel leads to its rapid clogging. Dirt from the tank and deposits from the fuel line reduce the throughput of the purifier. When it is contaminated, the following symptoms are observed:
- Reduced engine power. Noticeably reduced acceleration characteristics indicate problems with the gasoline supply;
- An increase in flow rate, as a result of the above reason, is also a common sign of a clogged filter;
- Problems with starting the engine (regardless of temperature);
- When going uphill, the car begins to twitch;
- At idle, the engine “tweaks” is observed.
Useful : Where is the fuel pump relay for VAZ 2114?
The above points seriously affect the normal use of the machine. For drivers of domestic cars, replacing consumables on their own is commonplace. Instructions on how to change the fuel filter on a VAZ 2114 will help young car owners.
Symptoms of a problem
You can safely assume that the fuel filter is dirty if the following signs of malfunction appear on your car:
- The car's former dynamics have disappeared;
- The engine does not develop high speeds;
- The engine takes a long time to start, you have to turn the starter for a long time;
- When overcoming hills on the road, the car moves jerkily;
- The engine stops when the gas pedal is suddenly opened;
All these symptoms directly indicate that the filter is dirty, and if you find these problems in your car, you first need to replace the fuel filter.
Frequency of replacing the fuel filter
On modern car models, engines are very picky about the quality of gasoline entering the combustion chamber. In the case of domestic cars, this problem is less relevant. However, for the most correct operation of the motor, all consumables should be replaced regularly.
The oil and air filters should be changed at every oil change, approximately once every 8-10 thousand kilometers. The fuel and cabin filter elements last a little longer - about 15-20 thousand kilometers.
Depending on the conditions and frequency of operation of the car, the frequency of replacement of the listed consumables may differ from those given. Specifically for the 2114 model, all replacement parts do not cost a lot of money, so they can be replaced as part of each maintenance.
Reasons for replacing the fuel pump mesh
The main reason is low-quality gasoline or additives that are added to it for various purposes: from “flushing the injector” to increasing the octane number. In hot summer weather, these substances crystallize on the mesh, clogging it.
Signs of mesh contamination:
- idle speed fluctuates;
- The car periodically stalls when the gas pedal is suddenly released;
- jerks when driving, poor throttle response - the car is “stupid”, accelerates slowly, especially noticeable when driving outside the city;
- when you sharply press the accelerator, the engine “chokes”, does not operate above medium or low speeds, and it is impossible to gain speed;
- poorly or does not start at all, but “grabs” (the last stage of the “disease”).
Failures do not appear all at once, but develop gradually or occur suddenly after normal parking.
Where is the fuel filter located?
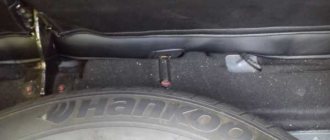
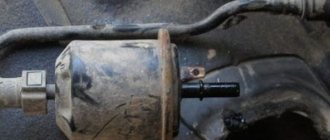
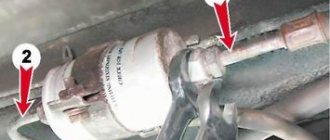
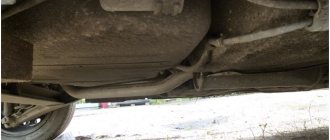
The filter mount is located directly under the gas tank on the bottom of the car. Upon inspection, it is difficult not to notice the housing with the filter part. It is clear that if there is a hole or a lift, it is more convenient to determine its location, but you can also get to it with a jack. To understand where the required node is located, see the photo below.
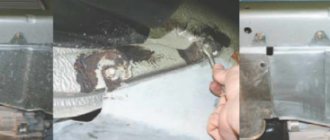
Tubes fit to the desired part on both sides. The body itself is secured with a metal rim, which turns sour over time. Before carrying out work, treat the fastening nuts with WD-40 or other chemicals. A quick replacement of the fuel filter on a VAZ 2114 is possible if there is a hole. If there is no hole, you will have to use a jack.
Price issue
The cost of a filter is influenced by its quality and the manufacturer’s pricing policy. Here, decide for yourself - pay more for a well-known brand, or buy a mid-price device, but from an unknown company.
If you frankly doubt the quality of the product, it is strongly not recommended to purchase it.
A filter for VAZ 2114 is not an expensive pleasure. The average price ranges from 150 to 600 rubles. As practice shows, you can find an excellent filter for 400-500 rubles. This is the optimal price.
Fuel filter direction
The only moment during work that can cause difficulties is the wrong choice of direction. On each body of this consumable, an arrow indicates the direction of installation. This arrow should point to the rear right wheel .
If you do not follow the correct direction of the fuel filter, you will reduce the efficiency of cleaning the gasoline entering the engine.
How to change a fuel pump
- We open the back seat, getting to the gas tank flap.
- Open the hatch and clean the surface from dirt.
- Disconnect the tubes and wires from the bulb.
- Unscrew and pull out the fuel flask.
- We disassemble it on the table, changing the fuel pump
- Let's put everything back together.
Further in our photo report there are more detailed instructions.
The fuel pump on this vehicle is located in the tank. To replace it, we will crawl under the back seat.
To recline the seat, you need to pull the part of the seat that is located on the side of the seat back.
The hatch for access to the fuel tank is located in the direction of the arrow. There are cuts in the silencer for free access to the tank.
We move the silencer aside and use a screwdriver to unscrew the two screws securing the gas tank flap cover.
Now we need to remove all the dirt around the fuel flask. We used air from the compressor and blew it out under low pressure, trying not to create dust in the car interior.
Now we can disconnect the fuel pipes and electrical connector. The tubes are removed by pressing on the plastic clips on the sides.
Unscrew the eight nuts securing the fuel flask.
We take the wires and tubes aside and pull out the fuel flask. It is necessary to prepare a cut canister or other similar container in advance, since the fuel flask will be filled with gasoline.
Now on the table we begin to disassemble the fuel flask and replace the fuel pump. First of all, use a screwdriver to pry up and remove the retaining ring shown in the photo.
We simultaneously press the three latches shown in the photo. and pull the top of the flask trying to disconnect it.
Disconnect all wires and electrical connectors shown in the photo. and pull out the inner part in which the fuel pump is located.
Now that the flask is disconnected we have access to the pump. Use a screwdriver to pry up and disconnect the coarse filter.
We bend the two fuel pump clamps with our hands and pull them out of the plastic.
To replace the pump, we need to disconnect the hose indicated by the arrow. To make removing the hose easier, you can use a hairdryer, heat the hose, softening it, and then use a screwdriver to pry and remove the hose.
Compare the removed pump with the new one.
We put the hose on the pump and secure it with a regular clamp. For better crimping of the clamp, we also recommend using a hair dryer.
We put a plastic casing and filter on the new pump.
Before reassembling, it is necessary to clean the housing from dirt, wash it with gasoline and blow out all debris with air.
We assemble the flask in the reverse order of disassembly.
Don't forget to reinstall the retaining ring.
We lower the assembled fuel flask into the tank.
In order not to confuse the correct position for installation, there is a special flag on the body of the flask that must fall into place.
We install the pressure plate and tighten all the fastening nuts, not forgetting to connect the ground wires.
Reconnect the tubes and connector.
Close the hatch and lower the seat.
Necessary tools and spare parts
Work on replacing consumables yourself should begin with preparing the tool. For this simple procedure you will need the following:
- A set of keys (keys for 10, 17 and 19 will be useful);
- A rag for the remaining gasoline in the pipes;
- Containers for collecting gasoline and dirt from the old building;
- Jack (if there is no hole or lift);
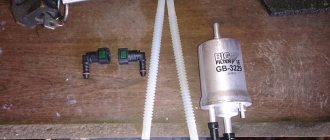
- New filter
In addition to ensuring that the housing is positioned correctly, the rubber O-rings should be replaced. They come in a package with a new replacement element. Instructions on how to change the fuel filter on a VAZ 2114 are presented below.
Replacing the fuel pump mesh on VAZ 2113, VAZ 2114, VAZ 2115
Welcome! The fuel pump mesh - it acts as a filter as such, that is, when the fuel in the gas tank is pumped into the car engine, it first passes through this very mesh, which in turn is the fuel, or, more simply, cleans the gasoline from dirt and small specks that are very harmful will affect if it gets into the car engine, but this mesh needs to be changed from time to time, because when it is clogged, fuel does not pump into the engine as it should, that is, it passes very poorly through the clogged mesh and therefore the car drives jerkily and sometimes even doesn't start well.
Note! To replace the mesh that is located in the fuel pump, you will need to stock up on: A basic set of wrenches, as well as screwdrivers; for convenience, you can also stock up on a tubular wrench and gasoline, but you only need to stock up on them if you are not going to replace the fuel pump mesh , but just rinse and put the old one in its place!
Summary:
What causes the fuel pump screen to become clogged? One of the main reasons is the poor quality of the fuel poured into the car, because if you have already read the text that was written earlier (Above), then you understood from it that the mesh serves to clean gasoline from various contaminants and thus it is, as it were, serves as a filter, which, if clogged, will need to be replaced with a new one, but this filter, that is, the mesh is clogged only from one thing, from low-quality fuel in which there are particles of debris, various kinds of deposits, etc. This is why this mesh gets clogged. Where is the fuel pump screen located? It is located right in it, that is, it is located at the bottom of the pump, so that you can see it in more detail, then in this case, remove this pump from the car and look at its very bottom part, this is where this mesh will be installed on it, For more details, see the photo below:
When do you need to change the fuel pump grid? It needs to be replaced if your car starts to run worse, it starts to drive in some jerks, and especially if the grid is clogged, if you immediately get into the car and start it right away, then most likely it will not start at all, because the grid is clogged and the fuel it goes through it very poorly.
Note! In fact, if you immediately turn the key and start the car without waiting for the gas pump to pump gasoline, it will be very incorrect, and even most likely the pump with a new mesh may not start the car the first time either!
Replacement process
The step-by-step replacement process looks like this:
- Relieve pressure in the fuel system to prevent high pressure of gasoline when removing the hoses. Remove the fuel pump hatch under the rear seat and disconnect the connector with the wires.
- After removing the chip, start the engine and wait for it to stall on its own. This will mean that the remaining gasoline in the system has run out, return the chip to its place and close the hatch. You can also turn off the fuel pump using its fuse by simply removing it from the contacts.
- Proceed to remove the fastener. Using wrenches 17 and 19, unscrew the nuts on both sides. On more recent VAZ 2114 cars, instead of threaded connections, plastic latches are used, on which the latches need to be snapped off.
- Move the unscrewed tubes on both sides and loosen the fastening of the metal rim with a 10mm wrench.
- Remove the old housing.
- Install in reverse order. Don't forget to change the O-rings.
- After tightening all the fastening nuts, turn on the ignition several times. As soon as the fuel pump pumps fuel throughout the system, start the engine. Check for leaks.
Since it can be difficult to remove the fuel filter due to souring of the nuts, use two wrenches at once when unscrewing.
Installing a new element
Before installing a new filter, it is recommended to immediately replace the o-rings that are located on the gas pipes. If there are drops of gasoline on the filter, be sure to wipe them off. By not doing this, you yourself will cause a decrease in the service life of the new element.
Installation of the filter element is carried out in the reverse order of its removal. But here the direction of this element plays an important role.
Filter direction
Look at the body. It has an arrow that indicates the direction of fuel movement through the system. If you have a version with a 1.5 liter engine, then the arrow should point from starboard to left. If it is a VAZ 2114 with a 1.6-liter power unit, the fine fuel filter of the VAZ 2114 injection engine is directed from left to right.
After installing the element, wait a little. This is necessary so that the filter is filled with gasoline and all excess air comes out of it. You can even leave the car overnight and then come back with renewed vigor and finish the job. As you prefer.
When the filter is filled with fuel, check the quality of the connections and their tightness. To do this, start the engine for just a few seconds. If after this you notice gasoline leaks, then try to fit the pipes onto the filter more tightly. As a rule, there are no other reasons for leaks other than the defective part itself.
Which filter should you choose?
The best advice when choosing a new filter element is to buy original spare parts from trusted companies. Consider two options to choose from:
- Filters from Avtovaz. Average quality is justified by a good price. If you frequently replace parts, you can safely buy consumables from this manufacturer. Price: 180-250 rubles.
- An almost identical quality option from SCT. Cost: from 200 rubles or more. Made in Germany.
In the case of fuel purification, the spare parts manufacturer does not decide, because The main point is how long it takes to change the fuel filter (every 15-20 thousand kilometers).
How to replace the fuel pump mesh, also known as the fuel pump, on a VAZ 2113-VAZ 2115
How to change the fuel pump grid on a VAZ 2114.
For now, let’s start with a few words about this mesh, practically you don’t have to replace it with a new one, you can first remove it and later wash it in gasoline; some dirt from such washing will lag behind the mesh and disappear, but still not all the dirt will disappear, so the leading option will obviously be Replacement of this mesh for the newest one, besides, it costs only around 50-130 rubles.
As annoying as this may sound, if you find yourself in a situation where your grid is very clogged and the car is moving jerkily, and you don’t have this grid next to it, then although there is an option to remove the clogged grid and wash it in gasoline and finally It is best to blow it out with compressed air under pressure, for example a compressor, pump, etc.
Removal: 1) First of all, remove the fuel pump itself from the car. (For information on how to remove the fuel pump, see the text of the article: “Replacing the fuel pump on a VAZ”)
2) Then, when you remove the pump, take it in your hands, in other words, continue to hold it in your hand (Based on the situation), and then turn the pump over so that one of its parts is directed to the top, so that the mesh is in your field of vision, and then grab this mesh with your hand and simply pull it up, then it will move away and disengage, then it will be removed from the fuel pump.
Installation: The new mesh is installed in the same way as it is removed, but only in the reverse order, then you take the new mesh in your hands and simply put it on where the old mesh stood, as annoying as it may sound, just put it on until a proper installation is completed it will not go in one hundred percent, it will not stick, and when it is put on, check whether it fits perfectly on the fuel pump or whether it is wobbly, and after checking, install the fuel pump in its place.
