If the ignition is adjusted incorrectly, detonation may occur during operation of the power unit. And this, in turn, can lead to a major overhaul of the engine itself.
It’s interesting that in practice, many drivers have their own opinion on how to set the ignition on a VAZ 2106. Some use what is called “by eye,” while others purchase a strobe light for this purpose. Some people don’t try to do it themselves and entrust this work to car service specialists.
To set up the ignition on a VAZ 2106 car with your own hands, use the instructions below.
Preliminary preparation
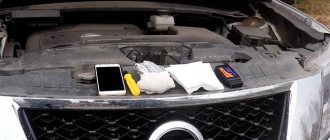
You need to take with you to the garage:
- candle key;
- key to 13;
- a voltmeter or an ordinary twelve-volt light bulb.
Contact ignition is installed on the first cylinder.
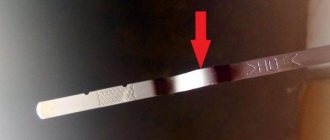
Set the ignition timing using marks of different lengths that are placed on the timing cover.
Distributor function in the ignition system of a carburetor car
1. The engine does not start: - there is no gap or too large a gap between the contacts of the breaker; - burnt and dirty contacts; - the capacitor is out of order; - the interference suppression resistance of the “slider” is burned out; - the distributor cover is “broken”; - the low voltage wire is broken or its terminals are oxidized;
- Hall sensor burnt out (non-contact ignition). 2. The engine “shakes” at idle: - the gap between the contacts is not normal; - ignition is too “early”. 3. The engine “jerks” at high speeds: - the gap between the breaker contacts is too large; - the spring of the breaker movable contact has weakened;
- the springs of the centrifugal regulator have weakened.4. “Jerking”, interruptions in all engine modes: - damaged high-voltage wires, oxidized or loose in the sockets; - dirty, oily, burnt contacts of the breaker; - worn or broken corner of the moving contact in the distributor cover;
- cracks and burns in the “runner” and the distributor cover; - the capacitor is “half-broken” and needs to be replaced; - the bushings are worn out and the distributor shaft is “playing”; - the switch of the contactless ignition system is faulty.5. The car accelerates slowly, consumes a lot of fuel: - the ignition timing is set incorrectly.
The full name of this device “ignition switch-distributor” reveals part of its “responsibilities” - at a strictly defined time to break the low-voltage circuit of the ignition coil and distribute the resulting high-voltage energy, in a given order (1-3-4-2), among the cylinders .
The ignition breaker on the VAZ 2107 may need repair as a result of mechanical damage, wear of structural elements, and also due to moisture getting inside the device.
Distributor repair occurs when:
- the appearance of cracks and other damage on the cover of the device, usually the contacts burn out in this part of the structure;
- breakage of the runner;
- failure of the Hall sensor;
- wear of shaft bearing parts;
- broken contact of the regulator;
- broken diaphragm of the vacuum regulator.
If we are talking about a contact structure, then the capacitor in it can also fail.
As for the symptoms of node failure, they are as follows:
- the power unit is unable to develop power;
- the engine begins to triple, one or more cylinders may not function;
- the operation of the power unit is accompanied by popping sounds in the exhaust pipe or carburetor;
- when the driver presses the gas pedal during acceleration, detonation may be heard;
- the motor does not start.
Device malfunctions
Replacement and repair of the distributor on the domestic “six” is carried out in the event of incorrect operation of the mechanism.
We recommend: Do-it-yourself tow bar installation
Below are the main symptoms of breakdowns that indicate possible malfunctions:
- The vehicle jerks while driving. Moreover, these jerks are completely uncharacteristic of a car.
- The engine generally does not start.
- When trying to accelerate the car, the car may also jerk, and the acceleration process itself takes a lot of time, and the engine may detonate - the piston rings knock.
- Increased fuel consumption.
As you can see, in general the symptoms are similar to those that appear when the ignition is set incorrectly. Of course, if such symptoms appear, it cannot be said for sure that the fault lies in the distributor, but attention should also be paid to diagnosing this unit.
As for the breakdowns that may force the car owner to repair or replace the mechanism, they are as follows:
- The unit slider is worn out and burnt out.
- The problem lies in the cover itself - the contacts on it could have burned out.
- Hall sensor failure. The problem may be associated not only with a breakdown of the controller, but also with poor contact on the regulator plug.
- Another reason that domestic drivers encounter quite often is the distributor bearing. After a long period of use, it could become loose, but it could also simply jam.
- Presence of mechanical damage, including cracks on the cover.
- Engine fluid gets into the distribution unit; usually the problem is related to the seal of the cap.
Contactless ignition system
The ignition system (IS) serves to create a pulse voltage and timely ignite the combustible mixture in the combustion chambers of the power unit. It is the main part of the vehicle's energy supply system.
The evolution of the “seven” ignition began with a contact-type mechanism. Its feature was the process of generating an electrical impulse using a group of contacts located in the distributor. The constant mechanical and electrical loads to which the contacts in such a system were subjected led to the fact that car owners very often had to clean them, change them and adjust the gap between them.
In the early 90s of the last century, the “seven” received contactless ignition. It made the life of the owners of these cars much easier, because in its design there were no longer any burning contacts that required constant adjustment. They were replaced by an electronic switch that does not require any maintenance.
The design of the contactless ignition system and the principle of its operation
The contactless ignition system (BSI) of the VAZ 2107 includes:
- electronic (transistor) switch;
- transformer coil (two-winding);
- distributor (distributor) with Hall sensor, contact cover and slider;
- set of high-voltage wires;
- candles.
Each of these elements is a separate part and performs its functions independently of other components. Sparking in a VAZ 2107 engine with a non-contact ignition system occurs according to the following algorithm:
- When voltage is applied to the starter, its rotor begins to rotate the crankshaft, which, in turn, rotates the distributor shaft with the slider.
- The Hall sensor reacts to this rotation, registers the rotation of the distributor shaft and transmits a signal to the switch. The latter, having received a signal from the sensor, turns off the current supplied to the primary (low-voltage) winding of the coil.
- At the moment the current is turned off, a powerful voltage pulse occurs in the secondary winding of the transformer, which is transmitted through the central wire to the slider (moving contact) located at the end of the distributor shaft.
- The slider, moving in a circle, alternately comes into contact with four fixed contacts located in the distributor cover. At certain moments, it transfers tension to each of them.
- From the stationary contact, current flows through a high-voltage wire to the spark plug, causing sparking at its electrodes.
In a contactless ignition system, the role of a breaker is performed by a Hall sensor and a switch
Installation Tools
For all work carried out we will need:
- key to 38;
- open-end or socket wrench 13;
- a 12 V control light with two wires attached to it (each wire is approximately 20 cm long).
DETAILS: Photo report on replacing the cabin filter in Opel Corsa C. Instructions on how to change the cabin filter in Corsa
How to work with tags correctly
There are three marks on the engine block next to the crankshaft pulley, each with its own length. You can feel these marks from the driver's side, but only strictly with the engine not running, since the pulley rotates at high speed when the engine is running! The shortest of them will mean that the ignition is advanced by 10 degrees or 10 degrees to the top dead center of the piston in the cylinder, the middle mark by 5 degrees and short - 0 degrees.
Step-by-step description with photos and diagrams
- If during the work you accidentally messed up the ignition setting, then do not rush to remove the valve covers to understand when the compression stroke begins. Do the following: remove the spark plug in the first cylinder and plug the hole with a small, tight plug made from a rag soaked in water. Having made sure that no one is standing nearby and will not be harmed by the impromptu plug flying out, in short series we turn the crankshaft with the starter for literally a split second, turning the starter on and off, and at the moment when the plug flies out with a characteristic sound from the spark plug hole, we stop turning the starter.
- Now, turning the crankshaft a little at a time by the pulley nut with a 38 wrench, we ensure that the marks on the pulley and the cylinder block coincide with the middle mark, which means 5 degrees.
- We unhook the latches from the distributor cover and look at the direction of the slider: when it is positioned as in the photo, then half the job is already done. If not, then use an open-end wrench or a 13-socket wrench to unscrew the nut, remove the distributor and put everything back in the required position.
Required position of the distributor and slider relative to the cylinder block - We make a mark with a marker on the cylinder block to further optimize the ignition settings.
For ease of ignition settings - Now we connect our light bulb with one wire to the positive terminal of the ignition coil, and the second wire to ground. We remove the central wire of the coil from the distributor cover and fix it at a distance of approximately 1-5 mm from ground. This is done in order to prevent breakdown of the ignition coil to ground.
- Having turned on the ignition, slowly turn the ignition distributor housing (distributor) in the direction of movement clockwise and watch when the light goes out. If it didn’t burn, then we leave everything as is.
- Slowly rotate the distributor housing in the opposite direction, until the light comes on and use a 13 key to secure the housing.
- Turn off the ignition, return the distributor cap and the central wire to their place. Unhook the wires of the control lamp.
Video about setting up a VAZ 2107 (carburetor)
How to ensure that the installation and ignition setup procedure is completed correctly
Despite the fact that the procedure is not very complicated, not all people can perform it on their own. That is why, if you are not confident in your abilities, it is recommended to trust the installation and adjustment of the VAZ-2107 ignition (carburetor) to qualified specialists with experience. They know exactly how to carry out this procedure in a short period of time and at the same time achieve the desired result.
In general, similar services are provided at most service stations. Therefore, there should not be any problems with the issue of finding specialist services. It is recommended to give preference to professionals with experience. They will not only be able to carry out the work efficiently, but will also answer all questions that arise with great pleasure. By approaching this issue responsibly, no problems will arise in the performance of your vehicle.
Installing electronic ignition on the VAZ 2107 allows you to make the functioning of the car engine softer and smoother.
Switch
The commutator is necessary to create an electrical impulse by interrupting the constant supply of current from the battery to the primary winding of the coil. The BSZ VAZ 2107 uses a switching device of type 3620.3734. The working elements in it are ordinary bipolar transistors, which open the circuit when a signal is received from the Hall sensor.
Switch 3620.3734 is built according to a simple single-wire circuit, in which the device body is connected to the vehicle ground and, accordingly, to the negative terminal of the battery. The advantages of using this unit instead of a traditional breaker include:
- no need for maintenance or adjustment;
- high spark energy, which makes it easier to start the engine in the cold season, as well as the ability to use gasoline with a lower octane number;
- the presence of a stabilization system that protects the Hall sensor from voltage surges.
This switch has one drawback - low production quality. It happens that the device fails after just a few months of use. Its design is non-demountable, therefore, repair is impossible. That is why experienced owners of “Sevens” and other VAZs with a contactless ignition system carry spare switches in their cars. Fortunately, the part is inexpensive - 400–500 rubles.
How to set up on the injector
On the injection engine of a VAZ 2107 car, ignition timing adjustments are not required, since the setting function is performed by an electronic control unit that receives the necessary information from sensors.
Checking the correctness of data in the system
- We start the engine and start driving.
- Having accelerated the car to approximately 45 kilometers per hour, we very quickly engage fourth gear and sharply press the gas pedal to the floor.
- We listen to the engine, if detonation, or as car enthusiasts say, “knock of fingers,” is present for 1.5-3 seconds and disappears as acceleration occurs, then the ignition is set correctly, which means no manipulations are required. If detonation does not disappear during acceleration, then the ignition is “early” and you need to turn the distributor clockwise by about 0.5-1 notches. In the case when there was no detonation - the ignition is “later”, you need to turn the distributor 0.5-1 notches counterclockwise.
Which distributor is suitable for the VAZ-2107
On all carburetor rear-wheel drive VAZ cars, the device has almost identical components and a similar operating principle. Distributors for engines with a volume of 1200-1300 cc differ in that: - the drive rod is 7 mm shorter; - there is no vacuum ignition timing regulator;
DETAILS: Wiring diagram for the VAZ-2107 generator. Generator device
— the settings of the weights and springs of the centrifugal regulator are different. For engines with a volume of 1500-1600 cc, all distributors are suitable in terms of seating dimensions and characteristics. Only “Nivovskie” ones differ. They are tuned for stable traction at low speeds and the VAZ-2107 with such a distributor will accelerate slowly.
Replacing the starter relay
Another common problem on VAZ 2107s with a carburetor is a malfunction of the starter relay. When you turn the key in the lock, the system makes a click, but the retractor relay does not operate. Replacing the relay is very simple. First you need to remove the starter from the relay. Unscrew the 2 bolts that secure it. Slide it to the right and take it out, turning it backwards. Unscrew the nuts securing the starter and relay.
Unscrew the terminal. Turn it to the side. Remove the 2 bolts securing the relay to the starter. Remove the relay. Installing a new relay occurs in the reverse order. If you follow these simple steps, your VAZ 2107, which has a carburetor system, will serve you for many more years. In this article we told you about how you can set the ignition on a VAZ 2107 car with a carburetor engine.
Setting the ignition on a VAZ 2107 is easier than it seems. This does not require any special skills or tools. The article describes the complete procedure.
Installing the ignition on a VAZ 2107 is not so difficult. But in this matter you need to be extremely careful and precise, otherwise the whole procedure will have to be repeated.
The main components of the distributor and a description of its operation
Device.
The distributor is assembled in a housing. Inside it, a contact group is mounted on a bearing: moving and fixed contacts or a Hall sensor (for contactless ignition). To correct the advance angle, the vacuum regulator can rotate the contact group at a small angle relative to the housing.
A capacitor is secured to the bottom of the housing with screws. A drive roller is installed on bushings in the center of the housing. Its bottom has splines with which it engages with the drive gear. In the upper part of the roller there are contact drive cams (for contact ignition) or a steel cup with four slots - a screen (for contactless ignition).
At the very top, on a steel platform, two weights and two springs of the centrifugal ignition regulator are installed. A plastic housing with a moving contact and noise suppression resistance of the high voltage distributor (slider) is screwed onto the top with two screws.
The entire structure is closed with a lid on two spring latches. The body and cover have a tongue and groove so that they fit together in only one position. The cover contains contact terminals for high voltage wires from the spark plugs and from the ignition coil.
Job.
The distributor is connected through the drive to the engine crankshaft and rotates with it. For two full revolutions of the crankshaft, the distributor shaft makes one revolution. This is due to the fact that our engine is four-stroke. When installing the distributor in place, the roller is oriented in strict accordance with the operating order of the engine.
This is done so that the contacts open and the spark jumps on the spark plug when the piston of each cylinder, compressing the combustible mixture, does not reach top dead center (TDC) by a few millimeters. This is called ignition advance. When the number of revolutions increases, the distance must be increased, and when it decreases, it must be decreased, which is what the centrifugal regulator does.
Its weights, under the influence of centrifugal force, which is greater the higher the engine speed, diverge to the sides and move the cams relative to the roller, making ignition “earlier.” When the engine speed decreases, the springs return the weights to their place and the ignition becomes “later”.
This is necessary to increase engine power and efficiency. In addition to the centrifugal one, a vacuum ignition timing regulator is also installed on the distributor. Its function is to fire “earlier” at low throttle opening angles and “later” at sharp throttle opening angles.
Purpose of the distributor cover
The design of the ignition distributor cap (aka distributor) has remained and remains virtually unchanged throughout the entire history of the use of this device as part of the ignition system of gasoline engines:
Let's look at the design and operating principle of this much-needed part.
The distributor cap is a molded part made of non-electrically conductive material (insulator) that has the following device:
- Metal contacts are pressed into this part - these are the side and central electrodes
- The number of side electrodes strictly corresponds to the number of engine spark plugs (but not cylinders, do not forget that there are engines in which there is more than one spark plug for each individual cylinder); the distributor cover on the VAZ 2109 in our case has four side electrodes
- A high-voltage (armor) wire coming from the ignition coil is connected to the central electrode from the outside
- To the side electrodes - high-voltage (armor) wires going to the spark plugs
- Inside the cover itself there is a central contact equipped with a terminal that has a spring-loaded contact element (“carbon”), which transmits voltage to the central (main) contact of the distributor rotor (ignition distributor)
Schematic design of the lid
- When installing the cover on the distributor body, it is important to take into account not only the order in which the armored wires are connected, but also the orientation of the cover in relation to the “nose” of the runner is also important
- The ignition distributor cap is attached to the distributor body using latches or screws (the distributor cap on the VAZ 2109 is secured with screws)
- To prevent the formation of condensation under the lid, it has a special ventilation hole
Distributor
The ignition distributor (distributor) is designed to transmit high-voltage current pulses that come from the coil to the spark plugs. The distributor consists of:
- aluminum body;
- shaft;
- Hall sensor;
- vacuum and centrifugal ignition timing regulators;
- runner;
- covers with four fixed contacts.
In “sevens” with contactless ignition, distributors of type 38.3706 are used.
Distributor device with Hall sensor
On the VAZ-2109, the manufacturer installed a contactless type distributor equipped with a Hall sensor. It is four-spark, additionally equipped with a centrifugal and vacuum corrector.
In addition to correctors, the device has other elements that contribute to proper operation. Thus, the distributor is equipped with a special plastic screen. It is necessary to protect the working surfaces of the mechanism from dust and dirt. The slider mounted on the distributor rotor has a constant resistance of about 1 kOhm. In addition, the design includes thrust washers, lock washers and O-rings. The body is one-piece, aluminum.
Installing an electronic BSZ instead of a contact one
Today it is very rare to find a “seven” with contact ignition. With the arrival on sale of switches, distributors and coils for electronic spark generation systems, owners of classics began to massively re-equip their cars.
DETAILS: Replacing the air filter on a Hyundai Solaris with your own hands
What is included in the BSZ kit
In addition, you will need spark plugs (preferably new ones) with a gap of 0.7–0.8 mm and a set of high voltage wires. Coil type B-117A (used in a contactless system) is not suitable for electronic ignition. Its characteristics do not correspond to those of other equipment in the circuit.
Preparation
Before installing a new VAZ-2107 distributor for a contact ignition system, you need to adjust the gap between the contacts of the breaker. It is more convenient to do this with the device removed from the car. We check the gap with a flat feeler gauge. The value is set from 0.35 to 0.45 mm.
In this case, the protrusion of the cam should move the moving contact away from the stationary contact as much as possible. We adjust by slightly loosening the screws, and then tighten them more firmly and check the gap again. Contacts that have worked hard may have a protrusion on one and a depression on the other, which interferes with adjustment.
Before removing the old distributor, mark its position relative to the cylinder block with a marker. You also need to accurately mark the position of the moving contact (slider) relative to the body. If all this is not done, the settings will be violated and the engine will not start.
Installation
Having established exactly the same position of the roller in the body on the new distributor, carefully insert it into the hole in the block, slightly turning the roller to align the splines. Having “planted” the device in place by rotating the body relative to the block, we set the approximate advance angle, as on the old distributor.
Secure with a washer and nut, but not too tight. Now you need to plug in the high voltage wires. This is easy to do - each contact on the distributor cover has the number of the cylinder to which it needs to be connected. We connect the wire from the ignition coil to the central terminal.
The wires should fit tightly, with a slight tension, the protective caps should be pushed all the way down. Don’t get carried away, don’t bend the petals of the wire tips too much, otherwise later, when you try to remove them, you’ll tear off the wires “with their roots”! A wire goes from the contact wire to the “K” terminal of the ignition coil, usually it is green.
If your VAZ-2107 is equipped with a contactless ignition system, then you need to connect a connector with three wires. Having plugged it into the socket, check the fit of the wires; it happens that they “crawl out” of their places and the device does not work. Everything is done, the new distributor is installed and ready for use.
How to use a strobe?
To set the ignition timing, start the engine at idle speed, and use a strobe light to illuminate the previously discussed marks. One of them, called movable, is located on the crankshaft, although it may be on the generator drive pulley or on the flywheel, and the other is on the engine housing.
Interesting materials:
How to calibrate the sensor on Xiaomi? How to refuse free medications through government services? How to refuse hot water from Kievteploenergo? How to refuse MTS cable television? How to refuse a radio point through government services? How to refuse a radio point in an apartment in Moscow through government services? How to unsubscribe from MTS mailing list? How to refuse Tinkoff investments? How to recline in Sapsan? How to disable safe search in the new VK on iPhone 2020?
How to understand that you need to set the ignition
There are several indirect signs that are worth looking at. Of course, if the engine does not start, then turning the ignition on is the first thing that comes to mind, unless of course the spark plugs are wet. Let's look at the main symptoms that indicate the need to install the ignition.
Signs that an ignition installation is required:
- Increased fuel consumption. Of course, this may be a consequence of improper carburetor adjustment, but it also happens. For example, when ignition is delayed, the car’s dynamics decrease; in order to achieve the same acceleration, a larger amount of combustible mixture is required.
Loss of dynamics. With late ignition, the explosion follows the piston, which has already gone down under the influence of the inertia of the flywheel.
Silencer shots. When the explosion occurs afterward, the expansion of the gases takes some time. If the piston has already reached bottom dead center, then the exhaust stroke comes next. This means that part of the fuel explosion will be transferred to the exhaust system, hence the popping noise.
Required tools:
You can set the ignition on the first or fourth cylinder. On our website you can see a description of the ignition installation on the first cylinder.
A short, medium and long mark on the timing cover (gas distribution mechanism) shows the ignition moment of the VAZ 2106 .
- Short mark with a leading angle of 10°.
- Average - 5°.
- Long - 0°.
The top dead center is indicated on the pulley rim; opposite TDC there is a special indentation on the pulley hub.
