Brake pads are an extremely important element of the car’s braking system, and the safety of both the car and road users largely depends on their serviceability. Therefore, you need to constantly monitor the condition of the brake pads and replace them in a timely manner. This operation is not very complicated, so it is easy to carry out yourself if you have all the necessary tools, without going to an expensive service station. As an example, consider the process of replacing pads on a VAZ 2110.
- 2 Which ones to choose for replacement
- 3 How to remove
- 4 How to change the front pads
4.1 Video instructions
When do you need to replace the pads and how to determine the degree of their wear?
The service life of the pads on VAZ-2110 cars and its derivative modifications is, on average, 15–20 thousand kilometers for the front ones, and 40–50 thousand for the rear ones. However, their wear directly depends on a number of factors. Thus, during city driving, the degree of wear is higher, as well as when operating on dusty roads, when there is a high risk of mechanical particles getting on the working surfaces.
The main sign of a malfunction is the appearance of a characteristic whistle during braking. This is due to the fact that the pad design contains signal indicator strips, and when the working surface of the pad wears down to a critical minimum, the strips are exposed and create this sound.
Along with this, problems can be expressed in the form of a metallic grinding sound in the event of destruction of the friction layer and exposure of the metal structure of the pad. In this case, during the braking stage, vibrations and knocks may appear, as well as a characteristic creaking sound in the area of the front wheel (or the rear wheel if the rear pads become unusable). In other words, the pads whistle, rattle or knock, indicating a malfunction.
It would not be superfluous to check the condition of the wheel bearing on the VAZ 2110 when replacing the pads.
Main features
There are several symptoms by which you can determine the wear of these elements:
- Increased brake pedal travel. It becomes softer and only grips at the end. This reduces the braking efficiency of the vehicle. This significantly affects traffic safety. Similar symptoms can occur with brake fluid leaks. But if its level is in order, and there are no drips on the tubes and connections, then the VAZ 2110 brake pads on the rear wheels of the car need to be replaced.
- Increased travel of the parking brake lever. If the pedal can be soft even if the front pads are worn out, then a weak handbrake indicates wear on the rear ones. How to determine whether the lever stroke in a car is normal? To do this, place the car on an inclined surface (at least ten degrees) and tighten the handbrake. If the car rolls down, it means the cable is loose or the rear pads are worn out. You can also count the number of clicks on the lever. In normal condition there should be 3-4. If there are 5 or more of them, then you need to replace the rear brake pads on a VAZ-2110.
- Characteristic creaking noise when braking. Subsequently, it can develop into vibration. In this case, the friction material is completely worn out, and the lining is in contact with the drum mechanism with bare metal. Driving with such a symptom is extremely dangerous. At one point, the pads can simply jam, not to mention the crazy wear caused by metal-to-metal friction.
- Minimum thickness of friction material. Unlike previous cases, this can only be found out by removing the drum cover. Experts note that the thickness of the friction material on the rear drum mechanisms of the “tens” should be at least one and a half millimeters.
Knocks and squeaks
In addition, knocking in the rear brake mechanisms, squeaking when braking, contact with brake fluid or oil on the lining, chips and cracks on the surface, as well as jamming of one of the wheels due to a torn lining will force us to replace the pads.
We select brands and look at prices
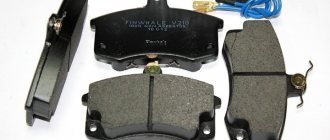
The native tenth pads are not spoken of very flatteringly. They are only enough for a break-in, after which the braking efficiency drops noticeably and they begin to creak and vibrate. These are pads from the domestic TIIR plant with catalog number 2108 35010 80. Their only advantage is that they are available free of charge (along with the new car), so it’s not a shame to throw them away.
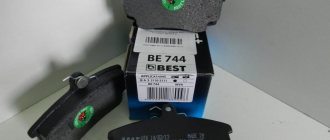
Budget brake pads FERODO TAR527B.
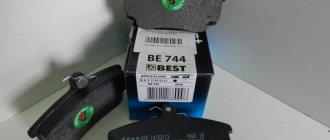
Lucas/TRW can hardly be called budget, they cost about 800 rubles. Catalog number GDB1446. They practically do not wear out the brake disc and last quite a long time. The best option for urban conditions. Good ATE pads and German Girling pads will cost about the same amount; they are supplied to Bavarian conveyors.
For 1,500 rubles you can buy Ferodo Premier series pads. Excellent quality, premium series of famous pads. In all indicators and characteristics they are ahead of the first two groups. Durable, low noise with a high coefficient of friction, which is not lost at temperatures of about 500 degrees.
Ferodo Premier premium pads.
There is a choice, the most important thing is to determine in what conditions and how intensively the car is used. Then the pads will not disappoint with their quality and will not upset you with the high price. Strong brakes and smooth roads to everyone!
Video review of brake pads in the mid-price segment
| The service life of the front brake pads of VAZ 2110, 2111 and 2112 is 30-50 thousand km, or when the thickness of the friction linings reaches 1.5 mm. Do you know how to replace brake pads yourself? |
Required
: remove the wheel, prepare pliers, a key “13”, “17” and a set of front brake pads VAZ 2110 (catalog number: 21100-3501080-00, approximate cost 350 rub.) To remove the brake pads you should:
- Bend the edge of the locking plate of the lower wheel cylinder bolt using pliers.
- Unscrew the bottom bolt with a 13mm wrench, holding the guide pin with a 17mm open end wrench.
- Pull out the bolt along with the plate.
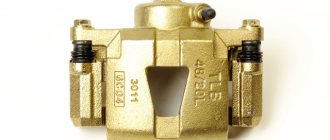
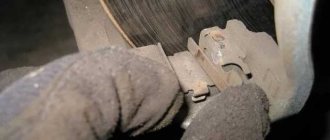
We lift the caliper with the cylinder up, prying it with a screwdriver, and then remove the brake pads from the guide.
Installation of brake pads
done in reverse order. Before installation, the seats should be cleaned of dirt. You can use pliers to press the piston inside the cylinder. Or install the inner pad and lower the bracket into the working position, and then move the bracket with a screwdriver, leaning on the brake disc, retracting the piston (insert the screwdriver through the caliper hole).
After replacing the brake pads, you need to press the brake pedal several times until the pistons are in the working position. We check the brake fluid level. It is worth noting that the brake pads can only be replaced as a set, otherwise the car may pull to the side when braking. You can also watch the replacement process in the video:
By the way, do you know which set of front brake pads is better to choose?
Replace the front brake pads on the VAZ. Keywords:
Close Window.
This may take a second or two.
This is interesting: How to replace the cabin filter of Skoda Octavia A7
Symptoms of the problem
Most car enthusiasts do not know when VAZ 2110 brake pads should be replaced.
In fact, there are several obvious symptoms:
- -firstly, the effectiveness of the braking system has decreased (the braking distance has increased);
- secondly, a strong grinding noise appeared when the brake pedal was pressed;
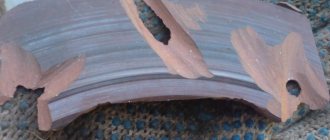
- thirdly, chips and damage on the disks became visually noticeable;
- fourthly, during braking, unnecessary noise, vibration, and jerking appeared;
- fifthly, the brakes are blocked when the pedal is pressed;
- sixthly, there is a large free movement.
Front
Before starting work on replacing the front brake pads on a VAZ 2110, be sure to arm yourself with a set of tools, which includes:
- Hammer with short handle;
- A small sharp chisel;
- Two wrenches - socket and socket 13;
- Open-end wrench 17;
- Pliers;
- Small crowbar;
- Jack;
- Balloon wrench;
- New pads.
When everything is ready to go, you can begin the replacement process.
- Park the car in such a way that it cannot roll away. It is best to put some kind of stoppers under the wheels. It is advisable to use special devices rather than simple bricks.
- Loosen the bolts on the front wheels and lift the car to one side using a jack.
- Completely remove the wheel mounting bolts, remove it and place it under a raised part of the machine. This is a simple safety measure in case the jack accidentally comes off.
- Now we determine the location of the front brake pads on the VAZ 2110. The calipers are located in front of the brake disc, so to easily replace the left pad, turn the steering wheel all the way to the left, and vice versa.
- To make it easier for you to access the part, arm yourself with a thin chisel and a hammer. These tools will unlock the top bolt.
- Unscrew it with a 13 socket wrench, holding it on the other side of the caliper with a 17 socket wrench.
- There is no need to remove the pad yet, since the caliper is now in its extreme position. That is, the new part will not fit into place.
- Do not completely unscrew the bolt; use a crowbar and insert it between the body and the pad, pressing the caliper all the way.
- Once this is done, unscrew the top bolt all the way. This will move part of the caliper to the side, thereby providing access to the pad itself.
- Remove the old pads and put new ones in their place.
- During assembly, simply follow the reverse order of dismantling. Just remember the importance of bolt countering. The washer must be bent onto the edge of the fastener. At this point the replacement can be considered complete.
Rear
For clarity, we recommend watching a video about replacing the rear brake pads on a VAZ 2110. This will make it easier to complete the task and have a visual representation of each stage of repairing the brake system.
It will be good if you once installed disc elements . The beauty of them is that the process of replacing the rear pads will be similar to the front ones.
In some cases, depending on the design of the rear brakes, it may be necessary to completely remove the rotor and caliper. All other activities are carried out in exactly the same way as in the case of the front pads.
The situation is completely different for those who use factory drum braking systems. The work will have to be done delicately, but completely achievable on your own.
To get started, arm yourself with a set of tools, which includes:
- Balloon wrench;
- Jack;
- Pliers;
- Screwdriver;
- Hammer;
- Sharp chisel;
- Open-end, socket and ring wrench sizes 12, 13 and 17 - 3 sizes of each type of wrench.
Now we proceed directly to replacing the rear brake pads.
- Place chocks under the front wheels and remove the rear wheel.
- Unscrew the guides using a 12mm wrench.
- Guides are required for fixing to the axle shafts of the drums.
- It may be quite difficult to remove the drum from its place. This is where you will need a hammer and a wooden stand. Tap the inside of the drum. It is strongly not recommended to hit the drum directly with a metal hammer, as the mechanism may be damaged.
- If the drum cannot be removed even after hammering, treat the contact areas with the hub with WD40 or other penetrating lubricants.
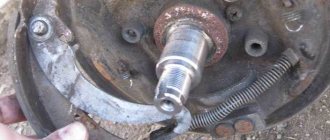
- Then, arm yourself with pliers and remove the springs from the bottom and top of the pads.
- Remove the guide spring located in front.
- This will allow you to completely remove the block.
- When the bar is removed, you can begin to remove the spring from the rear pad.
- Well, now remove both parts of the block. When removing the back one, remember the hook. It comes from the handbrake cable.
- After removing the old block, put a new one in its place. Assembly is carried out in reverse order.
- But there is one caveat - the bushing must be removed from the drive arm, which will greatly facilitate the reassembly process. The upper part of the pads is inserted into the grooves located on the cylinder rod.
- Be prepared for the fact that certain difficulties may arise when installing a new element. The reason is the large output that remains as a result of the operation of old brake elements.
- Take two pry bars and squeeze the two blocks together to bring them as close as possible. At this point the replacement can be considered completed.
- At the last stage, mandatory bleeding of the brake system is carried out. Without it, not a single intervention in the design of car brakes can be done.
As you can see, replacing the pads is not difficult if you act consistently. The best option is to install disc brakes everywhere. They are easier to work with, they are more efficient in their tasks, plus replacement is carried out without any problems, unlike drums.
Rear
For clarity, we recommend watching a video about replacing the rear brake pads on a VAZ 2110. This will make it easier to complete the task and have a visual representation of each stage of repairing the brake system.
It will be good if you once installed disc elements . The beauty of them is that the process of replacing the rear pads will be similar to the front ones.
Replacing brake pads on a VAZ 2110. Progress of work
Replacement of front brake pads.
- 1. Work must begin by removing the brake hose (on this model it is attached to the bracket using a rubber ring).
- 2. After removing the hose, push the piston into the cylinder. This is not difficult to implement, thanks to a special tool or clamp.
- 3. Under the bolt securing the guide pin, there is a lock washer - carefully bend its edge.
- 4. Using a 13 by 17 wrench, unscrew the mounting bolt
- 5. Now you can lift the caliper cover and remove the brake pads.
The same tools can be used to replace the brake pads on the rear wheel.
In this case, the sequence of work will be as follows:
- Unscrew the two drum bolts and carefully pull it off the shoes. If it gets stuck, don’t be nervous - you can take a mallet and tap it around the circumference of the drum. This will allow you to gradually pull him away from his “home” place.
- Now, using a screwdriver, remove the spring that holds the pads together and disconnect it.
- Remove the block that is located closer to the front of the car. To do this, grab the product and slightly pull it to the side.
- Loosen the top spring slightly (rotate the shoe at an angle of 50-60 degrees) and remove the other spring.
- Remove the spacer bar.
- Disconnect the parking brake rod (here try to carefully remember the sequence of actions).
- Remove the guide spring and remove the cotter pin.
In fact, this is a kind of “equator” for the progress of work. Now you can proceed to the installation process itself.
Let's start with the front wheels.
- 1. Clean the seating areas well from soil and dirt (most likely, there is plenty of it that has accumulated there).
- 2. Try to move the piston as far away as possible (in relation to the cylinder).
- 3. Cut the wire of the pad wear sensor (the new kit will have a different sensor).
- 4. Disconnect the wires from the connector.
- 5. Remove the wire from the rubber rings.
- 6. When installing brake pads on a VAZ 2110, it is necessary to pass a new wire through the rings of the brake hose and connect the connector. Insert the tip of the sensor into the opening of the block
- 7. Lubricate all caliper guide pins (you can use regular lithol).
- 8. Use a screwdriver to tighten the caliper bracket and tighten the mounting bolt well. Secure it by bending the lock washer.
- 9. Connect the brake hose.
Installation of brake pads on the rear wheel is carried out in the following order:
- 1. Clean all openings under the drum.
- 2. Press the cylinder pistons inward.
- 3. Connect the handbrake linkage to the newly installed block.
- 4. Seal the block using a screwdriver and pliers or a loop (see video).
- 5. Place an intermediate bar.
- 6. Connect the guide spring to the block.
- 7. Connect the handbrake rod to the cable.
- 8. Install the spring.
- 9. Press the pads together.
- 10. Tighten the guide bolts and return the wheels to their place.
Briefly about the procedure
To replace the pads you will need about half an hour of free time. The procedure is quite simple, even an inexperienced driver can figure out how to do it.
You need to take:
- screwdriver/pry bar;
- ordinary tools;
- lubricant;
- a piece of old cloth;
- the pads themselves.
Replacement is made with a new set on the right and left wheels.
Required spare parts
Just 10 years ago, old pads were not replaced; they were glued on, linings were changed, or they were riveted. Today on the market you can easily purchase the entire mechanism. To replace, you need to prepare new pads. Experts believe that it is better to install replacement factory parts, article number 2110-3501080-60 (TIIR-260), 21100350180082 or 2110-3501080. There are other opinions. Some motorists believe that pads from well-known brands provide the best braking parameters on the VAZ 2110, 2111, 2112. These are parts from brands such as Brembo, ABS, Ferodo, TRW, Bosch, Optimal or Delphi.
Tool needed for work
Before you repair your car, you need to prepare the following tools:
- jack;
- pliers;
- hammer;
- long screwdriver or awl;
- a set of keys;
- wire cutters;
- heads for 7 and 30.
The work is also accessible to a beginner if he knows how to handle the tool. This way you can save time on a trip to a car service, and money. The average price for this type of work as of January 19, 2019 is 600 rubles. How to replace the rear brake pads of a VAZ 2110, 2111 or 2112 yourself will be discussed below.
Replacing brake pads on a VAZ 2110. Preparatory work
To speed up the replacement of brake pads on a VAZ 2110, it is necessary to prepare tools for work in advance.
So, you will need:
- New pads;
- Balloon wrench;
- Jack;
- Open-end wrenches “13 to 17”.
In addition, prepare the car itself for repair. First, fix the rear wheels (you can place special stops, bars or bricks).
After this, “tear off” the mounting bolts on the wheel, jack up the car and remove the wheels.
In this case, replacing the brake pads of the VAZ 2110 must be done one at a time, each time placing a wooden block under the beam (this will relieve the jack).
Choosing the best pads
Despite the fairly long service life and relatively low loads during operation, you should not waste time when choosing rear pads.
After all, brakes are about safety. The market offers about two dozen different pads, differing in price, country of production and brand status. True, the difference in prices is not so great, as can be judged from the list of the most popular kits:
- The most inexpensive pads can be bought for 480–500 rubles a set. They are produced by the domestic company ARTEX . The catalog number of all ten rear pads is 2108–3502090 . The pads are not remarkable for anything except that they are afraid of overheating - they lose about 40% of their friction properties at 150 degrees.
- VAZINTERSERVICE kit , at a price of about 580–600 rubles, showed itself to be worthy. The only negative is their low resource and they also don’t like high temperatures.
- Some of the most expensive are FERODO . They ask for at least 1,200 rubles, but the quality is always stable, they are not afraid of cold or overheating, they are wear-resistant and practically do not make noise.
- Slightly cheaper, but not much worse than ALLIED NIPPON marked ABS 1701 . They will cost 800 rubles, but at the same time they have stable characteristics, good friction qualities, and minimal pressure in the brake circuit to create optimal braking force.
- The most expensive pads are LUCAS from the manufacturer TRW Automotive . Catalog number - GS8210 . The price is about 1600 rubles. Despite impeccable compliance with all parameters, their only drawback is the high price.
Necessary tools to change parts
Changing the brake pads on a VAZ-2110 on your own is not difficult if you have basic skills. For this you will need:
- keys for 13 and 17,
- regular wire cutters
- jack for raising a car.
If the rear pads are being replaced, the kit should include:
- 7" head with knob,
- pliers,
- head “30” in case there are difficulties in removing the drum.
Removing the pads
The set of tools is not so extensive. You can start working. The first step is to clear the workspace and put the car on a jack. So, let's begin the repair work. Step 1:
- First you need to prepare the car for removing the rear wheel;
- Carry out the operation to remove the rear wheel;
- When the wheel and disc are removed, you can see two mounting bolts on the drum that should be unscrewed. A wrench will come in handy here (usually suitable for 12).
Step 2:
- We remove the brake drum.
Note. This action may be quite difficult and may take some time: very often the brake drum “sticks” and it is difficult to remove it. In this case, you should use a hammer and hit the drum, but be sure to attach a wooden block or flat metal object to soften the blow and not crack the drum body.
Step 3:
- Taking a screwdriver or pliers, carefully remove the spring that tightens the rear brake pads of the VAZ 2110;
- Disconnect the guide spring - the one that secures the brake pad to the shield.
Step 4:
- We remove the block from the support bar.
Note. To do this, you need to take the brake pad that does not have a direct connection with the handbrake rod, and pull it along the shield, as if spreading the brake pads apart from each other. It is necessary to continue this action until the brake pad is disconnected from the support bar.
Step 5:
- Now you should try to loosen the spring, which is located on top; it tightens the brake pads.
Note. In order to carry out this operation, you need to turn the block itself 60 degrees to the side. As soon as it appears that the brake pad can be removed, you need to do so.
- We perform a similar operation to remove the next brake pad.
Step 6:
- After the second spring is disconnected, the spacer bar should be removed.
Step 7:
- Disconnect the handbrake linkage from the cable.
VAZ 2110 rear drum pads
Step 8:
- You should definitely look and remember, or even better, sketch the connection between the handbrake rod and the brake pad;
- Using pliers, you need to disconnect the guide spring and remove the cotter pin, after which the block will detach by itself.
This completes the dismantling process.
Installation of brake pads VAZ 2110
New pads are installed in the reverse order of removal. It will be necessary to recess the piston into the brake cylinder, otherwise the new pads simply will not fit into place. Take the clamp and install it as shown in the figure. Place some kind of spacer (small board) between the clamp and the piston itself and after all operations, start wrapping the clamp, waiting until the piston is completely sunk into the cylinder.
Note! Don't forget to bend back the lock washer, which will prevent the guide pin bolt from coming loose. After installation, press the brake pedal a couple of times (2-4 times) so that the pistons are in the working position and the car brakes normally without any interruptions. ,Adjust the amount of brake fluid in the reservoir to normal. Please note that new pads require grinding in, so it is not recommended to drive very hard for 100 kilometers and it is not recommended to press the brake pedal sharply, drive smoothly and carefully.
If you decide to keep the old pads, then make marks on them with a felt-tip pen; they must be strictly installed in the same places; it is not recommended to rearrange them among themselves or place them on different sides (for example, moving pads from the left side of the car to the right side) - this can lead to to deterioration of the brakes.
Assembling new rear brake pads
It would be possible not to describe the assembly process, but to indicate that replacing the rear brake pads on a car is carried out in the reverse order. But in this case, the operation has a number of important features that must be known and provided for:
- in order for the brake fluid pressure to be at an optimal and sufficient value, you need to place a piston inside, which goes along with the brake cylinder;
- Be sure to fix the handbrake rod to the block, do not forget to place the shieling in place;
- move the guide spring to the brake part;
- combine the cable and the handbrake rod;
- bring the upper spring to the new product, just placed in place of the old, worn pad;
- It is the heel of the brake cylinder that must be equipped with a second block. To do this correctly, pull the bottom part, when the spring is properly tensioned, it will be possible to insert the bar;
- turn on the second block and place it in the cut of the bar;
- using pliers, align the spring with the brake pad;
- track the condition and location of the cable, do not let it get affected by the movement of parts of the brake product, otherwise the device will malfunction;
- fix the brake drum in the car in its original place;
- securely secure the guide bolts on the VAZ-2110 and finally mount the wheel.
Replacing brake pads VAZ 2110 front
In the “ten”, the service life of the front brake pads averages from thirty to fifty thousand kilometers, but in general it greatly depends on driving style. What will you need to replace it yourself?
- Keys from "13" and "17".
- Pliers.
- New details.
Replacement sequence:
- First, we remove the wheel on which we will replace the linings;
- Then we find a bolt in the wheel cylinder and use pliers to bend its locking plate;
- We unscrew the bolt with a key to “13” and remove it, while fixing the guide pin with a key to “17”;
- The cylinder needs to be pryed and lifted so that the old pads can be removed;
- Clean the guides and all grooves from debris and carbon deposits;
- Install new pads and reassemble everything in reverse order.
Don't forget to check the level of the brake fluid in the reservoir. When finished, press the brake pedal several times until the brake cylinders are in place.
Replacing brake pads VAZ 2110 Rear
At the rear, the 10 has drum brake pads, which is typical for budget cars. Drum brakes are a little more difficult to change than disc brakes, this is due to the fact that due to wear in the drum it is difficult to remove it, since the pads will certainly rest in the groove from the wear and will not allow the drum to just come off.
To remove the drum, two bolts are unscrewed from the front, which secure the drum to the hub, and after that, dancing with a sledgehammer and a wooden spacer begins.
The fact is that the drum will not come off so easily; as a rule, it must be knocked down. And since it is made of brittle metal, the edge on it often breaks off, so you have to hit it through the spacer. Nothing complicated, we rest the spacer on the back side of the drum and hit it with a sledgehammer, periodically changing the side. So we tap the drum around the perimeter, and it will eventually come off (or fall apart?). Now you can see the pads.
What is the problem with drum brakes - you won’t know the wear of the pads until you remove the drum, and when the friction lining comes off the pad, the wheel jams.
When we get to the pads, everything becomes easier. To remove the pads, remove all the springs that compress the pads. The easiest way to pry them off is with a simple screwdriver.
When the springs are not in the way, the pads will come out easily. There is a plate installed on top between the pads; this also needs to be removed.
The handbrake cable will be attached to one of the blocks; it is simply inserted into the groove on the block. We remove the block from the groove and install a new one.
We reassemble in the reverse order, it is best to tighten the springs with a screwdriver, they slide along it very well and fly straight into the mounting hole.
Setting up the parking brake
To do this, we need access to the bottom, so we put the car in a pit or lift it up as much as possible. To adjust the handbrake on the “ten”, it is enough to have two open-end wrenches “13” and pliers. First, we sit down in the cabin and pull the lever until the first click. Then we go down into the pit and find the tension adjustment nuts on the bottom. First, unscrew the locknut. Next, use the second key to screw the main one clockwise. This is how we tighten the handbrake cable. Then we sit back in the cabin and check the handbrake movement. It should work in 3-4 clicks. If the lever stretches further, go down and loosen the nut by rotating it counterclockwise. Having set the normal position, tighten the locknut. This completes the adjustment procedure.
Adjusting the pressure
First, you need to adjust the parking brake. This device always requires adjustment after repair work.
Required spare parts
Just 10 years ago, old pads were not replaced; they were glued on, linings were changed, or they were riveted. Today on the market you can easily purchase the entire mechanism. To replace, you need to prepare new pads. Experts believe that it is better to install replacement factory parts, article number 2110-3501080-60 (TIIR-260), 21100350180082 or 2110-3501080. There are other opinions. Some motorists believe that pads from well-known brands provide the best braking parameters on the VAZ 2110, 2111, 2112. These are parts from brands such as Brembo, ABS, Ferodo, TRW, Bosch, Optimal or Delphi.
Troubleshooting possible replacement problems
There are relatively few difficulties when replacing brake pads. As a rule, they are associated with souring of bolts due to rust. The drum elements most susceptible to corrosion are the mounting pins. In case of possible difficulties, the drum is removed along with the rear wheel hub, and when unscrewing the studs, it is allowed to use a penetrating lubricant such as WD-40. However, when working with brake mechanisms, lubricants should be used extremely carefully, avoiding their contact with the working surface of the pads or disc (in the case of the front wheels). Otherwise, the efficiency of the brakes can be significantly reduced, up to severe slipping between the working surfaces of the pad and the drum linings or the disc.
To summarize, we can note the ease of replacing brake pads on a VAZ-2110. The procedure does not require special skills or tools; it can be done in an ordinary garage without any particular difficulties. Knowing the order of operations when replacing allows you to complete this procedure quickly and efficiently.
How to replace the rear ones
Replacing rear pads on VAZ-2110 series cars and their derivatives is somewhat more difficult, since they are of the drum type. Replacement work is carried out as follows:
- The rear of the car is jacked up, after which the wheel is removed.
- The guide pins located on the drum are unscrewed (if the pins become soured, it is possible to remove the drum along with the hub after unscrewing it).
The work is carried out with a 12 key
It is better to tap through a wooden spacer
Or using a mounting blade
Video: How to remove and install rear brake pads on a ten
Order of Operations
Compared to repairing the front pair on the above VAZ models, working with the rear elements is more difficult, since they have a drum structure. To ensure ease of operation, you need to place the machine on a level floor and jack up the rear part.
- First the wheel is removed. Behind it there is access to the dirty drum. It is necessary to completely loosen the handbrake cable, otherwise there will be problems with dismantling.
- The studs on the brake drum are loosening. If they are heavily oxidized, you can remove the part together with the hub; to do this, you also need to unscrew it.
- First you need to try to remove the drum. If that doesn’t work, you can coat the acidified areas with a brake or aerosol compound. This will increase the repair time, but will make the work easier. Then tap the part with a hammer through a mounting blade or wooden block.
Attention! At this stage, you need to assess the safety of the brake drum, that is, understand whether it needs to be replaced or can continue to be used. If there are deep scratches, chips, cracks, or grooves on the body, then the old part must be replaced.
- After removal, you can assess the condition of the entire mechanism. If there are leaks, the cylinder will need to be repaired. It is necessary to remove dirt and check the integrity of the anthers. If everything is normal, you can continue replacing the pads.
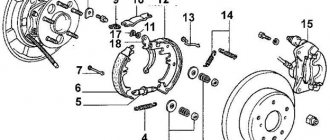
- Use pliers to remove the cotter pin, remove the tip and disconnect the spring. It is important to save the puck. You will have to tinker with the spring; you may need a long screwdriver or a strong awl. The spacer bar is then removed and the parts are removed from the body.
- You need to clean the shield from dirt. The condition of the linings should be assessed. Manufacturers recommend replacing them with a thickness of one and a half millimeters, but practice shows that it is advisable to use new ones even with a thickness of 3 millimeters.
- The new part is now being installed. But first you need to completely clamp the cylinder piston, otherwise the drum simply will not install.
- New pads are mounted, the rod is pinned, the spring is installed with a screwdriver.
Care must be taken to ensure that the cable housing does not come into contact with moving parts. Important! When making repairs, you should act carefully; liquids and lubricants should not come into contact with the surfaces. Otherwise, the performance of the brakes will be reduced.
See the order of events in this video:
