01/26/2022 11,085 Electrical package
Author: Ivan Baranov
If the car's power window does not work, this entails inconvenience, especially in hot weather and for drivers who are accustomed to smoking while driving. The article discusses the types of window lifters, as well as the window lifter cable, its structure, operation and malfunctions, and provides replacement instructions.
[Hide]
Types of window lifters
A window regulator is designed to raise and lower the side windows of a car. There are several types of these devices, which differ in their operating principle and location.
According to the principle of operation, lifting devices are divided into:
- Mechanical. The windows are lowered and raised by rotating the handle located on the car door. The movement is carried out thanks to gears. This type of device can only be found on older car models.
- Electrical. In order to lower or raise the window, you need to press the switch button located either on the door or on the handrail.
There are also so-called automatic ones - this is an addition to the electric one. The glasses are automatically activated. At the same time, the door locks are blocked. Most often they are installed on cars with an anti-theft system, in parallel with electric windows.
The design of all types is the same: using a button or handle, the mechanism of the device raises or raises the bar on which the glass rests. The glass moves only vertically. Movement is limited by a window seal at the top and a rubber damper at the bottom.
The window regulator slowly raises the glass - what should I do? There is a solution!
Hi all! Dear friends, you are all aware of what “jambs” and shortcomings each of us “happy” owners of domestic VAZ cars have to eliminate. Today’s article is another life-saving solution for those who are faced with the problem of poorly functioning beet lifters.
Electric windows (ESP) have been installed on foreign cars for decades, so, as a rule, there are no problems with them, which cannot be said about VAZs. On “our” swallows, such a miracle has been occurring for about 10 years, and as practice shows, the good old “meat grinders” in the form of a simple mechanical handle worked much more reliably. Get to the point! A defect was noticed on many models from 2109 to 2115, where, as a rule, the front right glass does not rise well. Moreover, the window lifters slowly raise somewhere from the middle or even lower, the glass slows down or stops rising altogether. At the same time, drivers help the ESP either with their hand or with a “clarion word”.
Mechanism design
Depending on the type of window lifter, there are two types of drive mechanisms: mechanical and electric. In the first case, the drive mechanism is activated using a handle/lever located on the inside of the door. By rotating the handle, the driver transmits movements to the drive gear, which begins to move.
Automotive window regulator
The electric drive is driven by a reversible motor. It, in turn, starts when you press a button located on the driver’s or passenger’s handrail. The drive uses a worm gear; with its help, the engine drives the gear of the drive mechanism (the author of the video is Sergey Zukol).
The drive is connected to a device that moves the glass. The lifting mechanism can be lever or rack type.
Lever has three subtypes:
- single lever;
- double lever;
- double wishbone wheel.
Lever devices are compact and reliable in operation. Another advantage is their ease of installation and dismantling. The versatility of the mechanism allows it to be installed on any car. The disadvantage is the inability to move the glass evenly. At first it moves quickly, then more and more slowly, and at the end even with jerks.
In a rack-and-pinion device, a plate of glass moves up and down along a vertical toothed rack. A gear is mounted on the plate, which meshes with the drive gear. Thus, the movement is either down or up. The advantage of a rack and pinion window lifter is the reliability and smooth movement of the glass. The disadvantage is the massive design, which limits its use.
Rack type device
The third type is a cable mechanism, which will be discussed in more detail below.
Models and manufacturers
Currently, the ESP market is oversaturated with a variety of devices and accessories.
Below are the most popular ones in the Russian Federation. Window lifters made in Italy. They are installed in both the front and rear doors of cars of any model.
The device is installed while preserving the entire standard mechanism installed by the car manufacturer.
The basis of the design consists of a durable flexible cable drive connecting the electric motor and the driven gear on opposite sides. The composition includes adapter bushings, of which there are about 30 in the set. They are able to adapt ESP to more than 200 car models.
Spal De Lux price is approximately 5,000 rubles
Lifts made in Taiwan, Cenmax company. Absolutely universal i.e. can be installed on every car.
Thanks to this device, you can quickly, easily and silently control the windows of your car. The model is mounted under the door trim.
The main advantage of the mechanism is the very reliable material of the sleeve. In addition, these electric windows have special engine protection from excess load and overheating.
The cost range of Vigilant ACM 002 on the domestic market is 2,000 - 2,500 rubles
Garnet - universal window lifters of domestic production. They can be installed on both domestic cars and foreign cars.
This model produces no more noise than a functioning engine with a working muffler.
The price of the product ranges from 2,500 to 3,000 rubles
The operation of the window lift cable, or the cable mechanism for raising the glass in a car
The cable window lifter consists of the following components:
- The cable is a flexible part that ensures the reliability of the device. Some car models use a chain or belt instead of a cable; they are more reliable. The tension of the flexible part is carried out using 3-4 rollers. The rollers are attached to the inside of the door.
- The guide pipe on which the rollers are mounted.
- Drum. This is the part on which the cable is wound.
- The plate on which the glass is attached.
- Rollers. Among the rollers, one is spring-loaded, which allows you to adjust the tension of the cable: tighten it if it is too stretched. Can be used to tension a spring.
Cable driven device
The mechanism works as follows:
- The plate is attached to a cable and moves along a guide pipe located vertically.
- The lower edge of the car glass is connected to the plate.
- When a knob is rotated or a key is pressed, the drive gears are activated, and these movements are transmitted to the drive drum. In this case, one branch of the cable is wound onto the drum, the other is unwound.
If the glass is too wide, distortions are possible, since one cable will not hold it. To avoid this, two guide pipes are installed. The cable runs through them and holds the glass in two places.
The design resembles two triangles, the vertices of which are the rollers and the drum. The cable mechanism is more popular. It is compact because it can be installed on any car model. Its big drawback is the stretching and breaking of the cable, which makes it impossible to move the glass.
Cost of cable repair
You can repair or replace the window lift cable at any car service center. However, if you replace it yourself, the cost of the parts will be as follows: the price for the window lift roller will be about $7, the cable itself is offered at a cost of $8, depending on the manufacturer. Also, the car owner can purchase a repair kit, the cost of which will be about $15 or more.
Video of replacing the window lift cable:
If you are faced with the problem of the cable breaking when lowering the window, then our article will help you solve this problem. The difficulty in solving the problem of replacing the window lift cable depends on the design of the window lifters. Let us start the article by introducing you to the concept of “what is a window lifter” and what types of window lifters are there.
Technical purpose of the window lifter
A window regulator is a part of a car whose task is to move and hold the windows of the car in any position. Nowadays, companies that produce various models of cars, and also improve all mechanisms, provide you with a large selection of cars with different doors.
The range of window lifters currently includes more than 10 items. You, as a driver, know that there are doors in the car: left, right, front and rear. In the same machine, the entire design of all parts is different.
Let's now look at the types of window lift drives
The first type is mechanical. The mechanical mechanism includes the following parts: handle; a pair of spur gears. The purpose of the gears is to strengthen and transfer the glass to the drive roller.
The second type is electric. The electric window regulator is a reversible electric motor in which a worm gear is mounted.
All window lifters consist of two units:
1) from the drive, it ensures the movement of the glass when a circular motion is created;
2) from the glass lifting mechanism. The task of which is to ensure the rotation of the drive roller and its transformation into flow movement.
What is used to determine the direction of glass movement?
The following details are responsible for this process:
Grooves are those parts located on the inside of the door frame. Their task is to ensure that the glass is held by the side edges;
Special rails, they are mounted in the car door body. It is along them that the glass located on the lower edge moves;
Window seal. The purpose of this part is to limit the upward movement of the glass.
A rubber damper, and the task of this part is to limit downward movement of the glass.
To move on to the most important question of our article, let’s also get acquainted with the glass lifting mechanisms. If you understand the mechanism, it will make your task easier.
Glass lifting mechanisms
There are such types of glass lifting mechanisms as:
1) cable mechanism;
2) rack and pinion mechanism;
3) lever mechanism
To help you with the issue of replacing the window lift cable, we need to take a closer look at the cable mechanism.
So let's get started
The cable window regulator has:
1) A flexible part is a cable that serves to ensure reliability. In machines, in some cases, parts such as a belt or chain can be used. Please note such details are more reliable than a cable. The flexible part is usually tensioned with rollers, it is fastened between them, the rollers are used in an amount of 3 to 4 pieces. The rollers, in turn, are mounted inside the door.
2) Drum. It is on it that the cable is wound to increase the friction force. When the drum is in the process of rotation, one branch of the cable begins to wind around it, and the other branch unwinds and the cable forms a forward movement.
3) A plate that is located on a vertical section. The drum is connected to the lower edge of the glass through the plate. The plate forms its movement along the pipe.
4) Rollers. Typically, one of all the rollers is spring-loaded and also serves as a tensioner, compensating for the expected stretch of the flexible part (in this case, the cable). This tensioner is made in the form of a spring. There are cases when the glass is very wide, then there may be a skew, because there are only two sections in the cable, located vertically, they, in turn, can hold the glass in two places.
Now, in such a case, such as a break in the window lift cable (flexible part), you need our instructions, which will help you carry out a replacement with the result you expect.
If you want minimal costs and are confident that you will cope with this problem without the intervention of specialists, we will begin the replacement process. To be on the safe side, ask a friend to help you with this, for example.
Replacing the window lift cable
What will you need?
A new cable (preferably with a reserve), aluminum clamps, side cutters, screwdrivers: slotted and cross-headed, an awl, lithol, file, a pencil that you will use to make the necessary marks and clamps for the pads (clamps).
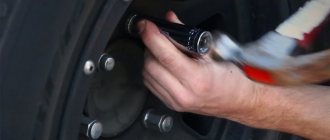
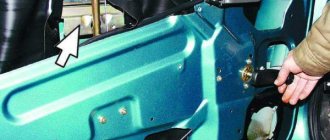
The second thing you need to do is start disassembling the door. Do everything carefully and carefully. Before you start removing the door card, you must disconnect the wires and the door handle rod.
To disassemble the door you should carry out the following steps: Unscrew the screws along the edges of the casing. Proceed to remove the power window buttons using a screwdriver and a clamp. Then remove the door card. Mark the placement of all glass frame bolts and wedges with a pencil. Then you need to disconnect the wiring from the glass frame and mirror. Begin the removal of the window motor and the process of removing it. Unscrew the frame bolts, then remove the frame itself and place everything on the table. Then we proceed to unscrew the screws using a Phillips screwdriver. Carefully begin to pull the glass out of the blocks on the frames.
After you have disassembled the door, proceed to replacing the window lift cable.
Follow these steps:
Make notes for yourself and keep in your memory the location of the cable, as well as how the shirts are located. Remove the washer cover; it is secured with a bolt from the side of the near door. Now you need to remove your worn cable. Proceed to remove the pads. They can be removed with one movement around the rails. Now remove everything from the cable. Clean: washers, jacket and casing. We take a new cable in our hands and fix 2 clamps in the middle. We install the cable jacket between the clamps. At the same time, observe the distances between the blocks; if this moment is missed and ignored, the glass in the frame will be skewed. Now you can insert the cable and then the shirt into the clamps, or rather between them (diagonally). We fix the ends of the cable in place, then put shirts on them, and then proceed to guide them to the washer casing and assemble them into one mechanism. Take the upper end of the cable and pull it, the pads should go up. We try everything on and cut the lower cable (its reserve), now you need to put a clamp on it and insert it into the lower washer, and the washer into the casing. Rotate the washer all the way, see if the bottom cable is wound up, and the pads should go down. Now we measure the upper cable and cut it, install a clamp on the cable, and then insert the cable into the upper washer. We twist the washer in all directions and carefully watch how the pads move. After this, we proceed to the process of installing the washer body with cables and washers. Screw everything into place! After this you can install the glass on the pads.
And the final stage is assembling the door. The process of replacing the cable takes place in three stages.
Electric windows
create certain conveniences for the driver and passengers. If such devices are not included in the factory equipment of the vehicle, they can be supplied additionally.
Window lifters
designed to move and hold sliding windows in extreme or any intermediate positions. Due to the wide variety of car doors, the range of window lifters includes dozens of items. For the right, left, front and rear doors of the same car, the design of their parts is different.
Window lifter designs
The role of glass guides for all window lift designs is performed by:
grooves on the inner sides of the door frames that hold the glass by its side edges;
special rails, fixedly fixed in the door body, along which sliders mounted on the lower edge of the glass slide.
Upward movement is limited by the window seal, downward movement is limited by a rubber damper.
Window lifters include two main components: a drive and a glass lifting mechanism.
The drive creates a torque sufficient to move the glass.
He can be:
mechanical, consisting of a handle and a pair of spur gears to increase the force and transfer it to the drive shaft;
electric, which is a reversible electric motor with a built-in worm gear1, on the drive roller of which a drive gear or drum is installed.
The lifting mechanism converts the rotational movement of the drive roller into translational movement of the glass. Regardless of the type of drive, manual or electric, window lift mechanisms are divided into cable, rack and pinion.
Cable (Fig. 1). A flexible element2 in the form of a ring is stretched between three, sometimes four rollers, mounted inside on the door or on a separate subframe. To increase friction forces, several turns of the cable are constantly wound on the drive drum. When the drum rotates, one branch of the cable is wound onto it, and the other is unwound and the cable receives forward motion. In the vertical section, it is connected through a plate to the lower edge of the glass. The movement of the plate occurs along the guide pipe. One of the rollers is spring-loaded and serves as a tensioner to compensate for possible stretching of the cable. Sometimes the tensioner is made in the form of springs installed at the junction of the opposite ends of the cable. If the glass is wide and there is a possibility of it being skewed, the cable can have two vertical sections and hold the glass in two places.
Rice. 1. Cable window lift (version with two vertical
areas for lifting wide glass)
The advantage of the cable mechanism is that it occupies a small space in the inner cavity of the door. The disadvantage is the complexity of the design and the possibility of twisting and chafing the cable.
Rack and pinion (Fig. 2). A stationary toothed rack is vertically fixed inside the door and meshes with a gear mounted on the drive roller. The electric motor with gearbox is mounted on a guide plate connected to the glass. When the gear rotates, the guide plate, together with the electric motor, gearbox and glass, moves vertically relative to the rack.
Rice. 2. Rack and pinion window lifter
The advantage is the constant speed of movement, simplicity of design and reliability. The disadvantage that limits its use is the large height dimension.
Single lever (Fig. 3). The drive gear rotates the wheel sector and moves the lever arm up or down. A slider mounted at the end of the lever moves the movable plate and the glass mounted on it. To equalize the force, a scheme with two parallel levers is sometimes used.
Rice. 3. Single lever window lift
Double-lever (Fig. 4) is a complicated version of the single-lever, where an additional lever is attached to the main lever. It is equipped with sliders on both sides. One of them, together with the slider of the main lever, moves the movable plate with glass. The other moves along a guide in a fixed plate fixed inside the door. In this case, the force is distributed between the main and auxiliary levers, which reduces the possibility of misalignment.
Rice. 4. Double-lever window regulator
Double-lever wheel (Fig. 5). The drive gear meshes with two wheels. When it rotates in one direction, the levers diverge, and when rotated in the other, they converge, moving the movable plate with glass using sliders.
Rice. 5. Double lever wheel window lift
The advantages of lever mechanisms are reliability, compactness, and ease of installation.
The disadvantage is the uneven speed and effort of moving the glass depending on its position (the higher the glass is raised, the slower it moves).
Control system
Depending on the requirements, control of the electric window can be from the simplest push-button to “intelligent”, combined with an alarm or security system.
“Push-button” control is carried out using key switches. They are installed in a convenient place in the cabin, two on the driver’s side and one each on the other openable windows. Switches come in a variety of designs and designs and may also be backlit. In this case, automatic fuses are used to protect against overloads.
Remote control is carried out by the control panel and can provide simultaneous automatic closing of windows, doors and the electric sunroof when the car is armed.
The convenience unit for electric windows provides:
the ability to open and close windows with one short key press;
stopping and (or) switching the direction of movement if there is any object between the glass and the frame;
automatic protection against electric motor overload, for example if the glass is frozen to the seal.
To convert a manual window lifter into an electric one, install:
an electric motor with a built-in gearbox in cases where the design of a standard window regulator provides for the possibility of directly replacing a mechanical drive with an electric one;
an attachment to the standard window lifter in the form of an electric motor with a gearbox and an additional flexible drive on the roller of the existing mechanical drive3;
On older models of VAZ cars, such as “Classics”, “eights” and “nines”, electric windows were not installed regularly from the factory; the driver and passengers had to lower the door windows in the car manually, which is generally inconvenient.
But now various companies produce electric window regulators (ESP) for these cars, and many auto repair shops can install the mechanisms for a reasonable fee. Installing window regulators with your own hands is not a difficult task, and those car owners who have plumbing skills and do not want to overpay do this work themselves.
Typical cable faults
There are three main cable faults:
- chafing and breakage;
- twisting;
- stretching
In addition to the listed malfunctions, cable wear can occur for a number of other reasons. For example, if the device is installed incorrectly or foreign objects get into the glass groove.
A malfunction of the mechanism can be determined by the following signs:
- glass jams in one position;
- difficulty moving glass;
- there is no reaction when you press the button;
- jerks when moving.
The cable can weaken not only due to long-term use, but also when the plastic clamps break, which should be replaced. If the window lift cable is broken, it must be replaced.
Tracks or contacts in the mounting block
Another reason may be a broken contact of the mechanism relay in the mounting block.
Considering the circuit of the mounting block, we can conclude that a constant plus comes to pin 30 through a fuse, and when we turn on the ignition, we apply another plus to pin 85. As a result of turning on the ignition, an electromagnetic field appears, which closes pins 30 and 87, which provides power to window lift buttons.
This means that if the operation of the plus on the ignition switch is disrupted, the contacts stop closing, even if the relay is in working condition. You can check this by closing contacts 30 and 87 directly, then the plus will come without the ignition switch and if the problem is in it, then the power windows will work.
But there may also be the opposite situation, that we do not have a constant positive supply to pin 30, and when we turn the ignition key, the contacts close, but nothing happens. In this case, it is best to ring the contact with a tester and find out whether there is constant voltage. For testing, you can connect the plus directly to pin 87, but this is not safe, since the wire will go outside the fuse.
DIY replacement instructions
To replace the window lift cable, you must prepare the following materials and tools:
- new window lift cable;
- flat and Phillips screwdrivers;
- side cutters;
- aluminum clamps;
- awl;
- lithol.
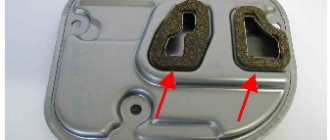
Photo gallery “Changing the cable with your own hands”
Before changing the window lift cable, you need to turn off the door drive and handle rod.
The replacement procedure consists of a sequence of steps:
- First, remove the door trim by unscrewing the fasteners and removing the control buttons.
- Next, disconnect the power wires if an electric drive is installed.
- Then we remove everything that might get in the way: the motor, speakers and hatches.
- At the next stage, we take out the glass and put it aside so as not to accidentally break it during work.
- After removing the glass, the cables will loosen and can be easily removed. First of all, the cable is removed from the side rollers. Then you need to push the cable mount out of the glass mount. Now you can remove the cable from the drum.
- The new part is installed in the same way as the old one was installed. Before installation, clean all rollers and the drum from dirt and lubricate them with lithol. This will extend the life of the device.
- To tension the cable, you need to remove the nail from the spring block.
- After installing the new part, the door is assembled in the reverse order.
After the replacement has been completed, it is necessary to check the operation of the glass lifting mechanism.
The window lifter on the VAZ 2114 does not work
As standard, on a VAZ-2114 car, only two window lifters are installed on the right and left sides of the front doors. If a malfunction is identified due to the failure of both power windows, you will first have to check the thirty-amp fuse F6, located in the mounting block under the hood of the car.
If it is burnt out, then it needs to be replaced with a new one. Well, the driver will have to look for the reason for the failure of this fuse, because if this is not done, then the new fuse will burn out in the same way. When searching for a short circuit, it is necessary to take into account at what point the fuse blows. If this happens when the power window is turned on, then most likely there is a short circuit under the door trim, and if the fuse burns out immediately after the ignition is turned on, then most likely the wiring is shorted to ground, somewhere from the mounting block to the door trim.
The weak point that leads to chafing of the insulation of the wires going to the electric window lifter motor is the transition of the bundle of wires from the passenger compartment under the door trim. Therefore, this place needs to be checked first.
If the fuse is intact, then you will have to remove the door trim and check the voltage at the contacts in the plug connectors of the wires suitable for the window lift motor. This can be done very simply using a test light (one wire to the contact, the second to ground, if the light is on, it means there is voltage). If there is voltage and the window lift motor is not working, it will have to be replaced.
In addition to the fuse, the cause of the window regulator not working can be the failure of the K5 relay located in the mounting block. A relay that is not working is usually replaced with a new one. Sometimes, the window lift motor stops working as a result of warping of the thermobimetallic fuse built into the motor to protect it from overloads.
Also, the cause of a non-functioning window lifter can be mechanical faults. These include: failure of the worm gear, which serves to reduce the rotational speed of the electric motor shaft, and problems associated with the cable drive. During operation, the window lift cable stretches and increases in length, which leads to incomplete lowering of the side window. In addition, the extended cable can jump off the guide rollers and then there is nothing to move the side window.
Concept and types of window lifter
First of all, it should be noted that window regulators are a necessary attribute of every car. With its help, you can effortlessly raise or lower the glass. The main parts of the window regulator are the drive and the lifting mechanism. Today, window regulators differ from each other in the way they work, as well as in their location. According to the first characteristic, there are several types of window lifters. The first type is called mechanical, the operation of which is carried out by unscrewing the lever by hand. Its design contains gears that press on the mechanism and set the glass in motion. The second type is called electric and is more modern than mechanical. In this case, the driver only presses the window switch button to lower or raise the window.
In addition to the drive, there are also different types of lifting mechanism. The first type is cable. This is what we will talk about next. The operation of the cable mechanism is based on the rotation of the cable and pressure on the glass mechanism. This type is quite common and has many advantages. However, there is also a drawback, which is that with constant and long-term operation of the window lifter, the cable wears out or loses its shape and properties. The second type is called rack and pinion. It is based on gears that move using a special electric motor.
VAZ 2114. Why don't the power windows work?
The fuse and relay are ok, what should I do?
The fact is that after checking the relay and fuse, you forgot that external lighting is also involved in the power supply of the ESP. Personally, I had such a problem, I checked the fuse, relay, removed the door trim and checked the entire circuit. At the service station, the repair took 5 minutes, it turned out that the fog lights, which I don’t have, were burnt out.
Of course, the window regulators may not work if something just fell off. Yes, while driving, it also happens that a bolt comes out somewhere. After all, our roads do not really meet the standards. And even more so, if you have electric windows, then the contact may simply fall off. So the reason will have to be found out. And you just need to start by checking whether voltage is supplied to the motor, which raises the windows.
Well, then you’ll have to disassemble the lifting mechanism and see how it works and whether anything got in there.
And only after this is it necessary to check the motor itself. Since it can simply fail.
If the window regulators do not work, both at once, then the motors simply could not burn out and only the fuses of all other circuits and, first of all, the lighting are to blame. Check them and the problem will probably be fixed.
VAZ 2114 can be equipped with either conventional manual (mechanical) window lifters or electric windows.
If we are talking about electric windows, then as a rule (at least quite often) the cause of the breakdown is in the electric motor
The window lift motor on the VAZ 2114 is not dismountable, only replacement.
Perhaps the problem is in the fuse (the most simple failure) the fuse box, like in its predecessors (VAZ 2109, VAZ 2108), is located under the hood.
True, sometimes just replacing the fuse is not enough; sometimes you need to look for the reason why it (the fuse) blows.
This is interesting: Curtains on car windows: allowed or prohibited?
Perhaps the wires are shorted to ground, you need to remove the door trim and see what’s wrong, perhaps the insulation of the wires is broken.
Maybe the reason is in the relay, it is located in the same block under the hood, relay K5, here too only a complete replacement is required.
Or there may be a breakdown in pure mechanics, for example, a worm gearbox has failed, or a problem with the cable drive.
The window lifter system on the domestically produced VAZ 2114 car is quite simple and consists of the following mechanisms:
- motor or mechanical crank
- lifting mechanism with a set of gears
- adjustable lifting device
There are several reasons why power windows may not work:
- No current reaches the electric motor connector. The cause could be a blown fuse or a break in the electrical wiring.
- The problem is in the motor, this is either a loss of current through the electrical wiring or a failure of the motor itself. The motor is removed and current is supplied to it with reversal of polarity; the motor should rotate freely in different directions.
- Failure (mainly the teeth are worn out, resulting in the mechanism jamming) of the lifting mechanism. It is not repairable, only replacement.
- The bushings on the adjustable device come off due to wear.
- The glass has jumped off and rested against something, which is why the mechanism simply cannot raise it (or lower it)
- A foreign object has entered the mechanism.
Cable mechanism
The cable of the window lift mechanism is wound on a drum and tensioned with special rollers that regulate the tension. The rollers themselves are attached to the door. In turn, the drum is connected to the lower part using a plate and moves along with the cable. If the car has wide glass, a cable holds it on both sides in order to avoid distortion.
Window lifter malfunctions and ways to eliminate them
The designs of manual window lifters for VAZ cars suffer from a number of “childhood” diseases, the cause of which is design flaws and the lack of the required intermediate tests on benches. Moreover, the most negative thing is the fact that manual window regulators are actually not suitable for manual repair. Even if it seems that fixing the problem is very simple (using a regular screwdriver and wrench), it turns out that in order to restore the system to working order, workshop conditions are needed. The following “popular” faults can be identified:
Window lift creaking
It is very easy to confuse this “symptom” with the normal operating mode of the window regulator (because all more or less complex components in VAZ cars necessarily make sounds during operation). But it is wiser to take it as a rule: if at least some noise appears in the operation of the window regulator, this means that it is necessary to lubricate them. Because if this is not done, then the next event will be, directly, a breakdown of the mechanism.
Window lifter jammed
It happens that it is impossible to close or open the window regulator. Mechanism wedge is a very common situation. In this case, there may be the following reasons for this:
- or the welded joint that secures the cable to the glass strip has broken. (Then you need to unfasten the cable and re-weld the detached bracket);
- or the correct winding of the cable on the block has gone wrong. (Then you should try to carefully unwind it, however, in case of failure you need to be prepared that you will have to replace the entire mechanism);
- Wedging of the lift mechanism can occur due to simple wear and breakage of gear teeth. (In this case, the only solution is to replace the defective parts).
Glass falls
A window lift malfunction typical only for VAZ cars is... glass falling. Down, but not all the way. The reason for this is the weakening of the tension cable, resulting in sagging of the glass. It is possible that you just need to tighten the cable, or it is possible that its end flew out of the fastening. In the latter case, the window regulator will have to be disassembled in order to restore the integrity of the cable and rewind it.
Cable pulling diagram for 2104, 05, 07
Cable replacement process
You can replace the cable yourself by following the rules and instructions. First of all, the replacement begins with disassembling the door. To do this, you must first unscrew the screws and mark the places where they were. The power window buttons are also removed and their placement is also noted. Next, all adjacent wires are disconnected and the door inserts are removed. You should carefully check that all parts are disconnected from the glass frame. After all the operations performed, the motor will be in front of you. It should also be removed. It is based on a frame that needs to be removed by unscrewing bolts and screws. After everything, you need to remove the glass itself. This should be done carefully so as not to damage the glass and adjacent parts.
We measure the required distance, place these parts and place the cable washers to the casing. Having collected all the parts, we check the correct operation of the cable. We rotate in all directions, check the movement of the pads, and it is also necessary to cut the spare cable size. After making sure that everything is securely and correctly fastened, install the washer body. After everything, you should reassemble the door in reverse order.
Electrical faults
First of all, check the fuse. If it is faulty, we replace it. Most often, after replacement everything will work. But, according to popular belief, a blown fuse will soon lead to wiring repairs. Therefore, it is advisable to check everything at once. If the fuse is working, check the power supply to the door. It should receive 12-12.4 V
. To do this, you will have to remove the door trim. The voltage is measured at the motor terminals. If there is no voltage, first of all you should look at the wiring. Very often the wires fray, especially at the junction from the door to the body. To check, inspect the wires, and it is also advisable to ring individual sections. All this allows you to identify damage. It's also a good idea to check the connectors. After winter they often oxidize. As a result, the current is not transmitted and the window regulator does not work. It is advisable to check the contacts twice a year, clean them, and coat them with a grease specifically designed for this purpose. This way you can avoid problems with connectors. Also, do not exclude the option when the chip simply falls off. In this case, it’s enough just to put it on. The buttons located on the doors are checked. They should be checked using a tester. Sometimes the board responsible for the operation of the control button fails. To check, we find the contacts that are responsible for powering the button (to do this, you will have to study the electrical circuit of the car). After which they are simply bridged. A working button will open or close a window. If there is no reaction, then the button is clearly faulty. The control unit is not installed on all cars. The test consists of measuring the voltage at the terminals of the block. Each contact is checked individually. When the lift is operating, voltage that is normal for the machine should appear. If this does not happen, then the reason is the burnout of the track. Of course, you can try to restore it, but it is much easier to buy a new one. Especially if several tracks are damaged.
Removing and installing a window regulator
Removing and installing the window regulator should be done in the following order:
- Unscrew the screws securing the pillar 5 (see Fig. 317) of the sliding glass in front of it.
- Open the tilt glass and lower the stand.
- Remove the sliding glass 8 by lifting it.
- Remove the old window regulator with bracket.
- Install the new window regulator and tensioner roller bracket without tightening the bracket mounting bolts.
- Tension the cable 7 (Fig. 318) by moving down the bracket 8 tension rollers and tighten the nuts.
- Install the facing rosette 3 of the handle, insert the bracket 2 into the socket on the handle and install the handle on the window lifter rod.
- By rotating the window regulator handle, rewind the cable on the drum to the position corresponding to the lowest position of the sliding window. Then, making three turns in the opposite direction, install the sliding window bracket in the middle of the hatch and secure the sliding window to the cable.
How to repair a motor
We have figured out the reasons why the window lifter in a VAZ 2110 car may stop working, and now we will tell you how to fix the window lifter motor with your own hands.
Before repairing the device, it must be dismantled. Do not save time and do not try to disassemble it in the door, as this is inconvenient. It’s better to immediately remove it and pull it out of the door, and then start repairing:
- First, remove the gearbox cover with a 5.5 wrench - to do this you need to unscrew 4 bolts.
- Remove the driven gear from the gearmotor and check the condition of the teeth on it.
- Using a shaped screwdriver, unscrew the bolts that hold the engine.
- Disconnect the wires from the engine and note how they were connected.
- Insert the wires into the electric motor housing.
- Disconnect the gearbox and motor.
- Knock the armature out of the engine by holding its shaft in a vice (it is better to wrap it first so as not to damage it). Knock out the anchor through the wooden spacer with light blows of a hammer on the end.
- Remove the plastic plug from the base using tweezers or pliers.
- Knock out the bushing at the end of the shaft. You can make this process easier by spraying with WD-40. Next, fix the shaft and bushing so that the stop is on the bushing. Insert a thin punch and make a few gentle blows.
- Remove any rust from the shaft using fine sandpaper. Additionally, it is recommended to treat the elements with gasoline or solvent.
- Press the rear shaft bushing into the body of the VAZ 2110 electric motor, using a thin spacer with a hammer.
- Insert the brushes into place and secure with wires.
- Place the shaft into the gear housing.
- Release the brushes and check for contact between them and the commutator.
- Place the previously removed plastic tip on the end of the shaft and thoroughly lubricate it with some lubricant, for example, CV joint-4.
- The seal on the wires must be pulled away from the terminals. Insert the wires inside the electric motor housing and then install the seal in place.
- Insert the driven gear into the gearbox housing and screw the cover to the housing with four bolts.
- Connect the gear housing to the electric window lift motor of the VAZ 2110. This can be done by holding the gear shaft with pliers to prevent it from turning. Otherwise, the anchor will jump out of the gearbox. Secure them with two bolts.
Do-it-yourself repair of the VAZ 2110 window lifter electric motor has come to an end, and all you have to do is check the operation of the mechanism.
Video:
Video:
Video:
Video:
How to fix any broken window regulator
As we have already found out, the main problems with the correct operation of the window regulator can be caused by such components as fuse F5, which protects the electrical components from short circuits, a relay, an on-off button and a gear motor.
In addition, there may be a variety of minor troubles associated with broken wires or disappearance of contact in those parts of the circuit where it is needed.
Troubleshooting all such faults will seem relatively easy even for a beginner. Almost all of the parts listed above cannot be repaired. Therefore, if one of them fails, it needs to be replaced with a new one. This is not difficult to do, but you will have to disassemble the entire mechanism. Dismantling is carried out in several main stages:
- First you need to de-energize the battery to prevent a short circuit;
- unscrew the screws and lift the fixing latches to disassemble the door pocket;
- we dismantle the window lifter handle along with the clamp holding it;
- We remove the door trim, thereby getting to the window lift mechanism.
After this, it is already possible to diagnose individual parts and replace those that do not cope with their functions. Using this scheme, you can get to both the front and rear windows on a VAZ-2110 car.
All the operations described above are best performed with experience, as well as special tools that help prevent damage to individual parts or door trim. Otherwise, it makes sense to contact a specialized car service. This will involve some expense, but you will be confident that your window regulators will work flawlessly after professional repairs.
There is a special offer on our website. You can get a free consultation with our corporate lawyer by simply submitting your question in the form below.
How much will it cost
As you understand, you can go to the service, and then you will get the maximum possible amount for this work. But if you do everything yourself according to these instructions, then it will not be expensive for you. The fact is that the cable costs about 500 rubles, and a complete repair kit costs a little more than 1,000 rubles. The replacement is simple and will take you about 30 minutes, especially if this is not your first time doing this.
In general, we told you everything in sufficient detail, but if something was not clear to you, then watch the video below. Everything will be done there clearly. Don’t forget that you can save a lot of money by repairing simple mechanisms yourself, so we recommend that you also