Types of panels
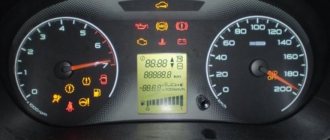
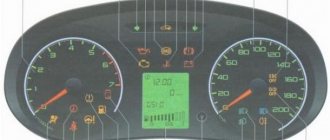
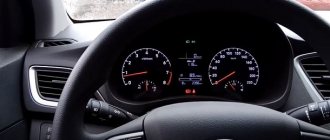
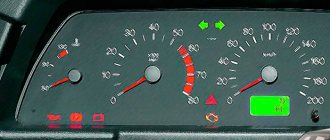
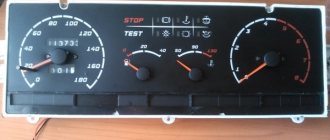
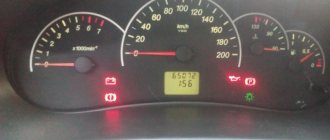
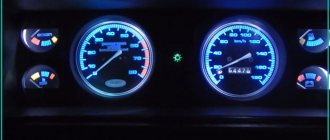
During the release of the Lada XRAY, several instrument panel options have changed, but the differences between them are not fundamental and mainly come down to design and software. All panels are combined, well-type, in the center there is a larger analog speedometer, on the left there is a well of the same tachometer, and in the right well there is an on-board computer screen (in most brands it is placed in the center).
Since the car was created at one time on the basis of Sandero, the XRAY is suitable for a fully virtual dashboard from the “French”, but it costs 4-6 times more than the original one and the feasibility of replacement is a big question.
How to determine the coolant temperature on the new Lada XRAY Cross instrument panel
On the Lada XRAY Cross, AvtoVAZ began installing an updated instrument cluster (part number 8450022501). One of the distinctive features of this instrument panel is the presence of a coolant temperature display. However, these readings are not very informative, because temperature is displayed as rectangular segments. Do you know how to decipher these divisions?
The vehicle's operating manual states that in a variant version the instrument cluster uses an on-board computer display with functions for indicating the coolant temperature. However, there is no additional information.
Owners of Lada XRAY Cross note that the coolant temperature does not rise above the 4th division. We addressed this question to the manufacturer, and here is what they told us:
At what temperature the remaining divisions light up, we were able to determine using the EML327 adapter (can be ordered from this accessories catalog):
- 45-55 o C;
- 55-65 o C
- 65-75 o C
- 75-110 o C
- 111 o C and above
Update 04/10/19
: AvtoVAZ response:
Keywords: Lada XRay cross
Found an error? Select it and press Ctrl+Enter..
Source
Removing (replacing) the instrument panel
This in itself is not particularly difficult:
- Remove the screws connecting the upper and lower parts of the steering column housing.
- Unscrew the screws, disconnect the connectors and remove the steering column switches.
- Unclip the panel frame latches in the following order: starting from the lower left corner, bottom, left, top, right.
- Remove the panel frame.
- Unscrew the 2 screws at the bottom of the instrument panel.
- Disconnect the connector on the back of the panel.
- Remove the panel.
The installation is carried out in the same way.
Indicators
| Alarm | Backlight color | Checking the lamp | Internally controlled (S)/externally controlled (E) |
| Glow plugs activated | Amber | No (may light up when the ignition is turned on, indicating activation of the glow plugs) | E |
| Safety belt | Red | No | E |
| (MIL (Malfunction Indicator Light)) | Amber | * Yes | E |
| Left Turn Signal | Green | No | E |
| High temperature ECT | Red | Yes | S |
| High beam | Blue | No | E |
| Alarm | Red | No | E |
| Right turn signal | Green | No | E |
| Traction control system | Amber | Yes | E |
| Differential lock | Amber | No | E |
| Rear fog lamp. | Amber | No | E |
| Trailer | Green | No | E |
| Low fuel level warning lamp | Amber | Yes | S |
| **ABS | Amber | * Yes | E |
| Brake warning light | Red | Yes | E |
| turning on the side lights; | Green | No | E |
| Anti-theft alarm system | Red | No | E |
| Engaging transfer case downshift | Green | No | E |
| Ignition/charging circuit fault | Red | No | E |
| Low oil pressure | Red | No | E |
* = The lamp test is performed by the subsystem module and not the instrument panel. ** = Following the replacement of the ABS (Anti-Lock Braking System) unit on 2011 MY vehicles, changes were made to the IPC unit hardware to update the IC inputs to accommodate differences between WABCO units and Bosch. IPC compensates for the difference in operating logic, so the system does not require owner intervention. The indicator will remain illuminated in the event of a high or low voltage signal corresponding to an open circuit (O/C) or short circuit (S/C). Since ABS is not installed on all cars, there is a PID recorder on the instrument panel that detects the presence of ABS. The default state is to have ABS in the new data package. Therefore, if a new IPC unit needs to be installed on a vehicle because the vehicle is NOT equipped with ABS, the ABS warning light will remain illuminated until the PID recorder is set to "No ABS Installed". If your vehicle is equipped with ABS, the warning light should come on for three seconds and then go off (normal test procedure).
Pinout
According to experts, the pinout of the contact group in all versions of the X-Ray device is the same, in theory, this simplifies interchangeability between generations. However, if you replace the “native” one with the dashboard of another VAZ model, there will be no more matches.
The example below shows the pinout of the X-Ray and Vesta models; when trying to replace it, I had to tinker a lot.
In the end, everything worked out for the person, the panel started working, but flashing the firmware is a rather complicated process, requiring programming skills and specific equipment.
Peculiarities
The appearance of such a tidy is simply luxurious - it looks stylish and expensive, immediately highlighting the interior of your X Ray.
It has a 4.3-inch display using TFT technology. In addition, 5 indicators can be displayed simultaneously, which makes reading information even faster and more convenient, and this is important when driving at high speed.
This component was received for testing by one of the Drayvovites, known there under the nickname Valdemar600. He immediately noted a number of pleasant and useful points:
- Colorful – this dashboard looks much more attractive than the standard one;
- The presence of a sports mode, which allows you to display the current engine speed, as well as maximum speed during acceleration;
- Fuel indicators – fuel consumption (instant and average), as well as remaining range on the current gasoline supply;
- Battery charge level;
- The calendar is far from the most necessary aspect in this case, but it is there;
- Crossover maintenance - for example, you can set a notification for an oil change;
- Possibility to display an overspeed indicator.
Icons and indicators
Like other cars, VAZ provides the driver with information about malfunctions, errors and other events that require his attention, by highlighting various icons on the dashboard.
- ABS warning light.
- Airbag warning light.
- Multifunctional indicator reporting problems with the internal combustion engine. To accurately determine the error, you need to connect a scanner; it is recommended to contact the service.
- The need indicator will switch to a higher gear in the gearbox.
- Engine overheating indicator.
- The battery discharge indicator indicates problems in the vehicle's power supply system.
- Left turn signal indicator lamp.
- Indicator of the applied handbrake, if the parking brake is released and the lamp is on, this indicates problems in the braking system.
- Right turn signal indicator lamp.
- ECO mode indicator.
- Oil pressure indicator.
- ICE preheating activation indicator.
- Signal switch for disabling the electronic stabilizer.
- Indicator for activation of the electronic stabilizer.
- On-board computer screen.
- Low fuel tank indicator.
- Speed controller warning light.
- Cruise control warning light.
- Speed limiter indicator.
- High beam indicator.
- Heating alarm.
- Low beam warning light.
- PTF activation indicator.
- Rear PT lamp indicator.
- Speedometer needle.
- Indicator of problems with the internal combustion engine.
- The need indicator will switch to a lower gear in the gearbox.
- Tire pressure warning light.
- Open door alarm.
- Tachometer needle.
Renault Logan: errors on the instrument panel
The car has a special computer on board to control the electronic systems of the car. Regardless of the release, be it a 2008 or 2016 car, errors during self-diagnosis of the BC are displayed on the main screen of the module. At the same time, the standard system displays only the main circuit, without indicating a specific malfunction. The following is a breakdown of the most popular error codes:
- 002 – potentiometer is faulty;
- 003 – incorrect information from the air supply sensor in the intake manifold;
- 004 – DTOZH, failure or failure;
- 006 – the fuel mixture detonation sensor is covered;
- 014 – the operation of the adsorber purge valve is disrupted;
- 017 – DPKV;
- 022 – The ECU is damaged or the firmware has been lost;
- 032 – internal combustion engine overheating;
- 044 – immobilizer faulty;
- 52-55 – injector drivers for cylinders 1-4 are damaged, respectively;
- 064 – speedometer, sensor break;
- 106 – the catalyst has failed;
- 253 – engine ground contact lost.
Flight computer
Its screen is located in the right well of the instrument panel, the control is located on the end button of the right steering column switch. A rather extravagant solution, perhaps caused by the relatively limited functionality of the on-board computer, for which a simple “flipping” is sufficient.
However, it cannot be called completely “empty”; some budget set of functions is present, but some of the following operating parameters may be absent depending on the specific configuration of the car:
- odometer (mileage counter);
- mileage counter No. 1 (daily mileage or mileage per trip);
- total gasoline consumption (after zeroing);
- current consumption;
- average consumption;
- expected range based on the remaining gasoline in the tank;
- mileage counter No. 2 (mileage after reset);
- average speed information;
- remaining mileage before maintenance;
- set cruise control/speed limiter parameter;
- watch;
- air temperature outside the car;
- tire pressure data.
To reset the readings, you need to select the desired item in the menu and hold the button pressed for several seconds. To reset the mileage until the next maintenance, you will have to hold the button for about 10 seconds. Schematically, all the functionality of the on-board computer complex is presented in the table below.
In general, the dashboard of the Russian-French VAZ baby can be called acceptable, given the price range in which the car is located.
Indicators and warning lights
A whole complex of control lamps and light indicators is built into the vehicle's instrument cluster, with the help of which the driver receives important information about the serviceability and malfunction of the main units and systems of the car (control lamps), and can also monitor the serviceability of activation and deactivation of the corresponding components and systems (indicator lights ). Below is a list and description of warning lamps and indicator lights.
When you turn on the ignition, most indicators light up briefly to check their functionality. The indicator colors indicate:
- red, orange – danger, important reminder;
- yellow – warning, help, malfunction;
- green, blue – confirmation of switching on.
Tachometer
The tachometer (Fig. 3.4) shows the engine speed. To find out the engine speed per minute, you need to multiply the tachometer reading by 1000.
Rice. 3.4. Tachometer (rpm x 1000)
Warning! If the tachometer needle moves into the red sector of the scale, this means that the maximum permitted engine speed has been exceeded. The engine may fail.
Anti-lock Brake System (ABS) Warning Light
glows yellow. Lights up for a few seconds after turning on the ignition. The system is ready for operation when the indicator goes out (see section 4. DRIVING AND OPERATING THE VEHICLE). If the warning light does not go out after a few seconds or lights up while driving, this indicates a malfunction of the ABS system. The brake system continues to function, but without ABS.
Warning! You must contact an official LADA dealer.
Airbag warning light
glows red.
The indicator lights up when the ignition is turned on. If the airbag system is working properly, it will go out approximately a few seconds after switching on. If it does not light up, does not go out, or lights up while driving, this indicates a malfunction in the airbag or seat belt tensioner circuits (see section 2. SEATS, PASSIVE RESTRAINT SYSTEMS).
Warning! In the event of an emergency, these systems may not work. Contact your official LADA dealer immediately.
Multifunctional warning lamp
glows red or orange.
The lamp lights up when the ignition is turned on and goes out after the engine starts. For some malfunctions, the lamp may light up along with other warning lamps. The turning on of the red lamp is accompanied by a sound signal.
ATTENTION! When this warning light comes on, for safety reasons, you must stop the vehicle immediately as soon as traffic conditions allow. To troubleshoot the problem, contact an official LADA dealer.
Exhaust gas control system warning light
glows yellow.
Lights up when the ignition is turned on and goes off shortly after starting the engine (see section 4. DRIVING AND OPERATING THE CAR). When the warning lamp turns on or flashes while the engine is running, it indicates a malfunction that requires elimination.
ATTENTION! Operating a vehicle with the exhaust gas control system malfunction indicator light on or flashing can lead to failure of the system, increased fuel consumption and deterioration in vehicle dynamics. You must contact an official LADA dealer.
"Open door" indicator
glows red.
This indicator serves to warn about opening or loose closing of car doors (see section 1. KEYS, DOORS, WINDOWS, PEDALS).
Gear shift indicators
and light up as a recommendation to change to a higher (up arrow) or lower (down arrow) gear.
Tire pressure indicator
The indicator system (lit in orange) shows the decrease in tire pressure (see section 9. PRACTICAL TIPS. “Tires and wheels”).
Speedometer
The speedometer (Fig. 3.5) shows the vehicle speed in km/h. Depending on the vehicle's equipment, if the speed exceeds 120 km/h, an audible signal will sound every 30 seconds for approximately 10 seconds.
Rice. 3.5. Speedometer
Turn signal indicators
flash green.
The indicators flash when the direction indicators are on or when the hazard warning lights are on. Frequent blinking—the turn signal lamp or the corresponding fuse may have failed (see section 8. CAR CARE).
Brake fault/parking brake warning light
glows red. When the ignition is turned on
The warning light lights up continuously when the parking brake is on, reminding the driver to release it before driving (see section 4. DRIVING AND OPERATING THE VEHICLE). If the warning lamp continues to light after releasing the parking brake, or is activated while driving, this indicates an excessive drop in the brake fluid level (see section 4. DRIVING AND OPERATING THE VEHICLE, “Preparing the vehicle for movement”), or there is a malfunction of the brake distribution system forces (EBD, see section 4. DRIVING AND CONTROLLING THE VEHICLE, “Electronic Stability Control System”).
Warning! Do not drive if the brake system fault warning light is on. Driving with a faulty brake system could result in a collision that could result in personal injury, damage to your vehicle, or other property. Contact your official LADA dealer immediately.
Low battery warning light
glows red.
Lights up when the ignition is turned on and goes off shortly after the engine starts (see section 8. CAR CARE). If the lamp turns on while the engine is running, this indicates a disruption in the normal operation of the vehicle's power supply system and indicates a malfunction of the battery charging system, low tension or breakage of the alternator drive belt, or a malfunction of the alternator itself.
ATTENTION! Stop and turn off the engine. Contact an official LADA dealer.
Coolant temperature warning light
glows red.
This warning light warns of overheating of the engine coolant (see section 8. CAR CARE).
ATTENTION! Immediately stop the vehicle in a safe place and let the engine idle for a few minutes. If the warning light does not go off, turn off the engine and contact an official LADA dealer as soon as possible. Prolonged driving with the warning light on can lead to engine failure due to overheating.
Engine oil pressure warning lamp
glows red.
Lights up when the ignition is turned on and goes off shortly after the engine starts. If the lamp is constantly on after starting the engine, and also turns on while driving, this indicates a dangerous drop in oil pressure in the engine systems. If the lamp turns on while the vehicle is moving, you should pull off the roadway, immediately turn off the engine and check the oil level (see section 8. CAR CARE).
ATTENTION! Operating the vehicle with the warning light on can result in serious damage and engine failure.
Signal lamp for high beam headlights
glows blue.
Lights up when the high beams are on and when the headlights are flashing (see section 3. INSTRUMENT PANEL, CONTROLS. “Controls and instruments”).
Signal lamp for turning on the front fog lights
glows green.
Lights up when the front fog lights are on (see section 1. Keys, doors, windows, pedals. “Light alarm switch”).
Rear fog light warning light
glows yellow.
Lights up when the rear fog light is turned on (see section 1. Keys, doors, windows, pedals. “Light alarm switch”).
Low beam headlight warning light
lights up green when the low beam is on (see section 1. Keys, doors, windows, pedals. “Light alarm switch”).
Engine warning light
glows yellow.
Lights up when the ignition is turned on and goes off shortly after the engine starts. When the warning lamp turns on or flashes while the engine is running, it indicates a malfunction that requires elimination.
Electronic Stability Control Warning Light Off
glows yellow. Lights up when the electronic stability control system is disabled (see section 4. DRIVING AND OPERATING THE VEHICLE).
Electronic Stability Control Warning Light
lights up or flashes yellow (see section 4. DRIVING AND OPERATING THE VEHICLE).
Lights up when a system fault is detected. The trip can be continued. However, depending on the condition of the road surface, stability may be reduced.
Warning! Eliminate the cause of the malfunction by contacting an official LADA dealer. Flashes if the system is triggered. In this case, engine power and vehicle speed may be slightly reduced automatically.
Warning lamp for minimum fuel level in tank
The lamp lights up yellow when turned on
ignition and goes out after a few seconds. If the light comes on while driving and a short beep sounds, fill the fuel tank as soon as possible. From the moment the warning light first comes on, you can drive about 50 km.
Speed Control Warning Lights
and glow green.
The set speed is displayed on the instrument panel instead of a dash, and the activation of the governor is confirmed by the message “Cruise” on the instrument panel and a warning light, which glows green along with the “Cruise control” warning light.
Cruise control warning light
glows green.
The message “CRUISE” and dash signs appear on the instrument panel, which inform you that the speed regulator is turned on, as well as the readiness to save the set speed value (see section 5. SYSTEM OF CORRECTION AND ASSISTANCE WHEN DRIVING A CAR).
On-board computer
Rice. 3.6. On-board computer control buttons on the windshield wiper switch
1 – On-board computer display. 2 – On-board computer control buttons on the windshield wiper switch.
Rice. 3.7. On-board computer display
Rice. 3.8. On-board computer control buttons on the windshield wiper switch
When you briefly press buttons 2 (Fig. 3.6), display 1 sequentially displays the following information (in a variant): a. total mileage counter; b. trip mileage counter No. 1; c. total fuel consumption (from the moment the readings were reset); d. average fuel consumption (from the moment the readings are reset); e. current fuel consumption; f. estimated range with remaining fuel; g. trip mileage counter No. 2 (distance traveled since the readings were reset); h. average speed (from the moment the readings were reset); i. mileage before oil change; j. speed limiter or cruise control set value; k. time indication; l. outdoor temperature indication; m. setting tire pressure.
See Table 1 for examples of display data on the following pages.
Resetting the trip mileage counters and resetting other parameters
To reset the trip mileage counter No. 1, switch the on-board computer menu to mode b “Trip mileage counter No. 1.” To reset the remaining parameters (c, d, g, h), switch the on-board computer menu to any of modes c, d, g, h. Then press any button 2 (Fig. 3.6, 3.8) and hold it for a while. In addition, if the maximum value of the trip counters is exceeded, the parameters are reset automatically.
Explanation of some of the data shown on the display after the reading is reset
The greater the distance traveled since the last zeroing operation, the more stable and reliable the readings of average speed, average fuel consumption and range of fuel remaining in the tank will be. During the first few kilometers of driving after resetting the calculated values, you may notice that the range of the fuel available in the tank increases while driving. This is due to the fact that the average fuel consumption since the last time the readings were reset is taken into account.
Average fuel consumption may decrease in the following cases:
- the car has finished accelerating;
- the engine temperature has reached normal (and the calculated values were reset when the engine was cold);
- You have left a busy city onto a free country road.
Table 1
Note. Depending on the vehicle configuration, the mileage until the next oil change may depend on your driving style (frequent driving at low speeds, driving short distances, long periods of driving at low speeds, towing a trailer). Therefore, in some cases, the displayed distance to the next oil change may decrease faster and may not correspond to the difference between service mileage and the actual distance traveled since the last oil change. In other vehicle configurations, the mileage before an oil change is always equal to this difference; in this case, when operating the car in difficult conditions (described above and in the service book), the oil change should be made earlier than the mileage counter indicates before the oil change. The frequency of oil changes depends on the vehicle's maintenance program: see the vehicle's service book.
Resetting readings. To reset the mileage counter until the next oil change, display the corresponding parameter on the display, press and hold any button 2 (Fig. 3.6 and 3.8) for about 10 seconds until the display shows new values.
