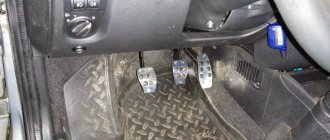
The clutch pedal position sensor on the Lada Grant is fixed on the clutch pedal bracket. To see it, just look under the steering column at the base.
Clutch sensor
Violation of vehicle operating conditions leads to premature wear of the sensor and incorrect engine operation.
Pedal under the steering column
To restore the machine's performance, it is necessary to replace the clutch sensor (hereinafter referred to as DS).
The process is not complicated, but it requires increased attention and precision from the repairman. Do not damage the vehicle's electronic control unit.
Why did it happen so?
Perhaps the automatic requests do not belong to you, but to another user accessing the network from the same IP address as you.
You need to enter the characters into the form once, after which we will remember you and be able to distinguish you from other users exiting from this IP. In this case, the page with the captcha will not bother you for quite a long time. You may have add-ons installed in your browser that can make automatic search requests. In this case, we recommend that you disable them.
It is also possible that your computer is infected with a virus program that is using it to collect information. Maybe you should check your system for viruses.
If you have any problems or would like our support team, please use the feedback form.
How to replace the clutch on a Lada Granta?
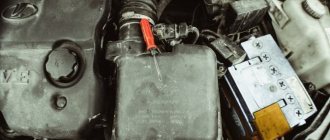
- On the Lada Granta, the process should start from the engine compartment
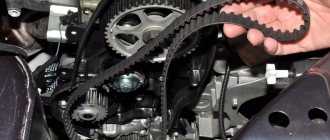
- Under the hood, you need to remove the air filter and air duct so that they do not block access to the gearbox. However, you can remove anything, as long as it’s convenient for you.
- Now unscrew the starter from the engine
- Unscrew the clutch cable from the gearbox
- Now we remove the engine protection under the car
- Remove the clutch housing cover. Draining the oil from the gearbox
- Disconnect the front suspension arms from the steering knuckles, unscrew the torque rod
- Disconnect the reverse wire and speed sensor
- We take the CV joints out of the gearbox one by one. The main thing is that the differential gears do not become out of sync. To do this, insert special plugs into the differential.
- We unscrew the gearbox torque rod and the rocker. Before doing this, you need to mark the position of the adjusting bolts so that after the repair you do not have to adjust the rocker again
- If the ignition coil is in the way, remove it
- We place any strong and stable support under the gearbox.
- Unscrew the gearbox from the engine and remove it
- Now you can unscrew the clutch basket and driven disc
- We replace them with new ones, center the position using a special plastic device that fits onto the crankshaft and assemble everything in the reverse order. To make it easier to understand, watch the video on how to replace the clutch on a Lada Granta with your own hands.
- After assembly, we adjust the clutch cable so that the free play of the clutch pedal corresponds to those recommended by the manufacturer
- During this repair, you can replace the release bearing and lubricate the clutch fork. These parts are located on the gearbox itself.
The release bearing (VP) is a ball bearing that is installed in a special clutch with a spring and moves along the input shaft bushing. The part is used to press the clutch disc and remove the flywheel from engagement with the gearbox. The release bearing (Kalina VAZ 1118, Priora, Granta), like the clutch, periodically fails after a long mileage or improper operation and maintenance. If a clutch malfunction occurs, the gearbox will need to be removed for repairs, but there is a method in which the Kalina release bearing is replaced without dismantling the gearbox. Many VAZ 1118 owners often ask the question “How much does it cost to replace a release bearing on a Kalina?”, we can say with confidence that in a car service this repair will cost about 3,000 rubles. Replacing it yourself according to these instructions will take you 3-4 hours, so the choice is yours.
The article outlines a guide to replacing the clutch release bearing on a Lada Kalina with removing the gearbox, and also shows a method without removing it. Additionally, information is provided on the selection of spare parts, numbers, prices, and sizes. The material is accompanied by numerous photographs, as well as supporting videos, including on replacing the clutch on Kalina. This instruction is suitable for owners of Lada Priora, Lada Granta, VAZ 2110-2115 cars.
➤ Granta clutch sensor - replacement and troubleshooting
The clutch pedal position sensor on the Lada Grant is fixed on the clutch pedal bracket. To see it, just look under the steering column at the base.
Clutch sensor
Violation of vehicle operating conditions leads to premature wear of the sensor and incorrect engine operation.
Pedal under the steering column
To restore the machine's performance, it is necessary to replace the clutch sensor (hereinafter referred to as DS).
The process is not complicated, but it requires increased attention and precision from the repairman. Do not damage the vehicle's electronic control unit.
Sequence of actions to independently replace the clutch sensor on a Lada Granta car
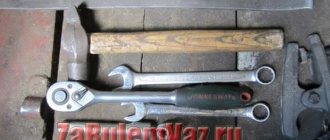
Necessary tools, materials:
- screwdriver with a short arm, flat and Phillips bits for unscrewing screws;
- new sensor;
- flashlight, other device as additional lighting.
Clutch sensor replacement algorithm:
- We install the machine on a flat platform. We provide unobstructed access to the front doors.
- Move the front driver's seat back all the way. We open the hood, “reset” the battery terminals to avoid a short circuit in the circuit.
- We climb under the steering column and remove the DS (chip).
The chip is fixed
- Use a Phillips screwdriver to unscrew the base – the board. It is fixed to the pedal bracket with two screws.
- Remove the latch; it is located on the opposite end of the sensor block.
- Remove the DS block holder.
Pad holder bolts
- We troubleshoot the spring mechanism and inspect the integrity of the board fastening. If there are no defects or damage, insert the new DS block.
- We assemble the structure in reverse order.
Self-replacement of the clutch pedal position sensor on the Lada Grant is completed.
Note to the driver!!! Before installing a new sensor, check its functionality with a multimeter. The process will take a minute, and you will be confident that the equipment is in good working order.
Malfunctions: symptoms, diagnostics, elimination
| Malfunctions | Diagnostics | Elimination |
| When changing gears the car “stops” | Disconnecting the block with wires, checking for changes after disconnecting the DS | Replacing the DS with a new one, since the structure cannot be repaired |
| Uncharacteristic increase/decrease in engine speed when the clutch is disengaged | Connecting a new, working DS | Replacing the DS with a new one |
| P0830 "Check Engine" - clutch sensor error on the dashboard | Connecting a new, working DS | Replacing the DS with a new one |
Frequent causes of failure of the clutch sensor on the Lada Grant
Dashboard faults
- defects in vehicle manufacturing;
- short circuit in the circuit;
- damage, abrasion of the cable insulating layer;
- third-party mechanical damage resulting in circuit malfunction;
- overestimated, underestimated clutch pedal height.
Software disabling the clutch sensor on the Lada Grant
After replacing the DS with a new one, reset the error code. This can be done either with a standard on-board computer or with an ELM-327 scanner (version 1.5).
The standard on-board computer does not always remove system errors. For high-quality car prevention and diagnostics, purchase a modification of the ELM-327 scanner.
The process of self-adjusting the clutch on a Lada Granta car
On domestic cars of the Lada Granta family, in addition to the electronic clutch unit, a cable mechanism is installed. One end is fixed at the base of the pedal, the other on the gearbox drive lever.
In addition to the automatic tensioner on the cable, the manufacturer has provided a mechanical nut adjuster.
- We place the car on a flat platform, open the hood, and squeeze the parking brake lever.
- We remove both terminals from the battery to avoid a short circuit in the circuit.
- We remove the adsorber - air flow sensor, block - air filter module.
- On top of the starter in the engine compartment we find the clutch fork.
- Use pliers to pull the tip forward.
- Using a caliper, measure the distance from the fork to the plastic disk - the rim. Ideally, the distance is 27 mm. If there is a discrepancy, we make an adjustment.
- Press the clutch pedal 4-5 times and repeat the measurement for objectivity.
- We measure the free play of the clutch pedal; it should not exceed 146 mm. If the distance is increased or decreased, the cable must be replaced; it is stretched.
Note to the driver!!! We carry out maintenance of the clutch mechanism on a Lada Granta car every 20,000 km.
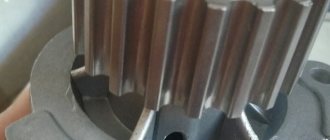
Technical parameters of the roller: 100 x 60 x 20 mm, weight 0.05 kg.
| Manufacturer | Price, rub.) | Resource (Thousand km) |
| VAZ 11180-1602266-00 cable lead | From 250 | 25 – 35 |
| 11180-1602210-00 cable assembly | From 300 | —/— |
| 21901-1602210-00 cable assembly | From 300 | —/— |
| 1118-3720015-00 DS | From 370 – 450 | —/— |
*prices are current as of October 26, 2018.
Equipment:
- Toad - switch 1118-3720015 – 1 piece;
- Housing 1118-3720024-10 – 1 piece;
Source: https://remont-avtovaz.ru/zamena-datchika-scepleniya-na-lade-grante/
Clutch pedal position sensor VAZ
Details Category: Repair Published 02/11/2015 Clutch release bearing Lada Granta
On the latest models of VAZ cars equipped with an electronic gas pedal, a clutch pedal position sensor is installed. Let's consider why it is needed, the principle of operation and possible malfunctions.
Where is the clutch sensor installed on VAZs?
The clutch pedal position sensor on VAZ cars is installed directly on the clutch pedal bracket; it can be seen by looking under the steering column.
What is a clutch sensor used for?
The clutch pedal position sensor is one of the elements of the engine management system with an electronic gas pedal. This sensor provides a more flexible control scheme for engine modes. It simplifies the process of starting to move, eliminates “drops” and jerks of the car when changing gears in the manual transmission, and also allows for a reduction in fuel consumption.
By providing information to the engine controller about the moment the clutch is engaged and disengaged, the clutch pedal position sensor allows it to reduce or increase engine speed at the right moment, as well as adjust the ignition timing.
Working principle of the clutch sensor
The clutch pedal position sensor is an ordinary limit switch with two positions - “on” and “off”.
Its normal position is open, that is, it turns on only when the clutch pedal is pressed.
Clutch position sensor malfunctions
The following symptoms may indicate a malfunction of the clutch pedal position sensor:
- car "pecks" when changing gears
- a sharp increase or decrease in engine speed when the clutch is disengaged
Also, if a malfunction occurs in the clutch pedal position sensor, error 0830 “Clutch pedal sensor error” is recorded in the engine controller and the “Check Engine” light in the instrument cluster turns on.
Error 0830 is detected if the engine controller does not receive a signal from the clutch sensor:
- within 2 seconds after changing gear while driving
- after four gear changes at speeds above 10 km/h and engine speeds above 1000 rpm
The main reasons for error 0830:
- malfunction of the clutch sensor itself
- short circuit or open circuit
- Incorrect clutch pedal height
We encountered error 0830 while preparing the material “How to get there without a clutch?” We recorded video instructions on how to change gears without a clutch. After several gear changes without disengaging the clutch, the “Check Engine” light came on on the panel, which went out only after several dozen gear changes in normal mode.
Clutch sensor price
On many VAZ cars with an electronic gas pedal there is a connector for this sensor, but there is no sensor itself. It is not clear whether they forget to install it at the factory, or whether careless dealers remove it. The second option is also quite possible, since this sensor is still in great short supply. It costs an average of 350 rubles, but finding it on sale is almost impossible.
There are two types of clutch pedal position sensors for VAZ cars:
- 21214-3720020-02 for Lada 4×4 cars with electronic gas pedal
- 1118-3720015 for Kalina, Grant and Priora cars with an electronic gas pedal.
They are not interchangeable with each other. It would seem like a simple sensor, but how much it can complicate the life of an ordinary car owner.
- Replacement of high-voltage ignition wires - 01/24/2015
- Self-service car maintenance - 01/09/2015
- How to change engine oil - 01/08/2015
- How to wash an engine at home (photo) - 02/01/2015
- How to lubricate locks and hinges on a car - 01/01/2015
Operating principle of the electronic engine control system (ECM)
Communities Lada Priora Lada Priora Club Blog Micro FAQ 2. Checking the functionality of the expansion tank cap
In a modern car, all process control, except for the rotation of the steering wheel, and then for now, is entrusted to the computer, or the Electronic Control Unit (ECU). It contains a program with many different tables. In general, the ECU receives data about the state of the car, speed, revolutions, and activated mechanisms from a large number of sensors. Based on the results of these observations, the ECU, using these tables, includes certain ignition modes, fuel supply and other executive functions.
The role of the clutch sensor
It would seem, what does the clutch have to do with it? And here's what it has to do with it. When the clutch engages, the most sensible thing to do is to reduce the engine speed. But not to idle, but according to the speed of the car. This is not always available to the driver, especially a beginner. And here the computer will come to the rescue. Reacting to the signal from the clutch sensor, it can independently adjust the engine speed.
Important! In addition, in accordance with the Priora speed sensor, the ECU can obtain information about the serviceability of the clutch. Summarizing the above, we can say that the presence of a sensor on the clutch allows:
Summarizing the above, we can say that the presence of a sensor on the clutch allows:
- saves fuel;
- make driving easier;
- monitor the serviceability of the coupling;
- increase its service life.
Therefore, its serviceability is an important factor in the Priora control system.
Design and location of the Priora clutch sensor
In principle, this is the simplest switch. In the position when the clutch is disengaged and the pedal is not pressed, the sensor circuit is open. If you press the clutch drive, the limit switch of the sensor closes and the signal “clutch is on” is sent to the ECU.
It is located on the clutch pedal mounting assembly, where the very tip of this pedal is located opposite the sensor end switch.
Knock sensor for Lada Granta
When and how is the first car Lada Granta carried out?
The main tasks of this element include the determination of high-frequency oscillations resulting from fuel combustion in the cylinder block.
Based on the DD signal on the Grant, the control system selects the most suitable ignition timing angle, thanks to which efficient and complete combustion of fuel is achieved in the cylinder block of the car engine
In addition, the ignition timing is also regulated, which is important when using fuel with different octane numbers. The knock sensor on the Lada Granta is located directly on the cylinder block (more precisely, between the second and third cylinders)
Operating a vehicle may lead to malfunctions, for example, the engine may lose power. This symptom indicates that there are obvious problems with the knock sensor. The presence of a malfunction is indicated by the illuminated “Check Engine” lamp, and diagnostics almost always reveal one of the following errors:
- P0325 – signals that the DD circuit has broken;
- P0327 – the level of the signal received from the device is very low;
- P0328 – the signal supplied by the element is too high.
Incorrect operation of the sensor and ways to eliminate them
When operating a Chevrolet Cruze, malfunctions in the clutch pedal position sensor may occur: the “check” light comes on, the car simply does not start, or the engine runs intermittently.
The reason for this may be the following:
- wiring fault;
- failure of the clutch pedal position sensor;
- ECM failure or breakdown;
- Making changes to the electronic circuit of the car by third-party specialists (when installing alarm systems with auto start or changing the firmware).
Connecting diagnostic equipment for this fault may indicate the error codes listed in the table below:
| P0806A | Clutch pedal position sensor operation |
| P0807A | Sensor Circuit Low Voltage |
| P0808A | Sensor circuit high voltage |
These errors may appear when replacing the battery or during frosts - the system receives a one-time incorrect signal and issues a malfunction. When performing diagnostics, it will be enough to reset the error. After the described procedure, the sensor will automatically adapt, and the car will be ready for normal operation.
It’s better to contact official representatives who have specialists in the specified car brand.
The last error shown in the table (P080A) indicates that the position sensor has not been trained. A check by a specialist will help identify the problem - and this will not necessarily involve replacing the sensor. An MDI dealer scanner is required for proper training. The intervention of a garage “genius” in the car’s firmware often causes a malfunction. It is enough to reset the fuel corrections for problems with the equipment to begin.
Tips, tricks and useful repair videos
"Lada Granta" (VAZ-2190) - a model of a people's car
1. Follow general recommendations for transmission operation to increase service life.2. Service life is 80-100 thousand pedal cycles, do not press or hold the clutch unnecessarily.3. Before installation, generously lubricate the new VP.4. Removing a manual transmission is a time-consuming operation (2 hours), so it is recommended to immediately troubleshoot the disk, fork, flywheel, and also replace the cable if necessary. 5. Do not purchase spare parts at the car market or other dubious retail outlets.6. Watch useful videos on repairing, replacing clutches and more!
1. Clutch Lada Granta and its possible malfunctions
2. Adjusting and replacing the clutch cable on a Lada Granta
3. Operations for adjusting the clutch cable Lada Granta
4. How to eliminate squeaks and clicks in the Granta clutch pedal
Lada Granta clutch and its possible malfunctions
The car has a clutch from the Lada Kalina model. The clutch is a flywheel on which a basket is attached. The basket constantly presses the clutch disc, and it is due to this that torque is transmitted to the gearbox from the engine. When you press the clutch pedal, a metal cable connected to the clutch fork is stretched. The petals of the basket are wrung out and stop pressing the disk towards the flywheel, while no torque is transmitted from the engine.
Here is a drawing for reference only, with the design of the Lada Granta clutch.
Clutch and its drive: 1 - metal clutch drive cable; 2 — cable sheath; 3 — lower tip of the cable sheath; 4 — protective cover; 5 - leash; b - fork lever; 7 — bearing guide sleeve; 8 — clutch release bearing; 9 — clutch casing; 10 — pressure spring; 11 — pressure (drive) clutch disc; 12 - flywheel; 13 — friction linings of the driven disk; 14 — driven disk; 15 — damper spring; 16 — torsional vibration damper; 17 — driven disk hub; 18 — spring; 19 — toothed cable tip; 20 — housing of the automatic cable length adjustment mechanism; 21 — spacer sleeve; 22 — cable sheath bracket; 23 — clutch housing; 24— gearbox input shaft
The clutch does not need adjustment throughout its entire service life.
Clutch malfunctions of Lada Granta
The table below shows possible clutch malfunctions of a Lada Granta car and methods for eliminating them. For more detailed information about the operations carried out to repair the machine’s clutch, see the individual articles in the category.
Adjusting and replacing the clutch cable on a Lada Granta
On a Lada Granta car, the clutch is disengaged and engaged by changing the position of the clutch paddles. The petals are pressed out using the clutch bearing, which is moved by the clutch fork. The clutch fork, which is actually a lever on an axle, is driven by a metal clutch cable. This article provides information on replacing and adjusting the clutch cable on a car.
Tools required to replace and adjust the clutch cable: 8 mm wrench, ruler, flat-head screwdriver
The process of replacing the clutch cable on a Lada Granta car
1. From the interior side, under the instrument panel (for clarity, the work is shown with the panel removed), unscrew the nut securing the clutch cable sheath stop to the pedal assembly bracket and remove the stop from the stud.
2. Using a screwdriver, remove the locking bracket and the plastic housing of the clutch wear compensation mechanism from the clutch pedal rod.
3. In the engine compartment, remove the clutch cable sheath seal from the hole in the partition between the passenger compartment and the engine compartment. 4. Pull the cable forward, that is, in the direction of movement of the car. Remove the cable from the recess on the clutch release fork (see picture below).
5. Unscrew the leash from the cable end, remove the guide sleeve of the cable sheath from the hole on the gearbox bracket (see figure below) and remove the cable from the car. Remove it from the hole in the partition.
Clutch sensor spring on grant than to replace
The clutch is designed to connect and disconnect the gearbox and engine flywheel, smoothing out sudden changes in torque loads. The friction clutch allows the car to start and stop smoothly with the power unit running. If sudden braking is necessary with the clutch engaged, it slips, protecting the gearbox from possible overloads. In good condition, the mechanism should provide a reliable connection between the transmission and the power unit.
Friction clutch device
The manufacturer installs the same clutch on the Lada Granta as on the Lada Kalina. The mechanism consists of a flywheel with a basket attached to it. The task of the latter is to continuously press the disk with linings made of friction material - this is how the torque from the engine is transmitted to the transmission. A cable-type clutch means that when the pedal is pressed, the cable connected to the clutch fork becomes taut, the paddles stop pressing the disc, and torque from the engine is not transmitted to the gearbox.
The clutch on the Grant has one disc; it is frictional with a central spring in the form of a diaphragm. It is located in a special aluminum crankcase and combined with the gearbox in one housing, attached directly to the cylinder block. For clarity, you can see a detailed drawing of the device.
Lada Granta clutch device
- Drive cable.
- Outer braid of the cable.
- The end of the cable braid is lower.
- Dust cover.
- Metal leash.
- Fork bracket.
- Bearing sleeve.
- Release bearing.
- Casing.
- Diaphragm spring.
- Disk (master).
- Flywheel.
- Friction material linings on the disc.
- Disk (slave).
- Damper spring.
- Rotation vibration damper.
- Disc hub (driven).
- Central spring.
- Cable end.
- Automatic cable tensioner housing.
- Sleeve.
- Fastening the cable braid.
- Pan (crankcase).
- Gearbox input shaft.
On the Lada Grant, the clutch does not require additional adjustment during its entire service life - this is what is written in the car’s operating manual.
Possible faults
How to fix
| Cause of malfunction | |
| The clutch drives (switching gears is difficult) | |
| Not enough pedal travel | Adjust cable tension |
| Damage (curvature) of the driven disk | Replace driven disk |
| The clutch disc hub is stuck on the input shaft | Clean the splines; if there is severe wear, replace the input shaft and driven disk |
| Curvature of the pressure plate | Replacing the basket pressure plate |
| Damage to the friction linings of the driven disk | Replace the disc and check for axial runout |
| Malfunction of the cable tension mechanism | Replace the cable |
| Clutch slipping (the car does not move when the speed increases and the gear is engaged) | |
| Burning or partial (complete) wear of the friction linings | Replace disk |
| Oily friction linings | Clean the linings, replace worn parts, eliminate the cause of oil leakage |
| Drive jammed | Replace faulty elements |
| Sharp jerks when shifting gears | |
| Disc linings are oily | Clean the linings, replace worn parts, eliminate the cause of oil leakage |
| Drive jammed | Replace worn parts |
| Bent or damaged pressure plate | Replacing the basket |
| Extraneous sounds when turning on speed | |
| Worn or damaged disc damper springs | Replacing the drive |
| Whistle when turning on speed | |
| Worn or damaged release bearing | Part replacement |
Only the main causes of mechanism malfunction are listed; many indirect factors pointing to the same components and assemblies should also be taken into account.
Clutch adjustment methods
All diagnostic and adjustment work is carried out only with the engine turned off. To identify the need to adjust the friction clutch, you should perform a few simple steps. You need to press the pedal two or three times - no knocks, squeaks or other extraneous noises should be heard. The pedal should move freely, without sticking. If you suspect that the pedal is sticking, but visually everything is in order, you should perform the following manipulations:
- press the pedal all the way by hand;
- release the pedal, but do it in such a way that your hand is on it, thereby you can feel its movement, but not interfere with its progress.
You can feel even the slightest jamming or jerking with your hand when the pedal returns to its initial position. If characteristic twitching is observed, it is necessary to make adjustments.
Using a ruler, measure the distance from the floor to the protruding part of the pedal. You need to press it all the way so that it rests on the floor, then release it. The distance is measured again. If the ruler is more than 145 mm, then the pedal free play must be adjusted to normal values.
The pedal's full travel distance should be no more than 146 mm, less is allowed. The cable guide should move relative to the fork lever no more than 27 mm. Normally, the runout of the friction linings of the disc should not exceed 0.5 mm. There must be a distance of at least 0.2 mm between the rivet holding the lining and the lining itself; less is not allowed.
Source: https://chevroletcars.ru/info/pruzhina-datchika-sceplenija-na-grantu-chem/
Diagnostic features
To diagnose the work, you must first visually inspect it to see if there are any cracks or breakages. Then ring the contacts to identify a short circuit or broken cable. In the event of a break, short circuit or corrosion of the wires, the part must be dismantled.
How this simple manipulation is performed is below.
The widespread computerization of cars, adapting to consumer demand, non-stop pushes the best engineering minds to new discoveries. Every year, driving cars becomes more comfortable and safer - and all this thanks to all these innovations. Today we will talk about such an element as the clutch pedal sensor. There are two versions of the clutch sensor, which are not fundamentally different from each other - one is used in a robotic gearbox, the other in a manual one. What does the clutch sensor do? The answer is quite simple - the electronics send a signal to the control unit so that it, in turn, synchronizes the rotation of the engine crankshaft and the gearbox input shaft.
Malfunctions: symptoms, diagnostics, elimination
| Malfunctions | Diagnostics | Elimination |
| When changing gears the car “stops” | Disconnecting the block with wires, checking for changes after disconnecting the DS | Replacing the DS with a new one, since the structure cannot be repaired |
| Uncharacteristic increase/decrease in engine speed when the clutch is disengaged | Connecting a new, working DS | Replacing the DS with a new one |
| P0830 "Check Engine" - clutch sensor error on the dashboard | Connecting a new, working DS | Replacing the DS with a new one |
How to check the clutch release bearing?
Torque is transmitted to the release bearing only when the clutch pedal is depressed. He goes back and pulls the clutch disc behind him. This is why the clutch pedal should not be held for too long when the gear is engaged. This leads to the appearance of unstable loads on it, which leads to rapid wear of the part.
A clear sign of wear on the release bearing is the appearance of various sounds when the clutch pedal is pressed in the form of rustling and knocking sounds. However, there is no need to worry if such sounds appear during the cold season.
The fact is that this part has a low expansion coefficient at low temperatures. This is due to the high strength of the steel from which the bearing is made. The glass in which the entire assembly is located, on the contrary, has a large expansion coefficient. Therefore, when the engine warms up, the sound disappears.
In addition to this, there are a number of other signs, of which it is worth noting incorrect gear shifting. Some gears simply do not engage, or they engage and at the same time jerk the car, both at the start and while driving.
How to check the free play of the clutch pedal?
The car's clutch pedal serves to connect the gearbox to the engine and to separate them. When the clutch pedal is at rest, the engine is connected to the gearbox - the clutch is engaged.
First, we will describe how to measure the pedal stroke and then correct shortcomings in this value.
- We place the car on a level area.
- Press the brake pedal until it stops and fix it in this position. For example, you can substitute a hammer.
- We install a ruler next to the pedal, resting its end on the floor. Mark the distance of the pedal from the floor.
- Lower the pedal without lifting the ruler from the floor. We install the upper part of the ruler on the accelerator and take measurements.
- Press the pedal until you feel noticeable resistance.
The difference between the top position and the last reading will be the amount of free play.
After receiving the results, it will become clear whether adjustment of the brake pedal free play is necessary. If it is still needed, then to do this we lower the brake light lock nut by only 1 turn.
By screwing or unscrewing the switch, we set the required gap between it and the brake pedal.
After completing the described adjustment, tighten the locknut and re-check the stroke.
The clutch accelerometer is also adjusted with a nut, it is located on the cable.
When adjustment is required
Clutch adjustment is only performed when the engine is switched off. It is required if there is a deviation from the following values:
- full pedal travel does not exceed 146 mm;
- movement of the cable lead relative to the release fork lever - within 270 mm;
- runout of the dependent disc linings does not exceed 0.5 mm;
- the distance between the pads and the rivets that hold them is 0.2 mm or less.
There are several ways to check if your car needs a clutch adjustment.
- You should press the pedal several times in a row and listen for any extraneous noise. If the clutch pedal sticks or squeaks, it is advisable to make an adjustment. In some cases, car owners are unable to visually assess whether the pedal returns to its place freely. In such situations, it is recommended to do the following:
- press the clutch with your hand until it stops;
If the clutch pedal sticks and clicks, or it returns to its original position with characteristic jerking, you need to adjust the clutch.
It is necessary to measure the distance from the floor to the outer part of the pedal using a ruler or caliper. Then press the pedal until it hits the floor. After this, you need to release the pedal and take measurements again. If the distance exceeds 146mm, be sure to adjust the clutch.
Return to contents
Symptoms of this part being faulty
Since this element is connected to the ECU, it reacts to its failure first of all. That is, it gives peculiar signals that are reflected on the instrument panel and are noticeable in the behavior of the Priora when driving.
- turning on the “Check Anger” light;
- twitching when starting to move;
- a sharp drop or, conversely, an increase in speed when the clutch is engaged.
There can be three malfunctions in total: a breakdown of the sensor itself, a break or short circuit in its circuit, and incorrect adjustment of the position of the limit switch on the pedal.
Attention! Only Prioras, which have an electronic throttle, are equipped with such a device. Cars with a regular throttle cable do not have one.
It is also available for all-wheel drive VAZ. It must be remembered that these are two types of sensors, and they are not interchangeable!
In general, the “Check” warning lamp lights up in cases where the ECU has not received a signal within 2 seconds when starting from a stop or during four shifts on the move without a signal. Accordingly, the signs mentioned above appear.
Why does it break and can it be fixed?
If we ignore the very obvious reasons, such as a broken wire caused by the driver's foot, there is only one reason left for repair or replacement. Failure of the micro-switch (in simple terms: “micrika”). This is pure mechanics: the sensor works intensively, and natural wear occurs.
The first thought of a car owner who knows how to hold a soldering iron in his hands is to replace the Mikrik itself.
As a temporary measure, it is quite suitable. However, it is necessary to accurately select the geometry of the switch and its dimensions. In addition, “micrics” that work in consumer electronics are not designed for intensive use, and will most likely quickly fail.
Coolant temperature sensor for Lada Granta
The main functions of this part include measuring and monitoring the temperature of the coolant in the engine cooling system. Based on the data provided by the DTOZH, the ECU corrects the frequency at which the crankshaft rotates, and the system also corrects the ignition timing and the composition of the air-fuel mixture.
In general, the DTOZH on Grant is not prone to breakdowns, but sometimes it can provide incorrect information. Install them on the thermostat covers.
DTOZH are thermistors that have negative temperature coefficients; their resistance level becomes lower as the temperature increases. Thanks to the controller, the DTOZH receives a stabilized voltage; after it drops, the element calculates the coolant temperature.
The sensor influences the starting of the motor and its subsequent operation. The car owner will learn about its possible breakdown by noting the presence of the following symptoms:
- problems when starting the engine in cold weather;
- exceeding fuel consumption standards;
- poor exhaust from a still unheated engine;
- periodic malfunctions in the functioning of the cooling system, in particular during fan operation.
Grants clutch sensor: how to find out if the element is broken and how to replace it?
A color Check Engine indicator is installed on the front panel of the Granta, which notifies the car owner about a breakdown of the clutch sensor.
The element lights up orange or reddish and indicates the need to check the operation of the pedal and its addition. Problems may also be noticed during sudden changes in speed during gear changes. Such phenomena will indicate one of the following breakdowns:
1. Incorrect position of the pedal relative to the floor (the need to adjust its height).
2. Damage to the pedal sensor.
3. Disturbances in the circuit, incorrect closure of contacts.
Some car owners even complain that the clutch pedal on the Grant clicks
So it’s not the pedal that clicks, but the sensor.
In this video you can see the sensor larger (and the play near it)
The alarm can be replaced independently, but the contractor should remember to be extra careful in performing the work and purchasing the correct sensor. There are two types of elements installed on Lada 4X4 and Grant/Kalina/Priora.
When repairing Granta, you will need part number 1118-3720015, so when purchasing you should follow the index from the catalog. It is worth considering that spare parts can not be purchased from all suppliers, so it is better to immediately contact official dealers.
Once a new Lada Granta clutch sensor has been purchased, you can begin replacement. First you need to remove the terminal from the battery for safe repairs.
Next, you will need to remove the wire clamp from the hole on the pedal bracket (it is pulled out of the hole with some force). Then the front panel harness block and the sensor block itself are disconnected. The spring on the bracket supporting the sensor is pryed up and removed from the element.
Unscrew the two screws on the pedal bracket that secure the signaling device. After removing the side support of the sensor, it is removed from the bracket along with the holder plates.
They will need to be reinstalled on the new meter, after which the previously purchased Grant clutch pedal position sensor can be mounted in the reverse order. The work is not difficult, but requires careful removal of both the spring and the holders themselves.
If performed carelessly, the integrity of the structure may be damaged and the purchase of lost or damaged parts may be necessary.
Problems and solutions of Lada Granta
Today we will talk about error P0830 (clutch pedal switch, circuit faulty) in the Lada Granta. The mistake is that when we are driving in second gear, we begin to depress the clutch and shift to third gear, at this moment the engine speed increases. No matter what gear, downshift or upshift, the revs increase. Let's try to figure out the problem.
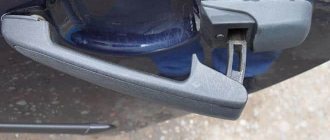
Raise the steering wheel to the maximum position and also move the seat back. Near the clutch pedal we see the following picture:
The clutch sensor is marked in red, next to it is a green harness that needs to be disconnected in order to remove the sensor itself and check its functionality. The sensor is also secured with two screws on the side that need to be unscrewed; for these purposes, use a small screwdriver; it will be difficult to get another one in there. We remove the clutch sensor and test it using a multimeter. In our case, “ringing” is carried out but the readings “jump”; in the video you can see the diagnostics of the new sensor, there these readings are stable. After installing a new clutch sensor, the error disappeared, the problem with increased speed when switching gears disappeared.
Video solving the problem with error P0830, replacing the clutch sensor in a Lada Granta:
Backup video on how to solve the problem with the clutch sensor and replace it, error P0830 in Lada Granta:
Well, the widespread computerization of cars has reached such a unit as the clutch. No, the electronic unit does not yet control the process itself, but it already controls this process. To do this, a sensor is installed under the clutch pedal to monitor the progress of the clutch.
Reviews
| № | Positive |
| 1. | Vasily: I’ve been driving a car for two years now and have no complaints about the DS. The pedal squeaked several times, a drop of grease was added, and the sound disappeared. The build quality of domestic vehicles is good. Timely maintenance of equipment is important. |
| 2. | Kirill: a year has passed since the purchase of the car, no investments except for oils and filters. All sensors are working properly. |
| 3. | Vladlen: after 35,000 km. mileage the engine error light came on. I took it to the service center, but they didn’t find the fault right away - it turned out that there was poor contact between the block and the wires on the DC. In all other respects there are no complaints. |
| 4. | Vladimir: for two years of active operation of the machine, there have been no capital investments, the mechanisms are working properly. My positive review of domestic technology. |
| 5. | Georgiy: at 20,000 km the clutch pedal squeaked, I lubricated it myself, there were no more problems. I've been using the car for a year and a half. |
| 6. | Vitaly: I have repeatedly heard negative reviews about the build quality of the Lada Grant. I can’t confirm because everything is fine for me. I carry out inspections in a timely manner, buy only original parts, and have them serviced at certified service stations. |
| 7. | Gennady: two years of active operation of the machine and no investments, with the exception of oils, fuel, filters. Domestic equipment is good, but requires careful inspection and timely maintenance. |
| Negative | |
| 1. | Ignat: The DS has flown for more than 15,000 km, so I went to the service center for a replacement. On top of that, the cable stretched. Primitive quality parts. I plan to sell and buy Lada Granta. |
| 2. | Vitaly: I bought a Grant a year ago, but now I regret that it’s not a Renault Logan. The quality of domestic transport is poor, the models are crude. |
| 3. | Victor: during the year of using the car, I went to the service station twice unscheduled for repairs. |
What does the clutch sensor affect?
We have already answered the question of why a clutch sensor is needed. Now let's try to figure out how it affects driving and all the components associated with it.
As you know, when changing gears, the entire load of synchronizing the engine speed and the gearbox input shaft is taken on by the synchronizing gears. Quite often, car enthusiasts are faced with the impossibility of switching any speed - and in most cases the reason for this is a worn synchronizer of one of the gears. The clutch sensor practically eliminates the operation of synchronizers, since the signal transmitted to the control unit forces the electronics to automatically reset or raise engine speed to the most optimal value.
As for comfort, the clutch pedal sensor helps to cope with the jerking of the car when changing gears, which will undoubtedly appeal to all car enthusiasts without exception.
Where is the clutch sensor located and why is it needed?
A special Grant clutch sensor is attached to the pedal bracket itself. You can see it by looking under the steering column. The stabilizer is a fairly simple design in the form of a limit switch. When not activated, it has an “Off” position. The element is activated only when the clutch pedal is pressed.
The electronic clutch control system ensures correct engine operation and rapid switching to a new mode. When you press the pedal, the stabilizer is activated and transmits the corresponding signal to the control unit.
Thus, the Grant clutch pedal sensor allows you to optimize gear shifting and eliminate speed jumps when changing speed modes, as well as unstable engine operation (jerks).
Description of the brake pedal sensor
Below we will find out how it works and how to replace it.
The essence of the system is that when you press on the brake, the piston in the cylinder begins to move. After this manipulation, fluid enters the brake system from the intake valve. It passes through the pipelines towards the main wheel mechanism, thus creating a suitable situation for the pads to move towards the wheel discs and drums. As a result, contact and subsequent braking occur. The controller itself turns on the brake lights.
When “communicating” with a car, you can encounter various problems, but there is the most common and annoying problem. This problem is called error P0504, or otherwise “Brake pedal sensor mismatch.”
This malfunction often slows down the car. To solve this issue, you need to release the brake pedal and adjust the gap in the position sensor.
The adjustment is quite simple:
- It is necessary to hang a small but weighty weight in the area of the rubber brake pad.
- Unscrew the sensor nut a little and bring the white part to the brake pedal so that there is a gap of 0.2-0.5 mm between the body thread and the white tip. The sensor must be fixed in this position.
Instructions for replacing the brake controller
- Pump out the liquid.
- Place the vehicle on a support stand and remove the wheel.
- Use a wrench to unscrew the two wheel pins.
- Remove the brake drum.
- Then, using a screwdriver, pull out the hook of the upper tension spring and remove the part. Perform the same manipulation with the lower tension spring.
- Then remove the front pad and spacer bar, while disconnecting the pressure spring and lower the pad.
- Remove the shoe lever from the parking brake hole, straighten the cotter pin and remove it from the parking brake drive.
- Remove the washer and lever.
- Install a new block and assemble the part in the reverse order.
Communities Lada Priora Lada Priora Club Blog Ignition coil
Absolute pressure and air temperature sensors for Lada Granta
These sensors are combined into one housing and installed on the receivers of the intake module; the most modern AvtoVAZ engines are equipped with them.
DBP on Grant differs in the output signal voltage within the range of 0.15..4.6 V, this voltage depends on the pressure level inside the intake pipe. The information it sends helps the ECU calculate the amount of air received by the intake pipe during one cycle.
A breakdown of the device circuit leads to an error code being entered into the system memory, and then the alarm turns on. After this, the control system calculates the air received based on the crankshaft speed, as well as based on the throttle valve opening angle.
The sensitive component of the DTV is the inlet pipe thermistor. The output signal voltage of the device connected to the computer will be approximately 0.3..4.9 V, it depends on the temperature of the air passing through the specified element. When a DTV failure is detected, the control system performs actions similar to its actions in the event of a DBP failure on a Lada Granta, replacing the readings of the described device with fixed temperature values.
Review of Manufacturer Prices
| Manufacturer article number | Price, rub.) | Resource (Thousand km) |
| Set of wheels LADA 2190-316010001 | From 3100 | 85 — 105 |
| —/— 2190-31601000 | —/— | —/— |
| —/— 302050901 | —/— | —/— |
| —/— 302052223 | —/— | —/— |
| —/— 302052307 | —/— | —/— |
| LADA 21810160118001 clutch | From 650 | 80 |
| LADA 21090160119000 input shaft guide | From 750 | 75 — 80 |
| LADA 21010160121500 fork support | From 150 | 75 – 95 |
| LADA 21810160120001 plug | From 800 | 85 – 95 |
| Connecting spring fork and clutch 21010160118800 | From 350 | 85 — 95 |
*prices are current as of October 30, 2018.
Recommendations for the selection of parts and components
The vast majority of spare parts are provided by domestic manufacturers. Foreign analogues are 10-17% more expensive. The manufacturing quality of the parts is approximately at the same level.
In order to prevent the purchase of counterfeits, use the services of official representative offices, dealer centers, and authorized service stations.
Lately, ordering parts with their subsequent installation directly in workshops has become popular. The advantages of this choice are professional installation, prompt delivery, and a guarantee.
List of online stores selling parts (Moscow, St. Petersburg, Kyiv regions)
| № | Name | Address |
| 1. | "VIN code" | VIN-code.rf/ |
| 2. | "Avtopiter" | https://www.autopiter.ru/ |
| 3. | "DvizhCom" | https://dvizhcom.ru/ |
| 4. | "BaltKam" | https://www.baltkam.ru/ |
| 5. | "Elite" | https://eshop.elit.ua/ |
| 6. | "Clan" | https://klan.com.ua/ |
List of online stores selling clutch sensors
| № | Name | Address |
| 1. | Auto ABC | https://avtoazbuka.net |
| 2. | MOTORRING | https://motorring.ru |
| 3. | LADA-GRANTA96 | https://ladagranta96.ru |
| 4. | AUTOPITER | https://www.autopiter.ru/ |
| 5. | DRIVEBOX | https://drivebox.ru/ |
| 6. | SKLADEXPRESS | https://skladexpress.ru/ |