Often, after time has elapsed on a Lada Granta car, the doors begin to open and close with some effort. To fix the problem in question with this car produced by AvtoVAZ, you have to contact a service station. In this case, you need to purchase door closers and door stops for Lada Granta.
Sometimes the owners of the Lada Granta Liftback, produced by the famous AvtoVAZ company, have to deal with various modifications after purchasing the vehicle. This happens for the reason that after even a short mileage, minor breakdowns or problems often appear at first, and if they are not eliminated in time, they develop into more serious ones. Many owners consider the most common defect to be the fact that the front door locks do not function well and open with great difficulty.
You can, of course, buy Lada door closers and door stops and make repairs in accordance with the instructions. But this operation can be performed in a more productive way. To carry it out you need:
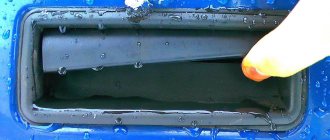
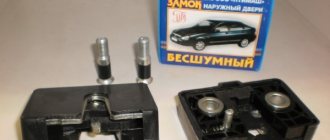
A common symptom of a broken lock is that a loud sound appears before the door opens/closes. The design of the front door lock is made in such a way that the metal can sometimes rattle. In order to eliminate this problem, you need to remove the lock itself and put rubber tubes of the required size on the levers. Immediately all sounds coming from ahead will disappear. When closing the doors, only a bang will be heard, and all sharp and loud sounds will be a thing of the past.
If jamming and play are observed, they should be eliminated. Moreover, all this must be done at once. You can also buy limiters for the trunk lock. Before purchasing Lada door closers or door stops, you should first consult with a specialist. Having received the necessary and important information, you can choose the highest quality limiters. Problems with the operation of the lock can be solved by making a quality adjustment. To do this, certain actions must be taken.
Most often, the reason for poor lock performance is the difference in the radius of curvature of the upper door frame. If you look at it in detail, you can see that when simultaneously adjusting the locks at the rear of the car, they always touch the top of the sealing rubber differently. Tight opening compresses it much more in the closed position. To adjust the locks, you can use the following method.
Adjustment process
If the gap is smaller, lower the glass all the way down. Then close it with one click, take it by the top edge and push it towards you a couple of times with a little effort. And if the gap on the front door turns out to be wider, then you need to open it with the window down and, resting your foot on the trim, pull the door to the inside several times. Then it will be possible to move on to the main problem associated with the poor functioning of the lock.
- special screwdriver;
- Silicone Grease;
- limiters.
When there is a slight bulging outward, you need to put a soft and durable gasket in the opening and on the central post, in the place where the hinges are, and then try to close the door. If the door is slightly recessed relative to the body itself, then you need to support the outside with your knee in the hinge area and pull the open door towards you. By making such adjustments to the rear doors, you can achieve soft operation without various side effects.
How the central lock works
Central locking is a system that, when given a certain command, performs the function of opening or closing an object. For ease of use, this operation is performed remotely. Some car enthusiasts choose the function of closing all doors after a certain period of time. It is very convenient for those cases when the driver does not have time or forgets to close the car door.
As a rule, using a long-range remote control you can control both the trunk and the hood, close and open the windows. The most common way to control the remote control is by pressing one button, after which all the locks on the car are activated. If the remote control does not work for some reason, then you need to insert the key into the door lock and turn it clockwise.
If an accident occurs, the car's security system is activated automatically and all locks open. At the heart of the central locking mechanism are incoming sensors located in the structure itself. These are microswitches and door switches (limit switches), actuators and a control unit.
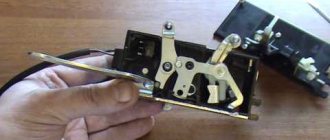
The limit switch must maintain the door position and this information must be transmitted to the control unit. The switches fix the structural part of the door lock. The front doors of the car are equipped with a cam device. To fix the cam, the front doors are equipped with microswitches: there are two parts for each mechanism.
Blocking the lock is formed by one switch, and unlocking is formed by the second. There are two more microswitches used by the central locking mechanism. A fifth switch is installed on the lever device in the lock drive. It serves to determine the door position: when the door is open, the switch contacts close and the central locking system is deactivated.
The electronic mechanism (unit) receives the signal from the microswitches and sends information to the central control. In order to open an object, the central device sends a signal to certain control units, thereby activating the mechanisms in the locks.
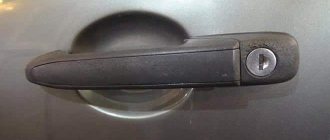
Operations for removing the outer handle of a Lada Granta
1. Remove the door trim (see the article “Removing the door trim of a Lada Granta”)
2. Use a screwdriver to pry up the plastic end of the lock switch rod and move it out of engagement with the lock switch lever.
3. Using a screwdriver, pry and disconnect the lock drive rod from the outer handle lever.
4. Unscrew the nut that secures the front handle to the door panel.
5. Remove the rear bolt securing the outer lock drive handle to the front door.
6. Pull forward in the direction of vehicle travel and remove the outer lock drive handle from the opening in the outer door panel.
7. Remove the outer lock drive handle.
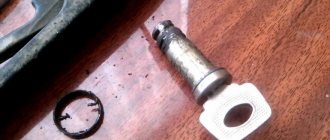
8. If it is necessary to replace the switch mechanism, use a screwdriver to press the lock cylinder latch and remove it from the handle.
9. Install the removed parts in the reverse order of removal.
Rice. 1. Location of the lock (D), lock drive rods, outer (B) and inner (8) front door handles (A): 1 - outer panel of the front door; 2 — lock switch rod; 3 — external handle of the lock drive; 4 — door glass; 5 — door lock switch button; b - door trim; 7 — rod of the lock switch button; 8 — door lock; 9 — internal handle of the lock drive; 10 — rod of the internal drive of the lock; 11 — guide of the lock switch button; 12 — rod of the external handle of the lock drive; 13 — nut securing the external handle of the lock drive to the outer panel of the door; 14 — lock fastening screw
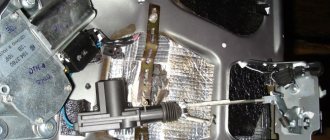
The front door lock on a Lada Granta car is removed for its repair or complete replacement, as well as when carrying out various works in which its presence will interfere with the progress of their implementation. Prepare a standard set of tools and perform the following sequence of actions:
- Remove the decorative door trim.
- After that, use a Phillips screwdriver to unscrew the screw and remove the inner handle of the lock.
- We disconnect the drive rod from the handle and remove it from the plastic holder on the door panel.
- Disconnect the drive rod from the outside handle and the lock switch.
- Disconnect the lock lock button rod holder from the door panel.
- Pull out the plastic holder of the wiring harness and disconnect the connector from the lock.
- We unscrew the screws securing the lock to the door frame and lower it into the niche.
- Having disconnected the rod of the inner handle from it, remove it.
- Make the necessary repairs, then install in the reverse order.
At this point, the repair work to remove the front door lock on the VAZ 2190 has been completed.
Removing the outer front door handle on a Lada Granta car is done to replace it with a new one in case of failure or to carry out repair and restoration work. Prepare a standard set of tools and perform the following sequence of actions:
What tends to break down in a mechanism?
Sometimes disassembly occurs only to tighten the fasteners. It is also necessary to dismantle the opening mechanism if it does not work correctly. Main causes and options for breakdowns:
- A defect appeared after an accident.
- The part does not close or open the door well. There is insufficient adhesion to the body part.
- Microcracks, scratches, and abrasions appeared on the product.
- Damage to internal components has been detected. If no defects are found during a visual inspection, you will have to unscrew the handle to make sure that the whole problem is in the fastenings.
- In the case of the driver's door, where there is a lock in the handle, the reason for dismantling is an attempt to break into it.
An equally compelling reason: failure of the external door opening manipulator. It is important to understand that the plastic from which the products are made is not as durable as other elements. It may simply crack due to strong pressure on the handle.
Sequence of actions when replacing the front door handle on a Lada Grant
- We place the car within the perimeter of the repair area and provide priority safety measures.
- Open the front driver's door and raise the window to the top position.
- Unscrew the three screws that secure the upholstery at the bottom.
- We carry out dismantling on the right side by analogy.
- We unscrew the little soldier - the door lock lever.
- Use a screwdriver to pry off the plastic plug.
- Additionally, we unscrew the screw that secures the upholstery in the middle part of the door card.
- We unscrew the screws in the armrest niche.
- Unscrew the handle fastening (two self-tapping screws).
- We insert a flat-head screwdriver between the metal body and the plastic upholstery.
- Squeeze out the plastic.
- We remove the card from the seat.
- Disconnect the block with wires from the locking lever.
- By analogy, we disconnect the contacts from the electric window drive.
- We remove the upholstery.
- Use a screwdriver to pry up the power window control unit and remove the switches.
Replacing an internal part
Replacing the internal handles on the rear door of a Granta is slightly different from dismantling the external part. The internal element has more fastenings and is partially hidden by decorative trim. Algorithm of actions:
- The cladding is dismantled. To pull it out, you need to pry up the edge. To do this, use the thin edge of a screwdriver or a sharp knife.
- The rear door card unwinds. There is a rod inside that is important to disconnect.
- To remove the remains of the broken opening device, the fasteners are unscrewed. The handle is removed and a new part is mounted.
Before installation, the internal niche is cleaned. This can be done with alcohol infusion or detergent.
Source
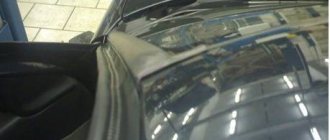
Let's proceed to the second stage: dismantling the side view mirror
- Using a screwdriver, unscrew the three screws that secure the mirror frame to the body.
- Using pliers, remove the locking bracket.
- We remove the mirror and remove the hinges through the diagnostic hole.
- Using an “8” socket, unscrew the bolt that secures the outer handle to the end of the door.
- In the inner tunnel, unscrew the second bolt holding the handle.
- Using a screwdriver, carefully pry up and remove the rods from the lock.
- We remove the handle from its seat, turning it slightly from side to side.
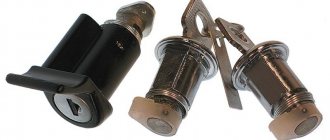
Front door lock device of Lada Granta
In conclusion, we carry out troubleshooting, inspect adjacent parts and mechanisms, and replace them with new ones as necessary. Replacing the front door handle on the Lada Grant is completed.
Tools and Supplies
Reinstallation and repair of the part can be done in the garage; for the work you will need the following tools and consumables:
- Set of car keys.
- Set of heads, ratchets and cranks.
- Set of special plastic tools.
- Ruler for opening the door of a Lada Granta car.
- Phillips and flat head screwdrivers.
- Anti-corrosion lubricant WD-40.
- Litol lubricant.
- Rags.
The work does not require special skills; the driver only needs to carefully dismantle and install new parts according to our instructions.
Review of spare parts prices
| Name/article | Price, rub.) |
| 00001003833121 Bolt M5x10 with serrated shoulder | From 100 |
| 00001003831801 M5 nut with serrated shoulder | From 100 |
| 00001002624101 Washer 5 mm | From 50 |
| 00001003275901 Screw M6x10 | From 50 |
| 00001002605371 Lock washer 6 mm | From 50 |
| 21230610542000 Lock cylinder | From 550 |
| 11180610515000 External front right handle | From 650 |
| 11180610515100 External front left handle | From 650 |
| 21900610518000 Inner front right handle assembly | From 950 |
| 21900610518100 Inner front left handle assembly | From 950 |
*prices are current as of November 27, 2018.
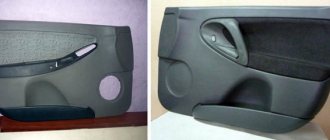
Recommendations for choosing and replacing door handles
When choosing spare parts, always give preference to original ones. Good, high-quality parts are always 10 - 15% more expensive than analogues. At the same time, by purchasing a factory part, you can count on a long service life of the mechanism.
A cheap counterfeit does not provide even a third of the required resource. The final choice is up to the owner of the technical device. The deciding factor is the budget.
Repair kit
Repair kits for the Lada Granta car have the following articles and prices:
- rear right DAAZ – 1118-6205150, price – 450 rubles.
- rear left DAAZ - 1118-6205151, price - 450 rubles.
- front left DAAZ – 1118-6105151, price – 505 rub.
- front right DAAZ - 1118-6105150, price - 505 rub.
- rear left LADA – 2190-6205181, price – 145 rubles.
- rear right LADA – 2190-6205180, price – 145 rubles.
In addition to original repair kits, you can use spare parts from similar models of the VAZ line, caps, levers, fasteners, clamps, rods, lock cylinders.
Adjusting the front left (right) door lock on the Lada Granta
In the process of systematic use of the door, its frequent opening and closing, the lock and adjacent elements wear out. As a result, the door closes with a distinct knocking sound.
Often knocking occurs after an accident due to changes in body geometry. The functionality of the lock can be restored by partially repairing it, and in case of deformation, by completely replacing it with a new one.
- screwdrivers, set of auto tools;
- lubricant;
- liquid WD-40.
Sequencing
- We inspect the gaps around the entire perimeter of the door. We mark areas with deviations. The factory standard is 2–3 mm, anything higher or lower is a defect.
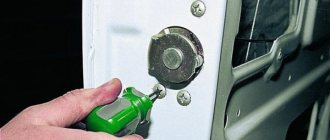
- Using a screwdriver, unscrew the screws securing the hinge to the body. If necessary, use an impact screwdriver.
- Move the hinge a few millimeters up and down and check the tight fit of the door to the body. If you hear a rumble when closing, lower the hinge; if you hear a dull knock, raise it.
- We carry out a control measurement and tighten the bolts.
By analogy, we adjust the lock on the opposite side.
How can you align the door of a VAZ 2110 car?
You can level the door using a bolt. For this:
- Take a bolt of the same size as the finger.
- The element is placed with its head up on the lower door hinge from the inside so that the bolt hangs on the edge of the hinge.
- The door is carefully closed, and the bolt is clamped inside the hinge.
- The door is slowly closing and the result is visible.
- If necessary, the operation is repeated.
There are repair instructions for sagging doors after increasing the gap between the doors and their poor closing. For this:
- You need to remove the door and disassemble its trim.
- Make a longitudinal cut in the bottom loop using a small grinder.
- The remains of the finger are knocked out with a core.
Reviews
| № | Positive |
| 1. | Vitaly: for two years of operation of the car, there are no comments on the body or locks. From time to time I lubricate the components myself; for this I bought a special grease gun. To prevent the core from freezing in winter, I spray it with an aerosol. |
| 2. | Gennady: I used the aerosol several times to lubricate the core in winter. The door slams easily, the plastic does not rattle, the sound insulation is standard. |
| 3. | Vasily: after using the car for a year and a half, I only replaced the factory vibration and noise insulation and re-lubricated the door mechanism. Everything works as usual, there are no complaints. |
| 4. | Kirill: I’m happy with the car, the build quality is good, I fix minor breakdowns on my own. |
| 5. | Gennady: During the year, I made one unscheduled visit to the workshop to lubricate the door components. The central locking works properly and stably. Poor sound insulation, but this is easily fixable. |
| 6. | Alexander: my positive review of the Lada Granta, the car is good, it fully meets the “price-quality” criterion. Minor flaws are present, as the model is in the budget segment. |
| 7. | Ivan: I drove 75,000 km on Grant, I didn’t make any capital investments, I just bought consumables for maintenance. I treat my equipment with care, fill it with high-quality fuel, and periodically lubricate it. |
| Negative | |
| 1. | Victor: The standard locks are very weak, they wear out quickly, after which the door rattles and knocks. A year and a half has passed since the purchase, and the mechanisms already need to be changed. |
| 2. | Dmitry: after another winter, the castle on the left side flew away. There is no point in repairing it, since repairs will cost more than buying a new one. |
| 3. | Vyacheslav: the factory hinge on the left side lasted only 80,000 km, after which it was replaced with a new one. The service life is short, the quality is very poor. |
Conclusion If the need arises, you can replace the door handle on the Lada Grant yourself. The process is not complicated, and the principle of operation is intuitive.
When selecting and purchasing consumables, give preference to parts with factory catalog numbers. When contacting a service station, request a quality guarantee for the work performed.
Crib
Instead of a conclusion, let's summarize :
- Carry out work on a lift, pit or overpass;
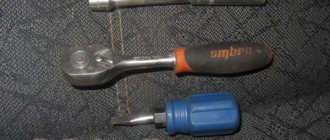
- Tools: open-end wrench 13, ratchet with heads 10 and 13 (preferably long);
- It is not necessary to remove the heat shield - just move it forward as the vehicle moves;
- The ideal stroke is 3-4 clicks of the handle until the rear wheels come to a complete stop.
If you've already started adjusting the brakes, maybe change the rear pads too? Detailed instructions with description and photos are here.
Have something to add to the article, share your opinion or recommend? Write in the comments!