Welcome! Want to learn how to properly replace a trunk lid lock? If yes! Then, in this case, we have prepared an article especially for you, after reading which you can easily replace the trunk lock on cars of the Samara family. The duration of replacing the trunk lock will be around 10-15 minutes, but if this is not the first time you are doing this work, then you can do it in 3-5 minutes. The entire progress of the work will be in photographs, making everything very clear to you.
Castle repair
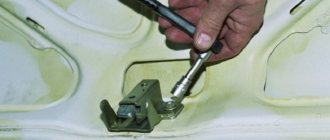
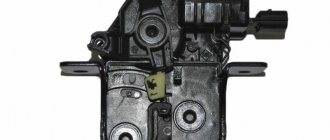
When starting to repair the luggage lock of the “nine”, you should remove the trim. It is attached to ten pistons, which can be removed with a screwdriver. After the plating, it’s the blocker’s turn. Unscrew the 2 nuts securing the lock to the trunk lid. To do this, you will need a wrench or a socket wrench.
Care must be taken; behind the nuts there are negative terminals, which are also disconnected. The lock can be pulled out of the hole. The lock cylinder is replaced if there is a defect in the locking tooth, it does not perform its function - it is worn out or broken.
The next step is dismantling the retainer. It is also secured with two bolts. Next, the position of the part is adjusted and adjusted so that the trunk lid begins to close. Next, the latch returns to its place.
If the locking bushing is broken, adjustment is impossible, only replacing the lock. Installing a new lock follows the reverse procedure for removing it. Before final tightening of the bolts, it is necessary to adjust the position of the door fastening.
Replacing and adjusting the door lock on a VAZ 2109
The design of the front door locks of all cars and the rear doors of VAZ 2109/21099 cars is fundamentally the same; the main difference between the locks is that lock switch cylinders (cylinders) are installed in the outer handles of the front doors. The door locks of the VAZ 2109/21099 are not dismountable and cannot be repaired. If they break, they need to be replaced.
So, for this work you will need : a wrench or ratchet with an “8” head, an extension cord, a flat-head screwdriver, new locks.
Catalog numbers of VAZ 2109 door locks:
- external lock for VAZ 2108-15 doors: right - 21080610501400, left - 21080610501500;
- internal lock for the front door of VAZ 2109: right - 21080610501210, left - 21080610501310;
- internal lock for the rear door of VAZ 2109: right - 21090620501210, left - 21090620501310.
The price for an external door lock for a VAZ 2109 was 235 rubles, an internal lock for the front door was 200 rubles, and an internal lock for the rear door was 240 rubles (Prices are indicated for spring 2022 in Moscow and the region).
- The front door trim will need to be completely removed. We remove the protective film of the door by squeezing the seal from the three clamp springs.
- Disconnect the two rods. One from the internal lock and the other from the lock release handle.
- Unscrew the two screws securing the door lock from the end of the door and remove it.
- Unscrew the two screws securing the interior lock handle and remove the handle from the door groove.
- We take out the door lock and replace it with a new one by disconnecting the rods.
Adjusting the locks comes down to changing the height of the locking rods. They are located inside the door, behind its trim and are attached using ball ends in a plastic groove.
How to adjust the door lock of a VAZ 2109:
- You should pull out the plastic groove and unscrew/screw it in accordance with the adjustment. In this way, the correct setting of the locking lock is achieved.
- To adjust the closing of the door “not with the key,” you need to change the position of the lock on the body. By the way, changing the position of this latch can help reduce noise and effort when closing the door.
Replacing the lock cylinder
Experienced craftsmen advise carefully changing the cylinder on the trunk lock. The step-by-step process looks like this:
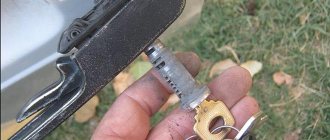
Using pliers, the end switch of the removed lock is removed. To remove the pin, a hole is drilled. The pin is knocked out through it using a screwdriver. The flap moves back and is pulled out. There is a spring under the damper; it can also be pulled out.
Next, the body of the larva is pulled out. By hitting the back of the body with a hammer, the larva is knocked out. A new cylinder is inserted into the freed body, the pin is hammered in and the ring is put in place. Next, the spring and valve are inserted in the reverse order, and the limit switch is hammered back in. Vedashka is sprayed into the key hole.
Who can you trust to re-equip closing devices?
This modernization can be offered to “tuners” who will save you from unnecessary locks and keyholes and handles located on the outside of the luggage compartment lid and car doors. In order to control the trunk locking device, you will need an electrical contact device.
This system will work as follows: by pressing a button, which is located in any convenient place for the driver, an additional contact system is activated, which starts the main relay, after which the core is retracted and the trunk lock latch is opened. In this case, we cannot do without auxiliary parts and fasteners, for this reason we will have to make a fastening device for the roller. This wheel, with the help of a screw, is easily attached to a bracket, which is held on the body by a special screw.
Installing the lock yourself
First, you need to remove the casing. Then you need to drill two holes to secure the activator. The ground wire is clamped with the activator screw and sealed with sealant. The frame, which is included in the activator kit, bends at approximately an angle of 90 degrees. Although it is better to bend it in such a way that it is easier for the cable to pull out the tongue.
The next step is cutting a steel rod, approximately 4 cm long, which is installed in the activator ring. An adapter is put on its second end, to which the cable is attached. The fastener for the cable sheath can be made from the rest of the frame, which will be clamped with the windshield wiper motor bolt.
Then we lay the wiring inside the trunk door and lead it through the rubber shell into the cabin. In the cabin, you need to bend the edge of the headliner and lay the wire down along the rear pillar, then run it under the carpet and sound insulation. The plastic sheath is then peeled off at the end of the cable and soldered to the frame using a copper washer. Everything is lubricated with sealant.
Next, when installing the trunk lock, the cable is attached to the tongue. It presses well, because the cable is single-core and steel. Next, the shell mount is screwed on. You need to adjust its tension. Connecting the lock according to the standard electrical diagram. You can use the standard activation button. Now all that remains is to check how the trunk opens.
The rear of the eighth and ninth series VAZ cars are designed in such a way that when there is a counter flow of air, they contaminate the rear viewing window of the vehicle. These models drive almost all the time with a dirty rear end. And accordingly, with contamination of the rear part of the vehicle, sand, dirt, moisture and salt solutions get into the trunk lock structure, leading to corrosion on the critical mechanisms of the lock, which often leads to its failure.
But the opening of the mechanism can be activated using a button that is located at the driver’s hand in the car interior. Thus, you don’t have to worry about dirt in the closing mechanism, and it will create more trouble for intruders who want to check the contents of the trunk. It is possible to improve the “closing-opening” device of the trunk on most Zhiguli models.
Instructions for replacing the trunk cylinder with photo report
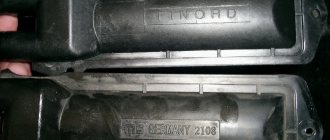
First of all, we need to open the trunk and remove the plastic casing from its inside, which is attached to “clips” - latches, after first prying it off with a screwdriver.
After this, we have access to the cylinder and now we need to unscrew the bolt that secures it, which is shown by the arrow in the photo below.
After this, it is necessary to disconnect the rod running from the lock to the cylinder itself. This can be done in two ways: either by loosening the locking bolt of the lock, or by bending the rod to such an extent that it is released from the hole in the cylinder. Since it is quite flexible, you can use the second method:
As a result, we get the following picture:
Now you can easily remove our part from the outside, since nothing else holds it.
The installation is carried out in the reverse order and you should not have any difficulties with this repair. As for the price of the removed parts: a set of cylinders with a trunk lock is about 500 rubles for a VAZ 2110.
Installing an electric trunk drive
In the latch it is necessary to drill several technological holes with threads intended for fastening screws under points 3 and 4. With such screws you can secure the end of the cable. One question remains unresolved: how to get rid of the lock latch from the trunk lid? This can be realized by making a hole in the trunk lid, the diameter of which will be 1.15 cm. To knock out the axle in it, you need to insert a dense drift into it and remove the rod. It is necessary to ensure that the roller recess and the two screws are located symmetrically to each other. When removing the axle, the plate moves and the inside is removed along with the pusher. To make it impossible to open the lock with a key, it is enough to reduce the size of the end of the pusher by approximately 10 millimeters.
After the work has been done, having assembled a new lock system, you can put it in its original place. Then fix the relay in the lower part of the door, at a distance of 150-200 mm from the lock. It is also necessary to maintain a symmetrical arrangement on the axis of the entire device made. Due to the fact that the roller can be purchased separately, the electromechanical part can be connected to the window lift mechanism. To facilitate installation of the cable, the bushing located at the end of the relay core is replaced with a screw. You can attach the cable to the screw in different ways, for example, press the body of the cable to the lock with screws, but first place adjusting washers under them. In the same way, we attach the other end of the cable to the main part of the relay. After the electrical part has been checked, the entire mechanism needs to be adjusted. It is necessary to adjust the cable travel for normal opening of the trunk latch.
If you are a specialist in the field of electrical and technical mechanics, you will need no more than three hours for this work. As a result of the work performed, your car will receive a certain amount of benefits.
If the electrical part of the trunk opening still fails, you can open the lock latch from inside the vehicle by manually pulling the cable.
How to change the lock on the trunk of a VAZ 2109
You will learn about the topic of VAZ 2109, replacing the trunk lock cylinder - we are interested. Do-it-yourself car diagnostics, repair and maintenance. How to repair a car yourself at home. We will help you with repairs and repair the car yourself. We know how to restore a car with minimal investment. I have attached video instructions.
Laughter in the topic: Physics exam. The professor, out of a hangover, decided to fail all the students. The first student comes in, the professor asks him: “You’re on the bus, you’re hot, what will you do?” “I’ll open the window.” “That’s right.” Now calculate the changes in the aerodynamics of the bus caused by opening the window. - Uh.... - Go, two. Several more students are knocked down in the same way. A student comes in. “Girl, imagine, you’re on a bus, you’re hot, what will you do?” “Me?” Well, maybe I’ll take off my blouse. - No, you don’t understand, you’re very hot. - Well, then I’ll also take off my blouse. - Well, no, IT’S TOTALLY hot! - Well, I’ll take off my skirt. - Aren’t you afraid? - Yes, let the whole bus take me off You%%t, but I won’t open the window!
Car owner's opinion: Due to the lengthening of the car, the ride has become better. Passengers sitting in the back feel comfortable.
Many problems of VAZ cars are related to the functioning and operation of doors. The inability to open the door causes discomfort for both the driver and passengers. It is a particular nuisance for the motorist if the lock, particularly the cylinder, breaks down on the front door, and even on the driver’s side.
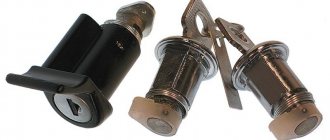
It is known that the lock cylinder ( cylinder ) is a security mechanism that protects the car from unauthorized access and penetration, so replacing the cylinder requires an urgent decision, and many drivers are interested in how to do it themselves.
replacing trunk lock 21099 — search on DRIVE2
Replacing locks! Inexpensive! – We work around the clock!
Replacing locks! 7/24 hours! - Fast! Exact price!
Replacing the trunk lock cylinder - Lada 2109, 1.5 l., 2001.
Replacement movement
larvae continues.
This time trunk
lock
cylinder was replaced . I couldn’t find the necessary information on the Internet, so I’m posting it as I did it myself. I bought a set of larvae. 3 pieces for 70 rubles. And thank you so much dad for your help! =).
In conclusion
As you can see, replacing the rear door locks on a VAZ 2109 with your own hands is quite simple. All that is required for this is accuracy and patience. Especially when adjusting a newly installed mechanism. And if you have to replace the old locking mechanism with a new one, experts recommend installing a silent model. This will help avoid unpleasant metallic clanging noises when closing doors. And, of course, after installation, the part must be adjusted correctly and carefully.
Sources:
https://avtonovostnik.ru/info/kak-pomenjat-zamok-na-bagazhnike-vaz-2109/ https://p-ng.ru/zamok-bagaznika-vaz-2114/ https://chevroletcars.ru/ info/remont-zamka-bagazhnika-vaz-2109/
DIY installation
We adjust the cable tension for proper unlocking and locking of the trunk.
After that, we connect the button itself; for this purpose, there is a special place in the car panel under the instrument panel on the driver’s side.
It would be wrong to place a button near the cigarette lighter or a drawer for small items when there is a regular place for this in the car.
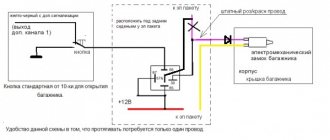
Rice. The simplest connection diagram for the electric drive of the trunk lock.
If you don’t have an additional brake signal, or for some reason you want to use it, then, as mentioned above, we pull a new wire to the bottom of the instrument panel on the driver’s side and connect it to the closer and to the battery through the fuse.
We make final checks and adjustments
You can also simultaneously open the rear door trunk lock using a button and using your alarm key fob (if your alarm has any additional channel) for this we need a relay. And the diagram of the alarm itself.
It is important that for normal operation of the electric trunk drive, when connecting to an additional alarm channel, you need to select a pulse length of 0.8 seconds.
Rice. Connection diagram of the trunk electric drive via a button and relay to an additional alarm channel
And here is the relay itself connected to the button and the additional alarm channel.
Hello friends! So I decided to share the installation of the lock from the viburnum! For those who haven’t done it yet, do it, you won’t regret it!
Now the solenoid easily opens the trunk lid in both winter and summer! There are many advantages: the trunk lid does not make a mess, it closes easily and softly.
Example of installing an electric lock drive (video)
I should have done this a long time ago, I don’t know why I was stupid. The VAZ 21099 is very deprived of electric drives, everything is done manually, but we understand that this is the last century and we need to switch to the fact that everything should work at the touch of a button. The epic began with the fact that he placed a motor on the door and it rose and fell with the press of a button. This won’t surprise anyone now, because any car dealership does it, and it’s relatively inexpensive. And then everyone came to look at the miracle.
