- home
- car transmission
- …
As you already understand, we will talk specifically about a manual “box” and about shifting gears (or rather, not shifting) on it. I have quite a lot of experience in this area; I personally repaired cars such as VAZ 2114, VAZ 2110 (and the 10th family in general). To say that there are global differences between foreign cars, there really aren’t any! So if your speed is not cut off, then the reasons may be similar. In general, the article will be useful, at the end, as usual, there is a video...
A fairly large number of such questions come to me, especially from novice drivers of our VAZs! Especially with front-wheel drive, because in rear-wheel drive cars the lever was installed in the manual transmission itself. I want to answer everyone right away - the problem of non-inclusion may not always be cardinal! Often it’s a small matter, something just got loose or unscrewed from time to time, as a rule, this happens in 50% of cases.
Therefore, I will try to break the material into two large components - simple and complex faults.
I suggest starting with simple faults.
Gearbox linkages and rods
I remember I was “infuriated” on the VAZ 2114 by the fact that the gearbox lever was swinging from side to side like a “spoon in a glass”; I always wanted to make it stiffer, in some way. But there was only one way, to climb down the car and play with the scenes and rods. In principle, they can be released, tightened, the lever can be adjusted for tilt, etc. In general, I played around, but I noticed that if I press the lever too hard to the left, the ability to engage gear (first and reverse) disappears. This manifests itself when the car is not running, I’m already silent about the running engine.
Often the slides break, or they fly out of the fastenings, or the wear is simply enormous and they need to be replaced (this happens with high mileage). The very first thing we do is climb under the car and look at them.
The main reasons for a soft clutch pedal
To depress the clutch pedal when the drive is fully operational, you need to apply a certain force. This setting can be adjusted. Some drivers deliberately use a soft clutch. However, most often this is a sign of breakdowns and malfunctions, especially if the driver notices a difference compared to the norm. For mechanical and hydraulic drives, the problems will be different, not counting cases of mechanical failure of some parts.
- Let's start with the hydraulic clutch drive. First of all, air in the system is a common problem. During any repair of the hydraulic drive, air enters the tubes. This makes the pedal stroke soft. In this case, you should check the quality of tightening of the pipeline fittings, and also bleed the entire system (bleed the hydraulic drive).
You can also highlight a malfunction of the clutch slave and master cylinders. The working cylinder most often jams, and when the main cylinder fails, it loses its tightness and, as a result, its pumping capacity.
We also recommend reading the article on how to change gears without a clutch. From this article you will learn how to drive without a clutch, how to change gears without using the clutch pedal with minimal risk of damage to the gearbox, etc.
If the clutch pedal becomes soft in the cold season after the car has been idle, and during warming up everything returns to normal, then you need to check the master cylinder. Most likely his cuff will have to be replaced.
- The mechanical clutch drive is also characterized by a number of breakdowns. It is more difficult to identify a problem in a mechanical clutch drive, since you will often have to disassemble the crankcase and get to the release bearing.
Its deformation, as well as the breakage of the drive foot, are most often the cause of a soft clutch. The problem may also be associated with the destruction of one or more damper springs of the driven disk. Often this can also be found out only after disassembly.
Drive and clutch cables
For rear-wheel drive models (VAZ 2101 - 2107), the gears are engaged hydraulically. That is, when you press the clutch, the fluid pushes the piston, which in turn pushes the clutch fork, which retracts the disc. For front-wheel drive models (VAZ 2108 - 2115), there is no hydraulic connection; everything is done here by mechanics, or rather by the clutch cable, which is connected to the pedals. If your slave cylinder leaks on a rear-wheel drive car or the cable breaks on a front-wheel drive car, the car will not engage in gear. The “fork” simply won’t work. We just check and replace damaged parts.
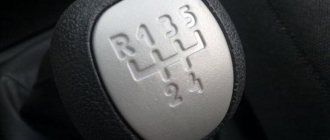
Methods for engaging first gear
So, if the modes in your vehicle are difficult to engage and you have already understood the reasons and theory, then let’s move on to the most important thing - methods for engaging first gear. The simplest method in this case would be to activate first gear while driving the car. You need to push the unit selector forward without any effort and do this until the corresponding synchronizer comes into operation. However, it should be noted that this method is relevant for most passenger vehicles and some trucks.
It should be taken into account that this cannot be done in most old trucks, since the design of the unit itself does not allow this, since they simply do not have synchronizers. In addition, you need to take into account that this method of activating the first speed is hardly relevant if the synchronizer on your vehicle has already exhausted its service life. This will simply be impossible.
Double car re-gas
Then the driver will only have to wait a while until the car practically stops in order to turn on the desired speed. Or use force to engage the gearshift lever. In principle, neither the first nor the second method can be called the optimal solution to such a problem. As practice shows, it is best to use the same old-fashioned method with re-gasping.
You can find out how to do this below:
- So, while driving in second gear, start depressing the clutch pedal.
- When you press the pedal, move the gearbox selector to the neutral position. Having done this, you can disable the clutch pedal.
- Then, when the pedal is completely lowered, you need to lightly press the gas with your right foot, pressing the pedal. In this case, pay attention to the tachometer, which shows the number of revolutions. You need to increase the revolutions to two and a half thousand per minute, that is, the needle should be at the number 2,500. Here, pay attention to one important nuance - the greater the difference in angular speeds of the mating gears of the box, the higher the number of revolutions needs to be raised. That is, 2,500 is the minimum, add gas if necessary.
- Then depress the clutch pedal again.
- Next, the box selector should be moved to the initial mode activation position, that is, first speed. Here, also pay attention to the fact that if the selector does not enter the required position correctly, then most likely you simply did not give enough gas. If this is the case, then repeat the steps, only add more gas.
- As a result, you need to release the clutch pedal smoothly, not abruptly. If you did everything correctly, the gearbox lever will move to the required position without any problems, shocks or extraneous sounds.
If you were unable to do this, then do not be discouraged - rarely does anyone manage to perform a double gas change the first time. By repeating the procedure several times, you will be able to remember everything that needs to be done to correctly engage the first speed. Actually, the same methods allow you to activate first gear when driving in third, for example, if in an emergency you need to brake the engine. In this case, the higher the driving speed, the longer you will need to wait for the synchronizers to help you. Or you need to press on the gas more.
But do not regard double throttling as a way out of the situation. This method can be called a temporary solution, but the unit will still have to be repaired. Since replacing synchronizers is a rather complex process, we recommend that you seek help from specialists. If you still decide to perform this procedure yourself, then the instructions provided below will be useful to you.
Changing synchronizers
Replacing gearbox elements is carried out in several stages. We will not describe them in detail, since all actions are individual for each individual car.
Moreover, if you have never encountered such a procedure, you are unlikely to be able to perform it yourself:
- First you need to remove the gearbox from its installation location. To do this, use the recommendations in the service manual or search our resource - here you can find several instructions. The dismantled gearbox is thoroughly cleaned of dirt and dust.
- After this, you should remove the clutch cable retainer.
- Next, unscrew the four nuts that secure the rear cover of the unit; move it to the side.
- After this, unscrew the screw securing the fifth speed fork. Then turn it on, to do this you need to move the synchronizer clutch down with the fork. This must be done in such a way that the coupling splines are together with the gear. Having done this, you should activate either the third or fourth speed.
- Then you need to unscrew the nut that secures the input shaft. To be able to move it out of place, pull the key firmly, since it is most likely tightened with force. Carry out similar actions with the nut that secures the secondary shaft.
- Next, lift the fifth speed gear and remove it with the synchronizer and the secondary shaft fork. Please note: the clutch should not move from the hub at this point. Installation of new elements is carried out in the reverse order. You need to be as careful as possible. As you can see, in general the process is quite complex and responsible, so do not bother replacing synchronizers without experience.
Engine mounts
I personally have never had this happen, but many people write that this is a fairly common problem. Actually, the problem is this: the engine hangs on cushions, the gearbox is connected to it (manual transmissions, by the way, have their own cushions). It happens that the fastening breaks, or it unscrews. The engine or “box” may sag, the scenes may break, or they will hit something.
THEN there is another not very serious problem - these are pillows! If the programs don’t turn on, then we watch them.
These malfunctions, AS I THINK, ARE NOT PROBLEMS AT ALL! Anyone can identify them on pits or lifts, and this is done quite quickly. Personally, I came across rockers and cables, using the example of a VAZ, a clutch cable.
However, if you have checked everything, and the gears do not engage with the engine running. Then it’s worth looking at the box itself and the accompanying attachments. Let's move on to complex faults.
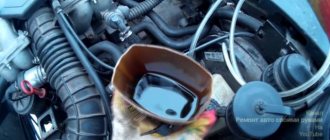
Replacing oil seals
Most often, gaskets and seals are subject to wear. And if the gasket can be changed even by an inexperienced driver, then the replacement of oil seals should be treated with the utmost care.
By its design, the oil seal is a rubber gasket that acts as a sealant. That is, if the oil seal breaks or wears out, the box ceases to be sealed, which, in turn, leads to oil leaks and breakdowns.
In order to restore the tightness of the gearbox, you will need to change this gasket. To work you will need:
- new oil seal from the same manufacturer;
- spanners;
- hammer;
- screwdriver with a flat thin blade;
- sealant.
Input shaft oil seal
The VAZ 2107 gearbox input shaft oil seal has the following performance characteristics:
- weight - 0.020 kg;
- dimensions - 28x47x8 mm;
- location - on the input shaft in the clutch housing.
Accordingly, in order to replace the gearbox input shaft oil seal, you will need to remove the gearbox from the car and disassemble the casing:
- Remove the bell (casing) from the box; it is secured with four bolts.
- Remove the fork and release bearing from the box (the fork is secured with screws, the bearing will have to either be knocked out with a hammer or pressed out with a vice).
- Access to the input shaft and its oil seal is provided.
- Using the blade of a knife or screwdriver, pry up the old ring and remove it from the shaft.
- It is good to clean the seal area from dust and dirt.
- Install a new oil seal.
- Reassemble the gearbox in reverse order.
The bell can be easily removed, as it is attached with only 4 bolts. It is important to very carefully pick up the oil seal without scratching adjacent surfaces. Even if the old oil seal does not have cracks or deformations, when disassembling the gearbox, it still needs to be replaced with a new one.
The work of replacing the input shaft oil seal is not particularly hassle.
Secondary shaft oil seal
The secondary shaft oil seal differs slightly in its characteristics from the input shaft gasket:
- weight - 0.028 kg;
- dimensions - 55x55x10 mm;
- operating temperature range - from -45 to +130 degrees;
- location - on the secondary shaft at the flange junction.
The oil seal is replaced with the gearbox removed:
- The first step is to firmly fix the flange of the box; you can insert a bolt or a thick screwdriver into it.
- Turn the flange fastening nut with a wrench.
- Using a screwdriver, pry up the centering metal ring and pull it out from the secondary shaft.
- Remove the bolt from the hole.
- Place the puller against the end of the secondary shaft.
- Remove the flange along with the washer.
- Using screwdrivers or pliers, remove the old oil seal from the box.
- Clean the joint and install a new oil seal.
Thus, replacing the secondary shaft oil seal is somewhat more difficult than doing the same job on the input shaft. The difference is due to the location of the seals and their dimensions.
Photo gallery: main stages of work
For work, you need to choose the thickest and most powerful screwdriver or bolt so that they do not bend The flange can only be removed using a puller The landing site must be cleaned of dust and dirt
Clutch fork
It’s rare, but it happens, for example, I had such a problem once on a VAZ 2105; the fork itself that retracted the clutch disc broke. Apparently it was not of very good quality. Why am I writing this down as a complex problem, because in order to replace it, you often need to remove the entire box, and this is no longer easy! Especially on front wheel drive. ALTHOUGH now people's “masters” in garages change it without removing the manual transmission.
Replacing oil seals
Most often, gaskets and seals are subject to wear. And if the gasket can be changed even by an inexperienced driver, then the replacement of oil seals should be treated with the utmost care.
By its design, the oil seal is a rubber gasket that acts as a sealant. That is, if the oil seal breaks or wears out, the box ceases to be sealed, which, in turn, leads to oil leaks and breakdowns.
The design of the oil seal allows it to seal all joints between parts on the shaft
In order to restore the tightness of the gearbox, you will need to change this gasket. To work you will need:
- new oil seal from the same manufacturer;
- spanners;
- hammer;
- screwdriver with a flat thin blade;
- knife;
- sealant.
Input shaft oil seal
The VAZ 2107 gearbox input shaft oil seal has the following performance characteristics:
- weight - 0.020 kg;
- dimensions - 28x47x8 mm;
- operating temperature range - from -45 to +130 degrees;
- location - on the input shaft in the clutch housing.
Accordingly, in order to replace the gearbox input shaft oil seal, you will need to remove the gearbox from the car and disassemble the casing:
- Remove the bell (casing) from the box; it is secured with four bolts.
- Remove the fork and release bearing from the box (the fork is secured with screws, the bearing will have to either be knocked out with a hammer or pressed out with a vice).
- Access to the input shaft and its oil seal is provided.
- Using the blade of a knife or screwdriver, pry up the old ring and remove it from the shaft.
- It is good to clean the seal area from dust and dirt.
- Install a new oil seal.
- Reassemble the gearbox in reverse order.
Photo gallery: main stages of work
The bell can be easily removed as it is secured with only 4 bolts
It is important to very carefully pick up the oil seal without scratching adjacent surfaces
Even if the old oil seal does not have cracks or deformations, when disassembling the gearbox it still needs to be replaced with a new one.
The work of replacing the input shaft oil seal is not particularly hassle.
Secondary shaft oil seal
The secondary shaft oil seal differs slightly in its characteristics from the input shaft gasket:
- weight - 0.028 kg;
- dimensions - 55x55x10 mm;
- operating temperature range - from -45 to +130 degrees;
- location - on the secondary shaft at the flange junction.
The oil seal is replaced with the gearbox removed:
- The first step is to firmly fix the flange of the box; you can insert a bolt or a thick screwdriver into it.
- Turn the flange fastening nut with a wrench.
- Using a screwdriver, pry up the centering metal ring and pull it out from the secondary shaft.
- Remove the bolt from the hole.
- Place the puller against the end of the secondary shaft.
- Remove the flange along with the washer.
- Using screwdrivers or pliers, remove the old oil seal from the box.
- Clean the joint and install a new oil seal.
Thus, replacing the secondary shaft oil seal is somewhat more difficult than doing the same job on the input shaft. The difference is due to the location of the seals and their dimensions.
Photo gallery: main stages of work
To work, you need to choose the thickest and most powerful screwdriver or bolt so that they do not bend
The flange can only be removed using a puller
The landing site must be cleared of dust and dirt.
Release bearing
The clutch fork is connected to the release bearing; it is this bearing (under the influence of the fork and your foot) that presses the clutch petals and disconnects the disc from the flywheel and basket. If the bearing is “covered”, then this process becomes very difficult. To be fair, it is worth noting that the gears will still be switched on, but it will be very difficult! With crunching, whistling and other jokes. It's worth changing it. However, again you will need to remove the transmission
Clutch adjustment VAZ 2107
Clutch adjustment is a mandatory step after troubleshooting or replacement. When dismantling the gearbox, basket, or driven disk, the control rod is usually unscrewed, so after assembly, the adjustment must be done again. This is also necessary if during the operation of the car, for one reason or another, the clutch on/off mechanism is broken. It's quite easy to make the adjustment yourself. To do this, you will need an inspection hole, overpass or lift.
Tools and materials
- open-end wrenches for 8, 10, 13 and 17;
- measuring ruler or construction corner with divisions;
- pliers;
- Cobra pliers;
- water-repellent composition WD-40.
The clutch adjustment is carried out after bleeding the hydraulic drive.
Adjusting the pedal free play
The pedal free play should be from 0.5 to 2.0 mm. It is regulated from inside the car by changing the reach of the clutch pedal limiter.
The procedure for this is as follows
- Using one 17mm wrench, loosen the locknut by 2-3 turns, and with the other same wrench, rotating the head of the limiter, change its length.
Adjusting the free play of the fork rod
The free play of the fork rod is the gap between the release bearing and the fifth diaphragm spring of the pressure plate. Its adjustment is carried out on the inspection pit or lift as follows.
- To make it easier to control the free movement of the fork, use pliers to remove the ends of the return spring from the clutch fork and from the plate under the working cylinder mounting bolts.
Adjusting the fork rod
The threaded part of the rod is not protected from dirt and moisture, so the adjusting nut and locknut may not immediately unscrew. It is recommended that after cleaning the rod from dirt, apply WD-40 to the threaded part. You are then prompted to perform the following steps.
- Holding the adjusting nut with a 17 wrench, use a 13 wrench to loosen the lock nut by 2-3 turns.
After adjustment, it is recommended to check the operation of the clutch. To do this you need:
- start and warm up the engine to operating temperature;
- Depress the clutch pedal and engage first gear;
- turn off first gear and engage reverse.
A properly adjusted clutch should press out easily, without jamming. Speeds switch on without difficulty or noise. When driving, there should be no slipping of the driven disk.
Video: do-it-yourself adjustment of the VAZ 2107 hydraulic clutch
A faulty clutch can cause a lot of trouble for VAZ 2107 owners. Therefore, experts recommend constantly listening to extraneous noise, knocking, and vibrations when changing gears while driving. It is quite simple to adjust the hydraulic drive yourself. To do this, you only need a minimum set of plumbing tools and careful adherence to the advice of professionals.
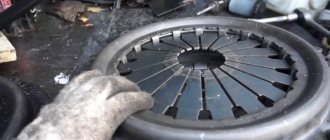
Clutch basket
Over time, the clutch basket fails on all cars with a manual transmission. Sometimes it’s due to wear and tear, sometimes the petals or the so-called “spider” break. Let me start, perhaps, with the “spider”, this is a mechanically fixed release bearing on several extensions (done like this on some VAZs), if the extension breaks, then it cannot be effectively fixed to the basket - the gears do not engage.
Next, the petals of the box break, or they become weakened. This leads to the fact that it is very difficult, almost impossible, to release the clutch disc. Therefore, the “speeds” do not switch – we just change the basket.
Well, the last wear and tear is the basket disk. It has a metal disk inside, and over time, especially from high mileage, wear forms there. When starting, the car will shake, and if the wear is very large, the gears may not shift.
In any case, we need to change the clutch basket.
If you have a mechanic
Gears shift poorly in a car with a manual transmission for three reasons. The first of these is a malfunction of the clutch when it does not completely disengage (drive). The first sign of this malfunction is that the reverse gear is engaged with a characteristic crash. The rear one reacts to this anomaly more noticeably than other gears, because it is the only one not equipped with a synchronizer.
The second reason is a defect in the gear selection mechanism of the gearbox. And finally, the third is excessive wear of the gearbox synchronizers.
There are also several clutch malfunctions in which manual transmission gears shift poorly:
- Air in the clutch release hydraulic drive or fluid leakage from it. The malfunction is eliminated by replacing failed components of the hydraulic system and pumping it.
- Worn or broken clutch release fork. The part requires replacement or repair.
- Warping (runout greater than 0.5 mm) or too thick new driven disk.
- Failure of the basket (temperature deformation of the pressure plate or its distortion).
- Loss of mobility of the support bearing of the gearbox input shaft (at the end of the crankshaft to which the flywheel is attached).
- Jamming of the clutch driven disc hub on the splines of the gearbox input shaft. To eliminate the defect, clean the splines of the gearbox hub and input shaft. It wouldn’t hurt to lubricate them a little with lithol.
There is too much free play in the clutch release fork. Its value needs to be clarified with the manufacturer, since it is slightly different for different cars. Until you find out the value of this parameter for your car, set it from 5 to 8 mm. Too little free play of the fork is also undesirable, as it leads to clutch slipping and increased wear of the release bearing.
Clutch disc and flywheel
In fact, wear occurs both at the clutch disc and at the flywheel itself. However, here, most likely, the gears will shift, but slip! You release the clutch pedal, but slippage occurs, that is, the car does not move, and it may jerk.
We look at the disk, maybe change it. We also look at the wear on the flywheel! If it is large, then we change it completely.
From experience I can say that our working VAZ 2111 was used mainly intercity, after 2 - 3 years the mileage was very high. The following symptoms began to appear: the gears turned on very poorly when the engine was running! We removed the manual transmission, looked at the basket - clutch disc - flywheel. And everything went for replacement, there was a lot of wear, and one petal on the basket was cracked. They even changed the release lever and the fork.
If the reason is not eliminated even now, then the problem is in the gearbox itself! It's worth taking it apart and looking at it
Why is it difficult to engage manual transmission gears?
manual gear shifting
- The most common problem is clutch failure. In such a situation, reverse gear turns on with a bang. This happens because the gear overlaps the tooth. Reverse speed is the only gear in the box that does not have synchronizers. For this reason, clutch failure is so obvious on it.
- The second reason is a defect in the mechanism responsible for selecting the gear. This breakdown occurs when the car is stationary and you try to shift into gear.
- The third is severe wear of the gearbox synchronizers. Mostly, breakdowns occur with those that are most often used. These are first, second and third gear. Severe wear of the synchronizers only appears when switching while driving.
To prevent possible gearbox malfunctions, perform regular maintenance, change the oil on time, and in case of minor failures, rush for diagnostics . This will save you time and money in the future.
Watch the video for what not to do with a manual transmission:
What to do if it is difficult to engage reverse gear?
If you have difficulty engaging reverse gear, do one of the following :
- When you feel that the gear has not reached the end, release the clutch slightly, and the gear will be inserted all the way.
- Fully depress the clutch and only after a few seconds engage reverse gear.
- Depress the clutch, set the gear to neutral and release the clutch. After this, press down and engage reverse gear.
- Shift into reverse through another gear. For example, first engage 4th and then shift to reverse.
Synchronizers
If, when the engine is running, you do not engage gears, or shifts occur with VERY great effort and CRUNCHING! Then there may be a problem with the manual transmission synchronizers. Without going too deep, these are soft gears (usually brass or copper) that synchronize the shafts for soft and fast shifting. If they wear out, then shifting may disappear altogether! In general, we are definitely changing.
Replacing oil seals
Most often, gaskets and seals are subject to wear. And if the gasket can be changed even by an inexperienced driver, then the replacement of oil seals should be treated with the utmost care.
By its design, the oil seal is a rubber gasket that acts as a sealant. That is, if the oil seal breaks or wears out, the box ceases to be sealed, which, in turn, leads to oil leaks and breakdowns.
In order to restore the tightness of the gearbox, you will need to change this gasket. To work you will need:
- new oil seal from the same manufacturer;
- spanners;
- hammer;
- screwdriver with a flat thin blade;
- sealant.
Input shaft oil seal
The VAZ 2107 gearbox input shaft oil seal has the following performance characteristics:
- weight - 0.020 kg;
- dimensions - 28x47x8 mm;
- location - on the input shaft in the clutch housing.
Accordingly, in order to replace the gearbox input shaft oil seal, you will need to remove the gearbox from the car and disassemble the casing:
- Remove the bell (casing) from the box; it is secured with four bolts.
- Remove the fork and release bearing from the box (the fork is secured with screws, the bearing will have to either be knocked out with a hammer or pressed out with a vice).
- Access to the input shaft and its oil seal is provided.
- Using the blade of a knife or screwdriver, pry up the old ring and remove it from the shaft.
- It is good to clean the seal area from dust and dirt.
- Install a new oil seal.
- Reassemble the gearbox in reverse order.
The bell can be easily removed, as it is attached with only 4 bolts. It is important to very carefully pick up the oil seal without scratching adjacent surfaces. Even if the old oil seal does not have cracks or deformations, when disassembling the gearbox, it still needs to be replaced with a new one.
The work of replacing the input shaft oil seal is not particularly hassle.
Secondary shaft oil seal
The secondary shaft oil seal differs slightly in its characteristics from the input shaft gasket:
- weight - 0.028 kg;
- dimensions - 55x55x10 mm;
- operating temperature range - from -45 to +130 degrees;
- location - on the secondary shaft at the flange junction.
The oil seal is replaced with the gearbox removed:
- The first step is to firmly fix the flange of the box; you can insert a bolt or a thick screwdriver into it.
- Turn the flange fastening nut with a wrench.
- Using a screwdriver, pry up the centering metal ring and pull it out from the secondary shaft.
- Remove the bolt from the hole.
- Place the puller against the end of the secondary shaft.
- Remove the flange along with the washer.
- Using screwdrivers or pliers, remove the old oil seal from the box.
- Clean the joint and install a new oil seal.
Thus, replacing the secondary shaft oil seal is somewhat more difficult than doing the same job on the input shaft. The difference is due to the location of the seals and their dimensions.
Photo gallery: main stages of work
For work, you need to choose the thickest and most powerful screwdriver or bolt so that they do not bend The flange can only be removed using a puller The landing site must be cleaned of dust and dirt
Manual transmission bearings
And the last thing that could be the bearings - although they are very strong in the box, sometimes they also “stick”. The box will work like a tractor, especially when warm.
In any case, if you have problems in the gearbox itself, then this is an expensive repair. It is also better to entrust it to professionals, because the gearbox is a very complex mechanism.
As you can see, there are quite a few reasons, but in fairness it is worth noting that mechanical transmissions are a fairly reliable unit; they themselves break down quite rarely, especially if you change the transmission fluid on time and pour a branded one of very good quality.
If the gears do not engage, then these are most likely “attached” problems, starting from the rockers and cables, ending with the basket, clutch disc and flywheel.
Now let’s take a look at a short video version of my article.
And that's ALL for me! I think the information will definitely be useful, read our AUTOBLOG.
Similar news
- TIPTRONIK what is it. How to use it? And what does it have to do with manual...
- CVT (variable gearbox): what is it, the principle of…
- Automatic transmission clutches. What are they, how do they work and why do they burn?
Add a comment Cancel reply
Clutch mechanism of VAZ 2107
The VAZ 2107 clutch is a rather complex mechanism consisting of several dozen elements. The reasons for its malfunction can be very different. However, they can all be divided into two groups:
- Defects in the clutch mechanism itself. These include malfunctions of the driven part of the clutch, pressure device, basket, flywheel, and clutch fork.
- Defects in the hydraulic drive of the clutch mechanism. They can be caused by leakage of the working fluid, the formation of an air lock in it, as well as malfunctions of the main or working cylinders (MCC and RCC) and the pedal mechanism.
The clutch, like any other car part, has a limited service life. First of all, it depends on the skill of the driver, and therefore is not regulated by the manufacturer. To increase the service life of the clutch, it is necessary to adjust it in time, monitor the level of working fluid, avoid off-road driving, and learn the skills of using the clutch correctly.
It must be remembered that in addition, the clutch is a safety device that protects the transmission from serious damage when the rear wheels are blocked by various obstacles. The car is stuck in a quagmire, the drive wheels are stuck, the engine power is enough to turn the stuck tires. In this case, the clutch will begin to slip, protecting the gearbox, cardan and rear axle from damage. Yes, the driven disc linings will burn out. Yes, the clutch will overheat, which can cause the steel flats to warp or weaken the spring plates. But more expensive units will be protected from breakdowns.
Classic VAZ models have a dry, permanently closed single-plate clutch. It includes two main elements:
- Leading part. It consists of a driven disk, the splined part of which transmits rotation to the gearbox due to friction between the friction linings and the surfaces of the flywheel and pressure plate.
- Non-removable drive unit (basket). The basket is attached to the flywheel and consists of a pressure plate and a diaphragm pressure spring.
The clutch mechanism must be reliable, durable, and capable of dampening fluctuations in engine torque. The clutch has a hydraulic drive consisting of:
- clutch master cylinder;
- clutch slave cylinder;
- clutch on/off forks;
- release bearing;
- foot pedal.
Gears engage with effort: gearbox malfunctions
In cars with a manual transmission, gear shifting is done by the driver himself. Using a lever from the interior, it acts on the rocker and then on the entire gearbox mechanism. Simply put, the driver moves the gears on the shafts.
Since the shafts rotate at high speeds, cooling is required. This is done using special gear oil. Oil also protects the surfaces of rubbing parts from premature wear. The lubricant must be changed on time. On average, this is done after every 40-50 thousand kilometers.
As for the reasons for tight gear engagement, there may be several of them. However, most often they are associated with problems in the clutch or the gearbox itself. If you study the list of the most common breakdowns, then you can highlight the following:
- the link is poorly adjusted. In particularly difficult cases, it may be necessary to replace the plastic bushings. This procedure, like adjustment, can be done on your own;
- hydraulic drive failure. If it leaks, you may not be able to engage the gear at all, since it is impossible to disengage the clutch;
- the clutch cable has broken or fallen off (in a cable clutch);
- The clutch basket has failed.
The exception is reverse gear, since it does not have synchronizers; By the way, when the reverse gear is difficult to engage, extraneous noises, clanging, and crunching often occur. Such phenomena directly indicate wear of the gear teeth.