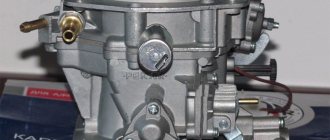
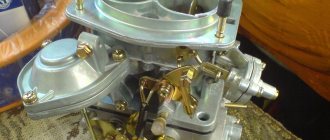
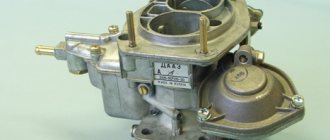
The VAZ 2107 model is the latest in the line of so-called “classic” carburetor versions. Such cars were equipped with an Ozone carburetor or DAAZ 2107 (1107010 20). The specified DAAZ carburetor is characterized by high maintainability and simplicity of design.
Taking into account such features, carburetor repair and adjustment can easily be done by yourself. Next, we will look at how the 2107 carburetor works, as well as how to adjust the carburetor on a VAZ 2107.
Photo instructions for repairing a carburetor on a VAZ 2107
Checking the needle valve for functionality
This photo instruction shows the process of removing and checking the needle valve; I recommend following it in order to easily check the valve for functionality.
How to disassemble and check carburetor cover parts for malfunctions
If you need to check the carburetor cover parts, this photo instruction is for you!
How to repair the pneumatic throttle actuator on a VAZ 2107 carburetor
Has your pneumatic throttle valve on your carburetor broken? Then this instruction is for you!
Repair of the body and the process of disassembling the carburetor for a VAZ
Is it time for a hull repair? Then I recommend following the instructions below and you will not have any problems with disassembling and repairing the carburetor body.
Throttle body repair and disassembly process
Has the throttle valve exhausted its service life or has its operation simply been disrupted? Look at the photo instructions that I prepared for you!
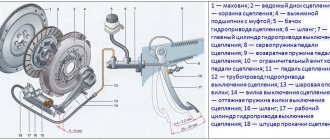
Design and principle of operation
Carburetors are available in several types, but the two most widely used are:
- Float models;
- Needle devices.
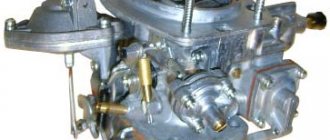
The most widespread are models with a float chamber, but although rare, bubbler-type products are also found. At different periods of production of the VAZ 2107, devices of different brands were installed, these could be Solex or Ozone carburetors. Let's try to understand the principle of their work.
The design of these devices is approximately the same, there are only minor differences. The design uses the following components:
- Float chamber for gasoline;
- Throttle valves;
- Damper that regulates air flow;
- Chambers for mixing fuel with air;
- Idle air valve;
- Econostat;
- Compartment for removal of crankcase gases;
- Acceleration pump;
- Jets for supplying air and fuel;
- Tubes for obtaining fuel emulsion.
Also, this device has several systems, such as a system for ensuring the engine starts with its subsequent warming up, and a system for controlling idle speed. System for monitoring the fuel level in the float chamber, accelerator pump assembly. Also, the operation of this device is impossible without a mixing chamber and econostat.
When the pistons move, a vacuum is created in the combustion chamber, which sucks fuel from the float chamber. Gasoline flows through channels into the mixing chamber where it is mixed with air. The throughput of the jets is selected in such a way that the ratio of the amount of incoming air to the mass of gasoline is approximately 15:1. This ensures maximum efficiency of the internal combustion engine.
For a variety of reasons, the factory settings of the carburetor may be violated, which will lead to a loss of power of the power unit and an increase in fuel consumption. In this case, many motorists turn to specialists at automotive centers for help in resolving their problems. If you wish, you can easily do this work yourself.
How to adjust the device
Carburetor adjustment is carried out in several stages:
- Checking the functionality of the air damper;
- Measuring the fuel level in the float chamber;
- Checking the performance of the accelerator pump;
- Cleaning fuel and air jets;
- Regulating engine idle speed.
It cannot be said that these are all types of adjustments, there may be others, it depends on the type of carburetor, its service life, and other reasons.
About checking the air damper
This is easy to do yourself. Pull the choke handle towards you as far as it will go and look at the condition of the air damper. It should completely cover the diffuser of the primary carburetor chamber without gaps. Turn the engine crankshaft with the starter for a few seconds; if flashes occur in the cylinders, it should deviate and allow the air mixture to enter.
Problems with the damper can arise due to incorrect installation of its drive cable, malfunction of the telescopic rod, or oily deposits on the walls of the diffuser.
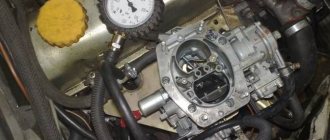
How to check the fuel level in the float chamber
To perform this operation, you need to remove the top cover of the device. You can check the level in two ways: by measuring the distance from the float to the cover, or using a caliper depth gauge for the fuel level in the carburetor float chamber.
We measure the distances from the float to the lid.
The distance from the float to the cover should be within 6-7 mm, while the needle valve should shut off the fuel supply. This can be easily checked by blowing into the pipe in the top cover. This distance is set by bending the tongue on the float. If the channel does not close, the needle valve should be replaced. A depth gauge measures the fuel level immediately after stopping the engine; it should be at a level of approximately 17 mm. It is also installed by bending the float tongue.
Acceleration pump and checking it
This check is carried out with fuel in the carburetor. To do this, you need to make several presses of the gas pedal and at the same time observe the “beak” in the diffuser of the secondary chamber. A stream of gasoline should splash out of it.
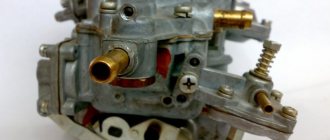
If a stream does not appear, the sprayer should be unscrewed as shown in the photo, then blown out. If you press the gas pedal again with the nozzle removed, fuel should appear in its channel. The nozzle must be removed carefully so as not to lose the copper gasket. The lack of gasoline in the nozzle channel may be due to a leak in the pump diaphragm.
To check it, unscrew the four screws on the cover with a Phillips screwdriver and remove it from the body. You should also be careful not to lose the spring. The diaphragm does not need to be repaired; it is simply replaced with a new part.
The arrows in the photo show the screws securing the accelerator pump cover.
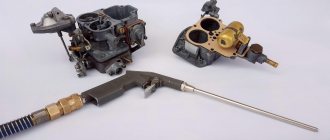
A little about checking jets
The use of low quality gasoline can lead to clogging of fuel and air nozzles.
Sometimes, when the carburetor top cover is removed, you can see sediment in the float chamber. It can easily get into the fuel channels and block the access of gasoline. Using a tire inflation pump or compressor, you can blow them out. An aerosol for jets is available for sale. The tube from the aerosol can is inserted one by one into the nozzles and washed. When checking the jets in the float chamber, you cannot swap them, this will lead to increased fuel consumption.
If this does not help or there is no aerosol for cleaning the carburetor, the jets are turned out of their mounting sockets for washing. It is best to use solvents 646 or 647 as a flushing liquid. If you dip the jets in them for a while, they will dissolve all the deposits in the holes of these parts. The carburetor emulsion tubes are subjected to the same procedure. You can get them out with the handle of a thin needle file or other rod of suitable diameter.
The air jets of the primary and secondary chambers are subjected to the cleaning procedure. To do this, use a flat-blade screwdriver to turn out the bronze screws, which are hollow inside, on the sides. Air jets are inserted into them. They can be easily removed from their seats for purging or washing. They usually have the same calibrated dimensions, so it is impossible to confuse them.
The photo shows one of the two screws with an air jet.
Do not use rags to wipe jets and other carburetor parts. Remaining fluff can cause problems in the future when using the machine.
How to regulate idle speed
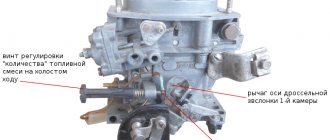
Most drivers complete the stage of adjustment work with the carburetor with this operation. To do this, there are two screws at the bottom of this device, which regulate the quantity and quality of the fuel mixture. As a rule, the manufacturer makes adjustments to the device, after which safety bushings are pressed onto these screws. After installing them, the screw can be turned only slightly. These bushings must be removed to make adjustments. When performing adjustment work at a service station, such bushings are reinstalled after completion of the work. There are two screws to regulate the idle speed.
In the photo, a screwdriver is used to screw in the fuel mixture quality screw, and next to the tubes you can see the mixture quantity screw.
Let's take a closer look at the procedure for setting the required engine idle speed. This operation is performed as follows:
- The screw that regulates the amount of mixture is set on the tachometer at approximately 850 - 900 rpm;
- By rotating the quality screw, maximum engine speed is achieved;
- By rotating the screw, the mixture quantity is reduced to 950 - 1035 rpm;
- Such manipulations with the screws are carried out several times until, when rotating the quality screw, only a decrease in the engine speed occurs;
- The quality screw is used to achieve nominal speed;
- The operation of the engine is checked at idle speed, when the gas pedal is sharply pressed. The operation of the power unit should be smooth, without tripping or failures.
It may happen that by rotating the screws it is not possible to change the engine speed. This may be due to excessive clearance between the diffuser and the throttle body. This gap is set with a screw located next to the fuel mixture quality screw.
Video about carburetor adjustment
What is important to know about the resonator
Structurally, the pre-muffler is identical to the forward flow described above - a straight perforated pipe passes through the cylindrical body. The only difference is the partition that divides the tank space into 2 chambers.
Resonator tasks:
- dampen primary sound vibrations of large amplitude;
- facilitate the work of the main muffler and extend its life;
- remove some of the heat from the flue gases.
The resonator bank resembles a forward flow, only the part size is smaller
The VAZ 2107 car is equipped with 3 types of resonators:
- The classic option for carburetor engines, used in the first models with an injector, is a long pipe with one or two banks (depending on engine size).
- On injection models that comply with Euro 2 exhaust standards, a shortened resonator section with a flange was installed at the front end of the pipe. The catalytic converter was bolted to it.
- After the introduction of Euro 3 standards, the length of the catalyst increased and the length of the resonator decreased. The section for the injection version of the “seven”, which meets these requirements, is equipped with a front flange with 3 bolts.
When operating resonators, the malfunctions described above occur - burnouts, rust and mechanical damage. Troubleshooting methods are similar to repairing a muffler - welding or temporary sealing with a bandage. Removing the resonator section is not difficult - you need to unscrew the fastening to the gearbox, then disconnect the muffler and “pants” pipes. On a VAZ 2107 with an injector, the flange is disconnected instead of the front clamp.
Video: how to remove the resonator VAZ 2101—2107
Since the classic Zhiguli models, including the VAZ 2107, have been discontinued, the problem of purchasing high-quality spare parts arises. The market is flooded with cheap mufflers that burn out after 10–15 thousand km. Hence the final conclusion: sometimes it is easier to contact a competent welder and eliminate the defect at low cost than to purchase a new part of dubious origin.