10 February 2015 203 532
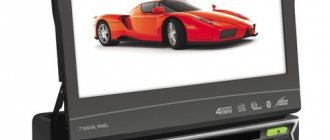
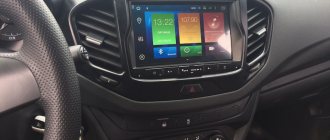
AvtoVAZ equips modern Lada cars (Granta, Kalina, Priora and Vesta) with standard push-button radios, and in the top version (Luxury trim levels) with more modern multimedia systems (MMS) with a touch screen. In this article we will tell you how to connect an amplifier and subwoofer to the standard radio and MMC of Lada cars.
Connectors for the standard radio and MMC Lada
It doesn’t matter which standard radio is installed in your car, a push-button with catalog number 2190-7900010-20, 2190-7900010-40 or MMC with numbers 2190-7900010-00, 2192-7900200 or a Vesta radio.
All devices have the same ISO and mini-ISO connectors on the back.
The amplifier can have two groups of inputs:
- linear
- high level input
We make the connection according to any of the schemes proposed below.
Connecting the amplifier to the radio via the ISO connector
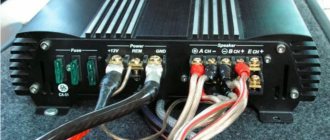
We connect the amplifier through the high-level input to the radio (speaker output).
- Connecting an amplifier and subwoofer to the Granta/Kalina 2 radio
This connection method is suitable for the average user. Music lovers are not satisfied with this method due to the large number of circuits between the radio and the amplifier (pre-amplifier, radio amplifier, external amplifier voltage divider, power amplifier), which introduce their own distortions.
Connecting the amplifier to the radio via the mini-ISO connector
To implement this amplifier connection scheme, you will need to find a mini-ISO connector, which should be connected to an empty slot on the back of the standard radio of Lada cars.
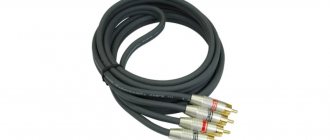
It is further recommended to use high quality shielded wires.
The main advantage of this connection scheme is high sound quality.
Installation of acoustics on Granta
Speaker in the car door
First of all, you will need to dismantle the plastic pocket that covers the compartment for the stereo system. Use a screwdriver for flat type screws. When the pocket is removed, you will see that behind it there are special sockets where ISO plugs from the future speaker system will be placed.
After this, you need to remove the protective metal frame from the radio. We install it in the vacated opening under the plastic pocket. Successful fixation of the equipment is usually accompanied by a characteristic click.
Now you will need to connect the plugs in accordance with the existing ISO standard, to which the electrical wiring of all international format radios meets. Incorrect connection of the audio system connectors can lead to malfunction of all electrical devices in the car, including the radio.
It is worth noting that many car radio manufacturers make individual connectors for them. In this case, the kit almost always includes a special adapter for ISO standard plugs. If your radio does not comply with the ISO standard and does not come with an adapter, you can consider cutting the wires from the radio plugs or from the car's electrical wiring. After this, you will need to properly solder the wires in accordance with the color pinout.
It is strictly not recommended to resort to simply twisting the wires with adhesive insulating tape. This type of connection is impractical, since in winter the tape freezes and cracks, which can cause the wiring to short out and electrical appliances to fail. For a high-quality connection, you can use terminals that are designed for clamping wires.
ISO standard connectors are prepared only once. After this, you will not have to deal with selecting plugs and pinouts when installing a new radio. This procedure should take no more than 3 minutes.
The ISO standard uses 2 types of connectors: brown and black. The first is intended to ensure the operation of all the acoustics of the car. The second is for special functions of the stereo system and its electrical power supply. The pinout diagram for ISO is shown in the figure.
ISO pinout diagram
Subwoofer connection diagrams
Let us remind you that on the website you can find other useful instructions for tuning Lada cars.
Keywords: cassette player Lada Granta | cassette player Lada Kalina | cassette player Lada Priora | cassette player Lada Vesta
- How to connect an antenna to a car radio video
Found an error? Select it and press Ctrl+Enter..
Connecting the amplifier
Installing speakers in a car
In addition to the radio itself, you will need to correctly place and connect the audio speakers.
Installation of the rear and front speakers is carried out according to the same scheme. To do this, you will need to cut openings in the door trim, so for ease of installation you need to remove them. The upholstery is removed in the following sequence:
- the door handle is removed;
- The plastic casing under the handle is removed;
- the adjusting handle for raising the glass is removed (only for Lada Granta Standard).
The stock upholstery has 16 cm diameter openings that are specifically designed for speakers. Certain difficulties may arise if you decide to install speakers of other sizes.
For speakers with a diameter of 13 cm, you will need to cut out the central plug in the door trim. The layout diagram is included with the speaker kit. Having understood the intricacies of a particular model, you will have to slightly increase the plane of fastening of the tongues, since standard openings are larger.
Speakers on the rear parcel shelf of a car
Speakers with a diameter of 16 cm are most often easy to install, but sometimes the sizes do not match. In this case, it is necessary to adjust the metal opening allocated for installing the speaker using an electric jigsaw
After each adjustment, be sure to try on the column, as it is very important not to overdo it in this matter.
After successful installation, you will need to connect power and check the functionality of the speaker. Then you can install the door trim back. A protective grille is placed over the column, which must be secured with self-tapping bolts.
Connecting the amplifier to the standard radio
Connecting the amplifier to the standard radio of most cars is carried out in the following order:
- Before starting work, be sure to disconnect the battery terminals.
- A red +12V wire is pulled from the battery to the amplifier. A fuse should be installed as close to the battery as possible.
- The black wire (ground) is connected at one end to the metal part of the body, and the other to the amplifier.
- The amplifier is connected with special wires to the speakers and subwoofer.
- Wiring is laid from the radio to the amplifier using special connectors on the radio. It should be located separately from the standard wiring to avoid interference.
- You only need to attach the terminals to the battery after the installation is complete.
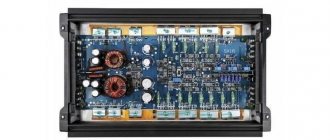
The amplifier is located in the passenger compartment or trunk of the car. If it is located in too narrow a space, additional cooling will be required, since the amplifier gets very hot during operation.
In this way, the amplifier is connected to the radio of a Lada Priora, Grant, as well as Kalina 2, Lancer 10 and many others. Differences appear only in the last point, since the radios have different connectors. The connection is made through the radio connectors marked ISO or mini-ISO.
Since different radio models have different connector locations, before installing the amplifier, you need to familiarize yourself with the diagram of their location. It can be found in the receiver's instruction manual.
- Slotted box for subwoofer Ural TT 12 with port setting 35 hz
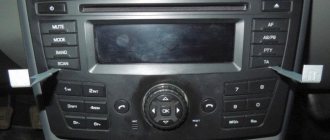
Removing the device according to the instructions
The algorithm for removing the radio if you have the keys is outrageously simple. It is worth considering in order to understand how to act if they are lost. The order is as follows:
- Remove the front panel of the player and the decorative plastic frame, prying it up with a flathead screwdriver if necessary.
- Insert the first key into the gap between the housing and the mounting frame, located at the end. You should feel slight resistance as the tool bends the latch.
- Repeat the same action with the second key.
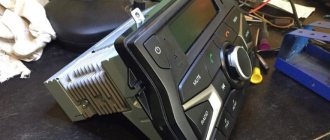
- Grasp the radio with your hands by the protruding parts on the sides of the case and carefully remove it from the niche.
To remove the radio, 2 keys are used
