Firmware for standard radios LADA Kalina 2 and Granta
To change the appearance of the menu of the supplied radio and expand its capabilities, you will need an SDHC (SD) memory card with a size not exceeding 4Gb. The SD card should be formatted in advance on the computer using the FAT file system.
Preparation for firmware:
1)Save the archive with the firmware on your PC and unzip it;
2) Copy all files from the FirmWare folder to the SD card via a card reader.
Firmware:
1. The USB port of the radio should not contain a flash drive;
2. Insert the card with the firmware files into the car radio connector;
3. Reboot the head unit by holding down the function keys (power key or volume key) until the display completely darkens;
4. After this, starting the desktop will talk about flashing.
Preparing for work:
1) Calibrate the screen. Click on the phone icon. Go to the “Calibration” section. Click on the “Recalibrate” button. The time countdown will start;
2) Without waiting for the time to expire, tap on the screen;
3) Without removing the SD card, restart the GU. A new menu will be presented to your attention. The firmware process is completed.
Firmware download
1. Stock firmware
software version with Russian locale, WiFi drivers, Russian Windows interface and keyboard
software option only for MMS from new batches, THIS SOFTWARE IS INCOMPATIBLE WITH THE FORMER 23.0.2.38 a distinctive feature of this software is the presence of the Launcher.exe file in the Windows folder, software with Russian locale drivers for WiFi and Russian Windows interface and built-in keyboard
2. Modified firmware
Firmware with altmenu ver.32 Kalina_mod_ver.23.0.2.32.rar (35.15 MB) Verified.
Russified time and date and correctly displayed Russian symbols Kalina_II_altmenu_rus_clock.rar (28.2 MB)
New menu XLada_NewMenu7.36.rar (12.09 MB)
3. REMOVING A DUMP FROM MMS
With an already flashed MMS, there is no point in taking a dump.
The dump is removed before flashing the firmware in case you have non-standard software and you destroy the device during the flashing process, then the device can be restored using the dump.
1. Download the program Attached file NDumpCE6+.rar ( 65.67 KB )
2. Unzip it onto an SD card or USB flash drive with the exFAT file system (in case the dump exceeds 4GB)
3. We go to the desktop of our MMS
4. Launch NDumpCE6.exe
5. In the program window, make sure that the “Full NAND” checkbox is checked and select “DISK1:” from the drop-down list and click “Save” to confirm
6. After the operation is completed, a file with the .img extension should appear on the SD (or USB) card, about 120 MB in size for old versions of MMS and about 4 GB for new ones, this is our dump
Description and characteristics of the Kalina 2 multimedia head unit
To list all the capabilities of the multimedia system that is installed in the Kalina 2 car, you will need a separate article. So we will name only the main functions of this device.
The ability to use a GPS navigation system and create a travel route based on traffic jam data received in real time from the Internet.
Displays images from rearview cameras and information from parking sensors.
High-quality audio and video files from storage media of any type. Including a television signal.
4G mobile internet connection.
All technical characteristics, as well as the design of the MMC Lada Kalina 2, fully comply with the requirements for equipment of this class.
Advice for future and current owners of VAZ push-button radios
The release of standard VAZ “devices”, devoid of an expensive “sensor”, has been expected for a long time. Back in the first half of the year, we were told that such a unit should appear in the fall. As you can see, VAZ was embarrassed to build a graphic display into the radio, and all information on the screen is displayed in standard symbols. The only available backlight color is emerald (there will be more of these colors in crossovers). The device is a “turn on and listen” device, and in standby mode the display displays the time.
Easy link mms 2190
Description:
Alternative menu (shell) for MMC cars Lada Granta, Kalina, Priora. In NewMenu 9, all functionality is divided into separate applications. The main applications - radio, video player, audio player, BT player, AUX, phone and navigation - are located on the main menu screen. The remaining additional functions of MMC are divided into corresponding applications. For example, application options: Trip computer, Car (displaying a car with doors, indicators, etc.), Climate (for displaying climate status), Motor (for reading and decoding errors, controlling fans), an application for measuring dynamics, an application for street racers (red flash), etc.. You can come up with many applications. Applications can be uninstalled and installed through the Application Manager. Those. You can create your own MMS functionality. Installed applications are displayed and launched in the Applications window. Some applications can be launched as a screensaver (Trip Computer application). Applications can be launched either by a hot button (the Trip Computer is launched by clicking on the Fuel icon in the Kan-panel) or by an event (for example, when check the Motor application is launched).
Possibilities:
- Listening to radio, audio files; watching videos.
- Connection with phone via Bluetooth protocol; Speakerphone; the ability to receive and make calls; phone book with quick contact search; listening to music from your phone via Bluetooth (via BTPlayer).
- Launch a navigation program, simultaneous use with all audio applications.
- Playing navigation prompts when listening to the radio, AUX, music from the phone, during a telephone conversation on the front or rear speakers (mixing).
- AUX input support (hardware modification required).
- Sound settings (balance, equalizer, advanced hardware equalizer settings); screen settings, automatic day/night mode switching; turning on the parking camera.
- Setting up sound alerts, mixing direction and volume, and the ability to immediately do a mixing test.
- Kan-panel with vehicle data readings, voice prompts about the vehicle’s condition.
- Automatic volume adjustment depending on the current speed (auto volume).
- Support for navigation programs, support for USB GPS receivers, support for standard GPS receiver.
- Trip computer application: display of trip data (speed, revolutions, gear, mileage, time, consumption, cost, remaining range, etc.), recording trip data in the log, log viewer with data grouping, adjusting the accuracy of mileage and fuel level in the tank, and etc.
- Motor application: reading, displaying, decoding engine errors, resetting ABS automatic transmission SRS errors, manual and automatic control of engine fans, idle speed control when the car is stationary.
- Other applications: file manager, text viewers, calculator, browser and many others.
- Switch between all running applications using the Mode (Menu) button.
- Ability to change the design style, preview the changes made.
- All main menu settings in one window with tabs.
- Saving all user settings (including design) when switching to a new version.
- Steering column switch support.
Installation, update, removal, disaster recovery:
1. Unpack the archive into the root of a USB flash drive or SD card (Install folder). 2. Exit to the MMS desktop. Run the file InstallInstall.exe (white label) from a USB flash drive (SD card). When installing on a clean MMC, there will be a reboot, then the installation will continue. 3. To install the MMC to the internal memory, click Install. To install to an SD card, click Cancel, then click Install. 4. Select drivers for the USB devices you are using and click Install. If there is nothing, click Cancel. 5. Select the MMC type. 2190 – MMS standard installed on Granta, 2192 – MMS standard installed on Kalina/Priora. For MMC with standard navigation, select the type with navigation.
Installing speakers in the standard places of the front doors on the Lada Granta
In addition to the radio, for its normal operation, it will also be necessary to install speakers and acoustics in the car door.
To cut holes in the door trim, it is better to remove it from the car. To do this, you need to dismantle the door handle, the plastic casing in which the door opening lever is installed, and the glass position adjustment handle (if you have a standard package). See the article “Removing and installing door trim on the Lada Granta.” The door trim and metal frame of the front doors provide a size for 16 cm speakers.
Depending on the variation of the speakers you have chosen, the following problems may arise: - if you have chosen 13 cm speakers, then you need to cut out a corresponding hole in the center of the plug on the door trim according to the template supplied with the speakers. In this case, the hole in the door frame is slightly larger and you will have to increase the plane from the mounting “ears” of the speaker to the mounting holes in the door;— If you decide to install 16 cm speakers, then you may have to modify the door frame here, since the speaker basket can It definitely won’t fit into the standard hole in the door hardware. You will need a grinder or a jigsaw with metal files. We cut a hole of the required diameter and try on the speaker. We connect the speaker and install it in place. We install door trim. We mount the frame for the metal grille of the speaker and, accordingly, firmly fasten the speaker to the door with 4 self-tapping screws. We install the speaker grille.
This is, in principle, the entire algorithm for installing a radio and speakers in the front doors on a Lada Granta car. In addition, you may find the material from the article “Wiring diagrams of the Lada Granta” useful, which shows the blocks for connecting the power supply of the radio and connecting the speaker wires to it, blocks 17 and 18. The “standard” configuration also includes wires going to the front door speakers car. So, the connection of the radio speakers in the doors is carried out through the rear harness, see the article “Wiring diagram of the rear wiring harness of the Lada Granta”, contacts on the block 16,17,18,19.
Additional information when installing speakers in the front doors of a Lada Granta car: When choosing speakers for installation, choose acoustic sets with minimal protrusion of the plastic frame and metal grille. The fact is that some speakers, after installation, may interfere with the opening of the glove compartment. Not all speakers, but some. As a result, you will crawl into the glove box of the Lada Grant through a small gap, or only after you open the right front door
Safety warnings when installing and connecting the radio in a Lada Granta car. All installation work should be carried out with the negative terminal of the battery disconnected. After installing the radio, you must carefully check all connections and that they are connected correctly.
Instrument panel removal and installation
On cars of the first releases, the instrument panel can be dismantled by first removing the instrument panel and other removable parts from it. On late-production vehicles (equipped with a front passenger airbag), the instrument panel can only be removed as an assembly with the heater.
Removal
1. Prepare the car for work and disconnect the terminal from the negative terminal of the battery.
2. Drain the coolant from the engine.
3. Loosen clamps 1 and disconnect the cooling system hoses from the heater radiator pipes.
Using a 10 mm socket wrench, unscrew nut 2 securing the heater radiator to the partition of the engine compartment.
4. Remove the filter element of the cabin ventilation filter.
5. Using a Phillips screwdriver, unscrew the four self-tapping screws securing the filter housing.
6. Remove the filter housing from the air intake box.
7. Remove the floor tunnel lining and steering column lining.
8. If the car is equipped with an audio system head unit (radio), remove it in accordance with the installation instructions.
9. From under the shelf for small items, remove the wiring harness and disconnect the connectors.
10. Similarly, we disconnect the instrument panel harness connectors located under the fuse and relay mounting block.
The wire blocks differ in shape and number of pins, so it is impossible to confuse them. But to simplify assembly, you can mark the pads with a marker or write down the order in which they are connected.
11. Using a 10 mm socket wrench, unscrew the nut securing the air duct.
12. Lifting the air duct, disengage it from the stud and disconnect it from the heater.
13. We disconnect the wire blocks laid under the air duct.
14. Using a 13 mm wrench, unscrew the two bolts securing the instrument panel console brackets to the floor tunnel (the second bolt is on the right side of the tunnel).
15. Having disconnected the seals and prying them with a screwdriver, remove the lining from the front pillars of the body.
16. Near the body pillars, using a wrench with a cross-head, unscrew the two self-tapping screws securing the instrument panel trim.
17. Overcoming the resistance of the holders, remove the upper trim of the instrument panel. Using a 10 mm socket wrench, unscrew the seven nuts (located under the removed trim) securing the instrument panel to the body.
18. Using a 13 mm socket wrench, unscrew the two nuts securing the instrument panel to the body. Remove the ground wire tip from one of the studs.
19. Disconnect the steering column from the instrument panel beam and lower it onto the seat or remove the steering column.
20. Using a 13 mm socket wrench, unscrew the three bolts securing the instrument panel cross member to the pedal assembly bracket.
21. Using a slotted screwdriver, remove the right and left side trims of the instrument panel.
22. Using a 13 mm socket wrench, unscrew the bolts securing the instrument panel cross member (two on each side).
23. Remove the instrument panel assembly with the heater.
Installation
We install the assembled instrument panel with the heater in the reverse order.
Exterior
Initially, Lada Kalina was considered exclusively as a “workhorse”. Consequently, the attitude towards design was largely characterized by the residual principle. They say that this is not the main thing for such a machine. But after the restyling, the model began to look much more lively and aggressive.
Initially, the Lada Kalina was a simple car. Rather, even too simple.
The front bumper is decorated with a huge air intake supporting a small radiator grille. And under the spectacular headlights there are small foglights located in massive seats.
The new Kalina looks much more interesting from the front!
However, there are an order of magnitude fewer changes in the profile. The same modest and proportional doors, a round tank flap with a recess for opening, front fenders and so on. Perhaps the changes affected only the rims and rear fenders.
On the side, other than the different rear wings and rims, no changes are observed.
The situation is similar with regard to the stern. There are no fundamental changes observed, with the exception of the rear bumper, which has become more massive and powerful, and has also acquired new reflectors and a trim at the bottom.
At the rear, the changes are more noticeable, but they are not fundamental.
The image of Lada Vesta is fundamentally different. She was not a nondescript machine, to which they later tried to instill pseudo-aggressive features. Initially, Lada Vesta was created as a landmark and expressive car - the first representative of AvtoVAZ’s new corporate style. That’s why it looks more harmonious – the headlights, chrome, air intake, foglights, “X” lines and other elements of the front end combine perfectly.
Vesta's front end is much more harmonious.
From the side the impression is the same. A solid, complete product, with logical lines and transitions, stylish rims and considerable ground clearance.
The ground clearance of the Lada Vesta can be the envy of some crossovers.
And the food didn’t disappoint. The chopped lines of the stops are impressive, especially against the background of a modest bumper and a proportional trunk lid, decorated with large letters of the brand name.
Vesta looks great from behind!
Firmware for radio Kalina 2 Lux
Despite all its advantages, Kalina's MMC car also has some disadvantages. However, getting rid of them is not very difficult. You can fix and improve the quality of standard equipment and additionally connected devices (navigation, rear view cameras, etc.) by flashing the OS.
Firmware for radio Lada Kalina 2.
To do this, you will need a five (5) GB SD card edited in FAT. In the future, if necessary, the exFAT format can be used. The sequence of operations performed is as follows:
- Copy the desired firmware version to the flash card. The average size of a version is about four Gigabytes in FAT.
- Transfer the files from the “FirmWare” folder to the root folder of the SD card.
- Remove the flash drive from the USB.
- We install it (SD card) into the USB connector of the car player.
- Reboot the GU by long pressing (at least 15 seconds) the power button. As a result, a reinstallation will occur and the MMS will automatically install itself into the desktop menu mode.
- Without turning off the player, we adjust the screen (by pressing the “Recalibrate” sensor). At the end of the countdown, click on the display.
- We reboot the radio again, but with the flash card inserted. As a result, the updated menu is loaded.
The manufacturer of Kalina installs one of two versions of the operating system on the car radio. 32nd or 35th. You can change them to the hybrid version 38 by registering and downloading this firmware version for free on the website 4pda, widely known among car enthusiasts.
In general world practice, manufacturers, as new operating system updates appear, publish information about them on their official websites.
Unfortunately, AvtoVAZ does not provide such care for the owners of its cars and equipment. Which, in principle, does not cause any surprise among our users of this car brand. In conclusion, video instructions on how to download the radio firmware for Kalina 2.
Decoding problems
The main pitfall of the described procedure lies in the security code embedded in the memory of most radio tape recorders. The bottom line is this: disconnecting the music center from the external power supply for 10-15 minutes will lead to the fact that the next time you turn on the car radio, it will require you to enter a security code (usually a four-digit one), without which it will not function.
Advice. Removing the device to replace it with a new one is not a problem, unless you plan to use the old player on another machine. In any case, try not to disconnect the battery for a long time.
The device requests a code after connecting to the on-board network
If the card with the code is lost or missing, the issue can be resolved in several ways:
- when it comes to a standard device, for a certain fee they will help you find the code at a dealership that sells cars of your brand;
- there are companies and individual specialists dealing with these problems;
- the free way is to search for code using various programs.
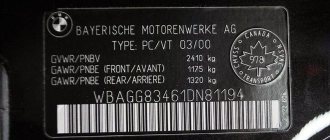
Serial number location
Regardless of the method chosen, you will have to remove the radio from the socket to find out the serial number. It is printed along with a barcode on a tag glued to the side or top of the case. After taking out the device, rewrite these numbers, and then try to calculate the PIN code using them using various online calculators on the Internet.
Important point. If you do not know the PIN code of the radio, then when searching on your own, do not enter combinations of numbers more than 3 times! Otherwise, the device will be blocked, and in this state, decoding it will cost much more.
New Lada: used LADA (VAZ) Priora 2022: buy a used Lada Priora 2017 in Novodvinsk | Auto RU
The issue of removing a car radio from its socket is not very difficult and will not require much time. But the consequences can be unexpected for an unprepared motorist. Hence the last piece of advice: find the lost pin code before turning off and removing the player in order to save your time and nerves.
How can you modify the MMC Lada Granta Liftback
To maximize the functionality of the MMS menu, we reflash the data. The process is not at all complicated; we strictly follow the recommendations of the experts.
- Flash card with a capacity of at least 4GB;
- Laptop (tablet);
- USB cable in case the system freezes.
Sequence of actions for independent firmware MMSlada Granta Liftback:
- We insert the SD card into the laptop, format it into the “FAT” file system;
- We write the modification of the firmware file to the root of the card. It is not recommended to copy the firmware to other directories, since the data is not counted when loading by the operating system;
Note to the driver. The stock firmware is indicated by the index 2.2.2.11. A complete list of official firmware is posted on the official Lada website. Custom firmware is not always installed correctly, and sometimes the system freezes. All actions related to custom firmware are under the personal responsibility of the owner.
Source
Search
Not long ago, AVTOVAZ began producing the Lada Kalina with a head unit. Previously, radio installation in Kalina was offered only by dealers in car showrooms as an additional service that was paid for by the client. Now the buyer has a choice between installing a music system with his own hands or buying a car with a head unit already installed.
Kalina sound installed
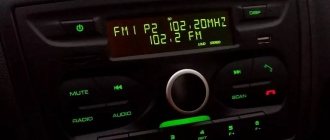
Technical characteristics of the head unit in the Kalina Lux selection:
- 2DIN touch screen;
- presence of stereo radio;
- ability to play multimedia files;
- ability to synchronize with a mobile phone;
- works with bluetooth.
Device development - WindowsCE 6.0. RAM - 128 MB. 5th generation CPU. These features cannot but please fans of AvtoVAZ products, because now driving a car has become much more enjoyable.
Kalina Radio Recorder: The Norma's technical specifications differ from the luxurious lack of a touch screen, Bluetooth connectivity and mobile phone synchronization. The size of the radio is 1DIN, removable panel. Some trim levels have 4 speakers and an antenna. The radio receives a wide range of radio waves, can play discs of different sizes, and work with USB drives and SD cards.
It's also funny that the car with the walkie-talkie went through all the special tests before going to the masses. They have been tested at extremely low and very high temperatures, and electrical compatibility has been verified by simulating the radio interference range.
When choosing a radio in your car, you must decide which media to use as the main one. This will save money. If, for example, a car enthusiast is sure that he does not need a CD or tape recorder, then why pay for a radio using these functions.
How to install a 2 din radio receiver Pioneer AppRadio SPH-DA110 in Lada Granta (OK)?
For those who choose CD players, there is one small drawback that manufacturers are trying to combat - loss of music fragments due to shaking while traveling. But progress is not in place, and the mechanics are improving. Having an ISO in the car and, accordingly, in the audio device will simplify the connection. The presence of a USB adapter allows you to play music from different media.
When choosing a radio, you should pay attention to the power characteristics. They have the most and a low threshold
Higher power is rarely used except in extreme situations. The choice should be made according to the rated power, in other words, the one that is used in most cases. Often, manufacturers indicate only the highest values on the packaging, so when choosing, you should carefully consider the annotation (passport), and not the box.
You may also like
It is also worth paying attention to the control panel. It should be as simple and convenient as possible, because in most cases it will be used while driving
Exquisite design can distract the road. Convenient and understandable buttons and backlight adjustment will only be useful. Be sure to check the spectrum of perceived frequencies. Since radio stations mostly broadcast in the frequency range from 80 to 110 MHz, it is better to have a tuner.
Connecting the radio, connector pinout
From time to time I answer the question about the correct connection of the radio. Many people do not understand the process of connecting via an ISO connector. Today I’ll write down for everyone (and for myself too) a link to an article about the pinout of the ISO connector. vaz-2109.ru/avtozvuk/podklyuchenie-magnitoly.html
For Peugeot (Citroen) owners, I’ll add that in the power block it is necessary to change red with yellow - so that the radio does not reset the settings every time the ignition is turned off.
Comments 25
I have a similar problem. I called that there is constant power on pin 7, and after the ignition on pin 4. After turning off the ignition, there is no reset? The radio works as expected. What's wrong?
ps stock radio for Ford Galaxy 1999.
This means that the standard radio has a suitable pinout. A similar situation happened with Pioneer radios, when it was necessary to swap the red and yellow wires. Manufacturers of radio tape recorders provide this opportunity, implementing this in additional features. contacts on the cable
Connecting a car radio is a job that you can do yourself. But for this, it is worth understanding the rules and features of connecting the device. Despite the variety of audio systems and car brands, the connection is made according to a similar algorithm everywhere, but with minor nuances.
Types of radio tape recorders
Let's start by looking at the types of car radios. They are:
- Full-time. Such audio systems are installed at the factory during the assembly process of the car. The peculiarity of standard devices is the variety of sizes and design options.
- Built-in. As a rule, such devices come with a curtain or a removable panel.
Connecting the radio is carried out strictly according to the instructions, because errors in this work can lead to failure of not only the radio, but also the car itself. Consequences of incorrect connection:
- Rapid battery discharge.
- Spontaneous change of radio settings.
- Sound distortion, uncontrolled shutdown, severe interference.
A connection diagram with pinouts of connectors is usually easy to find on the top cover of the audio system head unit.
Types of connectors
When connecting a radio, different connectors can be used, the type and design of which depends on the make of the car and the model of the radio. Conventionally, there are two types of connectors:
- Individual. Such connectors have a number of inconveniences for the car owner, because in the absence of connection experience, difficulties arise. In such cases, it is better to buy adapters for ISO connectors.
- ISO is a standard type of connector found on almost all modern car models. Its presence eliminates problems when replacing the radio. All that is required of the car owner is to reposition the plug.
If during the installation process the connectors match, this is good. Otherwise, you will have to select suitable conductors.
Connector pinout
The next point that requires special consideration is connecting the audio system, in accordance with the connector pinout. To perform the work, it is important to know the markings of the wires (varies by color):
- Yellow (BAT or B+) - connects to the battery positive.
- Black (GROUND or GND) - connected to the negative of the battery.
- Red (ACC or A+) - ignition.
- Gray with stripes (FR-) - to the “minus” of the right, front speaker.
- Gray without stripes (FR+) - to the “plus” of the front speaker, on the right side.
- White with stripes (FL-) - to the negative of the left speaker, in the front of the car.
- White without stripes (FL+) - to the “plus” of the left, front speaker.
- Purple with stripes (RR-) - to the “minus” of the right, rear speaker.
- Purple without stripes (RR+) - to the “plus” of the right, rear speaker.
- Green striped (RL-) - to the negative of the rear speaker, on the left side.
- Green without stripes (RL+) - to the “plus” of the rear speaker, on the right side.
Please note that paired wires, one of which has stripes, belong to the acoustic part of the wiring and are connected to the speakers of the radio. During installation, be careful with polarity. If you confuse “plus” and “minus”, there may be problems with playing bass.
How to connect power
The greatest number of errors are made when connecting power to the car radio. To solve the problem, use separate wires to connect to the battery, having a cross-section of 2-4 sq. mm. To achieve maximum sound purity, connect the yellow and black wires to the battery. In the yellow wire circuit, install a fuse with a rating of 10-20 Amps. As for the red wire, it is connected to the ignition circuit.
In practice, the yellow and red wires are often connected together, because the audio system must work regardless of the position of the key in the ignition switch. But this option has a disadvantage - the risk of battery discharge while the car is parked. This is due to the fact that the car radio will be in standby mode all the time (even after turning off). To avoid draining the battery, place a shutdown button on the red wire. When the car is parked for a long time, the power will be turned off automatically.
How to change the standard radio
Many people are interested in how to remove the standard audio system and install a built-in type device. The reason for the replacement may be the low power of the standard radio or the lack of certain functions. In any case, when installing a new device, it is important to choose the right adapters and take into account the pinout of the connectors.
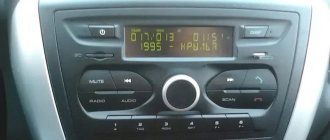
Description of the radio
| № | Control name |
| 1 | Power button |
| 2 | Microphone |
| 3 | Reboot, reset settings |
| 4 | Mute |
| 5 | Connecting a phone for conversation |
| 6 | Screen |
| 7 | Volume knob has multiple functions |
| 8 | Silence the phone ringer |
| 9 | Radio channel search button |
| 10 | Memory card slot |
| 11-21 | Radio wave buttons, with multiple functions |
Lada Vesta music on the standard radio is turned on in different ways:
- Quickly press button No. 1.
- Button No. 7 works in the same way.
Not everyone knows how to turn off the radio, but this is done in simple ways:
- Button No. 1 – short press.
- When you turn off the engine, Vesta's music will turn off automatically.
The radio has a built-in backup power supply; the battery retains music, sound and station settings in the event of a car battery disconnection. Settings are saved for up to 10 days.
Pinout of a standard Euro connector
What does a car owner need to know about the pinout of the Euro connector? Let's look at the notation using output 10478 as an example.
Upper power connector "A"
As already reported, this output is intended for connecting power supplies to the electrical circuit of the vehicle.
| 1 | Not involved |
| 2 | Not involved |
| 3 | Not involved |
| 4 | Regular meals |
| 5 | To connect the antenna |
| 6 | To connect the backlight |
| 7 | To connect the ignition |
| 8 | Vehicle weight |
And although the device is equipped with eight contacts, all of them can not be used to connect the head unit. But these contacts would not exist if they did not perform certain functions. The first three outputs, as well as the sixth, are rarely used, especially for connecting budget device options. Typically, their use is due to the need to connect additional functionality, and we are talking about more advanced car radios. Please note that contact colors may vary.
If we talk about additional options, we mean:
- ANT output. This pin is used if the vehicle is equipped with a retractable antenna.
- Remote function, thanks to which external amplifiers can be connected to the head unit. This will increase the number of connected speakers. This is relevant for music lovers and owners of vehicles with a large interior, which, with proper installation of the speakers, will increase the sound quality.
- Illumination function. This option allows you to automatically change the brightness and color settings of the head unit display. If the car is moving at high speed, the screen brightness will drop so that the system does not distract the driver from driving the car. When the vehicle stops, the radio will return to the initial settings.
- Mute function. Today, many head units have this option. But this option can be activated either by clicking on the corresponding button or automatically. In particular, if an impulse from a mobile device passes through the head unit receiver, the system will automatically lower the volume so that the driver can talk on the phone without being distracted from driving.
How to update the radio firmware to ver.38 (23.0.2.38)
The standard (or as they also say “stock”) firmware of the Kalina2/Grant radio can be versions ver.32 or ver.35. To update it to ver.38 you will need firmware files (Chain.bin, chain.lst, NK.bin and TINYNK.bin). There is currently no radio firmware for Lada Granta ver.38, there is only a hybrid of firmware ver.34 and ver.38, but it is only for installation from the altmenu. I offer you one of the options for updating the radio firmware to a new version, using the assembly from TarLink from the 4pda.ru forum (link to the topic at the bottom of the article):
Archive password: club-lada.rf
- The build is based on version 23.02.38.
- Has built-in Russian localization.
- Launching the altmenu without rebooting from the standard menu (by long pressing “Settings”).
- Built-in driver for GPS receiver BU-353s4.
- Initialize sound and time without the participation of the MMC.exe process.
- Display of engine temperature and remaining fuel (provided the CAN bus is entered into the MMC).
- Screen and sound settings.
- There is a radio.
- Support for radio buttons.
Firmware
Connecting the amplifier via the ISO connector of the radio
To connect an amplifier using a high-level input, you should take the signal from the output to the radio speakers (standard ISO).
This is the simplest method, suitable for undemanding listeners. This is because the signal going from the radio to the external amplifier has many circuits (pre-amplifier, radio amplifier, external amplifier voltage divider, power amplifier) that introduce their distortions.
TV standard
How to flash a car radio
Frequent requests from a Russian driver who wants to reflash his Japanese or Korean car radio are also related to a TV monitor. It cannot be used for its intended purpose, since it does not support the standard of our Secam television.
Due to some features of television broadcasting, it may also be impossible to watch high-quality television programs while driving. To ensure traffic safety, some cars use a lock that turns off the image on the monitor while driving.
How to reflash a car radio
To improve the TV systems of car radios from Japan (reflash the software, change the standard, remove locks), it is customary to use special adapters. They can be installed in any car.
Flashing car radios
Markings and types of connectors
Today, all car radio connectors comply with the ISO standard, and two connectors are used. Each is a plug with eight pins, sometimes the manufacturer can combine them into a single housing. Energy consumption sources are connected to one of them; it is marked with the letter A. As for the second, acoustics, that is, speakers, are connected to it. The connector designation is marked with the letter B.
Adapters for car radio connectors
Head units with three outputs can be found on sale, but they are rare and usually represent an exception.
Even if the connected sockets do not correspond to each other, the car owner has several connection options:
- You buy a special adapter for the radio, which can be connected to the outputs of the speaker system.
- The second method is considered “collective farm” among car enthusiasts. Its essence is to cut off the non-standard output and wind the necessary wires to it. But we do not recommend using this option, because eventually the wires will begin to unwind, so the “collective farm” procedure will have to be repeated. In addition, the cost of adapters is not so high to use this method.
Engines and transmissions
Vesta Cross has no engine options yet - the only one available for order is a 1.8-liter 122-horsepower gasoline engine. It produces 170 torque at peak power and consumes just over 7 liters per “hundred” in the combined cycle. A robotic transmission works in tandem with the motor.
Buyers of Kalina Cross have a choice of two petrol engines, both with a volume of 1.6 liters. Paired with the engines, a 5-speed “robot” or a 5-speed manual transmission is available.
The lowest-power 1.6-liter engine produces 87 hp. and 140 torque. The rest of the indicators are just as modest: maximum speed is 165 km/h, and acceleration to “hundreds” is 12.2 seconds. Consumption in “city-highway” mode is 7.2 liters. The second unit is a 1.6-liter 106-horsepower unit, delivering 148 Newton-meters of power at its peak. The maximum speed is 177 km/h, acceleration is 10.8 seconds, consumption is exactly 7 liters.
How to set up "GPS" on the firmware version of the multimedia?
Carrying out this action will not take much effort. The procedure involves preliminary switching with the GPS module and consists of the following algorithm of actions:
- go to the corresponding “Tools” menu;
- activating the display keyboard;
- direct module switching;
- route instructions: “\staticstore\dll\232usb.dll”;
- continuously pressing the “OK” key after the prompt regarding driver selection is displayed on the screen.
If the indicated steps are completed correctly, then we proceed to the manipulations of setting up the navigation software. In the program, we select the “COM 5” port and the corresponding speed – 4800 bps.
Upon completion of the entire list of manipulations, we observe the operation of the system
Please pay attention to the presence of the configured Navitel program
Where can I get firmware for the Lada Priora radio and other car models?
Today it can be obtained from a technical service center, as well as downloaded on the Internet on various sites for a fee or free of charge. Be sure to check the reliability of the source, because... Many installation files in the form of archives can be compiled manually by specialists whose skill level cannot be trusted.
It is better to search on trusted forums and websites, where various firmware versions are given in lists along with instructions and descriptions of the process, as well as recommendations and tips. Be sure to study the contents of the archives, and also check the downloaded files for viruses.
Do-it-yourself installation of a radio in a Lada Granta
This article will discuss how to install a radio on a Lada Granta car. I would immediately like to say about the electrical connection of the radio. AvtoVAZ has made a significant step forward.
Now, when installing a radio, there is no need to run wires to power the radio and speakers; all this is included in the standard audio preparation of the car.
This is a big plus if you remember the tenth family, when the owners of tens and twelves had to do everything from A to Z, everything themselves.
Dimensions of the radio for installation in a regular place in the Lada Granta
The space for installing a radio in the dashboard console of a Lada Granta car is designed for 1 DIN radio. Here is an example of installing such a radio.
When installing a 2 DIN radio, you will need to cut the partition up and adjust the frame in the console to the size of your audio system, which will make your life somewhat more difficult
Operations for connecting a radio to a Lada Granta
The first thing you need to do is remove the plastic pocket installed in place of the future radio. To do this you will need a flat blade screwdriver. Having taken out the pocket, on the reverse side you will find slots where ISO connectors will be inserted to connect the radio.
You can learn more about them from the article “How to connect a radio with your own hands.” The connectors fit quite securely into pockets, meaning you don’t have to look for them in the wilds of the panel to make connections. Now you need to remove the metal frame from the radio and install it in the place where the plastic pocket was. Unbend the frame's antennae to lock it securely in place.
When installing the radio, you will not need any tool to change the shape of the holes (a file, a file), all dimensions have already been made in accordance with generally accepted standards for 1 DIN radio casings.
Installing speakers in the standard places of the front doors on the Lada Granta
In addition to the radio, for its normal operation, it will also be necessary to install speakers and acoustics in the car door.
To cut holes in the door trim, it is better to remove it from the car.
To do this, you need to dismantle the door handle, the plastic casing in which the door opening lever is installed, and the glass position adjustment handle (if you have a standard package).
See the article “Removing and installing door trim on the Lada Granta.” The door trim and metal frame of the front doors provide a size for 16 cm speakers.
In this case, the hole in the door frame is slightly larger and you will have to increase the plane from the mounting “ears” of the speaker to the mounting holes in the door; - If you decide to install 16 cm speakers, then you may have to modify the door frame here, since the speaker basket can It definitely won’t fit into the standard hole in the door hardware.
You will need a grinder or a jigsaw with metal files. We cut a hole of the required diameter and try on the speaker.
We connect the speaker and install it in place. We install door trim. We mount the frame for the metal grille of the speaker and, accordingly, firmly fasten the speaker to the door with 4 self-tapping screws. We install the speaker grille.
In addition, you may find the material from the article “Wiring diagrams of the Lada Granta” useful, which shows the blocks for connecting the radio power supply and connecting the speaker wires to it, blocks 17 and 18.
The “standard” configuration also includes wires leading to the speakers of the front doors of the car. So, the connection of the radio speakers in the doors is carried out through the rear harness, see the article “Wiring diagram of the rear wiring harness of the Lada Granta”, contacts on the block 16,17,18,19.
Dismantling the console containing the stove control unit
As you know, some trim levels of the Kalina-2 car do not have climate control. Here the driver can only control the operation of the stove. The stove control panel is held in place by 4 clips. In general, the mount used here is the same as in versions with climate control, but you won’t be able to remove the control unit panel unless you first remove the three control knobs.
Let's say we managed to dismantle the stove control unit panel. Then, all that remains is to remove the top flap, which is adjacent to the air ducts. This part itself needs to be pulled towards you from below, but first you need to unscrew two screws (they are circled in the figure).
Any device of standard size 1 DIN can be installed in the compartment intended for the radio. You don't need to dismantle anything to do this. It is difficult to imagine a situation in which it is really necessary to remove the center console panels, if we consider the “Normal” or “Standard” equipment.
on MMC 2190 with Grants-Lux. As was already written on the drive, the most difficult thing was to remove the climate panel... it didn’t want to come off the latches. But still, I managed to first snap it off with a plastic card from below, and then it all gave up)) The main thing here Don't rush, or you'll scratch the panel!
Well, then it’s a matter of technique. We unscrew a couple of screws on the air duct trim, carefully remove the panel itself, then the four screws of the radio and.
.Stop! I almost forgot about the antenna! We are looking for the antenna plug; I found it right under the glove compartment.
Then loosen the wire and carefully pull the radio towards you,
then we snap off a couple of connectors and voila!
Now we take our MMC from Granta, stretch the antenna to our plug under the glove compartment, immediately pull the USB connector into place, only in the reverse order. We insert it into its original place in the glove compartment
and pull to MMS. We snap the speaker and power connectors into place. We connect the MMC to the CAN bus. Since I’m going to install a rear view camera a little later, I immediately connected the adapter with a tulip to the rear view camera. It’s worth getting a little distracted here... Since I didn’t have connectors for connecting a camera and a CAN bus, and ordering it would take a long time, it’s expensive and I’m too lazy... I did it , as advised here on the drive, (many thanks to whoever came up with this!) took the connectors from the computer’s power supply, cut off the wires with the necessary contacts, after first removing the contacts themselves from the connectors.
I put heat shrink on the contacts for insulation and carefully inserted it into the MMC connector on the required contacts. I soldered a tulip for the video camera to the opposite end (I pulled it under the glove compartment so as not to remove the MMC again later). I did not connect the camera control, the Crosses already have a signal on the connector power supply when reverse gear is engaged. Next, we put our MMC in place.
New Lada: Installing speakers in Priora | PrioraPRO
As it was written, the Grantovka MMS does not have ears with fastenings for screws, like on the standard one, but to be honest, it holds well anyway. (Maybe later, I’ll figure out something on how to secure it correctly) We snap all the frames into place. That's it!)) I'm going to connect the CAN bus to the wires going to the diagnostic connector, stripping the insulation and soldering the wires from the MMC connector.
Result: now there will be a trip computer in MMS with all the parameters! (It’s especially nice that it will even show the climate temperature when adjusting the temperature!), a rear view camera (when I install it), a navigator (when I buy a GPS antenna). It sounds better than the standard one , (this is my feeling).
Later, maybe I’ll get around to changing the microcircuits of the MMS output amplifiers, they also write that it gives an improvement in sound quality, but that’s only after I install normal speakers... P/S: I took the MMS from my hands (the camera was given as a gift for the MMS), it was already installed Single Menu, I just replaced it with a different version, but that's another topic.
So, the other day I finally decided to pick apart the center console. I’ll tell you right away! The plastic, although it seems hard, is actually scratched very well by the tool, and with great effort it is dented! Fortunately, I have an insulated instrument, the insulation softened the load and made it more uniform!
So, look in general at what, how, and where it is disassembled)) in fact, almost everything is sitting there on clips, you only need to tighten the two lower bolts (located under the plastic casing of the heater controls). Then everything is intuitively simple, but the clips are very tough!
First, we remove the knobs of the stove and the regulator. I used two “minus” screwdrivers, there are no scratches on either side)
We begin to pull out the stove casing carefully from above, then just use our hands to slowly pull it out
Next, unscrew the two bolts and pull out the lower latches with your hands.
I pulled off the middle ones in this tricky way, I just pressed the screwdriver away from me. I didn’t really want to break the plastic along the floors, especially in such a tricky place to latch)
Honestly, I had to sweat with the top latches, where the air ducts are. They didn’t give in to me for a long time! As a result, with a little more effort they moved from the dead point, everything opened up)
And in the end, I came to a disappointing conclusion, without a collective farm, in LK2, no matter what configuration - you can’t get by. Almost in the middle, there is a protrusion, the back wall of the radio rests on it, and does not allow it to fully fall into place. It turns out that she pushes it back
There is only one way out, carefully cut the whole thing off (highlighted in red)
If I do this, then I have had a burner lying around since ancient times; by the way, it cuts plastic with a bang, only then everything will need to be ventilated. But with all these manipulations, a simple question arises: if you cut out all this nonsense, then what to do with the metal the pipe on which the whole tidy is held? (I'm not going to touch it)
Will she bend all the wiring for me? Of course, I’ll check this whole thing, but still, I didn’t buy the car for a year, two, but for at least three years, I wouldn’t want any further problems in this regard. In general, these are the things, in order to plug in a cool radio, you need to cut out the plastic, And it would be nice if this plastic was a separate part of some collapsible element... what a fig, it’s solid, that plastic on the back of the radio, and the one that’s facing on the dashboard is a monolith. So what do you think gentlemen, is it worth cutting, or maybe someone has others , maybe more “correct” proposals?
And another question for backfilling, I couldn’t find the wire from the antenna, but it is there, where to look for it, or can anyone tell me how to disassemble the ceiling or the left, front inner plastic trim of the windshield?
Let us note right away that it is easier to remove the panel through the passenger door. As for the method of draining the coolant and removing the stove, everything is done almost the same, except with some nuances.
After soundproofing has been completed, we install the panel in place. Don't forget to first pass the block with wires for the switch. We also insert the glove box light in advance using the appropriate holes.
Thus, the operation can be considered completed. Having learned how to remove a torpedo on Kalina, you can safely take on this work, even without the help of an assistant. On the other hand, an extra pair of hands certainly won't hurt.
Exterior
Initially, Lada Kalina was considered exclusively as a “workhorse”. Consequently, the attitude towards design was largely characterized by the residual principle. They say that this is not the main thing for such a machine. But after the restyling, the model began to look much more lively and aggressive.
Initially, the Lada Kalina was a simple car. Rather, even too simple.
The front bumper is decorated with a huge air intake supporting a small radiator grille. And under the spectacular headlights there are small foglights located in massive seats.
The new Kalina looks much more interesting from the front!
However, there are an order of magnitude fewer changes in the profile. The same modest and proportional doors, a round tank flap with a recess for opening, front fenders and so on. Perhaps the changes affected only the rims and rear fenders.
On the side, other than the different rear wings and rims, no changes are observed.
The situation is similar with regard to the stern. There are no fundamental changes observed, with the exception of the rear bumper, which has become more massive and powerful, and has also acquired new reflectors and a trim at the bottom.
At the rear, the changes are more noticeable, but they are not fundamental.
The image of Lada Vesta is fundamentally different. She was not a nondescript machine, to which they later tried to instill pseudo-aggressive features. Initially, Lada Vesta was created as a landmark and expressive car - the first representative of AvtoVAZ’s new corporate style. That’s why it looks more harmonious – the headlights, chrome, air intake, foglights, “X” lines and other elements of the front end combine perfectly.
Vesta's front end is much more harmonious.
From the side the impression is the same. A solid, complete product, with logical lines and transitions, stylish rims and considerable ground clearance.
The ground clearance of the Lada Vesta can be the envy of some crossovers.
And the food didn’t disappoint. The chopped lines of the stops are impressive, especially against the background of a modest bumper and a proportional trunk lid, decorated with large letters of the brand name.
Vesta looks great from behind!
Firmware MMC Grant 2190: instructions with step-by-step description
The MMS Grant firmware makes it possible not only to expand the functionality of the system itself, but also the ability to connect a rear view camera to the standard multimedia.
It is worth noting that the presence of a standard or normative standard multimedia system pre-installed by the manufacturer is not suitable for performing a number of actions that will be described below. The exclusively multimedia system in the luxury configuration is suitable for firmware.
The process of flashing the multimedia system requires the presence of a GPS receiver, namely the Globalsat BU-353S4 model, as well as a Huawei E1750 3G modem from Megafon. These devices, paired with new software, will allow you to use the navigation that VAZ engineers promised, and will also delight you with the presence of the Internet in the car. All these products can be bought on eBay, and cheaper than in other stores.
Navigation and the Internet are not yet compatible things for a domestic car, so for their full and simultaneous operation it is necessary to use a hub (USB splitter DNS ATH-08).
Benefits of new technologies
MMC Lada Kalina 2 is characterized by a simplified control system. Now all the necessary options can be obtained with 1-2 taps on the screen. The system is equipped with a more functional resistive screen. Unlike the standard Kalina radio with a capacitive version, the resistant screen has improved performance characteristics. The device is able to operate without failures in any temperature conditions.
Lada owners often complained that in sunny weather it became impossible to use the car radio. This is due to the numerous glares that make the characters on capacitive screens almost unreadable. The designers, when developing the second version of the radio, took this drawback into account.
If desired, the car owner can choose a model with a mini-visor that protects from glare.
The maximum display area of MMS Kalina 2 is 7 inches. Its operation is based on the Windows CE 6 operating system. The version developed specifically for radio tape recorders has characteristics close to optimal. It takes a few seconds to turn on the device. The amount of RAM ranges from 128 to 256 MB. Firmware for the Kalina 2 radio has significantly improved the technical capabilities of the equipment. Now they are as follows:
- support for wav, wma, mp3 formats;
- 6 programmed shades of music playback;
- the display of the Lada Kalina 2 radio shows information about the song and album during playback;
- there is the ability to play video in wmv format;
- the multimedia system supports maximum video resolution at 320*240 pixels;
- it is possible to play video files of other formats, but for this you will have to use a convector;
- availability of FM radio;
- micro SD card support;
- Lada radio firmware makes it possible to view images saved in bmp, gif, jpe, jpg, jpeg formats;
- The maximum photo size is not limited, but if it exceeds 2 MB, then the Kalina multimedia firmware will open it from 2 to 10 seconds.
Firmware for radio Kalina 2/Granta
You will need an SD card up to 4GB formatted in FAT. In the future, it will be possible to use a card in exFAT format.
Attention!
| The author is not responsible for all your actions. In addition, flashing the MMC leads to loss of warranty. |
Procedure: 1. Copy the firmware to an SD card (up to 4GB in FAT). 2. Copy files from the “FirmWare” folder to the root of the memory card. 3. Remove the flash drive from the USB port. 4. Insert the SD card into the radio. 5. Reboot the GU by long (about 15 seconds) pressing the power button (for Lada Kalina 2) or the volume button (for Lada Granta). 6. A flashing will occur (4 status bars will run through) and the radio will reboot itself into the desktop.
https://youtube.com/watch?v=gCFqgFoW4F4
7. Without rebooting the radio, press the “Recalibrate” button and calibrate the screen. At the end, during the countdown, click on the screen.8. Reboot the radio with the memory card inserted. The new menu will load.
If, after flashing the radio, the download freezes at the “Lada” logo, then most likely there is a problem with the SD card. Try formatting the memory card to other file systems (FAT32/exFAT/FAT) and flashing it again. You can also try using other SD cards, 4GB or 2GB in size.
How to return to the standard menu of the Kalina 2/Grant radio:
- Click on the “Media” icon in the alternative menu.
- Reboot the radio, first remove the SD card.
Nothing changes in the standard shell, everything remains the same.
Removing the center console (lining) – Lada Kalina blog
In order to remove the center console (the black trim on the instrument panel) of the Lada Kalina, we will need a Phillips screwdriver and a lot of patience, especially when installing it later, so we will have to be patient.
- The first step is to remove the cassette player, if you have one installed, and disconnect the wires connected to it.
- It is also better to remove the metal insert in which the radio is mounted to make removal easier. After it has been removed, we press on the back side of the plugs, which are located on both sides of the “Hazard Alarm” button.
- And unscrew the two bolts securing the lower part of this lining, which are located under these plugs with a Phillips screwdriver:
- Then you need to remove the three heater adjustment levers, which are marked below in the photo with numbers 1, 2,3. They are easy to remove; just pull them with a little effort.
- Now, disconnect the plug from the hazard warning button:
- After this, you need to slightly pull the lining towards you, starting from the very bottom, overcoming the obstacle of the metal clamps, and pull the lining out of its seat.
- To remove it completely, you need to disconnect all the wires that lead to the lighting bulbs and fan speed control:
After this, it can be easily removed without any problems. But you will have to tinker with the installation of this overlay, well, at least I tinkered for probably 20 minutes until I got everything in place.
Theory
Like its predecessor roadster, Crimea-2 is built on VAZ units. The engine is a 1.6-liter VAZ-21127, the gearbox is mechanical, five-speed (“cable” VAZ-2181). Some of the suspension elements were also borrowed from Kalina. The rest was developed from scratch by students and graduates of the Baumanka formula team. The layout is mid-engine, rear-wheel drive. Crimea is based on a spatial frame on which plastic panels are hung; almost all of them remained unchanged, with the exception of bumpers, optics and, of course, the roof.
Vesta’s behavior on the track quickly makes it clear where the young, albeit untalented, developers are inferior to the experienced engineers of the automobile plant.
Vesta’s behavior on the track quickly makes it clear where the young, albeit untalented, developers are inferior to the experienced engineers of the automobile plant.
The interior of Vesta Sport is easy to distinguish by its original carbon fiber inserts and a steering wheel upholstered in pleasant leather.
The interior of Vesta Sport is easy to distinguish by its original carbon fiber inserts and a steering wheel upholstered in pleasant leather.
The front seats with developed lateral support and a different cushion are better than the standard West seats. But they are still inferior to the heavy-duty seats of Crimea.
The front seats with developed lateral support and a different cushion are better than the standard West seats. But they are still inferior to the heavy-duty seats of Crimea.
The architecture of the dashboard is the same as that of a regular Vesta, only the scales are painted scarlet.
The architecture of the dashboard is the same as that of a regular Vesta, only the scales are painted scarlet.
We struggled with the headlights - the seals and housing of the LED optics could not be done accurately. We found an elegant and effective solution - we tinted the headlights to hide the nuances of custom manufacturing. They look interesting: the high and low beam lenses are shrouded in LED strips, the turn signals are in the creeping line style in the manner of current Audi and Lexus models. Like the first car, the hood (remember, it is at the back) opens against movement along a complex trajectory so as not to touch the bumper. They struggled with the implementation of the sophisticated mechanism for several weeks. But most of the time was spent on setting up the suspension. After all, the kinematics were calculated from scratch (although Kalinov elements were used - steering knuckles and levers). Shock absorber calibrations and spring stiffness were also calculated taking into account mass. Everything is like adults!
A nice bonus of Vesta is that you can enjoy driving with a large group - it is still a family sedan.
A nice bonus of Vesta is that you can enjoy driving with a large group - it is still a family sedan.
Against the backdrop of the Crimea trunk, the cargo compartment of the Lada seems bottomless.
Against the backdrop of the Crimea trunk, the cargo compartment of the Lada seems bottomless.
Vesta Sport is also far from just a body kit and beautiful wheels. The main differences from the standard sedan are in technology. Reworked suspension, original brakes, increased track, which is why the front fenders had to be widened. Well, boosted to 145 hp. engine. In theory, a larger, heavier front-engined sedan doesn't stand a chance on a track against a lightweight mid-engined coupe. But in practice?
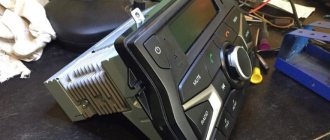
A brand new AvtoVAZ radio, which does not have a “detector”
Having mastered the production of the Lada Granta in the liftback body, VAZ began supplying a standard radio (not touchscreen) in the Norma+ car configurations. Let us immediately note that the radio tape recorders created for Kalina-2 and Granta look identical, but their mounting is different, so these devices are not interchangeable. Looking ahead, let's say that a review made by the owner of a car with a similar radio is presented on video. For now, let’s talk about what exactly VAZ is now giving to owners of Kalin and Grant in the Norma+ configuration.
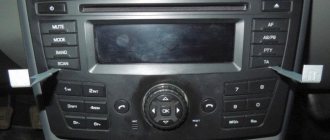
Removing the standard radio in Grant Lux
The difference between grants of the luxury configuration: the MMS (multimedia system) installed from the factory. This is a 2 din device.
To remove standard acoustic grants:
- take a knife or plastic spatula to dismantle the acoustics and disconnect the decorative trims to the right and left of the radio. It is not necessary to take pictures;
- in the gap between the cover and the panel we find the head unit lock. There are two of them on both sides. Press it out with a screwdriver;
- we take out the GU on ourselves.
Everything is described in detail in the video:
What kinds of mounts are there for radio tape recorders?
Different manufacturers use different types of fasteners:
- Using fixing elements on the side of the device;
- Using elastic latches;
- Using bolts or screws.
https://www.youtube.com/watch?v=vXrEHmrelsE
With clamps, a frame is used that is inserted into the “shaft”. The side walls of the car radio have special recesses, and there are tongues on the frame.
To dismantle the head unit you need keys. With them you can easily straighten the tabs or bend them. But this type of fastening has a drawback - the frame can become deformed.
The second type of fastening is more reliable - it involves the use of elastic latches. They can be seen on the side and top walls. These latches fit into special seats in the frame, the simplest and most reliable way to mount the radio.
In some car models, in order to ensure reliable fastening of the multimedia system and to eliminate the risk of failure due to vibrations, installation is carried out to the dashboard, or rather to the power elements. The dashboard is held on the pipe using metal corners. Such fasteners are used in premium cars Mazda and Toyota.
The option of installing a radio in this way is considered additional, but car audio installers often remove the corners, and installation is carried out without fixing elements. This option is not reliable.
Single- or double-din radios are mounted in the dashboard tunnel without any additional fixation. It is customary to mount the device on the center console.
The media system is latched with ordinary plastic latches. This is a screwless fitting - you can see this even on the Lacetti.
With this installation, the radio simply hangs and is not able to withstand even minor shock loads. There are holes on the sides of the device, but most motorists do not know what they are for.
It turns out that these holes are made for reliable installation of the device to the dashboard using corners.
This is a factory fastener that complements the standard fastener.