VAZ-2101 » Engine systems » Crankcase ventilation system
When the engine is running, fuel vapors and combustion products enter the crankcase through leaks in the piston group and valve mechanism.
Interacting with atomized heated oil, these substances contribute to the formation of foam, various deposits, and volatile substances, which, together with combustion products, are combined under the general name “crankcase gases.”
In addition, exhaust gases entering the crankcase can create excess pressure in it, causing oil to leak out of the engine through the seals.
To remove crankcase gases and reduce pressure in the internal cavity of the crankcase, the car uses a closed-type forced crankcase ventilation system (Fig. 1, a. b). Oma ensures the flow of purified air into the crankcase and the suction of crankcase gases into the engine intake system for their afterburning.
The ventilation system includes: breather oil separator 5 with cover 4, gasket and pipe, supply 3 and exhaust 2 and 8 hoses with clamps, flame arrester 9, suction ventilation manifold 10 (made integral with the air filter housing), crankcase ventilation filter element I (installed in air filter housing), fastening and auxiliary parts.
When the engine is running, a vacuum is formed in the suction ventilation manifold 10. In this case, blow-by gases are sucked off through the oil separator 5. Under the influence of centrifugal force, oil particles settle on the walls of the oil separator housing and flow into the oil sump through tube 6.
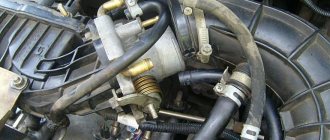
The suction ventilation manifold 10 has three pipes. Connection II with an internal diameter of 18 mm is connected via a hose to the breather body. Pipe I with an internal diameter of 10 mm protrudes into the air filter and is placed in the stream of purified air flowing into the carburetor neck. Finally, pipe III, having an internal diameter of 4 mm, is connected by hose 8 to the carburetor mixing chamber through a special spool (cut-off valve), which is placed on the axis of the carburetor throttle valves.
The crankcase suction ventilation device, which at first glance seems unnecessarily complex, allows you to regulate the amount of gases sucked from the crankcase depending on the operating mode of the engine.
When the engine is idling, as well as operating at low loads, the spool in the carburetor only partially opens the bypass holes, transmitting a slight vacuum to the crankcase and allowing a small volume of crankcase gases to be sucked out from there.
When the throttle valve opens, the spool valve opens the hole completely, increasing the flow of crankcase gases into the engine through pipe III. Full opening of the holes corresponds to engine operation at 3000-3500 rpm.
And finally, with a further increase in engine speed, a vacuum is created in the area of pipe II, and the vacuum in pipe III gradually decreases.
When the engine is running, the system sucks the maximum amount of gases from the crankcase.
The vacuum created is compensated by the entry of fresh, purified air into the crankcase. It is sucked through a special filter element 1 through pipeline 3 into the camshaft drive cavity. Due to the pressure difference between the manifold of the suction ventilation system and the air supply filter to the crankcase, purified air circulates in the internal cavities of the engine during operation.
To prevent the ignition of flammable gases in the internal cavities of the engine during possible outbreaks in the carburetor, a flame arrester 9 is used, placed at the upper end of the hose that connects the engine oil separator to the suction manifold.
Maintenance of the ventilation system involves periodically cleaning the exhaust and supply pipes of its parts from deposits. Cleaning should be done after 20,000 km of vehicle mileage.
In this case, the flame arrester, pipelines and spool should be removed and washed in a mixture consisting of 30% monobutylglycol-ethylene ether and 70% gasoline.
The filter element of the ventilation system, located in the carburetor air filter housing, is replaced after 10,000 km of the vehicle, i.e., together with the air filter filter element.
You should periodically check the flow capacity and tightness of the connections at the places where the clamps are tightened, remembering that crankcase gases should not enter the engine compartment.
Source
Crazy monuments
Over time, tarry deposits from crankcase gases accumulate in the crankcase ventilation system, making it difficult to remove these gases into the engine cylinders for combustion.
Pressure increases inside the engine and oil leaks appear through the seals. The air filter and carburetor are also contaminated, and on the injector - the throttle assembly and the supply pipe with the sensors located in them.
All this can affect the stability of the engine, especially with high mileage. Also, you should pay attention to the integrity of the rubber hoses.
If this is not so critical on a carburetor, then on an injector, unaccounted air leaks can affect mixture formation and, accordingly, engine operation. It is recommended to clean the crankcase system periodically before changing the oil. Let's look at the example of an injection engine, combining it with replacing cracked hoses.
For this we will need: - keys for 7, 8, 10 and 13 - flat and shaped - kerosene or other flushing liquid - rags - container for flushing - new breather cover gasket - temperature silicone sealant - new hoses (different for carburetor and injector )
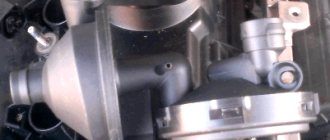
To begin, loosen the hose clamps on the breather cover and throttle assembly and remove them.
We clean the engine breather with our own hands on cars of the classic VAZ 2107 2105 2106 2104 family. This part serves as protection against oil leaks, since the oil always increases in volume when the engine is running, its pressure increases accordingly, it begins to look for a way out through various seals, gaskets, oil seals. The breather is installed to prevent this leak. Over time, it will certainly become dirty from incoming dirt. Periodically you need to check it and clean it for prevention; if the case is advanced, then it is better to buy a new part.
For cleaning, we use improvised materials that can be found in the garage, for example, the breather hose is wiped with ordinary wire, with a rag wrapped around it, as we see from the video, a lot of all sorts of nasty things have accumulated in it. We remove the device itself and thoroughly clean all cavities.
Video of cleaning the breather on a classic VAZ 2105 2107 2106:
This car also has a gearbox breather; it is intended for oil, which is located in the rear axle and gearbox.
#1 kostyan777
Good day! Today I washed the throttle valve and noticed that at the junction of the air supply pipe and the pipe of the large branch of the crankcase ventilation system, a sticky black tar deposit had formed. The photo shows the place where the resin formed. I understand that this “resin” is thickened oil. This means that the crankcase ventilation system is working poorly or something has worn out and the oil splashes out along with the crankcase gases. Confirm or refute my guesses. Is anything worth repairing? Otherwise, I don’t want to buy a new engine in the near future!
#2 Practitioner
Good day! Today I washed the throttle valve and noticed that at the junction of the air supply pipe and the pipe of the large branch of the crankcase ventilation system, a sticky black tar deposit had formed. The photo shows the place where the resin formed. I understand that this “resin” is thickened oil. This means that the crankcase ventilation system is working poorly or something has worn out and the oil splashes out along with the crankcase gases. Confirm or refute my guesses. Is anything worth repairing? Otherwise, I don’t want to buy a new engine in the near future!
It’s okay, but it’s necessary to clean the crankcase ventilation system as soon as possible; it’s probably never been cleaned. It’s all simple, you need to clean the so-called breather, you need a socket wrench set to “13”, a little kerosene, a new gasket under the breather cover (costs a penny). Remove two hoses (thick and thin), wash them with kerosene, and dry them. Take out the oil dipstick, remove the breather cap, the gasket, then the breather itself, having first unscrewed the nut to “13” (before removing the breather separator, use a felt-tip pen to mark together the breather separator body (black funnel inside with a tube) and the engine tide body, so that in the future the dipstick did not warp). Remove the breather cap, the gasket and the breather itself, carefully so that nothing gets inside and wash the removed parts in either kerosene or gasoline. Put everything back together with a new gasket, and you will be happy.
The crankcase ventilation must be flushed every 20,000 km, but I do it at 30,000 km.
- kostyan777 likes this
#3 VMSP
Tar deposits are caused by untimely oil changes or low-quality oil. I have people with a mileage of more than 150,000 km on our oil, they have never cleaned the ventilation, as it was not necessary. There are no deposits in the engine, system, or valve cover. In the photo: view under the valve cover of 2115, 2006, mileage 150,000 km, never washed.
Attached images
Post edited by VMSP: 05 May 2014 - 07:08
How to clean the crankcase ventilation system on a VAZ 2110-VAZ 2112?
Note! Before you start work, remove the air filter housing, as it will interfere greatly; if you do not know how to do this, then read the article entitled: “Replacing the air filter housing on dozens”!
Removal: 1) The hardest thing is to remove the cylinder head cover, but the remaining parts that relate to the ventilation system (And these are mainly hoses), removing is as easy as shelling pears, in general, let's start, first you will need to disconnect the wires from each other, namely the upper connectors (see photo 1 ) and lower connectors (Indicated by a red arrow), once this is done, remove the connectors, to do this, squeeze the two latches on one connector with your fingers and remove it (see photo 2) and do the same with the other connector, just without removing it, they will interfere, and in general you won’t be able to remove the cylinder head cover without removing these connectors, because the wires simply won’t allow you to do this, both connectors were sitting on brackets, so unscrew the bolts securing them and remove both brackets from the cylinder head cover, in more detail how to do this , look at photos 3 and 4 below.
cylinder head cover
2) Now remove the exhaust manifold from the cylinder head cover, it is bolted on and by the way, when you remove it, replace all the O-rings, firstly they are not expensive and secondly, after replacement, you will be 100% sure that the collector will not let air through anywhere, since the rings will be new; you can read in more detail how to do this in the article entitled: “Replacing the receiver on a 16-valve car.”
3) Then start removing the hoses, they are held in place by clamps, the clamps are loosened using a screwdriver or wrenches, if it is not convenient to work with a screwdriver, all the clamps that you will need to loosen and all the hoses that you will need to remove, you can see in the photographs a little below:
Note! Rinse the removed hoses with gasoline or kerosene, then dry them in the sun and, if possible, also blow them with compressed air (for example, a compressor), before installation, make sure that the hoses are dry, if necessary, wipe them dry with a rag and By the way, carefully clean all those places where the hoses are connected with a cloth and remove all dirt from them!
4) When everything is finished, remove the cover from the Cylinder Head, it is secured with fifteen bolts, these bolts are unscrewed with a socket wrench or a socket head and an “8” wrench, then the cover is separated from the cylinder head with a screwdriver and removed from the car, it is most convenient to separate it from the cylinder head in those places where there are special protrusions for this, one of such protrusions is indicated by a blue arrow.
5) After you have the cylinder head cover in your hands, using a wrench or a socket wrench, unscrew the six bolts that secure the separator to it (Several bolts are indicated in the large photo) and disconnect it from the cover (see small photo).
Note! This separator is an integral part of the crankcase ventilation system, it has such a part as an oil deflector, to pull it out, you will need to compress the side clamps using pliers (see photos 1,2), a rubber o-ring will be installed on the oil deflectors, it having picked it up with a screwdriver, you also need to remove it (see photo 3,4) and replace it with a new one, if such a ring is difficult to find in car shops, then you are allowed not to change it if it is in good condition, namely: It should not be too compressed, the rubber should not become rough and lose its elasticity, and there should be no cracks or other types of damage on the ring!
Installation: Installation of all parts is carried out in the reverse order of removal, but before installation, rinse everything thoroughly with gasoline or kerosene, this also applies to the cylinder head cover itself, there should be no dirt on it, and also remove old sealant (with a screwdriver or fine-grained sandpaper) the surface where the cylinder head cover is installed, after cleaning, degrease it and apply a new sealant, as it is shown in the small photo below:
Additional video: An interesting video that will give you a little additional information on the crankcase ventilation system is located just below:
Diagnostics
Since there are many reasons why oil flows through the breather, a comprehensive engine check will be required. To carry out such a check, you don’t even need to disassemble the power plant. It will only be necessary to measure a number of parameters and assess the state of the ventilation system.
For consideration, you can take a VAZ-2110 car. Let's say a lubricant deposit has formed in his engine. This indicates that oil is being driven through the breather. To find out the cause of this problem you will need a compression gauge, a screwdriver and several wrenches.
Diagnosis begins with assessing the gases escaping through the exhaust pipe. First, the engine is started and the color of the exhaust is assessed. If they are very dark in color, this indicates that oil is entering the cylinders as a result of damage to the CPG rings.
But whether this problem arises from the valves or from the rings can only be determined by the spark plug that is installed on a given cylinder. If there is heavy carbon deposits on it, this will indicate certain problems with the CPG.
If the compression is small, and the spark plug has a normal appearance without plaque, then it is worth inspecting the valves. In a situation where compression is normal in all cylinders, it is necessary to check the ventilation system.
Engine knock
If at one point you begin to hear extraneous knocks and noise when the engine is running, you need to pay serious attention to this. It is best to stop right away and try to find out the reasons. Indeed, in some cases, continuing to operate the engine can be very dangerous.
Let's look at the most common problems associated with knocking
Indeed, in some cases, continuing to operate the engine can be very dangerous. Let's look at the most common problems associated with knocking.
The main bearings are knocking. This is very dangerous, so you need to turn off the engine immediately. You will have to tow the car to the repair site. The problem can be easily recognized: the sound has a low pitch. It comes from the bottom of the crankcase and increases when you press the gas pedal. The oil pressure sensor turns on.
The connecting rod bearings are knocking. You need to turn off the engine immediately. His further work is very dangerous. You will have to go to the repair site in tow. The sound is resonant, has a metallic tint, a medium tone and a certain rhythm. Intensifies with increasing load.
Piston pins are knocking
You must continue to operate the engine very carefully. It is better to go slowly and immediately to the place of repair. The sound has a high metallic tone with sharp shades, rhythmic
If you disconnect the spark plug, it disappears immediately
The sound has a high metallic tone with sharp tones and is rhythmic. If you disconnect the spark plug, it goes away immediately.
Cylinders or pistons are knocking due to wear. You can continue driving, but without putting too much load on the engine. It is better to immediately go to the repair site. The sound is very similar to the knocking of clay dishes. It sounds more clearly until the engine has warmed up to operating temperature. As the engine warms up, it gradually quiets down.
Valves knocking
You can continue to move carefully, but it is better to head straight to the repair site. There is a dull noise with metallic knocks
Knocks are especially audible at low and medium speeds. It comes from the side where the valves are located.
Engine knock
You should immediately go carefully to the repair site. Sounds occur during acceleration
The problem is resolved by installing a later ignition. The problem may arise due to poor ignition control, due to the use of low octane fuel, or due to engine overload as a result of early engagement of a high gear. You also need to check if there is carbon deposits in the combustion chambers.
Relevance
Why do you need to install such a clever device? Due to high crankshaft speeds, oil flies through the crankcase ventilation breather and can end up on the carburetor assembly, and in the case of injection engines, on the throttle unit. And to prevent this from happening, just such a device is installed. Moreover, it is advisable to install it not only for those drivers who do not mind pressing the accelerator pedal to the floor. Those owners who have been using their car for quite a long time should also think about it. After all, during this period, the rings have most likely already worn out and do not provide proper sealing of the combustion chamber.
Lada 2106 Akkerman71 › Logbook › Crankcase gas filter.
Hi all. Another meeting of the “crazy hands” club.)) I have long been planning to make an oil dump for crankcase ventilation. I’ll write right away - the engine is in perfect order, the oil is not leaking, the pan is clean, and I recently washed the sump and replaced the flame arresters with new ones. But as the nun said, “God protects the most careful by putting a condom on a candle”)) I decided to make an additional filter. If it starts to smell bad, it’s easier to wash the filter than to tinker with the carburetor, looking for where it’s clogged. There are ready-made solutions, but paying for an aluminum can (even if it is very beautiful) 500-750 grams is an incomprehensible price for me, for what?) Moreover, having read that it is empty inside and cannot work correctly, it was decided to make it from improvised means . The main thing is that it filters possible oil ingress and is convenient to use. As a container I chose a mini flask from Atlas filters for water purification with 1/2″ inlets.
The choice was made on this option for several reasons: small size, transparent walls (convenient to observe the internal contents), and ease of disassembly (for washing or replacing the filter element). We also purchased the necessary fittings to connect the hose and stainless steel kitchen sinks for the filter itself. I chose a flask with an angular connection for the outputs, so that there were fewer bends. 1/2″ inch pipes with a Christmas tree for an 18mm hose. I sealed the connections with my favorite Uni Look; connections with it are much more convenient and of better quality than with tow or fum tape.
The top lid of the flask has space for a tube,
for which a 3/4 plastic pipe is ideally suited, heating the joint with a hairdryer produces a very strong connection. I cut the tube so that a couple of centimeters did not reach the bottom of the flask.
I put stainless steel washers on the tube itself, spreading them in the middle.
You put on 4 pieces, you get an excellent filter element, the outer side fits tightly into the flask, everything matches perfectly in size, it seems like everything was specially designed.) The flask comes without fastenings, so I had to make it myself.
The fastenings were made from stainless steel clamps mounted on rivets to a metal strip 4mm thick.
To prevent the flask from sliding on the metal clamps, I put the rubber tube scraps on the clamps, from old droppers.
I chose a place in the engine compartment for the flask so that it was not far from the air filter and would not interfere with my hands.
I attached a strip of metal to the already secured corner for the EBN.
Source
How to make an oil trap yourself
I decided to post my oil catcher, otherwise there is a lot of incomprehensible information on the internet
They show the finished version, but the most important thing is that it doesn’t show how it works inside. A more correct option is this
The exhaust gases must rise from below and pass completely through the scrapers. You can buy ready-made branded ones, but the cost is surprising.
They also put the tube outside, but you don’t want to breathe gases when the car is warming up, stuck in a traffic jam, or when you turn on the heater in winter.
I put it in my VAZ 2105, drove it 100 km and put it in for repairs, I need to do the engine. It is clear that oil was thrown into the carburetor before the oil sump was installed, now it will be interesting with the new engine how the oil catcher will work.
I created the diagram myself.
mesh so that the scrapers do not fall down into the emulsion
ordinary stainless steel scrapers
At the outlet of the oil catcher, I put a brush in the tube to make sure nothing gets into the carburetor.
Necessary tool
To clean the breather on a VAZ engine, check and replace the hoses, you don’t need any special skills or specialized equipment; a standard kit is enough. To complete the work you will need:
- set of keys No. 7-13;
- flat and Phillips screwdrivers;
- washing liquid, kerosene will do;
- container where washing will take place;
- rags;
- breather gasket;
- heat-resistant silicone-based sealant;
- if necessary, a set of new hoses will be required - separately for the carburetor and injector.
This tool can be found in any garage, so there are no problems with its selection. It is better to take rags that do not separate into individual elements, since during washing they can get into the engine.
When and how often do you need to repair the gearbox on a VAZ 2107?
(“Volzhsky Automobile Plant”) provides comprehensive information on when and how often the gearbox needs to be repaired. It turns out that this mechanism does not have a service life as such. The only thing AvtoVAZ engineers insist on is the timely replacement of transmission oil:
- After the first 2 thousand kilometers on a new car.
- After 60 thousand kilometers.
- Further, as necessary, depending on the care of the owner and the frequency of use of the car.
Accordingly, the plant does not have any specific wishes or requirements for preventive or repair work. However, in any case, regardless of the mileage, it is necessary to carefully monitor all the nuances in the “behavior” of the box, since repairs will be necessary if the slightest malfunction occurs.
In winter, due to temperature changes, the box experiences additional load
Source
Product delivery options
Note! Below are the shipping methods available specifically for this product. Payment options may vary depending on the shipping method. Detailed information can be found on the “Delivery and Payment” page.
Parcel by Russian Post
Available payment methods:
- Cash on delivery (payment upon receipt)
- Using cards Sberbank, VTB, Post Bank, Tinkoff
- Yandex money
- QIWI
- ROBOKASSA
Shipping throughout Russia. Delivery time is from 5 to 12 days.
Parcel by Russian Post 1st class
Available payment methods:
- Cash on delivery (payment upon receipt)
- Using cards Sberbank, VTB, Post Bank, Tinkoff
- Yandex money
- QIWI
- ROBOKASSA
Shipping throughout Russia. Delivery time is from 2 to 5 days. More expensive than regular delivery by Russian Post, approximately 50%. Parcel weight up to 2.5 kg
Express Parcel EMS
Available payment methods:
- Cash on delivery (payment upon receipt)
- Using cards Sberbank, VTB, Post Bank, Tinkoff
- Yandex money
- QIWI
- ROBOKASSA
Shipping throughout Russia. Delivery time is from 3 to 7 days. More expensive than regular delivery by Russian Post, approximately 100%.
Transport companies
Available payment methods:
- Using cards Sberbank, VTB, Post Bank, Tinkoff
- Yandex money
- QIWI
- ROBOKASSA
Delivery is possible to any locality where there is a representative office of the transport company. Delivery time is from 2 to 10 days. Sending large parcels is approximately 50% more profitable than by Russian Post.
Pickup from our warehouse
Available payment methods:
- Cash upon receipt
- Credit, installments
- Using cards Sberbank, VTB, Post Bank, Tinkoff
- Yandex money
- QIWI
- ROBOKASSA
Pickup times must coincide with store opening hours.
Why is cleaning necessary and its frequency?
When the ventilation system is clogged, an emulsion containing soot and oil residues settles inside the engine, resulting in the creation of excess pressure, leading to damage to the seals. This leads to loss of sealing and oil leaks, which can be seen during an external inspection of the engine block. Crankcase gases are gases from engine cylinders that are not discharged through the exhaust valve, but are squeezed out into the crankcase through the gaps of the pistons and piston rings when the engine is running. This process occurs especially intensively in worn-out engines with high mileage. For VAZ 2101-2107, these are mileages of 80-100 thousand km.
If the crankcase ventilation is not cleaned in a timely manner, the operation of the fuel supply system will be affected. In carburetor engines, the air filter and the carburetor itself become dirty; in injection engines, the throttle assembly, inlet pipe and sensors become dirty. All this leads to a decrease in power, problems with operation, and in some cases a complete stop of the engine. To avoid this, additional elements are introduced into the ventilation system to clean crankcase gases from emulsions containing oil.
If the crankcase ventilation system is not cleaned in a timely manner, the hoses crack due to excess pressure. This causes excess air to be sucked into the engine. Carburetor engines are not so sensitive to this problem, but in injection systems the quality of the mixture sharply deteriorates, the stability of the engine is disrupted and its power is reduced.
The best option is to clean the crankcase ventilation on a VAZ classic immediately before changing the oil. This frequency allows you to keep the system in order, change cracked hoses on time, extend the life of the engine, and reduce fuel consumption without loss of power.
Completing of the work
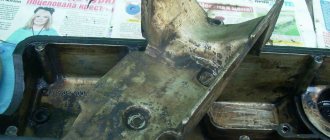
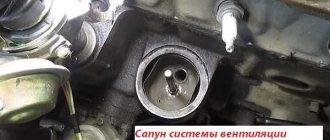
Cleaning the breather on the VAZ 2101-VAZ 2107 is carried out during a scheduled engine oil change. Unscheduled cleaning should be done if oil begins to leak through the gaskets or the outlet hoses are cracked, which indicates an increase in gas pressure in the crankcase. The crankcase exhaust hoses are disconnected, one of which goes to the carburetor, and the second to the air filter. Next, the nut holding the breather is unscrewed, for which the dipstick for checking the oil level in the engine is first removed. After removing the cover, sediment formed as a result of engine operation can be seen in the opened space. It can almost completely block the lumen, significantly complicating the movement of crankcase gases, which leads to an increase in pressure in the system.
After removing the lid, the opened glass must be thoroughly washed; at its bottom, a 13 nut holding the pin will appear, which can be carefully unscrewed with an open-end wrench. If problems arise with this, you can screw two 13mm nuts onto the top of the stud, which need to be counterlocked. Then, using these nuts, carefully, so as not to break them, the pin is unscrewed.
The glass, as a rule, sticks to the place of attachment, so it is better to tear it off with two small pliers, grabbing it by the edges. The removed parts of the breather must be placed in a container of sufficient volume filled with kerosene, gasoline or other washing liquid. A trimmed plastic bottle with a volume of 5-6 liters is perfect.
While the glass is being washed, the place where the breather is attached is thoroughly cleaned with a rag containing cleaning liquid. When working, you need to be very careful so that dirt and rag particles do not get inside the engine. The hole where the pin is screwed in should not be cleaned too thoroughly so that dirt does not get into the engine from it. After cleaning, there should be no soot or other deposits left on the surface of the breather.
Occurrence of rings
A common cause of this phenomenon is a problem with the piston rings. In this case, part of the exhaust gases enters the engine crankcase. Gases at increased pressure begin to look for a way out. As a result, you can see the exhaust flying out of all the cracks. At the same time, an increase in oil consumption is observed. Part of it squeezes out through the dipstick
, the other part, entering the combustion chamber, burns out along with the fuel. In fact, this reason is a consequence of a malfunction.
Often such a problem can be indicated by a lit “check” on the dashboard. It's all about changing the composition of the exhaust gases. Therefore, if such readings on the dashboard coincide with the engine breath, you should immediately check the condition of the engine. To do this, check the compression. If in at least one “boiler” the indicator is less than 11 points, then you will have to disassemble the motor and fix the problem.
Instructions for creating an oil trap for the Tavria ZAZ 1102 car
First of all, you should prepare the jar. We cut two holes in the lid with a diameter for threaded corner adapters. Then we screw them into the lid so that they stick out outside the jar. Apply sealant or silicone around the adapters to prevent gases from escaping.
We cut off the bottom of the bottle, according to the picture below, and cut off a part on each cone.
After this, we place the cut bottom upside down in the jar, insert the crusher with the hose inside, but at the same time push the metal jaws into it. We are closing this whole thing hermetically. Next, connect the hoses and clamp them with clamps.
In order to prevent your can from rattling under the hood on bumps, I recommend putting a cut-off inner tube on it and wrapping it with tape or something for better fixation (if the inner tube does not fit tightly).
This is probably all that needs to be done to create an oil sump. For convenience, you can turn the nipple of the engine head cover with a knob in any direction. You can see the results of the oil sump by going HERE. The oil washer worked for 4 months, and see the results of its work there.
The features of a piston internal combustion engine require the removal of crankcase gases, due to the fact that the internal volume of the engine changes... The change in volume occurs due to the movement of the pistons, albeit to an insignificant extent, but still this phenomenon is observed. This effect is especially noticeable on “non-symmetrical” engines, that is, with an odd number of cylinders. As a result, the volume either increases, creating a vacuum inside itself, or decreases, increasing pressure. This effect can be easily corrected by simply communicating the crankcase with the external environment. But usually, manufacturers do not simply throw the hose with crankcase gases outside, but connect it to the engine power system, to the hose in front of the throttle assembly (throttle valve). Everything would be fine, but crankcase gases, as they should be, contain oil vapor. This means that when they get into the throttle assembly, and then into the combustion chamber, they clog the surfaces of the damper, pistons, cylinders, and spark plugs. All this is for nothing, to say the least. We need to get rid of this.
Troubleshooting
The first thing you need to pay attention to is the color of the exhaust, blue or black smoke, a sign of burnt valves or problems with rings. Next, you should check the compression in all cylinders. The value on gasoline internal combustion engines should be within 11-13 MPa. Disconnect the pipes from the valve covers, air intake and breather
Assess the degree of contamination. If the pipes are very dirty or clogged with oil deposits, use gasoline to clean them or a special carburetor cleaner. Check the condition of the oil separator. Unscrew the required bolts to get to this unit. Remove the oil separator and assess its condition. If necessary, clean or rinse followed by drying. Inspect and, if necessary, flush the breather valve. There are situations when the valve gets stuck, resulting in exhaust gases entering the crankcase and creating excess pressure. Remove the part and wash it; in most cases, this will resolve the issue of squeezing oil out of the breather.
Read more: How to test the starter solenoid relay with a multimeter
Helpful advice! To distinguish stuck rings from a burnt-out valve, it is enough to perform several manipulations. After checking the compression in the cylinders, determine the cylinder with the lowest value. Then inspect the spark plug of this cylinder; if the rings are lodged in this cylinder, the spark plug will be covered with a thick oil layer. If the valve is burnt out, the spark plug will appear normal without any major abnormalities.
Finally…
The problem of oil escaping through the breather worries many motorists and causes a lot of trouble, but with timely detection of the problem and the right approach, serious consequences can be avoided
It is important to ensure that the oil level is normal, as soon as you find that the engine is taking oil, monitor its level and constantly monitor that it does not fall below the permissible level
Also pay attention to the breather and filter; oil on the air filter in large quantities also does not bode well. Regularly monitor the condition of the engine and all systems, and also promptly correct any malfunction
This will save you from engine overhauls and unnecessary waste.
Any type of car engine has a complex structure. It includes various systems and mechanisms that interact with each other. To ensure the removal of gases formed in the internal cavities of the power unit, the diesel engine is equipped with an effective ventilation system.
avtoexperts.ru
Among various auto systems, the crankcase ventilation system plays a significant role in the formation of the air-fuel mixture, stable and economical operation, full power delivery, protection of engine oil and extension of the life of the cylinder-piston group.
In the design of a car, the crankcase ventilation system is the “lungs” of the engine, necessary for its normal functioning. The system is called PCV (Positive Crankcase Ventilation). However, it is the one that is undeservedly given a minimum of attention and maintenance, and many car owners do not even know about its existence. In this article we will try to understand why this system is needed, how it works, its inherent faults and methods for checking its performance.
What are “crankcase gases”?
During combustion, the fuel-air mixture sharply increases in volume, creating enormous pressure inside the combustion chamber. The expanding gases from combustion force the piston to bottom dead center, causing the engine crankshaft to rotate. Some of the gases penetrate through the leaks between the rings and the cylinder mirror into the oil pan, where, mixing with oil vapor, they create pressure that aggressively affects the crankshaft seals and the pan gasket, and the oil dipstick channel.
The expansion stroke is repeated in each cylinder, constantly pumping the next portion of gases into the sump, and if the crankcase ventilation does not work, the gases will either squeeze out the crankshaft oil seals, or “knock out” the oil dipstick and expel the oil from the crankcase, with all that follows.
In addition, particles of unburned fuel, small fragments of soot, and moisture vapor are transferred to the sump along with the gas, which are mixed with the engine oil located in the engine sump. This, in turn, leads to oxidation of the oil, clogging it with wear products, reducing its performance properties and reducing its service life.
How to clean the crankcase ventilation on a VAZ 2101-VAZ 2107?
Removal:
First, remove the air filter housing from the car engine. (For information on how to remove the housing from a car engine, see the article “Replacing the Air Filter Housing”)
Note!
When removing the housing, be sure to remove the flame arrester from the crankcase ventilation hose, and then rinse it with kerosene if it is very dirty!
Then loosen the clamp that secures the additional hose to the breather cover (Indicated by the red arrow), and then disconnect the additional hose from the cover. After disconnecting the additional hose, proceed to loosening the clamp of the main hose (Indicated by the blue arrow), and after loosening, also disconnect the hose from the cover.
Next, remove the engine oil level dipstick.
Then unscrew the bolt that secures the breather cover and then remove the cover from the car engine.
Next, soak a rag in kerosene and wipe the entire internal cavity of the oil separator with it.
Note!
When you wipe the cavity, be careful not to get any dirt particles inside the engine. And also, if it is inconvenient for you to clean off dirt on the installed oil separator, then in this case, remove it from the car by unscrewing the nut that secures it (indicated by the red arrow), and then put the removed oil separator in a previously prepared container containing kerosene!
Next, clean the entire air filter housing from dirt by wiping it with a rag soaked in kerosene.
Note!
When cleaning the air filter housing, remove the sealing gasket from it and also clean it of dirt!
Installation:
Install all previously removed parts in the reverse order of removal.
Note!
When installing all parts, replace torn and cracked gaskets with new ones. And also check that metal bushings are inserted into the gasket of the air filter housing!
Important!
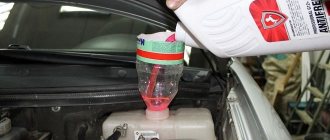
1) If a large amount of kerosene gets into the engine crankcase, change the engine oil! (For information on how to change the oil, see the article “Changing Engine Oil”)
For newbies!
Question: What does the oil separator look like?
Answer:
Didn't find the information you are looking for? on our forum.
We recommend reading:
Adjusting VAZ 2106 valves - adjustment and configuration procedure
Bleeding brakes for VAZ 2109 -2115, car brake system diagram
Fastening the beam to a VAZ 2107
Where is the oil pressure sensor located on the VAZ 2114 - 8 valves, how to diagnose and replace
VAZ 2114 injector boils, reasons
Air recirculation in a VAZ 2110 car
Installing the ignition button on a VAZ
Stiff steering on VAZ 2107
System assembly
After cleaning the breather is completed, you need to assemble the crankcase ventilation system. When installing the glass in place, you need to carefully align its tube with the seat. Next, a pin is screwed in, which is tightened with an open-end wrench to 13.
Before installing the breather cover, a paronite oil pan gasket is placed on the seat, which prevents gases from escaping from the system. After each disassembly of the breather, it is better to replace it, additionally treating the seating area with heat-resistant silicone, which will increase the reliability of the connection. The breather is put with a cut on the hole in the glass tube to form a channel for installing the oil level dipstick. A washer and a special nut with a rounded head are put on the stud, which is clamped with a wrench; when tightening, you do not need to pinch the nut so as not to strip the thread.
After this, the hose is put on the carburetor and the main hose. It must be inspected first, and if it is cracked, it is better to replace it with a new one to avoid excess air being sucked in. At the entrance to the air filter or in the hose itself, experts advise placing a special metal brush called a flame arrester.
It retains oil well, which may be contained in crankcase gases and enter the air filter, clogging it. As a result, the quality of the air-fuel mixture decreases and engine stability is lost. This is especially important for cars with high engine mileage; used oil and emulsion are deposited on it and flow back into the crankcase. When choosing this part, it is better to consult with specialists so that the wire from which it is made is of high quality and does not break, getting into the crankcase.
Oil pump
The oil pump (see Fig. 4) is a gear type, installed inside the crankcase and attached to the cylinder block with two bolts. The pump drive gear is fixedly mounted on the shaft, and the driven gear rotates freely on an axis pressed into the pump housing. The oil enters the pump through the oil inlet pipe, passing through the filter mesh. A pressure reducing valve is built into the body of the oil inlet pipe. When the pressure in the lubrication system increases above the permissible level, the oil presses out the pressure reducing valve, and excess oil is transferred from the pressure cavity to the oil receiver cavity. The pressure at which the pressure reducing valve operates is provided by a spring of appropriate elasticity installed at the factory. This pressure is not adjustable.
Classification
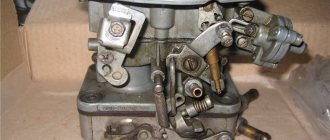
Carburetor for VAZ 2101
A large number of classic Zhiguli models use the VAZ 2101 carburetor in various modifications. There are several modifications of manufactured carburetors, which differ not only in the size of the installed jets, but also in the presence or absence of a vacuum corrector system.
The VAZ 2101 carburetor of all modifications is intended only for VAZ 2101 and 21011 engines, where an ignition distributor without a vacuum corrector is installed. On cars of later production systems are installed that are already equipped with vacuum correctors. It should be remembered that the use of carburetors for VAZ 2101, 21011 and 2105 engines without a vacuum regulator cannot be used on other engines and vice versa. The carburetor of the VAZ 2103 and VAZ 2016 is used in a similar way - only on models where there is no vacuum corrector.
Maintenance at home is a rather complex procedure that requires certain skills, knowledge and tools. You can independently adjust the idle speed, replace gaskets, clean jets, fuel channels, and also visually check the operation of the accelerator pump and, if necessary, replace it. But it is advisable to carry out final adjustments and adjustments in a car service center that has diagnostic equipment for checking the level of carbon monoxide in the exhaust gases.
The engine smokes
Usually a small amount of smoke comes out of the exhaust pipe. However, sometimes there come moments when thick smoke can literally pour out of your six
To understand what the problem is, you need to pay attention to its color
Transparent color. Transparent or slightly white smoke that is almost invisible. It's not even smoke, but rather steam. It occurs because the system has not yet warmed up. This is especially noticeable in winter after the car has been sitting in the yard all night. There's nothing wrong with that. After the system warms up, the steam will practically disappear.
Black color. This phenomenon looks quite scary. One of the reasons may be the usual overload of the motor with heavy weight. Try unloading the trunk if you have placed something particularly heavy in it. However, most often this problem does not arise for VAZ 2106 owners due to the small size of the vehicle
Therefore, also pay attention to how the mixture formation process proceeds. Most likely there is too much fuel entering the engine. The result is not only black smoke, but also increased fuel consumption.
Try changing the air filter. You also need to measure the compression. Check the condition of the cylinders and whether the engine control sensors are working correctly. Check the spark plugs to see if they have a black coating on them, which may indicate the need for engine repairs.
The result is not only black smoke, but also increased fuel consumption. Try changing the air filter. You also need to measure the compression. Check the condition of the cylinders and whether the engine control sensors are working correctly. Check the spark plugs to see if they have a black coating on them, which may indicate the need to repair the engine.
White color. Unlike the clear smoke described above, this smoke has a thick white tint and does not disappear as the engine warms up. It indicates that there is a malfunction in the cooling system. This is a sure sign that urgent measures need to be taken, because a breakdown can lead to a major overhaul of the engine. Check the candles to see if they have developed a coating similar to what appears on a kettle due to scale. If this happens, it means water is getting into the cylinders.
Bluish color. The reasons for this phenomenon can be various breakdowns. For example, you can check the serviceability of the valve stem seals. If they are damaged, oil may leak and enter the idle engine. You will also have to check the oil rings. Due to their wear, excess oil may flow into the cylinders.
see also
Comments 21
Well, how did the small circuit valve help prevent oil from getting into the receiver?
Not really))) I think because the oil was driven under the valve cover and the entire “crankcase” (the space under the valve cover and pan) was not sealed. As one of the reasons) Plus, the small breather fitting is located in a very bad place... Oil constantly rushes into the small circle... It’s dry in the big one! Not a bit! The advantage of this valve is that xx is even)))
I have the same problem, the throttle is flooding from a small circuit, then I’ll think about some kind of oil sump for a thin tube.
The small circuit not only constantly drives oil through it, it is also connected to the upper throttle fitting and from there the throttle feeds it all.
I have the same problem, the throttle is flooding from a small circuit, then I’ll think about some kind of oil sump for a thin tube.
This is the option I came across in the literature
Thank you, but it’s too complicated, I was thinking of screwing something like that www.drive2.ru/l/7634481/ I’m also wondering if the oil might somehow be drawn up the dipstick, because it’s too dry. Let’s say you take a tube for a small one next to a large tube, or put a tee on a thick one and send it to the throttle. In general, I will experiment.
This is the option I came across in the literature
Continuing, I installed a small ventilation circuit and a small fuel filter (diesel) and the problem with oil getting into the intake was completely resolved. When traveling, I see that about 3-5mm gets into it, after stopping, the oil simply drains back into the engine.
I have a question, tell me, here is the pressure reducing valve Jp Group 1117701500, how does it work, like a nipple, air flows in one direction from the crankcase to the intake, but not in the opposite direction, have you tried blowing it? I bought an analogue but somehow it blows in both directions.
This is how it will be purged) The principle is different. I don’t remember which fitting you need to “suck in”))) then the membrane will block the channel and the air will pass through the calibrated hole. The membrane reacts to vacuum.
What is the mileage with this ventilation system?
200 km so far))) Just done)))
Thanks for the answer
So you don't have to cut it?
I don’t have an adsorber, in theory everything should work if I connect a thin hose together with the PCV valve to the lower throttle fitting and plug the upper one, right? I just read the article www.drive2.ru/l/471252608883884988/ for some reason he was sawing a glass
I guess, yes. Only the diameters are different. The hose on the pcv valve is 8 mm, the hose on the fitting is 6 mm. It should be tightened with a mini ABA clamp. The glass is cut to increase the cross-section (clearance) between the glass and the block. The glass sits close to the block. Due to the edges it communicates with the breather.
If you just put a valve in a small ventilation, will there be an effect and what? Or do you need a complete modification?
Let it be, the idle will be smooth. And as a minus, the efficiency of engine braking will decrease. There is a large and small ventilation circuit. The small one works at idle. So, at idle, not only crankcase gases are sucked out, but also air from a large circuit in front of the throttle. That is, uncontrolled leaks occur. This valve is recognized to control them. This valve is like a gas reducer. Regardless of the pressure in the inlet receiver, the flow through this valve will be constant (exaggerated, actually a little different). The jet does not provide this. You can redo it without an ejection pump. The main thing is not to connect it to the same fitting in which the jet is (the jet on the classic is in the throttle, on the Prior, Niva, Shnivy, Kalino family, Grants, etc. with an electronic throttle in the hose, or maybe not even there). On the front drive there are additional fittings, on the classic either in a tee with a VUT (or ejection pump), or drill the receiver and make a fitting, or try in a tee with a fitting on the absorber valve.
Good afternoon!) I had this idea, but after reading it it seemed crazy! Although all ideas are crazy. Reading your post I wanted to install it myself!)
Yes, the idea is crazy and not at all rational from the point of view of the wallet) On the other hand, the wife takes more to the store)