A car engine cannot operate without coolant, which prevents the power unit from overheating. On absolutely any passenger car, and accordingly on the Russian Lada Priora, after a certain mileage, the antifreeze needs to be replaced. Let's say right away that this can be done independently, without contacting a car service, the most important thing is to know how to drain the antifreeze correctly and as expected, as well as how many liters of antifreeze to fill. We will talk about this and other nuances of replacement in this material.
General information on replacing antifreeze in Priora
The widespread 16-valve popular Lada Priora is one of the most popular in the domestic automotive market, and replacing the coolant in it is carried out in 6 stages, each of which is quite simple. As a rule, in severe frosts, the cooling system loses its tightness and antifreeze begins to leak; the same can happen with sudden changes in temperature. If this happens, you should find the location of the leak and tighten the clamps on the pipes more tightly, this will help correct the unpleasant situation. Therefore, it is important to regularly check the level of this fluid and replace it if necessary.
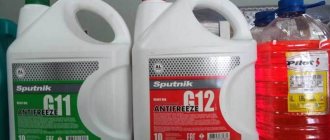
Antifreeze for your car can be purchased at a specialized auto store. The liquid has different price tags.
What are the consequences of ignoring the replacement of the catalyst gasket?
One of the unpleasant features of operating Kalina with a damaged catalytic converter gasket is the increased noise level during operation of the exhaust system. In addition, the correct mixture formation is disrupted due to improper functioning of the oxygen sensor. All this causes the formation of carbon deposits on the elements of the power unit, timing mechanism, spark plugs, worsening their performance. Well, the most unpleasant moment is that after a short period, the exhaust gas neutralizer itself will simply fail.
Since the ceramic parts of the part are destroyed and clog small areas of the part with their fragments, reducing its permeability, more pressure will now be required for the free movement of gas mixtures through the collector.
What color and how much antifreeze should I use?
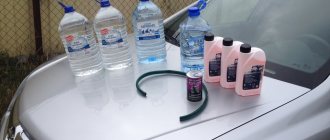
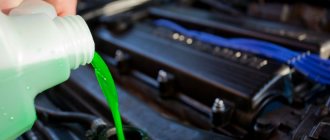
One of the main questions of car owners is: how many liters of antifreeze should I fill? According to the official technical documentation for Russian-made Lada Priora cars, the required volume of antifreeze is 7.84 liters. For full operation of the power unit, you can fill 6 liters each; this option is suitable for the winter period. However, it is best not to deviate from the regulations and fill in the required amount of liquid so that no problems arise.
Each antifreeze is divided into classifications, and it can be distinguished even by color if there is no label, for example. So, in our country, red antifreeze is predominantly poured - the so-called carboxylate. Regardless of the type, it is important to know how many liters of antifreeze to fill and follow this rule.
Coolant selection
The manufacturer decided that the best way to cool the power unit is with red Felix-40 antifreeze. Cool Stream Standard 40 refrigerant can also be used. You can find out in more detail what is in your car by looking at the sticker on the expansion tank in the engine compartment.
In accordance with the official guidelines, any brand of liquid can be used. The main thing is that you need to pour in those refrigerants that meet the standards of antifreeze poured during production.
Article number and cost of antifreeze for Priora
According to factory standards, coolant of different brands cannot be mixed in Lada Priora. The Lada-A40 brand is suitable for Priora, its catalog number is: 88888100005082. The cost of the liquid is approximately 550 RUR. rub. for 5kg. There is also a list of acceptable liquids:
- Antifreeze G-48;
- OZH-K Tosol-TS;
- Macra Cool Stream liquid Standard/Premium;
- 2 types OZh-40 Tosol-TS/OZh-65 Tosol-TS.
What types of car malfunctions can occur due to antifreeze?
When the coolant begins to drain, the owner of the Lada Priora should think about why this is happening. Antifreeze leaks often occur due to mechanical damage to the cooling system. In the worst case scenario, the engine overheats and the cylinder head gasket burns out.
The car owner noticed that antifreeze was constantly flowing, reasons:
- Leak between block and cylinder head. In this case, you can tighten the bolts better.
- When the radiator is damaged. You can try to replace it, but there are times when only repairs are required.
- The water pump has become unusable. The situation can be corrected by replacing the pump.
- The pipes are damaged. Initially, you need to tighten the clamps; if the problem does not go away, you can replace the hoses and pipes with new ones.
- The expansion tank of the automobile cooling system is damaged. There is only one option - replace the tank.
- Malfunctions can also be short-term in nature:
- There is scale on the cooling jacket; it can also be seen on the pipes and on the walls of the radiator. Flushing the system will help. Next, fill in new high-quality coolant.
- The existing antifreeze circulates poorly through the system. In certain cases, the pump, and in some cases the entire water pump, needs to be replaced.
- When the car owner first notices a low coolant level, he needs to top it up to the level. If the leak becomes regular, the system needs to be checked for leaks.
Recommendations
- Immediately after replacing the coolant, the engine must be warmed up, while simultaneously checking the heating of the lower radiator hose. It should be cold at first, but then quickly warm up. Its heating will indicate that the antifreeze is circulating normally in a large circle.
- Then the engine should continue to warm up until the cooling system fan turns on. After turning off the fan, turn off the engine and allow the engine to cool. After cooling, unscrew the cap of the expansion tank again and check the fluid level again. If necessary, the normal level in the tank should be set again.
- Please note that on models with a cable transmission, the starter will also need to be removed. To do this, you need to remove the negative terminal on the battery. Next, the latch of the wire block is pressed, after which the block is disconnected from the traction relay connector. Then you need to remove the protective cap from the nut securing the wire tip, which is connected to the “plus” wire of the battery.
We also recommend reading the article on how to flush the engine cooling system before replacing the coolant. From this article you will learn about the features of cooling system maintenance, as well as how to flush the engine cooling system correctly.
Using a spanner “13”, unscrew the nut and remove the wire tip from the contact bolt of the traction relay. Now, using a key set to “13”, unscrew the starter mounting bolts (3 pieces), and the starter is removed from the car. If there is a box with traction control, removal of the starter is not required.
Details about mixing antifreeze in Priora
Remember that antifreeze should never be mixed with antifreeze. In all other cases, a certain scheme applies:
- Type G11 can be mixed with: G11/G12+/G12++. G must not be mixed with type G12.
- Type G12 can be mixed with: G11/G12+. Do not mix with G11/G12++/G.
- It is permissible to mix with each other (combine): G13/G12++/G12+.
Remember that the type of liquid is certainly indicated on the packaging; it is always the letter “G” with a 2-digit number and pluses. The type of coolant is also TL - this is antifreeze.
Let's sum it up
As you can see, from this material it follows that there are no obstacles to independently replacing the antifreeze on the domestic LADA Priora. The set of necessary tools and materials is minimal. The knowledge required for replacement is all present in the manual. All that remains is to make a replacement.
Sources
- https://linhai-russia.ru/uhod-za-avto/kak-pomenyat-antifriz-na-priore.html
- https://avto-ritet.ru/remont/tonkosti-zameny-ohlazhdayushhej-zhidkosti-na-priore.html
- https://avto-idea.ru/remont/zamena-antifriza-lada-priora-kakuyu-ohlazhdayuschuyu-zhidkost/
- https://mirsmazok.ru/antifrizy-i-teplonositeli/zamena-antifriza-priora/
- https://KrutiMotor.ru/kak-zamenit-antifriz-ili-tosol-na-lada-priora-svoimi-rukami/
- https://Vaz-Lada-Granta.com/priora/zamena-ohlazhdayushhej-zhidkosti.html
- https://enginehack.ru/zamena-antifriza-na-priore/
- https://kamaz1981.ru/other/nado-li-slit-tosol-snimaa-vypusknoj-kollektor-lada-priora.html
How to remove an air lock on a Priora
On a car, malfunctions occur in the cooling system, and an air lock may form. To remove air from the system, you need to use its hoses. This is done in one of two ways. In each case, you need to wait until the power plant has completely cooled down, and only then begin to troubleshoot the problem.
I Option:
It is best to wear thick gloves before work to avoid burns. Warm up the engine a little and be sure to turn off the car. Remove the tube and clamp from the heating when antifreeze flows. Put everything back in its rightful place and tighten the clamp again. Air will escape under the resulting pressure.
II Option:
A device such as the throttle assembly clamp needs to be loosened, then the tube must be removed from the heating. Next, open the lid of the special expansion tank of the cooling system located in the engine compartment, cover the neck with a clean rag and blow through it properly. You will see air coming out. You need to tighten the cap when the coolant appears directly.
Stages of work
To prevent air pockets from forming in the cooling system after filling the cooling system with liquid, use a Phillips screwdriver to loosen the clamp on the throttle assembly heating hose (the highest point of the vehicle's cooling system). After loosening, disconnect the hose from the fitting. Now you need to pour antifreeze into the expansion tank. This should be done carefully, since spilled liquid will evaporate for a long time while the engine is running, causing a large volume of steam. It should be poured until antifreeze runs from the removed hose.
Next, attach the hose to the fitting, tighten the clamp and fill the antifreeze to the required level in the expansion tank. If after replacement the cooling system does not work correctly (the engine overheats quickly), then there are air pockets in the system. You can eliminate them in the following ways:
- Remove the hose from the throttle body heating fitting, then blow into the neck of the expansion tank. As soon as liquid runs out of the hose, immediately return everything to its original position;
- Since antifreeze is poisonous, excess pressure can be created without direct interaction with the expansion tank. To do this, you just need to start the engine for a couple of minutes. Then we remove the hose and wait for the liquid to appear. You should be careful as the liquid will be hot and come out under pressure, so you should protect yourself from possible burns.
How to change antifreeze to antifreeze on a Priora? Replacing antifreeze and replacing antifreeze with antifreeze are not much different. The only detail is that the cooling system should be flushed more thoroughly to remove antifreeze, since it remains on the walls of the hose and reservoir. Also, antifreeze is changed more often than antifreeze, after 40 thousand kilometers.
Priora with 16 valves
Replacing antifreeze on a Priora with 16 valves is not much different from replacing a Priora with 8 valves. The main difference is that in a Lada with 16 valves, antifreeze replacement is necessary only after 75 thousand kilometers. Also, unlike an 8-valve car with air conditioning, a 16-valve car has a drain plug on the radiator.
Lada Priora with 8 valves
When replacing antifreeze on a Priora 8-valve with air conditioning, you may notice the absence of a drain plug on the radiator. Accordingly, the coolant is drained by disconnecting the lower pipe coming from the radiator. After draining the liquid, return the hose to its original position and continue the procedure described above.
Step-by-step instructions for replacing antifreeze in Priora yourself
Replacing the coolant yourself requires some tools and items, check out the list before you get started:
- 13th key;
- Phillips screwdriver;
- Capacity 10 l.;
- Coolant – 8l.
Before the antifreeze is replaced on the LADA Priora, it is, of course, necessary to drain the old antifreeze. First you need to wait until the “engine” and the coolant itself cool down, this is required in order to avoid getting burns.
A procedure such as replacing the coolant is carried out in the following sequence:
- We drive the car into the pit and stop it accordingly.
- Remove the negative terminal from the battery.
- We remove the crankcase protection of the power unit.
- Remove the cap of the expansion tank of the cooling system.
- We substitute the previously prepared container under the “engine”.
- We unscrew the drain plug, a key will help with this.
- The plug should be tightened when all the antifreeze has completely drained out.
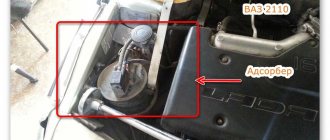
- We transfer the container with the drained antifreeze under the radiator and unscrew the cap on it, from here it is also necessary to drain the antifreeze.
- Close the plug after the coolant has drained.
- Disconnect the throttle body heating hose.
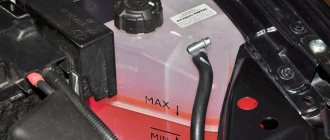
- Fill in new antifreeze within the MIN/MAX marks.
- We install the throttle body heating hose in place. Tighten the pipe properly.
- Check the steam outlet pipe for leaks.
So, you have read the instructions on how to replace the coolant on a LADA Priora with 16 valves. If you have a model with 8 valves and air conditioning, then the work will be a little more complicated, since there is no drain plug. The coolant must be drained exclusively from the lower radiator pipe, and upon completion of the entire procedure, install it in place.
How to fill
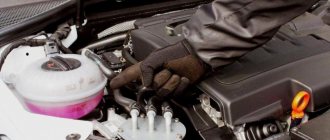
- Loosen the clamp and disconnect the pipe from the fitting.
Disconnect the pipe
- We unscrew the cap of the coolant container and fill in antifreeze or antifreeze until it begins to flow from the hose, which is disconnected from the throttle assembly.
Pour the required volume into the coolant reservoir
- When coolant starts flowing, install the pipe in its place and secure it with a clamp.
- Add antifreeze to normal level.
Minimum and maximum coolant volume
Cleaning the Cooling System
Experts recommend cleaning the system after each replacement. When you change antifreeze to antifreeze, or vice versa, switch from antifreeze to antifreeze, be sure to clean the system. What you may need for this:
- Plastic funnel and hose.
- A packet of regular citric acid.
- Distilled water (15 liters for Priora).
- A brush, sized to fit into the neck of a 5-liter bottle.
Please note that if the coolant is not cloudy, then you can only get by with distilled water. Otherwise, be sure to add citric acid. A good working fluid begins to lose color over time, that is, it becomes discolored, and a contaminated fluid always becomes cloudy.
Cleaning of the LADA Priora cooling system should be carried out after removing the air lock. Let water flow through the system through the open pipe. Using a brush, you can clean the expansion barrel separately. After this procedure, damage to the tank body is clearly visible. After cleaning the system is complete, you can add antifreeze.
List of necessary materials and preparation for work
First of all, you need to purchase supplies and prepare the car.
Materials and tools for replacing fluid:
- antifreeze - 8 liters, you can also purchase coolant concentrate and dilute it with distilled water yourself;
- key “13”;
- crosshead screwdriver.
How to drain antifreeze on a Priora? The following instructions must be followed:
- remove the engine crankcase protection;
- unscrew the expansion tank cap;
- After making sure that the engine has cooled down, place a bucket under the engine and use the “13” key to unscrew the drain plug.
After all the antifreeze has run out of the engine, screw the plug back on. Now you need to drain the liquid from the radiator; to do this, remove the cap on the radiator.
Attention! When the engine is not cooled down, the cooling system is under pressure; it is not advisable to remove the plug, as you can get burned. Substituting a bucket, unscrew the drain plug on the radiator and wait until all the antifreeze comes out.