Make or buy?
Ball joint end pullers for domestic cars cost no more than 1000 rubles.
You can purchase the device at any store. This means that the instrument is easier and easier to acquire. To make even the simplest tool, you need blanks, special nuts and bolts with a large thread pitch. It is easier to purchase a ready-made tool because it saves time. You won't have to do unnecessary things. Perhaps purchasing a device will cost a little more, but then there is no need to waste time and effort on making the tool.
Good day to all!
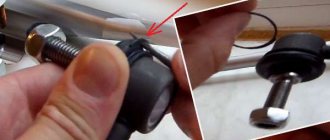
In this article I would like to share with you a very good homemade product, namely a remover for ball joints and steering ends. I don’t know if it will fit on other cars, but it will definitely fit on a VAZ!
Not long ago I changed the ball using the “old-fashioned” method using a hammer, I’ll tell you it’s not very convenient and fast. Having looked on the Internet, I found how to make a puller as easily and cost-effectively as possible, on the Internet I looked at prices from 500 rubles and above! This homemade product will take about 30-60 minutes if you have everything you need.
And we need:
- A pipe with an internal diameter of 45-50mm, and a thickness of at least 2 mm, more is possible!
- Two thick washers to fit the diameter of the pipe, or you can cut them out of thick metal.
- Bolt and nut, I used a 24mm wrench bolt, maybe smaller.
Puller design
In order to press the hinge out of the suspension, serious effort is required. Some car owners simply knock out the shank with a sledgehammer, which risks damaging the threads.
To facilitate dismantling, a ball joint remover has been invented, with which you can create force without shock load. To understand how to make a device with your own hands, consider various options:
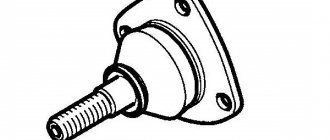
The illustration shows a screw-type ball joint remover.
- The hinge pin (1) is tightly installed in the steering knuckle housing (2).
- The puller bracket (3) is placed on the fist.
- Using the screw stop (4), the necessary pressure is created on the finger.
The advantage of the design is that the puller’s uniform and directed pressure on the ball joint avoids distortions and damage to the unit. Disadvantage - the tool can only be used if there is free space above the fastening nut.
Despite the complexity of the design, such a ball joint remover can be made with your own hands. You will need:
- steel sheet with a thickness of at least 4 mm;
- bolt with a strength class of 9.8 and higher;
- a nut, or a threaded bushing turned on a lathe;
- welding machine, grinder.
The design and dimensions of the puller are developed for a specific ball joint; the device is not universal.
If the installation location of the ball joints is quite compact, you can make a puller from a piece of pipe by welding plugs with holes at the ends. A thrust nut is welded to one of them.
This design is more reliable. Most factory pullers are made according to this scheme.
The next option is a ladder type screw puller. It is made of steel ties, with the help of which the spring earrings are attached. To install into the working position, it is necessary to tighten the threaded rods evenly, and the force is generated using a bolt.
With this puller you can press the hinges out of the seats in the levers. The device becomes universal if you add to it a set of bushings of different diameters (cut from steel pipes). But this puller will not be able to squeeze the ball pin out of the fist.
About other manufacturers
As mentioned above, the production of high-quality ball joints requires serious costs. And this cannot but affect the final cost of the product. Therefore, there are only four large manufacturers of supports for the VAZ 2107, and all of them are listed above. Of course, there are smaller companies that offer car enthusiasts ball joints at almost half the price. But any sane person understands: if a ball joint costs half as much, it means that the manufacturer saved on something during its manufacture. Most often, savings are made either on ultrasonic analysis of rod blanks or on heat treatment. Neither the first nor the second bodes well for the buyer of the support.
Cheap ball joints have a very short service life
And if the car owner is of sound mind, then he will not react to a temptingly low price and save on a detail on which his life literally depends. It is for this reason that little-known manufacturers of cheap supports will not be considered in this article.
Here we should mention another unpleasant thing: fakes. Recently, ball joints from well-known brands have begun to appear on the shelves of car dealerships, costing suspiciously cheaply. Upon closer examination, the vast majority of them turn out to be fake, and often the fakes are made so well that only a specialist can recognize them. For an ordinary car enthusiast, the criterion for selecting supports is still the same: price. It should be approximately the same as indicated above. And if a ball joint from a well-known brand costs half as much, then buying such a part is categorically not recommended.
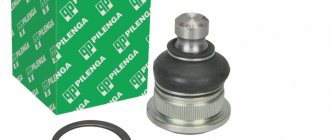
Requirements for a new ball
Make sure that the new ball joint boot is in good condition - there should be no cracks or damage. The new ball joint should have a grayish color to the finger. There should be no defects on the clip. The ball pin is not allowed to rotate freely - this indicates that the element is of poor quality.
For good elements, it either does not rotate in the cage at all, or does so very tightly. Try to purchase products from domestic manufacturers - “BelMag”, “Trek”, “Trial”, “Kedr”, “Nadezhda”, “BZAK”. You should not trust manufacturers from China or Turkey - practice shows that such elements are very unreliable and have a short lifespan.
Replacing the upper and lower ball joints on a VAZ 2106
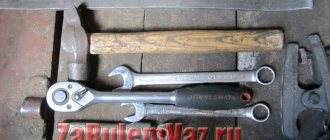
Ball joints, due to their design, cannot be repaired. Because it is impossible to restore the surface of a worn ball pin in a garage. So the only repair option for this part is replacement. But before we start, let’s select the necessary tools. Here he is:
Sequence of work
Before starting work, the wheel on which the ball joint is planned to be replaced should be lifted using a jack and then removed using a socket wrench. This preparatory procedure will have to be carried out when replacing both the upper and lower supports.
Video: changing ball joints on a classic
Since squeezing the old ball joint out of the eye is still a task, people, in order to make their lives easier, resort to all sorts of tricks, often quite unexpected. If the finger cannot be removed from the eye using a tool, ordinary people use WD-40. But one mechanic I know solved this problem much simpler: instead of expensive WD-40, he poured ordinary dishwashing liquid - FAIRY - onto the rusty supports. From his words, it turned out that it works no worse than the vaunted WD-40. The only problem, he said, was that the fingers “take longer to sag”: after WD-40, the supports can be removed after 15 minutes, but FAIRY “worked” after about an hour. And that master also began to swear unprintably at the mention of the above-mentioned French supports, claiming that “the French have gone bad now, although they used to be great.” In response to my question about an alternative to the “French”, I was recommended to “install cedar and not worry.” It is, they say, cheap and cheerful.
As you can see, replacing ball joints on a VAZ 2106 is a very labor-intensive task. In addition, significant physical strength is required to press out old supports. If a novice car enthusiast has all this, he may well refrain from visiting a service center. Well, if a person still has doubts about his abilities, then it would be wiser to entrust this work to a qualified auto mechanic.
Source
Replacement
Replacement is quite simple if you follow the step-by-step instructions below. To make the work easier and more trouble-free, you need to prepare the necessary tools in advance.
Required tool:
- Socket wrench or socket for 17 and 19 mm;
- Ratchet or crank;
- Hammer and pry bar (it is better to use a puller);
- Puller;
- Jack;
- Penetrating lubricant WD-40;
Step-by-step instruction
First of all, put the car on the handbrake and put the stops under the rear wheels of the car.
Raise the car with a jack and remove the front wheel.
Unscrew the two bolts securing the ball joint with a 17mm head;
We unscrew the pin securing the ball joint to the steering knuckle with a 19mm socket;
How can a puller make the process of removing steering linkages easier?
This is one of the main questions of interest to most motorists who have (or will have) to use this device. Alas, not everyone knows about the existence of such a device, which significantly extends the service life of the steering. In the absence of this tool, you have to use a hammer to dismantle the steering rods, and this will negatively affect the functioning of the entire system. Hitting with a hammer causes the rack to vibrate, causing its balance to be disrupted.
The barbaric method of dismantling the tips using a hammer takes a lot of effort and time. With this device, everything can be done in a matter of minutes. Thus, the work process is simplified and damage to parts is completely eliminated.
Tool for unscrewing the support
We will consider another type, which is used not for pressing out the finger, but for removing the support itself.
The fact is that on a number of cars (Peugeot, Citroen) the ball joint is screwed into the lever. Over time, the threaded connection sours, and it is quite difficult to unscrew this suspension element without a special tool.
But you can make the necessary puller yourself, rather than spending money on a factory one.
It is made from a thick-walled pipe 2\'\' 8-9 cm long.
At the end of this pipe it is necessary to make 4 spikes with a width of 5 mm and a height of 7 mm, located at an angle of 90 degrees relative to each other.
That is, you should get 4 protrusions at the end of the pipe, evenly distributed around the circumference. This can be done using a hacksaw and a file, or with a grinder.
From the other end we make slits to a depth of 3 cm, dividing the circumference of the pipe into 8 parts.
Then we bend these petals to the center using a hammer, significantly reducing the diameter.
We take a 24mm nut and screw it to the end part, and then use a welding machine to seal the slots made.
It is quite convenient to work with such a puller - we put it on the support so that the spikes fit into special grooves on the support body.
In this case, the finger will pass through the manufactured tool, which will allow the locking nut to be screwed onto it, thereby securing the puller. All that remains is to use a 24mm wrench to unscrew the support using the welded nut.
Diagnostics of the ball joint condition
The car owner can learn about the need for diagnostics by the following symptoms of a ball joint malfunction:
- driving over small humps and pits is accompanied by extraneous sounds emanating from the front suspension;
- There is a knocking sound in the wheel arches when entering a turn at speeds over 35 km/h;
- it becomes more difficult to turn the steering wheel and a creaking and grinding noise appears;
- decreased level of control over the car when cornering;
- partial loss of vehicle control while driving on uneven road surfaces.
To indirectly check the condition of the ball joint, you must use the method below.
- Hang the wheel on the side where the ball joint is expected to fail.
- Firmly grasp the tire with one hand from below and the other from above.
- Shake the wheel rim. If this is successful, then more accurate diagnostics of the suspension is required. Play can indicate not only a malfunction of the ball joint, but is also often a consequence of excessive wear of the stabilizer struts or steering tips.
Checking wheel play
You can more accurately identify a faulty ball joint if you gain access to the car from the bottom. To do this, you need to use an overpass, inspection hole or lift.
- Insert the mounting bracket between the lever and the ball.
- Shake the mount.
- The presence of noticeable play is unacceptable, as it is a sign of the need to replace the support.
Having gained access from below the machine, you should visually inspect the boot. It should not show any mechanical damage, such as cracks or tears.
Leaking grease is also a reason to pay attention to the ball joint
Leaking grease on the ball joint boot
The most accurate diagnosis of the ball can be carried out by dismantling it. The support must be clamped in a vice and the axial and radial movement of the pin must be checked. It should not move due to hand effort. The presence of any play indicates that the ball joint must be replaced.
Checking the axial and radial movement of the pin in the support clamped in a vice
A torn boot, in most cases, signals the need to purchase a new support. Still, if you want to save money, you can conduct a more detailed diagnosis of the condition of the lubricant and, based on the test results, decide on the advisability of replacement. If it is noticeable that dirt is present inside the ball, then applying new grease on top does not make sense and you will need to buy a new spare part.
If you do not want to troubleshoot or have doubts about the failure of the ball, it is recommended to contact a service station.
Sequence of actions for diagnostics
- Detecting a breakdown “by ear”;
- "To the touch".
First stage:
- We climb under the car, while our partner pumps the front left/right fender with mechanical pressure;
- We identify the place where the knocking is coming from.
Second stage: we use it when the first did not help find the worn part. Using automotive installation, we check the actual condition of connections, fastenings of suspension elements, hub mechanism, steering knuckle, and brake caliper.
In good condition, there should be no creaks or play. The maximum allowed tolerance for play is 0.8 mm, however, it is not possible to check without special diagnostic equipment. This is invisible to the human visual organs.
After identifying faulty suspension elements, we begin to replace them. Don’t forget to check the proper functioning of the brake circuit, caliper, pads, and disc. Measure the thickness with a caliper and check it with the permissible values specified in the instruction manual. Make a decision on the advisability of replacing with new ones.
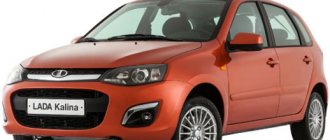
Purpose of ball joints VAZ 2107
A ball joint (BJ) is an ordinary hinge built into the VAZ 2107 suspension and allows the wheel to move only in a horizontal plane. At the same time, it limits the possibility of wheel movement in the vertical direction.
Ball joints on the latest versions of the VAZ 2107 have become more compact
Ball joints of the VAZ 2107 are very short-lived, so they have to be changed often.
Design of ball joints VAZ 2107
Previously, passenger cars did not have ball joints. They were replaced by bulky king pins that had to be lubricated frequently. The mobility of such compounds left much to be desired. This, in turn, negatively affected the car's handling. The designers of the VAZ 2107 abandoned the kingpins and installed ball joints. The first SHO consisted of:
- housings;
- ball pin;
- springs;
- anther
The finger was pressed into a fixed eye, fixed with a powerful spring and covered with a boot. This structure also needed to be lubricated periodically, but quite rarely (about twice a year). The lubricant on the pins had to be changed every week.
Modern ball joints do not use springs
Subsequently, the VAZ 2107 SHO was constantly improved:
- the spring disappeared from the structure;
- the steel boot was replaced with a plastic one;
- the fixed eyelet in which the finger was fixed became more compact and received a plastic external finish;
- SHOs have become non-separable, that is, practically disposable.
One driver I know assured me that he had found a great way to extend the life of plastic boots. Before installing new ball joints, he always applied a thick layer of silicone ointment to the boots, which car owners use to prevent the rubber bands on car doors from freezing in winter. From his words, it turned out that the anthers after such a procedure become practically “indestructible.” When I asked how an ointment intended for rubber could improve the quality of plastic, I was recommended to just try it and see for myself. Unfortunately, we never got around to it. So I leave it to the reader to check this driver’s find.
Reasons for failure of VAZ 2107 ball joints
The main reasons for SHO failure are as follows:
- Alternating shock load. As a result, the ball pin pressed into the suspension eye is destroyed. The support is designed in such a way that the shock loads on the pin ball are very high. When the quality of roads is poor, these loads increase manifold. In such conditions, even a high-quality SHO will not be able to fully exhaust its resource.
- Lack of lubrication. Under the influence of shock loads, the lubricant is gradually squeezed out of the SHO. In addition, over time, the lubricant loses its original properties.
- Anther destruction.
The boot protects the hinge joint from dirt. If a crack appears in it, the dirt that gets into the joint turns into an abrasive material and grinds down the surface of the ball pin. Dirt gets into the joint through a crack in the boot and wears down the surface of the ball pin.
Signs of malfunction of VAZ 2107 ball joints
The main symptoms of a VAZ 2107 SHO malfunction include:
- Extraneous sounds. While driving, a knocking or grinding noise begins to be heard from the wheel. This is especially pronounced on uneven roads at a speed of about 30 km/h and is usually a consequence of partial destruction of the ball on the support pin.
- Wheel rocking.
When accelerating, the wheel begins to sway slightly in different directions. This happens due to the backlash that occurs in the SHO due to its wear. The situation is quite dangerous, and the backlash must be eliminated quickly. Otherwise, the wheel may turn at a right angle to the body at speed. Play in the ball joint causes the front wheel to sway, which can spin out at speed. - Grinding and squeaking noise when turning the steering wheel left or right. The reason is the lack of lubrication in one of the SHOs (usually only one of the supports fails).
- Uneven wear on front and rear tires. This can happen not only due to faulty SHOs. The cause of uneven wear may be incorrectly adjusted camber and toe-in, insufficient or excessive air pressure in individual wheels, etc.
This is interesting: Where is the engine number of the VAZ Priora
Causes and signs of ball joint failures
Let us list the main reasons due to which the service life of ball joints is significantly reduced. Here they are:
- severe shock loads. This is the main reason for hinge failure. And it is especially relevant if the driver constantly drives on dirt roads or on roads with dilapidated asphalt pavement;
- lack of lubrication. If the driver does not carry out systematic maintenance of the ball joints and does not lubricate them, then the lubricant exhausts its service life and ceases to perform its functions. This usually happens within six months. After this, the destruction of the ball pin is only a matter of time;
- boot breakage. The purpose of this device is indicated by its name. When the boot fails, dirt begins to accumulate in the pivot joint. Over time, it begins to work as an abrasive material, which gradually damages the ball pin.
The boot on the support was cracked, dirt got inside and began to act as an abrasive.
Now we list the main signs that clearly indicate a broken ball joint:
- suspension rumble. It is heard especially clearly when the driver goes over a speed bump at a speed of 20–25 km/h. If the suspension rattles, it means that the grease has been completely squeezed out of the ball joint;
- When driving at high speed, one of the wheels begins to sway from side to side. This indicates that there is a lot of play in the ball joint. The situation is very dangerous, since the swinging wheel can turn almost perpendicular to the body of the car at any moment. After this, the car is guaranteed to lose control, which can lead to a serious accident;
A broken ball joint can cause a serious accident. - When you turn the steering wheel you hear a grinding noise. The reason is still the same: there is no lubricant in the ball joints;
- Uneven wear of front and rear tires. This is another sign that something is wrong with the ball joints. It should be noted here that wheels can wear unevenly not only due to broken ball joints, but also for many other reasons (for example, the car’s wheel alignment may not be adjusted).
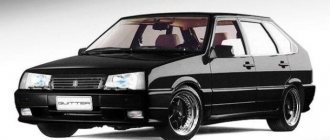
Lower arm of the front suspension VAZ 2107
The VAZ 2107, popularly known simply as the “Seven,” is the latest rear-wheel drive representative from the model range of the popular domestic manufacturer. Unlike front-wheel drive cars, the front suspension here has fewer parts, so diagnosing and repairing it is much easier and you can handle everything yourself, without involving expensive specialists.
The “Seven” has an independent front suspension, the main parts of which are two levers: upper and lower. The lower arm connects the hub or steering knuckle to the car body. Due to the front suspension arms, the wheels are held in a vertical position, and the lateral forces that arise while the vehicle is moving are dampened.
Lower arm VAZ 2107 assembly
Lower arm housing
The lower arm is fixed to the suspension cross member, which is mounted on the front side members. A ball joint is attached to it, and a spring also rests on the lower edge. All this makes it difficult to replace this suspension element, but even a novice car enthusiast can cope with such a task with his own hands. It is enough to determine the cause of the breakdown, and then act in accordance with the developed rules and recommendations of specialists.
The lower arm is fixed to the suspension cross member, which is mounted on the front side members
Spherical bearing
A ball joint is securely fixed directly to the lower arm. This is a hinge element that connects the lever and the hub.
The ball joint absorbs all the impacts that occur when the wheel hits uneven roads, so special attention is paid to its strength
Serviceable ball joints limit the swing of the wheel in the vertical direction, but at the same time allow it to move freely in the horizontal plane. When a ball joint breaks, the wheel turns spontaneously, and if this happens while driving, it can lead to an accident.
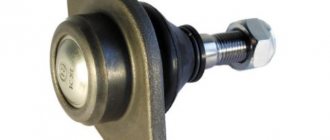
This element is a hinge, the main part of which is a ball rod, on one side there is a ball, on the other there is a thread. The rod is securely pressed into the eye with a plastic liner, after which the entire structure is covered with a boot to prevent moisture and dust from entering the friction points. Modern manufacturers usually use transparent boots, which allows you to assess the condition of the hinge without removing this element.
It is protected from moisture and debris getting inside the ball joint with a special cover (boot)
Since the ball joint is a very important and responsible part of the suspension, if it needs to be replaced, you need to purchase only high-quality products. Some of the most reliable and popular manufacturers of ball joints are the following brands: “TRACK”, “KEDR”, “BELMAG”, LEMFORDER (German company). In addition, any major manufacturer offers reinforced versions of such parts, they are also called sports: “Track-sport”, “Cedar-trial-sport”, etc.
In addition, any major manufacturer offers reinforced versions of such parts; they are also called sports: “Track-sport”, “Cedar-trial-sport”, etc.
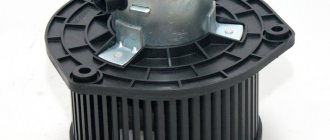
Silent block
The silent block is a part that allows the lever to rotate on an axis. It consists of two metal bushings, between which there is a rubber insert.
Modern industry offers silent blocks made of rubber and polyurethane. Nowadays, basically everyone is switching to polyurethane silent blocks, since they have a longer service life, but their cost is several times higher than their rubber counterparts.
Metal bushings can be connected with rubber or polyurethane inserts
Replacing rubber silent blocks on a VAZ 2107 with polyurethane ones allows you to:
- reduce deformations occurring in the suspension;
- improve car handling;
- remove the squeezing that is typical of rubber products;
- reduce noise and vibrations that occur while driving.
Axle bolt
The axis of the lower arm is rigidly connected with two bolts to a beam fixed to the front side members. On the axis, the mobility of the lower arm is ensured by the presence of silent blocks.
The lower arm axle is secured with two bolts
Replacing ball joints — logbook Lada 2106 1994 on DRIVE2
Good day everyone! I continue to post the next part of the cannonade of posts about assembling the front suspension. Today it’s time to write about installing ball joints and steering knuckles. A couple of ball joints were replaced, as well as all the fasteners.
The next minor assembly step was the installation of ball joints.
Of the four old supports, one was no longer good, the other two were in acceptable condition, and one had minimal mileage at all, as it was replaced during the repair of the lower suspension arm, after my ball joint and platform broke out.
The manufacturers of the first three were unknown to me; the last one was the usual “TRACK”. I immediately threw the dying ball into scrap metal, kept one as a reserve, and decided to leave the third and freshest one for installation on the upper arms:
These balls are still very good...
First, I removed the anthers and filled them with blue grease, which is used in trucks in areas of high load, friction and temperature:
Still left with Nexia, who needs an article - look in the Nexia BZ.
When installing the ball joints, I used a pre-purchased set of fasteners for ball joints:
With the new fasteners it will be calmer...
Next I installed these balls on the upper arms:
The upper ball joints are in place...
For the lower arms I chose new TRACK Champion ball joints.
I thought about installing a “Lemforder”, but the seller dissuaded me, citing the fact that the latter are more suitable for normal everyday driving, while the “TRACK Champion” can withstand much heavier loads and is more suitable for extreme driving.
I took him at his word and bought them, supporting my choice with the thoughts that it’s not in vain that many pelvis manufacturers use them for the same purposes as I do:
Quite popular among uprooters - Zhigulists TRACK Champion.
Before installation, I was thinking about where to install the new ball joints, and where the old ones - on the lower or upper arms? Purely logically, I came to the conclusion that the lower balls experience much stronger loads than the upper ones, since the lower balls bear the load along three axes at once - up/down (after all, the car sits on the lower arms, the springs press on the lower arms, therefore the finger of the lower ball tends upward), forward/backward (braking the wheel puts a load on the ball), left/right (when drifting, the wheel pulls outward). The lower balls are subject to loads on only two axes - forward/backward and left/right. Since the upper arms do not rest against anything in the vertical, it turns out that there is no load on them along the up/down axis. BUT! Why then is the use of levers highly recommended only with the installation of only UPPER supports on all levers? After all, according to my judgments, it turns out that the upper bearings experience much less load, therefore, manufacturers of balls from these judgments should include less safety margin than in the lower ones, BUT in practice, the upper TRACK Champion ball bearings are more expensive than the lower ones, therefore my judgments are wrong, but I don’t understand where the error lies in my logic... I really hope that the creator of these levers, Mr. Ne1R, will pay attention to my post and explain the essence, I’m very curious about this question and interested in the correct answer, which will set me on the path to a correct understanding of this suspension... Well in the meantime, I still installed new ball joints on the lower arms:
Beauty!
So, the ball joints are in place, you can install the steering knuckles:
Let's move on to the next nodes...
... to the steering knuckles!
Before this, I took the springs with cushions, tied them together for convenience with electrical tape, installed them in their places, then, jacking up the lower arms, installed the knuckles on the ball joints:
The springs, by the way, are from Shniva.
The fists with the springs are in place, or sort of in place...
But here, too, I made a small mistake - before installing the knuckles, I forgot to take into account the nuance of the presence of a reverse thread on one of them. It didn’t work out for me and later it turned out that I mixed them up - on the right I put a fist with a right-hand thread, and on the left with a left-hand thread, when it was the other way around from the factory.
Again, logically, it turns out that my option should be more correct, since if the hub nut is not tightened for some reason, then when the wheel rotates, the nuts will tighten and tighten the bearing, when in the opposite case they would unscrew and the hub would simply would fly out of my fist.
The second option is less desirable for me, but, apparently, my judgments due to my poor knowledge of physics are incorrect, since they do the opposite from the factory.
I would like to know the truth from you, maybe someone knows why everything is this way and not otherwise?
I didn’t rearrange the knuckles; I don’t see much point in this, since if you properly lock the hub nut, then the direction of the thread will no longer matter much.
I still can’t stop looking at it :)
PS
It may be necessary to slow down the flow of new entries, since heavy rainfall that has not stopped for several days now does not allow us to properly assemble the car, which is located in the open air.
I hope this will not last long and soon it will be fashionable to continue building the car. I recently had to drive a Japanese car, of course there is nothing to compare it with, but the car itself is certainly gorgeous! :)
Estimate: Upper reinforced ball support 2101 TRACK Champion Russia:
360 RUR. x 2 Fastening ball joints 2101 Belebey Russia: 122 rub. Total: 842 rub. —==="THANK YOU ALL FOR YOUR ATTENTION!"===—
Price tag: 842 ₽ Mileage: 90700 km
Source: https://www.drive2.com/l/4443616/
Which ball joint to choose for the “classic”
The ball pin is a key support element on which the level of reliability of the entire vehicle suspension depends.
The requirements for it must be strict:
- made from high quality steel;
- the surface of the finger (not the ball itself) must be hardened;
- the pin and other parts must be manufactured by cold heading and then heat-treated.
To be able to meet the stated requirements, significant production costs are required, which is why this is only possible by large domestic and foreign manufacturers.
Ball joints from the following companies are popular:
| Company name | Peculiarity | Cost, set |
| Belmag | Low cost combined with good quality | On average 1.2 thousand rubles. On average 1.7 thousand rubles. |
| Track | The presence of transparent anthers, which creates convenience when inspecting the ball | On average 1.7 thousand rubles. |
| Cedar | It is distinguished by a high level of quality, but due to numerous fakes it is quite difficult to find the original | On average 1.2 thousand rubles. |
| Lemforder | French parts are always in demand due to their excellent quality | On average 1.5 thousand rubles. |
These manufacturers are the most popular among VAZ 2106 owners.
The price of original LADA spare parts is about 1.5 thousand rubles.
Reinforced ball joints are more expensive.
Basic rules before purchasing:
- mandatory check of the complete set - all elements must be present;
- if the finger can be easily moved, the part is defective.
Screw pullers.
The force in these types of pullers is created by screwing the bolt into their body: the tool body is put on the eye of the ball joint, the bolt rests on the pin and, when screwed, presses it out of its seat.
These types of pullers are quite compact, therefore they are considered universal, that is, suitable for any car, although such mechanisms are most popular among VAZ owners.
Let's look at how to make a ball joint remover with your own hands using examples of screw options.
Option No. 1 – screw expansion.
- Take a 7-centimeter 4- or 6-sided rod with 17 or 19 key edges.
- Using a drill tank, make a hole inside its body and cut a thread for an M8 bolt.
- Screw this bolt into the hole prepared for it. The puller is ready.
Let us explain how it works using the example of pressing out the upper ball joint of the “seven”.
- Unscrew the lock nut. We unscrew it, but do not remove it.
- We install the made puller between the pins of the supports, the bolt in it is screwed in until it stops and the head rests against the pin that needs to be pressed out.
- We take 2 keys: with one we hold the puller body, with the second we unscrew its bolt. Unscrew until the support pin is pressed out of the socket.
If it is necessary to dismantle the lower ball, all actions are performed in the same way, only with the puller turned upside down.
Option No. 2 – screw L-shaped.
- Take a 15-17 cm round metal rod with a diameter of 10 mm or more. Using a vice and a hammer, bend it into an “L” shape (the length of the short arm should be 5 cm).
- Cut a thread on the long arm of the workpiece and select a nut for it.
- Take a metal plate half a centimeter thick and cut a hole in it for the support pin using the wedge puller technology (it will be given below).
- On the thickened part of the wedge, opposite the slot, make a hole for the L-shaped blank and insert the long part of the rod into it, only after that screw the nut onto the “improved” rod. Do not tighten too much - the wedge-shaped plate should move well.
- Insert the plate into the gap between the eye and the support. The short arm of the L-shaped element should rest against the finger.
- Start tightening the nut and do this until the pin is pushed out.
Option No. 3 - a screw puller of ball joints made from a corner.
- Take a 7-8 cm metal corner, half a centimeter thick, maybe a little less.
- Make a cut on one side; with this cut, the tool will be attached to the eye.
- From metal plates equal in thickness to the metal of the corner, cut out 2 identical triangles and weld them on the sides of the corner.
- Take a 17 nut, select a long bolt for it, weld spacers to this nut on both sides, they will help in the future to position the puller bolt on the same axis with the support pin.
Next, weld this entire structure to the corner perpendicular to the cut so that the nut hole is directly opposite the cut.
- Screw the bolt into the fixed nut and press out the pin using the technology described above (in other types of screw pullers).
As you can see, to create a ball joint remover you can use almost all available materials, the main thing is to understand the principle of operation, the drawing will help you:
Removing old ball joints from the car
Preparatory operations
We take a metal brush and carefully clean the hinge nuts, the threads of the ball pins, the seats and the bolts that secure the supports to the suspension arms.
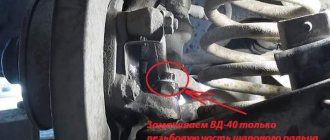
Soak with WD 40. Spray carefully so that the liquid does not get under the boot. Otherwise, during dismantling, the ball joint pin may rotate along with the nut. This will be a problem, but it can be solved, I’ll tell you about it later. We wait a few minutes for everything to sour. We begin to remove the old ball joint from the VAZ of the seventh model.
Dismantling
Let's start by replacing the lower ball joint. We are developing a nut. To do this, take a spanner wrench set to “22”. If you use a carob, you can “lick” the edges. If you tore it off, then we use an open-end wrench longer, because the cap wrench will not be able to be removed when you unscrew it all the way.
In most cases, this nut gets stuck and rusts. It takes a lot of effort to break it. Having torn it off, we walk it part way, unscrewing it and screwing it back so that part of the thread of the finger goes through, cleaning it.
You won't be able to unscrew it completely. Due to the design features of the steering knuckle on the VAZ 2101-07, it will rest against the bipod. Therefore, when dismantling the lower ball joint, you need to unscrew the nut as much as possible, as much as the design allows.
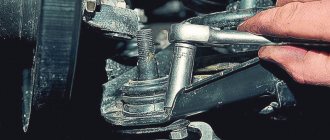
We take a puller and insert it between the fingers of the upper and lower support. We twist it until it rests against them with its edges. We continue to “tighten” it, but not to “useru”, so as not to break the thread on it. If it turns with great difficulty, stop. This force will be enough to press out the lower ball joint.
We have a hammer in our hands, it is advisable to take the adapter in the other hand to increase the accuracy of the blows. We rest one edge of it against the steering knuckle, there is a special protrusion there (shown in the photo below), and “hit” the other with a hammer. After several blows, the finger should “pop out” of the cone.
The rest is a matter of technique. We unscrew the nut completely, now there is enough space for full extension; if it still rests on the bipod, then use a pry bar to lower the lever down.
And now the unpleasant moment. Once the finger has come out of the steering knuckle seat, there is nothing holding it. The nut has a fluoroplastic ring that secures it from unscrewing spontaneously. It can pull the finger along with it, and the nut will begin to spin with it.
This is a problem that I have encountered more than once. You can saw the nut or chop it with a chisel, which is what I did at the beginning of my journey as a car mechanic. This is “hemorrhoids”, a big waste of time and effort. With experience, I realized how to unscrew the lower ball joint nut if it rotates with the pin. I want to share this experience with you, but a little later.
We soak the bolts securing the ball to the lever VD-40, having previously cleaned the dirt with a metal brush. We unscrew them with the key “13”. We use two keys, with one we hold the screw from turning, with the second we turn the nuts. We take out the old part from the groove.
Removing the upper support
To replace the upper ball joint, leave the hub on the lower pin. We carry out the preparatory operations mentioned above, “walking” the nut in different directions, gradually running it along the thread.
We unscrew it with the key to “22”. It is recommended to unscrew it completely; nothing will interfere. If this is not done, then after “knocking out” the support, the nut may spin along with the pin.
Place a brick under the lower arm and lower the car until it rests completely on it. Thus, fixing it. We insert the puller, unscrew it all the way and a little more, but not until your teeth creak. We need a “tension” to appear between the supports, sufficient to pull the upper ball out of the fist. We take the tip, a hammer and hit the ebb of the upper fist until it pops out.
We remove the hub from the fingers of both supports and put it aside so that it does not interfere.
We repeat the operations with fastening the upper hinge in the same way as its lower sister. We spray WD-40, take the keys to “13”, unscrew the bolts securing it to the lever.
Video on how to remove ball joints using a puller:
Instructions for self-checking ball joints
In order to verify the serviceability or malfunction of the ball joints, you need to lift the front of the car so that the wheels do not touch the ground on which the car is standing.
To check the play, we need to rock the car wheel up and down, applying some effort; if the ball is heavily worn, you will hear a characteristic knock.
Before checking the ball, it is advisable to check the tightness of the hub nut and the bearing play, so that later you can accurately determine the malfunction.
You can also resort to the help of an assistant, who should press the brake pedal so that the knocking noise of worn bearings installed on the hub or incompletely adjusted hub nuts is not heard, and then rock the wheel to check.
The same knocking noise will be heard when the vehicle moves over bumps and holes, and this signals that it is time to check the vehicle's undercarriage.
The ball joint located below cannot be checked in this way, since the force of the suspension spring is exerted on it; it can only be checked after removal from the car.
The chassis of VAZ 2101–2107 cars does not have any differences in design, so let’s look at replacing ball joints on a VAZ 2107 car.
There are two ball joints attached to different sides of the car suspension - the lower and the upper. Based on this, it is advisable to change both, the bottom and the top, at once, so that later after a short period of time you do not have to do the repair again.
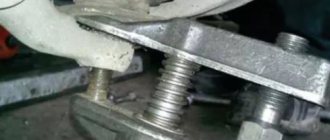
Making a puller
First of all, we look for a pipe and washers.
And we cut off a 10cm piece of pipe, I don’t know how others did it - I’m writing how I did it!
Now we need to weld the nut to the washer, and the washer to the pipe, we need to do everything as accurately as possible in the center.
The fact that everything turned out this way is not particularly beautiful - it’s okay! Everything needs to be cleaned and painted!
Now we need to make one side of the bolt slightly conical.
By the way, it is advisable to use a nut and bolt with a fine thread, but I used what I had. Now let's deal with the lower part, we need to cut out the washer and also make a hole in the pipe. Many people first cut a hole on the washer and pipe, and then weld it. We first welded it and then cut it out.
These are the holes you need to cut, this is what it should look like.
That's all! Our puller is ready! Final look.
0 rubles were spent! Everything you needed was lying around the house!
We have such a wonderful puller; it will make it much more convenient to remove ball joints and steering ends! I have +1 tool for the garage, and that’s it!
All that remains is to paint it in a bright color so that it is noticeable and does not get lost. Happy crafting everyone!
Making a serviceable cover
The blind part of the support body is made removable. At the same time, you can change the plastic inserts many times, each time restoring the functionality of the support. The removable bottom allows for routine inspection without removing the ball joint from the suspension.
Plug: do it yourself
- A hole the size of a finger ball is drilled in the bottom (with a small gap, of course). It is drilled out - it is said conditionally. A milling machine is required. Don’t be afraid to damage the plastic liner when boring, you will still need to change it. The thread is cut inside. This is a rather complicated procedure due to the large diameter. But in any tool shop they will do this kind of work for a nominal fee.
Entrust the work to professionals if you are not one yourself
Replace on a clean surface, otherwise the meaning of the work is lost.
Repair glass: everything ingenious is simple
The principle is the same as in the first case - to make a replacement bottom. Only the execution is different. If the bottom of the support is too thin to make a full threaded connection, it is necessary to make a repair cup. It is turned on a lathe from a steel circle of suitable diameter. The same hole is made in the bottom of the glass and a thread is cut. And finally, the support replacement bottom is made.
Then the bottom of the cylinder is cut off from the ball joint using a grinder or a hacksaw. A repair glass is welded in its place. The method is more labor-intensive, but it does not allow the finger to heat up during the dismantling process.
Scheme for manufacturing a product variant
Further operation follows the same scheme: when play appears, unscrew the repair plug, remove the pin, change the plastic inserts.
It is worth noting that spare parts manufacturers produce many options for repair ball joints. Replacement inserts and new pins are sold for these collapsible housings. However, in our article we are considering self-production.
Article number and cost of good analogues of original VAZ 2107 ball joints from third-party manufacturers
The quality of original balls differs from batch to batch. It is possible to purchase both good support and outright rubbish. Therefore, many car owners doubt which one is better to install. They often refuse to buy the original in favor of products from third-party manufacturers. The best analogues of native balls are presented in the tables below.
Table - Good analogues of ball 2101029040828
| Manufacturer | vendor code | Approximate cost, ruble |
| TRW | JBJ250 | 520-600 |
| Lemforder | 3731501 | 590-710 |
| Delphi | TC204 | 370-450 |
| Monroe | L0704 | 440-530 |
| CTR | CBFI4 | 510-630 |
Table - Recommended alternative support options 21010290419286
| Manufacturer | vendor code | Approximate cost, ruble |
| Moog | LABJ0392 | 360-420 |
| Profit | 23010098 | 260-300 |
| Denckermann | D110135 | 250-315 |
| Lemforder | 37320 | 330-425 |
| Delphi | TC203 | 395-450 |
Procedure for replacing the upper support on a VAZ 2106 - photo report
The upper ball joint is much easier to change than the lower one, so we’ll start with it. The first step is to jack up the front of the car on the side where the replacement will be made. We turn the steering wheel all the way to the left to make all this easier to do.
Then remove the wheel and unscrew the nut securing the ball joint to the hub. You can rest your foot on the brake disc to keep that part of the front suspension stationary. The procedure is clearly shown in the photo below:
I won’t unscrew the nut all the way so that I can rest against it later. Now you need to insert the pry bar between the support nut and the hub, and jerk it down with good jerks, applying a lot of effort. You may have to jump on the mount with your foot to get the ball to pop out of its place. The result is shown in the photo below, where you can see that the support pin has come out of the hub hole.
Now you can completely unscrew the lower fastening nut, after which you need to unscrew the three bolts that secure the support to the lever:
After everything is unscrewed, you can safely remove the ball, since the hub will move to the side:
We lift it and everything is ready:
Installation is carried out in reverse order. First, insert the support into the lever and tighten the three bolts:
Now we lift the hub and combine the support bolt and the hole, as clearly demonstrated in the photo below:
Now we press the lever on top with our hand, pressing with enough force so that we can tighten the nut, and tighten everything thoroughly.
Now I’ll tell you a little about the replacement from the bottom side, although by and large this procedure is carried out in a similar way, but a little more complicated.
Replacement on classic VAZ models
Next, we’ll look at how to replace ball joints on different cars. The examples will be different models of VAZ cars.
The first will be the classic models - VAZ 2106-07. In fact, in all classic models, from model 2101 to 2107, this operation is performed identically.
The suspension design of these cars is such that it includes two ball joints - upper and lower.
It should be noted that if at least one element wears out, you will have to replace them all, on both sides.
But the replacement operation itself is not particularly complicated. Tools and accessories you will need:
- A set of ring and open-end wrenches (keys for 12, 13, 14, 22 are required);
- Puller for ball joints and steering ends;
- Hammer;
- Mount;
- Chisel;
- WD-40.
Naturally, new supports, both upper and lower, will be needed. Having all this, you can start working.
The sequence of actions is as follows:
- The car is installed on a flat surface or in a garage. On the side where the replacement will be made, the car is jacked up and placed on supports, then the wheel is removed.
- To provide access to the support nuts, you need to unscrew the steering wheel in the appropriate direction (if it is changed from the left, then the steering wheel is turned all the way to the left; changing from the right side is accompanied by twisting it to the right).
- To change the upper support, first unscrew the pin nut with a 22 wrench.
Then, using 13mm wrenches, unscrew the nuts securing the support to the upper arm. To make it easier to unscrew them, you must first treat the nuts with WD-40.
- Next, a puller is used. With its help, the pin is pressed out of its seat in the hub.
- Using a pry bar, resting against the hub, the upper lever is raised so that the pin is completely removed from the seat. The hub is then gently pulled towards itself to release the part. Often the ball sticks strongly to the lever, so you will need to knock it down with a hammer.
- In place of the worn part, a new one is installed in the lever and immediately secured with fastening bolts.
- The hub is then lifted and the pry bar is installed again to lift the arm and place the hub in the correct position.
- Next, the pin is driven into the seat and secured with a nut.
The sequence for replacing the lower support is slightly different. Due to the characteristics of the hub, it will not be possible to completely unscrew the pin nut. Therefore, it is first unscrewed as much as possible (key 22).
The puller then comes into play to free the finger.
After this, the spring will press the lever down. To continue work, you need to put something under the lever so that it no longer moves down.
The pin fastening nut is unscrewed completely. Then the nuts securing the support to the lever are unscrewed, and it is knocked out.
A new one is installed in place of the removed support and reassembled.
Below are a few nuances when replacing supports on these cars.
If there is no puller.
The finger can be knocked out, but this will require help. The tools you will need are a hammer or a small sledgehammer, an attachment and a pry bar.
An assistant must drive the pry bar between the lever and the hub and create a pull-out force.
At this time, you need to use a hammer and a guide according to special ebbs in the hub near the pin seat.
The blows must be powerful and biting. Usually 3-4 hits are enough for the finger to pop out.
Don't forget about lubrication.
Some motorists advise that before installing a new support, remove the retaining ring and boot from it, and put Litol lubricant inside it.
Also, during assembly, it is recommended to lubricate all bolted joints with Litol, so that during future replacements of this element the bolts will be easier to unscrew.
And now the choice itself!
Theoretically, we already know how to choose a support, now let’s pay attention to brands and listen to reviews. Let’s make a reservation right away: we consider only original products, no fakes, and we already know how to identify them - fakes are turned on machines, without heat treatment, and by default they do not have stamps, logos or signs of compliance with quality standards
Supports Track
Ball joints Track with silicone protective cover.
Some of the most popular on the market.
They came into demand because of their reliability and durability for one simple reason - the domestic company Trek produces and develops only ball suspension and steering elements. There are several series on sale, one of which, Champion, was developed for fans of extreme driving on roads of not the best quality, that is, ours.
According to reviews, the Trek covers up to 60,000 km, and sometimes more.
Ball joints BelMag
The BelMag ball joint of the “Original” series is covered by a warranty of 40,000 km.
Some of the highest quality supports on the market. The company has developed several series for operation in different conditions:
- Original - inexpensive, characteristics fully correspond to the ratings of the original;
- Comfort is a more expensive series, but also more durable, since the surface of the ball pin is processed using patented technology, surfactants and anti-friction additives are added to the lubricant, and the body is coated with a special anti-corrosion layer;
- Favorite - reinforced forged durable body, wafer casing, pressure spring, casing made of special rubber with an extended operating temperature range (from -50 to +50°C);
All supports from this manufacturer do not require additional lubrication.
Cedar supports
Ball joint Cedar.
Balls of a special design with an all-metal rolled body.
Due to the technology of rolling the pin into the body, the highest accuracy of matching of the sphere of the pin and the body is achieved, which affects durability. The pin sphere is processed using special technology, and the boot is made of rubber material using ERDM technology, which contributes to a high degree of elasticity.
Puller type - WEDGE
The simplest puller is the so-called “wedge”. It does not belong to any type of removable mechanism, but at the same time it is a fairly effective device for pressing out.
To make it, you only need an angle grinder (“grinder”), you can also use a machine with an abrasive wheel.
The blank will be a metal plate the size of a matchbox.
First, it is necessary to give the workpiece a wedge shape, for which we grind the metal with a grinder or machine so that the profile of the plate looks like a triangle. Then, using the same “grinder”, we make a cut in the middle 2/3 of the length of the workpiece from the side of the apex of the triangle, that is, from the thin side of the wedge. The width of the cut should be slightly larger than the thickness of the support pin, that is, you should get a kind of bracket.
If desired, you can weld a metal rod to the bracket, which will make it easier to work with the wedge in the future.
Pressing out a finger with a wedge is very simple. It is installed in the gap between the eye and the support body. And then the wedge is simply driven in with a hammer, which leads to the finger popping out of the socket.
The disadvantage of the wedge is that the boot will be damaged during the pressing process. Therefore, the wedge can only be used when replacing supports or tips.
If the suspension and steering mechanism are being repaired, which does not involve replacing the ball elements, it is better not to use a wedge.