Required Tools
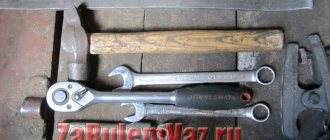
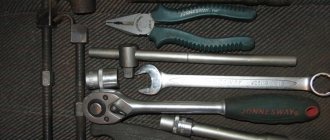
To carry out the work you will need:
- Socket wrench "22". It is the cap type, because the carob can “lick” the edges
- Metal brush. To clean the unit being repaired and its fastenings from dirt
- WD-40 or homemade penetrating liquid so that it can be easily unscrewed
- Socket wrench and socket set to “13”. One conveniently holds the bolts for fixing the supports to the levers, and the second one unscrews their nuts
- Crowbar, hammer, “adjustment” for an accurate blow
- Puller. You can replace the ball joints on a VAZ 2107 without a puller, but you will spend a lot of time and effort. I'll talk about this below.
Troubleshooting
Now we need to talk about how to determine that the ball joints have failed. Replacing the suspension (VAZ-2110 is not very complex in design) is done with a minimal set of tools. Firstly, an external sign of a malfunction is third-party sounds. A crunching sound comes from the suspension when driving, as well as when a passenger or driver gets into the car. Of course, this is not very pleasant and does not add comfort.
When the wheel is pulled, knocking noises are also heard. To make sure that it is really the ball that has failed, ask your partner to pull the wheel. And carefully place your palm on the clip. If the breakdown is really in it, you will feel your finger knocking inside the clip. For repairs, you will need to remove and install the VAZ-2110 ball joint. It is almost impossible to confuse this failure with any other, since grenades, for example, begin to make a crunching sound in the extreme position. And the ball joint knocks at any steering angle.
Removing old ball joints from the car
Preparatory operations
We take a metal brush and carefully clean the hinge nuts, the threads of the ball pins, the seats and the bolts that secure the supports to the suspension arms.
Soak with WD 40. Spray carefully so that the liquid does not get under the boot. Otherwise, during dismantling, the ball joint pin may rotate along with the nut. This will be a problem, but it can be solved, I’ll tell you about it later. We wait a few minutes for everything to sour. We begin to remove the old ball joint from the VAZ of the seventh model.
Dismantling
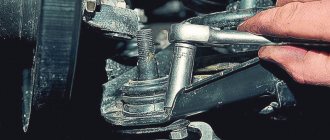
Let's start by replacing the lower ball joint. We are developing a nut. To do this, take a spanner wrench set to “22”. If you use a carob, you can “lick” the edges. If you tore it off, then we use an open-end wrench longer, because the cap wrench will not be able to be removed when you unscrew it all the way.
In most cases, this nut gets stuck and rusts. It takes a lot of effort to break it. Having torn it off, we walk it part way, unscrewing it and screwing it back so that part of the thread of the finger goes through, cleaning it.
You won't be able to unscrew it completely. Due to the design features of the steering knuckle on the VAZ 2101-07, it will rest against the bipod. Therefore, when dismantling the lower ball joint, you need to unscrew the nut as much as possible, as much as the design allows.
We take a puller and insert it between the fingers of the upper and lower support. We twist it until it rests against them with its edges. We continue to “tighten” it, but not to “useru”, so as not to break the thread on it. If it turns with great difficulty, stop. This force will be enough to press out the lower ball joint.
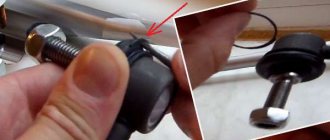
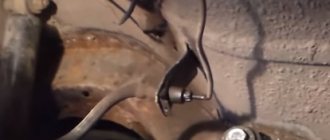
We have a hammer in our hands, it is advisable to take the adapter in the other hand to increase the accuracy of the blows. We rest one edge of it against the steering knuckle, there is a special protrusion there (shown in the photo below), and “hit” the other with a hammer. After several blows, the finger should “pop out” of the cone.
The rest is a matter of technique. We unscrew the nut completely, now there is enough space for full extension; if it still rests on the bipod, then use a pry bar to lower the lever down.
Important! We do not completely remove the hub from the lower ball pin; we will need it to press out the upper support.
And now the unpleasant moment. Once the finger has come out of the steering knuckle seat, there is nothing holding it. The nut has a fluoroplastic ring that secures it from unscrewing spontaneously. It can pull the finger along with it, and the nut will begin to spin with it.
This is a problem that I have encountered more than once. You can saw the nut or chop it with a chisel, which is what I did at the beginning of my journey as a car mechanic. This is “hemorrhoids”, a big waste of time and effort. With experience, I realized how to unscrew the lower ball joint nut if it rotates with the pin. I want to share this experience with you, but a little later.
We soak the bolts securing the ball to the lever VD-40, having previously cleaned the dirt with a metal brush. We unscrew them with the key “13”. We use two keys, with one we hold the screw from turning, with the second we turn the nuts. We take out the old part from the groove.
Removing the upper support
To replace the upper ball joint, leave the hub on the lower pin. We carry out the preparatory operations mentioned above, “walking” the nut in different directions, gradually running it along the thread.
We unscrew it with the key to “22”. It is recommended to unscrew it completely; nothing will interfere. If this is not done, then after “knocking out” the support, the nut may spin along with the pin.
Place a brick under the lower arm and lower the car until it rests completely on it. Thus, fixing it. We insert the puller, unscrew it all the way and a little more, but not until your teeth creak. We need a “tension” to appear between the supports, sufficient to pull the upper ball out of the fist. We take the tip, a hammer and hit the ebb of the upper fist until it pops out.
We remove the hub from the fingers of both supports and put it aside so that it does not interfere.
Important! Do not damage the brake hoses, otherwise they will have to be changed; I described in detail how to do this in the article on how to change the front brake hoses on a VAZ.
We repeat the operations with fastening the upper hinge in the same way as its lower sister. We spray WD-40, take the keys to “13”, unscrew the bolts securing it to the lever.
Video on how to remove ball joints using a puller:
Screw L-shaped
The third type of removable mechanism, which you can make yourself, is also a screw mechanism, but it has shown itself to be excellent and allows you to work on any car.
To make it you will need a round metal rod with a diameter of at least 10 mm and a length of 15-17 cm.
From it you need to make an L-shaped blank with a shoulder length of 5 cm. That is, we take a rod, measure 5 cm on it, clamp it in a vice and use a hammer to bend it 90 degrees.
We cut a thread on the long part of the workpiece and select a nut.
All that remains is to make the thrust bar. It can be made in the likeness of the wedge described above. That is, we take a plate, but 0.5 cm thick. On one side we make a cut for the support pin.
If necessary, you can reduce the thickness of the plate on the cut side by grinding off the metal layer. The main thing is that the plate fits into the gap between the support body and the eye, but it is not too thin, otherwise it will bend during the pressing process.
On the other hand, from the cut we make a hole for the L-shaped workpiece. All that remains is to put the plate on the long part of the rod. If the thread is not long enough to squeeze out the finger, you can place several washers under the nut.
This puller works like this: Unscrew the nut almost completely, install the plate in the gap between the support and the eye, and turn the rod so that the short arm rests against the finger.
Then we simply tighten the nut, while the plate will act as a stop, and the short arm of the rod will squeeze out the finger.
What to do if the lower support nut rotates with the pin
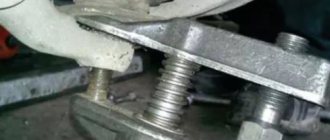
First way. We place a block or brick under the hub. We lower the car on a jack; there should be nothing under the lower arm. The car sits down until the hub is completely seated. When the jack is released lower, at this moment the trunnion warps relative to the lever. The ball pin is clamped like in a vice, this will be enough to unscrew the nut.
Second way. We insert the pry bar between the hub, shown in the photo below, and the edge of the lever, pulling it to the side, creating an artificial distortion. We do not put anything under it; it should hang freely in the air. As in the first case, the force to separate the two parts of the chassis should be enough; the hinge pin will jam in the cone of the steering knuckle. Unscrew the nut completely.
The third method is barbaric. Don’t want to bother with grinders and crowbars? Take a torch and heat the nut until the fluoroplastic ring melts. Once soft, it will not prevent unscrewing.
Screw made from angle
Another screw puller can be made from a metal angle and a welding machine.
To do this, take a corner with sides 7-8 cm and the same length, and a thickness of 0.3-0.5 cm.
We make a cut in one of the sides to secure the mechanism to the eye. From sheet metal 0.3 cm thick we cut out two triangles that will act as braces. They need to be welded on the sides to the corner. This will significantly increase the strength of the structure.
We take a 17 nut and a long bolt for it. We weld the nut itself perpendicular to the cut so that its hole faces the cut.
So that in the future the bolt can be easily positioned on the same axis with the pin, before securing the nut by welding, a spacer must first be welded onto the corner.
All that remains is to screw in the bolt and the puller can be used.
These are the simplest types of removable mechanisms that you can make yourself.
In general, there are a lot of options, and with a little imagination and basic knowledge of plumbing, you can easily come up with and make your own puller.
We offer some drawings for viewing.
What to do if the upper ball joint nut rotates with the pin
Remove the hub from the lower pin. We pull it in our direction with our hand until it stops. We wedge the finger in the cone of the fist. It will be clamped, unscrew the nut completely.
Second option. We insert a pry bar between the pin and the edge of the lever. We are trying to move the pin away from the lever. We clamp the finger and unscrew the nut.
Video, if the nuts turn together with the ball pins, how to remove them:
How to replace ball joints without a puller
To press the ball joint pins out of the steering knuckle cones, you need to:
- Jack up the car under the beam, hang the wheel so that it and the lever “hang” in the air.
- Loosen the ball fastening nuts as described above
- We insert a pry bar, when replacing the lower ball joint, between the lever and the knuckle. We press it down, as if squeezing these two parts apart
- With the second hand we hit with a hammer with “bulging” eyes on the ebb of the fist, shown above in the screenshot. After some time, depending on the degree of souring of the ball pin in the cone, the pin will “fly out”
- For the top one we do the same. We insert the pry bar between the upper knuckle and the lever and hit it with a hammer until the ball joint pin pops out
The remaining operations are carried out according to the same scheme as replacement with a puller: preparation, cleaning, lubrication, etc.
Video - replacement without a puller:
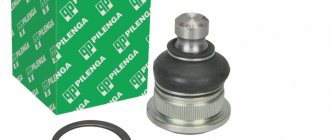
Parts selection
The main enemies of the upper and lower ball joints are not only water or dirt, but also low-quality materials. It is best to purchase spare parts made of steel, as they are the most durable and wear-resistant. Any auto store will tell you which companies produce such parts. Also, reviews of other VAZ 2107 car owners can help you in your choice. Most of them recommend paying attention to domestic manufacturers, since cheap Chinese analogues can fail at any time.
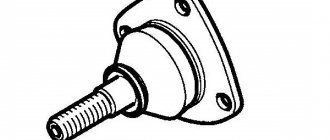
- pressure plate;
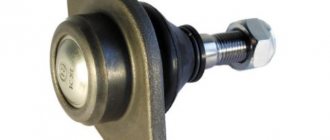
- ball pin cover;
- upper ball pin.