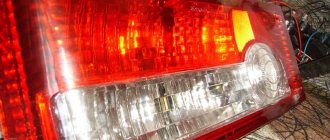
Factory optics on the VAZ 2106 include front and rear headlights, the installation of which is carried out according to the attached electrical diagram, which is available in the technical description for the car. The front optics include the headlights and fog lights themselves. Standard rear optics are lights in a metal case, covered with outer multi-colored plastic, which indicate “dimensions”, turn indicators, activation of the brake system and a red stern traffic light, fixed at the level of the exhaust pipe.
Content
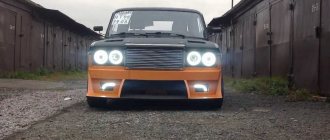
VAZ 2107 is a classic of the Soviet and Russian automobile industry. The car is easily recognizable on the road. The car is still in demand among car enthusiasts. And many owners of the “Seven” are happy to “go to great lengths” in order to change their “iron horse” beyond recognition.
In order to “modernize” the Seven, you can install various body kits, lower the ground clearance, install fashionable wheels, tint the windows, and work on the interior. But perhaps the most interesting touch is the head optics and rear lights. The strict and slightly angular design of the VAZ 2107 cannot be significantly changed. And is it worth trying? The body kits are quite enough. But you can work with headlights and lanterns. Moreover, if you have certain skills and knowledge, you can do it yourself, without turning to the help of professionals.
Tuning VAZ 2107 headlights can have many options. By the way, if you don’t want to engage in amateur activities at all, you can purchase ready-made options. Online stores sell a variety of headlights, including the famous “angel eyes”, which became popular after they appeared on some BMW models. By the way, if you decide to buy a ready-made version, you can find tinted headlights. This will save you from the need to contact specialists who professionally darken optics and glass. There are both pure black options and colored ones, like gold, chrome and so on.
Product change process
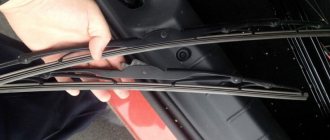
Anyone can replace a faulty low beam or high beam system component. You will need the following tools:
- awl (thin screwdriver);
- magnet with long handle (optional).
Then follow the instructions:
- Open the hood with the ignition off. Locate the headlights on both sides of the car.
- Unscrew the light source protective cover on the headlight unit from both sides. Having removed the lid of the box, you will see under it a block with three contacts responsible for powering the lighting system, as well as a spring holder.
- Detach the unit and then release the light element using the clamp. You can remove it from its normal mounting location.
Do-it-yourself dismantling and installation of headlights and taillights
So, if you decide to perform all the operations yourself, you will need, first of all, to dismantle the headlights and taillights. To do this, you need to “arm yourself” with a Phillips screwdriver and an open-end wrench. Important information! Care must be taken when removing headlights and lamps. The parts are quite fragile and can easily break if handled carelessly. As an example, let's look at the process of removing and installing one of the headlights and a flashlight. At the initial stage, it is necessary to disconnect all power plugs (this applies to high and low beam lamps, as well as the hydraulic corrector).
Three fastening bolts are unscrewed from the outside. This is done using a Phillips screwdriver. In the process of performing this operation, you should not encounter any difficulties. However, you may have some problems when unscrewing the third bolt. The fact is that it is fixed with a nut. It must be held from the inside. For this we need a key for 8. Once all these steps are completed, the headlight can be easily removed from its seat. To do this, you need to pull it by hand. After you have completed all the necessary operations for tuning the VAZ 2107 headlight, you can mount it back, following the same instructions, but only in reverse order.
To remove the rear light, we need the same tools. First, you need to remove the flashlight casing and disconnect the contacts. Next, using a size 8 wrench, you need to remove the four nuts that secure the lamp. By the way, under the two nuts you will find the ground tips. Once you have completed this operation, you can remove the flashlight. If you want to replace the diffuser, they can be removed easily and without any problems. Installation is carried out in the same way, but only in reverse order.
Kalina
0
For Kalina, Bosch was chosen as the headlight supplier. The headlight glass no longer functions as a lens, which makes it possible to get rid of the characteristic “notches.” Thanks to a competent design and a serious approach to fine-tuning, the Kalina headlight with H7/H1 lamps turned out to be noticeably better than its predecessors in terms of lighting characteristics.
In addition to the plant in Ryazan, Kirzhach also mastered the production of headlights for Kalina with the direct participation of the Czech company NAT (Nellaautotehnika). In addition, the lenses on headlights from Kirzhach began to be made of plastic, which made it possible to reduce the weight of each headlight by about 1 kg. However, compared to glass, this material is less durable due to the abrasive effect during operation. Another useful innovation is an electric light beam tilt corrector instead of the traditional hydraulic one. The electric corrector is much more reliable and durable than the hydraulic corrector, and there is no need to install fragile hydraulic pipes under the hood.
Tuning headlights VAZ 2107
So, the headlights and lanterns have been removed. What's next? How to tune the headlights and taillights of a VAZ 2107? The easiest way is to replace standard lamps with LED ones.
At a low cost, you can significantly transform the appearance of your car. What tools and consumables do we need for this:
- LED bulbs;
- resistors;
- box or panel for installing LEDs;
- drill (the drill must match the diameter of the LEDs);
- wires for connecting LEDs to the battery;
- glue sealant.
At the initial stage, we adjust the box or panel to the headlight. Then, using a drill, you need to drill holes to fit the size of the LEDs (naturally, their number must completely match the number of lamps that are planned for installation).
You may not be able to achieve high-quality results the first time. So try again. After all, you need to ensure that the number of lamps is optimal and their location is correct. After installing the LEDs on the box, we connect the wires together (pluses separately, minuses separately). It must be remembered that for every three or four lamps a resistor is installed.
Important information! Resistors are selected individually, depending on the characteristics of the lamps. It is necessary to calculate everything correctly, otherwise the service life of the headlights will be short.
Common problems
Other, more common problems that may cause low beam headlight bulbs to not light even after replacement include the following:
- Damaged fuses - contacts are oxidized or the protective element is melted. In the VAZ 2106 they are located under the dashboard.
- The low beam relay has failed. A continuity check of the electrical circuit with a multimeter is required.
- Poor ground contact on the path from the fuse block to the optics module. It is necessary to clean the oxidized joint.
Recommendation! To double the degree of illumination from the low beam in the VAZ 2106, you can connect the third contact in the high beam module - since a lamp with two filaments is also installed there.
After you have assembled the circuit, connect it to the power supply of the headlight or flashlight.
What advantages will headlights and flashlights with LED lamps have? First of all, the load on the network of the entire vehicle is reduced. This is achieved at the expense of reduced power. Secondly, as a result of such tuning of VAZ 2107 headlights, you will receive an even and diffused light, thereby increasing the efficiency of the headlights. At the same time, while driving, you will not blind drivers of vehicles on the road.
Finally, such headlights will be more durable and allow you to create a unique look for your car. As we noted above, if you have an unlimited budget, you don’t have to do tuning the VAZ 2107 headlights yourself. In various online stores you can always find a lot of interesting options that you can replace your standard optics with. In addition to headlights and lanterns, LEDs can also be installed in direction indicators, as well as fog lights. In this case, you carry out the same work on dismantling, preparing the LED block, connecting and installing. Why LEDs? The fact is that today they are used everywhere, not only in the automotive industry, but also in everyday life. Their distinctive feature is a high degree of reliability and long service life. With their help, you can easily tune VAZ 2107 headlights yourself. Moreover, you will not incur significant material costs.
If the option with LEDs does not suit you, you can install xenon headlights. What benefits will you get in this case? Firstly, more powerful light (unlike LEDs and halogen lamps). Xenon was widely used in headlights a few years ago. But its downside was that it created certain problems for drivers coming towards you. With the advent of LED technology, xenon began to be abandoned.
In addition to tuning the exterior, using LEDs you can also change the lighting and backlighting of devices in the cabin. All this can be done with your own hands without any difficulty. But if you are not ready to pick up a wrench and a screwdriver, you can contact specialized workshops. Specialists will develop for you an individual project for tuning VAZ 2107 headlights.
Samara/Samara-2
0
The “eight” headlight featured an interesting solution - a turn signal in a separate housing. Like on the “five,” the headlights could optionally be equipped with a brush cleaner, but they were practically never found on cars for the domestic market.
0
During the renovation of Samara, a new headlight was required that would fit into the modified front end design. Due to the low height of the headlights, the designers had to use a plastic homofocal reflector with an H4 lamp, and the representatives (formerly “Red October”) wanted to use thermoplastic for the reflector, but the problem of heat resistance and compliance of light characteristics with “GOST” standards was solved only by using thermorectoplast type DMC , as VAZ designers originally proposed. However, it is precisely because of the “cheap” solution with a small plastic reflector with a traditional glass diffuser that the Samara-2 headlight, compared to the optics of other models, has low lighting characteristics - in other words, it shines worse than ever. Alas, with such small dimensions of the reflector it was necessary to switch to a new type of optics - a lens. Plant specialists during the fine-tuning of Samara-2 optics.
0
Headlights for Samara-2 were produced by two factories - in Kirzhach and in Ryazan (the so-called “Boshevskie”). They differed slightly in design, and products from Ryazan can be recognized by the shiny body of the headlight near the lens. On the left is a headlight from the Automotive Lighting plant (Ryazan), on the right is Avtosvet (Kirzhach).
Video tuning of VAZ 2107 optics
Domestic cars that were produced several decades ago are unlikely to be able to impress with their exterior. Of course, foreign cars are in a better condition in this regard.
However, recently a trend has become noticeable when some car enthusiasts deliberately purchase domestic cars from previous years. It is quite simple to explain such actions.
It’s easier to buy a car at a low cost, “forgiving” its unsightly appearance. But later, you can apply your extraordinary skills and maximum efforts and get not just a luxurious, but certainly an original and unique “horse”, which definitely has no analogue on the road.
Tuning can help in modifying the car, which can be carried out by highly qualified specialists, as well as car enthusiasts on their own if they have the desire and familiarize themselves with some practical recommendations.
Improving the head optics of the “seven”
If you are the owner of a “Seven”, which is no different from many other similar analogues, you can take some steps to transform its exterior, make the car bright and different from a conveyor “product”.
Tuning the body, external and internal lighting, and body kits will help you improve your VAZ-2107 with your own hands. If you do not yet have practical experience in improving the appearance of a car, it is best to start by tuning the VAZ-2107 headlights yourself, since such actions will be accompanied by fewer problems and difficulties.
In addition, on the Internet you can find a lot of wonderful offers that act as tips on how to tune the rear lights of a VAZ-2107.
In particular, experienced craftsmen suggest that tuning VAZ-2107 headlights can be done using:
- use of LEDs;
- application of tinting.
Each of these methods deserves attention, so the owner of the “Seven” should familiarize himself with them, and then decide what is most acceptable for him, which will allow him to get cool tuned headlights on the VAZ-2107.
Uses of LEDs
The cheapest tuning of VAZ-2107 rear lights with your own hands involves the use of LEDs. In the same way, using LED lamps, you can beautifully decorate the headlights of a VAZ-2107. Tuning using LEDs encourages every car enthusiast to prepare in advance for the upcoming process, stocking up on all the necessary materials, which include:
- the LEDs themselves;
- resistors;
- wires;
- sealant.
Of course, in order to tune the VAZ-2107 headlights, you need to prepare a suitable tool, at least you will need an electric drill and a drill of the required diameter to create a socket for installing an LED into it.
Refinement of the rear lights of the VAZ-2107 begins with the creation of a seat, the size of which is very important to determine correctly, based on the fact that they will subsequently be implemented in the front and rear lights on the VAZ-2107. Tuning will look great if all actions are performed as accurately and accurately as possible.
So, after you have managed to create a suitable seat, use an electric drill to drill holes in it, the number of which should match the number of LED lamps that you wish to install in the headlights of the VAZ-2107.
In the same way, you must independently determine how such LED lamps will be placed, whether they will be lined up in one line or two, whether such lines will be smooth or zigzag, you must decide all this based on personal preferences.
Improving the appearance of your car is purely your personal prerogative; no one has the right to interfere with this process with criticism.
After installing LED lamps in the designated places, you should connect the negative contacts and, accordingly, the positive ones.
Now you need to equip each group of four LEDs with resistors. This completes the first stage of modifying the rear and front headlights, so we should move on to the final stage.
The seat with already filled and connected LED lamps is inserted into the headlights, and then into the rear lights. Of course, some car enthusiasts may want to see their tuned car, in which only the front lights are “decorated” with LEDs, while other owners, on the contrary, want to decorate only the rear stops of the VAZ-2107. Tuning is a creative process, so any of these options is acceptable; it is important that after all the planned actions are completed, it is possible to improve the aesthetics of the car’s appearance.
It should also be noted that a tuning car with LEDs will not only look beautiful, but also LED lighting will allow you to instantly feel some additional benefits.
First of all, you don’t have to worry about frequently replacing such lighting, since LED lamps have a fairly long service life.
In addition, turning on such lighting will be comfortable not only for you, but also for those drivers who are moving towards you, since LED lighting does not dazzle.
However, among all the benefits, the most advantageous is the significant improvement in the appearance of your favorite car.
Headlight tinting
In addition to installing LEDs, there are other ways to guide car owners on how to improve the light and decorate the headlights on a VAZ-21074.
Experienced car owners recommend paying attention to headlight tinting. Most often, the rear lights are tinted, but nevertheless there are also owners who want to maintain the exclusivity of the VAZ-2107 front lights. Tuning, which involves tinting, can be carried out using tinting varnish or film.
Tinting varnish is sold in retail chains in aerosol cans. Before purchasing, read the instructions for its use, make sure that it is suitable not for decorating, for example, a grille, but for tinting the lights.
Before tinting, the surface of the lamps is prepared for upcoming manipulations. Initially they are washed and dried.
To ensure maximum accuracy, masking tape is applied along the contour, thereby preventing the varnish from getting outside the headlights.
Next, degrease the surface and immediately spray the varnish, holding the can at a distance of about thirty centimeters.
It may happen that one tinting layer is not enough for you, then it is recommended to pause, allowing this layer to dry, after which you can apply a second layer.
It is very important to ensure that when applying varnish you do not cause drips.
After the last layer of tinting has completely dried, polish the surface, only after this the process can be considered complete.
If you ever have an urgent need to get rid of that tint, all you need is acetone. By wiping the headlight with a rag coated with acetone, you can easily remove the tint.
Step-by-step instruction
To replace a burnt-out lamp in the low-beam optics on a VAZ model 2106, you will need screwdrivers (flat-head and cross-head) and pliers. The repair procedure itself consists of the following steps:
- Disconnect the vehicle's on-board power supply and, if possible, disconnect the wiring from the battery terminals.
- Use a flat-head screwdriver to remove the trim panel on the outside of the headlights.
- Use a Phillips screwdriver to unscrew the bolts (not completely) securing the rims of the glass cups.
- The headlight is grabbed by hand and turned until the fastening screws fit into the grooves and it can be removed.
- The optics unit is removed from its seat.
- The block with conductors is disconnected from the back.
- Next, the headlight is installed with glass on a flat surface, and a pair of spring-clamps are bent to remove the lamp.
- The burnt-out light source can then be removed from the unit by pulling it up.
- Replace with a new copy.
- Reassemble in reverse order.
- Connect the car's power supply and check that the installed low beam lamp is working properly.
When replacing a low beam lamp on a VAZ 2106 model, do not touch its glass bulb with dirty gloves or bare hands. Fingerprints left on its surface will lead to uneven internal processes, which will quickly lead to its re-burnout.
Tuning VAZ 2107
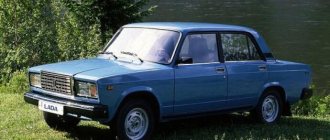
VAZ cars, produced several decades ago, can no longer attract anyone with their technical characteristics and appearance. In this regard, new AvtoVAZ models and foreign cars leave the legends of the domestic automotive industry far behind.
However, the owners of Soviet Zhiguli cars do not intend to give up. In recent years, there has been a certain trend in tuning VAZs - and the owners do not skimp on spending on modernizing and improving the exterior of their cars.
Ultimately, even the VAZ 2107, which, by modern standards, has the most ordinary appearance, can turn into a very stylish car.
Specifics of tuning the “seven”
Tuning this car involves various procedures aimed at improving the standard equipment. At the same time, attention is paid to both changing the appearance of the machine and its technical characteristics. Typically, VAZ 2107 tuning is carried out in several directions:
- motor;
- body;
- transmission;
- salon;
- lighting devices.
Any of these areas has many different options for improving standard characteristics. Often, in order to give the car an unusual appearance and at the same time save on tuning, owners modify the headlights. A relatively simple procedure turns the unattractive VAZ into a masterpiece of modern automotive engineering.
How to do headlight tuning
Tuning lighting devices is the easiest way to give the “Seven” an exclusive appearance. It is with headlights that inexperienced car enthusiasts begin to work, since almost anyone can change the current parameters without compromising traffic safety.
Today, tuning head optics and rear lighting devices has many different options. Sometimes you don’t even need to invent anything: online stores sell different configurations of headlights that can be installed on domestic cars.
Front lights
The front part of the car usually attracts more attention, so amateurs begin to tune primarily the headlights.
It must be said that modified headlights really greatly change the appearance of the car and give it a unique character - depending on what kind of tuning is intended.
Evil headlights
It’s very easy to give your car a menacing, gloomy and even evil look: just perform tuning like “evil headlights”. This is one of the easiest ways to give the “seven” an unusual appearance.
Depending on the owner’s capabilities, tuning can be done using a variety of materials:
- thin plywood;
- sheet metal;
- tinting film;
- paints.
The essence of this tuning is as follows: cover part of the headlight so that the remaining uncovered headlight resembles evil eyes. If any materials from plywood or metal are selected, then a blank is cut out in advance and glued into the cavity of the headlight. Using film or paint is even easier - just remove the headlight and apply darkening on the inside.
You can adjust the “anger” of the flashlight yourself - just increase the angle of the darkening part.
Angel eyes
In tuning, angel eyes are the luminous rings on the “face” of a car - like a BMW. Today everyone can afford this lighting option - it’s inexpensive and fast. In addition, the body of the VAZ 2107 will somewhat resemble an expensive BMW and thereby increase the status of the owner.
There are several technical solutions for making angel eyes with your own hands. The easiest option is to use LEDs. To work you will need:
- white LEDs 5 mm - 2 pcs.;
- 0.25 W resistor;
- wiring;
- transparent rod made of organic glass or plastic (diameter 8–10 mm);
- auxiliary materials (soldering iron, hair dryer, drill and glass jar).
The work is quite painstaking:
- Take the rod and clamp it in a vice.
- Using a drill, drill holes for the LEDs at both ends of the rod.
- Give the rod the shape of a ring - bend it around the jar and heat it with a hairdryer so that the workpiece remains in this shape.
- Solder wires to the LEDs, connect a resistor to one of the wires.
- Assemble an electrical circuit similar to the circuit of lighting devices that is already available on the “seven”.
- Insert the LEDs into the holes of the workpiece and glue them with superglue.
Video: how to make angel eyes
You can buy ready-made angel eyes at a car store - this will make it much easier to connect new lighting fixtures to the standard equipment of the car.
Work order
Some headlight repair operations should be performed indoors to avoid water and debris getting into the bonding area. In general, replacing a damaged element includes the following steps:
- Disconnecting the unit from the on-board network of the VAZ 2107 by uncoupling the connectors of the turn signal and the headlight lamp.
- Removing the body from the body opening using a Phillips screwdriver.
- Removing shards of broken glass, in this part of the operation you should be careful not to cut yourself.
- From the junction of the parts, it is necessary to remove the remaining adhesive mass using a flat screwdriver.
- The next step is to clean the unit and degrease it with a solvent.
- Using a dispenser syringe, apply a small amount of glue along the contour evenly without gaps or breaks.
- We place the transparent element in its intended place, press it and fix it using disposable devices or tape.
This is interesting: How to check glow plugs without removing
As the glue dries, the headlight element of the VAZ 2107 is installed in place; it is recommended to change both parts at the same time; during operation they tend to become cloudy and this will become noticeable even with a cursory inspection. The new transparent glass on the headlight of a VAZ 2107 car, which was replaced on our own, is pleasing to the eye. At night, better road lighting is provided.
Side lights VAZ 2107
The standard dimensions on the VAZ 2107 do not have bright light. Over the years, due to the wear and tear of the glass, even replacing the light bulbs in the headlights no longer helps. Therefore, it is quite logical that the car owner decides to tune the side lights.
On a VAZ 2107, tuning the dimensions comes down to transferring these lights from the sidelights to a separate lighting element on the body. This way they will be better visible, which will create comfortable and safe conditions for movement on the roads in any weather.
Minor modifications will be required using the following tools:
- electric drill;
- mandrel;
- pliers or pliers;
- Phillips-blade screwdriver;
- side cutters.
Transferring the side lights from the sidelights to the body is impossible without the following materials:
- light bulb socket;
- new sidelights;
- wires for connection;
- terminals;
- new light bulbs (drivers recommend Philips Vision 12 V).
Transfer process
Any tuning requires accuracy and care. And carrying side lights is no exception. Here it is recommended to follow the rule “measure twice, cut once”:
- Measure the diameter of the hole in the car headlight.
- Drill a hole of the same diameter on the new lamp.
- Drilling should be done with drills of different diameters, gradually increasing the diameter so as not to damage the headlight glass.
- Prepare a landing site for the socket with a light bulb (try it on, if the socket does not fit, increase the drilling depth).
2103/2106
0
The four-headlight headlight system, which appeared on the VAZ-2103 (and then inherited the VAZ-2106), was not easy for the plant, since it required high precision in observing the geometric parameters of the reflector and lens.
0
The city of Kirzhach, Vladimir Region, was not very ready for this, so the whole world had to master the new optics. Thus, the assembled optical element was purchased from) in the GDR, and in Kirzhach only the so-called “pot” was made, that is, the body itself. Then the already mentioned Czech company from the city of N. Jicin began producing such headlights. Above are optics from the German company FER. Below is a Czech PAL headlight.
Completely domestic headlights of type 2103 began to be supplied to VAZ only in 1976 - apparently, this coincided with the start of production of model 2106, which used exactly these optics, for a reason.
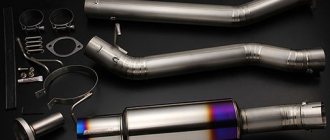
Fog lights
Fog lights are a lifesaver when visibility is poor. However, over the years they begin to fade, which creates unsafe driving conditions. The easiest option is to install xenon in the fog lights or mount 2 more fog lights side by side. But such methods are not legal, so it’s not worth the risk.
The most common option for tuning fog lights is to replace them with higher-quality lighting devices, most often round in shape or from foreign cars. To work you will need:
- frame with mechanism from standard VAZ 2107 fog lights;
- new fog lights;
- aluminum frame fasteners;
- bolts;
- silicone glue;
- primer and paint.
Manufacturing process
This type of tuning assumes that the driver has experience in locksmith work:
- Place the fog light frame on the aluminum base. Trace the outline of the frame.
Without adjusting the position, the new fog lights will blind oncoming drivers.
Video: which fog lights are better for the VAZ 2107
Tail lights
Of course, the exterior of any car begins primarily with the frontal part. However, if you are tuning lighting fixtures on a VAZ 2107, then you must not forget about the rear of the car.
American lights - tuning
The principle of operation of American headlights comes down to the following: this is a type of tuning that, when using the existing equipment on the car, allows you to perform a different connection scheme. So, the operation diagram of American headlights on a VAZ 2107 will look like this:
- When the lights are turned on, both turn signals come on.
- If one turn signal turns on, it begins to blink, and the second one begins to shine with a uniform light.
- When the turn signal is turned off, both light up again.
- When the emergency button is turned on, the turn signals blink in time with the emergency lighting system.
That is, the main decoration of the car in this tuning option is the non-standard operation of lighting devices.
How to make American headlights on a G7
In order for the headlights on the VAZ 2107 to start working “American style”, you will need to prepare the following materials and tools:
- two capacitors of 4700 uF and 25 volts;
- two diodes marked IN5819;
- two five-pin relays;
- two relay connectors;
- terminals for connections;
- soldering iron
Connect existing standard equipment according to the diagram.
Video: 3 ways to make American cars on a VAZ
LED light bulbs
LED lights are inexpensive and immediately improve the car's bodywork. And installation of such equipment is not considered labor-intensive. The cheapest tuning of VAZ 2107 rear lights today is the use of LEDs.
To work you will need to purchase in advance:
- LED lights themselves;
- resistors;
- wiring;
- sealant.
You will definitely need an electric drill and a drill bit to create a socket for installing the LED.
Progress
During the work process, you will need to carefully calculate each subsequent step, since the slightest error in size will be noticeable: the location of each LED must be adjusted to the nearest millimeter.
- On the surface of the rear headlights, make markings for the placement of LEDs (in one line, in two, around the perimeter, etc.).
- Holes must be drilled in the headlights to accommodate the required number of LEDs.
- Place LEDs in the holes.
- According to the connection diagram, connect the negative and positive terminals to each other.
- Next, combine the nearby LEDs into groups of four with resistors. That is, every four LEDs will need to be connected to one resistor.
- Connect the resistors to the standard wiring of the VAZ 2107 lighting equipment.
Video: DIY LED taillights
Some car enthusiasts do not drill headlights, but separate transparent polycarbonate plates and insert them into the headlight housing. In this way, they manage to avoid mistakes, since in case of calculation errors they can always take another plate and drill the holes again.
The LED taillights have an attractive appearance. In addition, their service life is measured in years (depending on the manufacturer), so you don’t have to think about frequently replacing light bulbs.
Toning
Tinting the rear (and sometimes even the front) lights on the “Seven” is another affordable method of do-it-yourself tuning. The work does not take much time at all, and the external effect of the modifications will make everyone look after your car.
Tinting tuning involves the use of any materials: from varnish to film. For example, glass-tinting varnish can be bought at any auto store in the form of an aerosol in a can. It is important to read all the manufacturer’s instructions in advance, since different companies have different approaches to safety requirements when working with a spray can. Film is not considered a scarce material, but the cheapest way is to order it through online sites.
Varnish application procedure
It is necessary to work with any tinting materials in a dry and warm room. In summer, work outside is allowed, but in winter it is better to drive the car into the garage.
- Thoroughly wash the surfaces of the rear headlights and dry them.
- Cover the outline of the headlights with masking tape to prevent the material from being applied to the body parts.
- The varnish is sprayed on the surface of the headlights from a distance of about 30 centimeters (according to the manufacturer's instructions).
- After applying the first tinting layer, it is recommended to wait for the varnish to dry. Typically, one coat will have little darkening effect, so a second coat of tint may be necessary.
- Any varnish drips must be removed immediately.
- The hardened varnish on the headlights must be polished - this way all defects are eliminated and the surface acquires a mirror shine.
If necessary, varnish tinting from headlights can be easily removed with acetone.
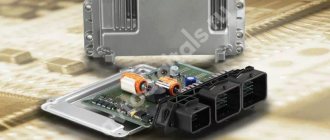
Electrical diagram
The wiring diagram for VAZ 2106 headlights includes:
- Actually the headlights.
- Circuit breakers.
- Indicator of high beam headlights on the speedometer.
- Low beam relay.
- Mode switch.
- High beam relay.
- Generator.
- External lighting switch.
- Battery.
- Ignition.
The wiring diagram for connecting VAZ 2106 headlights is simple in design and reliable in operation.
Understeering's shifter
The driver can turn on the low and high beam headlights using the steering column switch. In this case, it is necessary that the external lighting switch button is pressed. However, even if this button is not pressed, the driver can briefly turn on the high beam (for example, to give a light signal) by pulling the steering column switch lever towards him: this is possible due to the fact that the steering column light signal contact is powered directly from the ignition switch.
The steering column switch itself (which is also called the tube) on the “six” is three-lever (high, low beam and dimensions) and is attached with a clamp to the steering shaft bracket. If repair or replacement of the tube is required, then, as a rule, it is necessary to disassemble the steering column, and the most typical malfunctions of the steering column switch are failure of its contacts (as a result of which, for example, the high or low beam does not work) or mechanical damage to the tube itself.
The steering column switch on the “six” is a three-lever switch (high beam, low beam and dimensions) and is attached with a clamp to the steering shaft bracket
Headlight relay
The VAZ 2106 car initially used headlight relays of the RS-527 type, which were later replaced by relays 113.3747–10. Both relays are located in the power unit compartment on the mudguard on the right in the direction of travel of the vehicle. In terms of their technical characteristics, the low and high beam relays are identical:
- response voltage - 8 V (at 20–30 °C);
- gap between contacts - 2 mm;
- winding resistance - 85 Ohm (at 20 °C).
In normal condition, the headlight relay contacts are open: a closure occurs when the low or high beam is turned on using the steering column switch. Repairing relays when they fail is most often impractical: due to their low cost, it is easier to replace them with new ones.
Automatic headlight switching
The relevance of turning on headlights in automatic mode is due to the fact that many drivers forget to turn on low beams during the daytime (as required by traffic regulations) and as a result receive fines. In Russia, such a requirement appeared for the first time in 2005 and initially applied only to traffic outside populated areas. Since 2010, all drivers have been required to turn on low beams or side lights when driving: this measure is designed to improve road safety.
Those drivers who do not trust their own memory perform a simple modification of the VAZ 2106 electrical circuit, as a result of which the car’s low beam turns on automatically. Such an upgrade can be carried out in different ways, and most often the point of the upgrade is to ensure that the low beam turns on after the engine is started. This can be achieved, for example, by including a low beam relay in the generator circuit: this will require two additional relays, thanks to which it will be possible to control the headlights when the engine is on.
In order not to strain my memory and not to forget to turn on the neighbor, I installed a machine for myself)) This “device” looks like this. Operating principle: Started the engine - the low one turned on, turned it off - went out. I raised the handbrake with the engine running and the headlights went out; I released it and they came on. Disabling the low beam when the handbrake is raised is convenient during autostart. That is, turning off the lights using the handbrake has been removed and a power switch has been added, respectively, one relay has been removed. The low beam switches on after starting the engine and switches off when the ignition is turned off. The high beam is turned on by the standard steering column switch, but when it is turned on, the low beam does not go out, so the high beam shines into the distance, and the low beam additionally illuminates the space in front of the car.
Those drivers who do not trust their own memory perform a simple modification of the VAZ 2106 electrical circuit, as a result of which the car’s low beam turns on automatically
There are other options for automatically turning on the headlights, for example, through an oil pressure sensor, and any car enthusiast can choose the most suitable method for themselves.