Tuning VAZ 2107
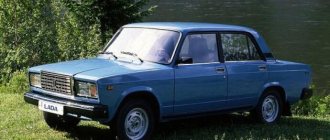
VAZ cars, produced several decades ago, can no longer attract anyone with their technical characteristics and appearance. In this regard, new AvtoVAZ models and foreign cars leave the legends of the domestic automotive industry far behind.
However, the owners of Soviet Zhiguli cars do not intend to give up. In recent years, there has been a certain trend in tuning VAZs - and the owners do not skimp on spending on modernizing and improving the exterior of their cars.
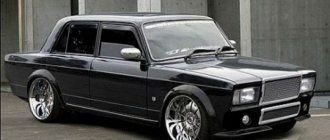
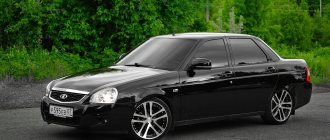
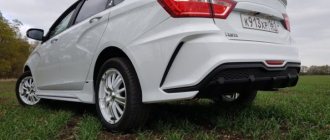
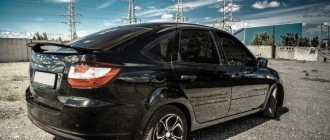
Ultimately, even the VAZ 2107, which, by modern standards, has the most ordinary appearance, can turn into a very stylish car.
Thanks to the replacement of bumpers, improvements to standard lighting and the use of two shades of body color, the VAZ 2107 acquired a unique appearance
More information about tuning the VAZ-2107: https://bumper.guru/klassicheskie-modeli-vaz/tyuning/tyuning-salona-vaz-2107.html
Specifics of tuning the “seven”
Tuning this car involves various procedures aimed at improving the standard equipment. At the same time, attention is paid to both changing the appearance of the machine and its technical characteristics. Typically, VAZ 2107 tuning is carried out in several directions:
- motor;
- body;
- transmission;
- salon;
- lighting devices.
Any of these areas has many different options for improving standard characteristics. Often, in order to give the car an unusual appearance and at the same time save on tuning, owners modify the headlights. A relatively simple procedure turns the unattractive VAZ into a masterpiece of modern automotive engineering.
Of all the tuning options for the “Seven”, modifying the headlights and rear lights is the fastest and most cost-effective way to transform the car.
Installation of xenon headlights
The disadvantage of xenon is a strong stream of light rays directed at the oncoming driver. As a result of blinding, an accident may occur. Therefore, the installation of these lamps in the headlights is prohibited by traffic regulations. Xenon lamps have better characteristics than halogen and LED lamps.
Original xenon designs have a high price. They come with a special unit that regulates the angle and flow of light waves, cleans the surface of dust and dirt, otherwise the lamp will simply burst due to overheating.
Car repair specialists do not recommend buying non-original xenon designs. They can be unreliable and dangerous.
How to do headlight tuning
Tuning lighting devices is the easiest way to give the “Seven” an exclusive appearance. It is with headlights that inexperienced car enthusiasts begin to work, since almost anyone can change the current parameters without compromising traffic safety.
Today, tuning head optics and rear lighting devices has many different options. Sometimes you don’t even need to invent anything: online stores sell different configurations of headlights that can be installed on domestic cars.
DIY angel eyes for VAZ 2106
08.03.2016
Having a car today will no longer surprise anyone. Of course, everyone would like to own an expensive and beautiful vehicle, but not everyone, alas, has such an opportunity. This is precisely why the products of the domestic automobile industry are still popular among car enthusiasts.
As they say, it may be ugly, but it’s inexpensive and unique. In addition, our car owners do not despair and are constantly coming up with something new in order to somehow improve the appearance of their iron horses.
Do-it-yourself angel eyes for a VAZ 2106 is one of the most popular options, and all because such tuning is affordable for every owner of the beloved “six”.
First of all, you will need plastic transparent sticks (rods from blinds will do just fine). The only thing is that these sticks should not be faceted or hollow.
Front lights
The front part of the car usually attracts more attention, so amateurs begin to tune primarily the headlights.
It must be said that modified headlights really greatly change the appearance of the car and give it a unique character - depending on what kind of tuning is intended.
Evil headlights
It’s very easy to give your car a menacing, gloomy and even evil look: just perform tuning like “evil headlights”. This is one of the easiest ways to give the “seven” an unusual appearance.
Depending on the owner’s capabilities, tuning can be done using a variety of materials:
- thin plywood;
- sheet metal;
- tinting film;
- paints.
The car's "angry" squint gives you goosebumps
The essence of this tuning is as follows: cover part of the headlight so that the remaining uncovered headlight resembles evil eyes. If any materials from plywood or metal are selected, then a blank is cut out in advance and glued into the cavity of the headlight. Using film or paint is even easier - just remove the headlight and apply darkening on the inside.
You can adjust the “anger” of the flashlight yourself - just increase the angle of the darkening part.
Tuning headlights from plywood painted black
Angel eyes
In tuning, angel eyes are the luminous rings on the “face” of a car - like a BMW. Today everyone can afford this lighting option - it’s inexpensive and fast. In addition, the body of the VAZ 2107 will somewhat resemble an expensive BMW and thereby increase the status of the owner.
Headlights that are very unusual for the “Seven”
There are several technical solutions for making angel eyes with your own hands. The easiest option is to use LEDs. To work you will need:
- white LEDs 5 mm - 2 pcs.;
- 0.25 W resistor;
- wiring;
- transparent rod made of organic glass or plastic (diameter 8–10 mm);
- auxiliary materials (soldering iron, hair dryer, drill and glass jar).
The work is quite painstaking:
- Take the rod and clamp it in a vice.
- Using a drill, drill holes for the LEDs at both ends of the rod.
- Give the rod the shape of a ring - bend it around the jar and heat it with a hairdryer so that the workpiece remains in this shape.
- Solder wires to the LEDs, connect a resistor to one of the wires.
- Assemble an electrical circuit similar to the circuit of lighting devices that is already available on the “seven”.
- Insert the LEDs into the holes of the workpiece and glue them with superglue.
Video: how to make angel eyes
You can buy ready-made angel eyes at a car store - this will make it much easier to connect new lighting fixtures to the standard equipment of the car.
Using LEDs of different shades, you can achieve an even more impressive effect.
Replacing headlight bulbs
No tools are required to replace burnt out lamps. Removal and installation of lamps is done manually. To do this, you need to open the headlight cover by turning it 10 degrees to the left. To prevent a short circuit, the ground wire should be disconnected from the battery before replacing lamps. The procedure for replacing a low/high beam lamp is as follows:
- disconnect the terminal block;
- unscrew the plastic boot;
- release the locking spring;
- get an old lamp;
- snap the spring;
- connect the terminal.
Important: when replacing halogen or xenon lamps, do not allow the lamp shell to come into contact with your fingers.
Grease marks on the glass will shorten the life of the lamp. The lamps responsible for the side lights and turn signals/hazard warning lights are changed in the same way as the headlight lamps. The only difference is that they do not have a fixation spring and are not afraid of finger touches.
Side lights VAZ 2107
The standard dimensions on the VAZ 2107 do not have bright light. Over the years, due to the wear and tear of the glass, even replacing the light bulbs in the headlights no longer helps. Therefore, it is quite logical that the car owner decides to tune the side lights.
On a VAZ 2107, tuning the dimensions comes down to transferring these lights from the sidelights to a separate lighting element on the body. This way they will be better visible, which will create comfortable and safe conditions for movement on the roads in any weather.
On old VAZs, tuning the side lights is considered a mandatory procedure.
Minor modifications will be required using the following tools:
- electric drill;
- mandrel;
- pliers or pliers;
- Phillips-blade screwdriver;
- side cutters.
Transferring the side lights from the sidelights to the body is impossible without the following materials:
- light bulb socket;
- new sidelights;
- wires for connection;
- terminals;
- new light bulbs (drivers recommend Philips Vision 12 V).
Transfer process
Any tuning requires accuracy and care. And carrying side lights is no exception. Here it is recommended to follow the rule “measure twice, cut once”:
- Measure the diameter of the hole in the car headlight.
- Drill a hole of the same diameter on the new lamp.
- Drilling should be done with drills of different diameters, gradually increasing the diameter so as not to damage the headlight glass.
- Prepare a landing site for the socket with a light bulb (try it on, if the socket does not fit, increase the drilling depth).
No wires or internal components should protrude from under the headlight. - Squeeze the cartridge and insert it into the socket. Using a mandrel, straighten it and fix it securely.
- Insert the light bulb into the socket.
- Connect the wiring to the new lamp and connect the lighting device according to the diagram.
Terminals with wires have different color codes for convenience.
After such tuning, the side lights will shine as brightly as possible without blinding oncoming drivers.
INSTALLATION OF LIGHTING DEVICES
Installing components on a VAZ 2107 car will not cause any particular difficulties.
The procedure is as follows: Open the trunk, use a screwdriver to remove the lamp cover that closes it from the inside. Use a wrench to unscrew the fastening nuts and unplug the electrical connector. Carefully remove the flashlight unit from its seat and clean it of dirt with a rag. We install new taillights instead of the old ones and secure them, after inserting a sealing gasket.
Upon completion of the installation of the lights, we connect them and check their functionality in all modes. The installation of new lighting devices on a VAZ 2107 car that complies with regulatory documents does not require registration.
Tail lights
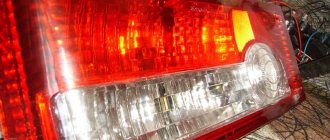
Of course, the exterior of any car begins primarily with the frontal part. However, if you are tuning lighting fixtures on a VAZ 2107, then you must not forget about the rear of the car.
Rear lighting devices are made in rectangular headlights
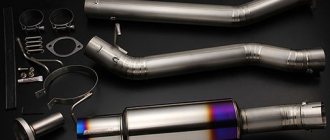
American lights - tuning
The principle of operation of American headlights comes down to the following: this is a type of tuning that, when using the existing equipment on the car, allows you to perform a different connection scheme. So, the operation diagram of American headlights on a VAZ 2107 will look like this:
- When the lights are turned on, both turn signals come on.
- If one turn signal turns on, it begins to blink, and the second one begins to shine with a uniform light.
- When the turn signal is turned off, both light up again.
- When the emergency button is turned on, the turn signals blink in time with the emergency lighting system.
According to this diagram, you can connect standard lighting devices and make American headlights
That is, the main decoration of the car in this tuning option is the non-standard operation of lighting devices.
Find out more about the rules for using the rear lights of the VAZ-2107: https://bumper.guru/klassicheskie-modeli-vaz/elektrooborudovanie/zadnie-fonari-vaz-2107.html
How to make American headlights on a G7
In order for the headlights on the VAZ 2107 to start working “American style”, you will need to prepare the following materials and tools:
- two capacitors of 4700 uF and 25 volts;
- two diodes marked IN5819;
- two five-pin relays;
- two relay connectors;
- terminals for connections;
- soldering iron
Connect existing standard equipment according to the diagram.
Video: 3 ways to make American cars on a VAZ
LED light bulbs
LED lights are inexpensive and immediately improve the car's bodywork. And installation of such equipment is not considered labor-intensive. The cheapest tuning of VAZ 2107 rear lights today is the use of LEDs.
To work you will need to purchase in advance:
- LED lights themselves;
- resistors;
- wiring;
- sealant.
You will definitely need an electric drill and a drill bit to create a socket for installing the LED.
Using different colors of diodes, you can get a headlight of a wide variety of colors
Progress
During the work process, you will need to carefully calculate each subsequent step, since the slightest error in size will be noticeable: the location of each LED must be adjusted to the nearest millimeter.
- On the surface of the rear headlights, make markings for the placement of LEDs (in one line, in two, around the perimeter, etc.).
- Holes must be drilled in the headlights to accommodate the required number of LEDs.
- Place LEDs in the holes.
- According to the connection diagram, connect the negative and positive terminals to each other.
- Next, combine the nearby LEDs into groups of four with resistors. That is, every four LEDs will need to be connected to one resistor.
- Connect the resistors to the standard wiring of the VAZ 2107 lighting equipment.
Video: DIY LED taillights
Some car enthusiasts do not drill headlights, but separate transparent polycarbonate plates and insert them into the headlight housing. In this way, they manage to avoid mistakes, since in case of calculation errors they can always take another plate and drill the holes again.
The LED taillights have an attractive appearance. In addition, their service life is measured in years (depending on the manufacturer), so you don’t have to think about frequently replacing light bulbs.
The shape of the LEDs is limited only by the driver's imagination
Toning
Tinting the rear (and sometimes even the front) lights on the “Seven” is another affordable method of do-it-yourself tuning. The work does not take much time at all, and the external effect of the modifications will make everyone look after your car.
Tinting tuning involves the use of any materials: from varnish to film. For example, glass-tinting varnish can be bought at any auto store in the form of an aerosol in a can. It is important to read all the manufacturer’s instructions in advance, since different companies have different approaches to safety requirements when working with a spray can. Film is not considered a scarce material, but the cheapest way is to order it through online sites.
Headlight tinting is equally suitable for both dark and light cars
Varnish application procedure
It is necessary to work with any tinting materials in a dry and warm room. In summer, work outside is allowed, but in winter it is better to drive the car into the garage.
- Thoroughly wash the surfaces of the rear headlights and dry them.
- Cover the outline of the headlights with masking tape to prevent the material from being applied to the body parts.
- The varnish is sprayed on the surface of the headlights from a distance of about 30 centimeters (according to the manufacturer's instructions).
- After applying the first tinting layer, it is recommended to wait for the varnish to dry. Typically, one coat will have little darkening effect, so a second coat of tint may be necessary.
- Any varnish drips must be removed immediately.
- The hardened varnish on the headlights must be polished - this way all defects are eliminated and the surface acquires a mirror shine.
If necessary, varnish tinting from headlights can be easily removed with acetone.
To achieve the greatest effect, it is recommended to varnish the lantern in 2–3 layers
Film application procedure
Gluing the film on the surface of the rear headlights of the VAZ 2107 also does not involve any difficulties:
- The surfaces of lighting devices must be washed and wiped dry.
- Next, cut out the required size from the film according to the dimensions of each headlight. Leave a centimeter of film on each edge.
- Spray the surface of the lanterns with a solution of water and soap, and remove the protective layer from the film.
- Immediately apply the material to the lantern and smooth out the film.
- After fixing, use scissors to trim off the extra centimeters of film on the device.
It is recommended to choose shades that are not the darkest, as there may be problems with traffic police inspectors.
The tinting film may not be applied to the entire surface of the headlight.
Thus, tuning the headlights on a VAZ 2107 can be easily done with your own hands. It is important not to use xenon and double-row placement of identical lighting devices, as this is prohibited by law and traffic regulations.
Brake lights do not work on VAZ 2105, 2107 cars
The reasons for brake lights not working on VAZ 2105, 2107 cars can be either a banal bulb burnout or a short circuit in the wiring. Let's look at the most common faults that lead to their failure, as well as how to consistently identify the cause.
The bulb in the rear light socket has burned out
One or two light bulbs can burn out at once. Moreover, visually they may look like workers. We replace the faulty lamp with a known good one and see if it lights up or doesn’t light up. The P21W bulb can be taken from the reversing light or from the turn signal in the same rear light. We replace faulty light bulbs with new ones.
The contacts in the rear brake light sockets have oxidized
Turn the light bulb in the socket several times to remove the oxidized layer. A more radical repair would be to sand the contacts in the cartridge with sandpaper.
The contacts in the rear light wire blocks have oxidized
We remove the block and clean the contacts in it and the contacts on the rear light board. The red wire is responsible for supplying current to the brake lights (to both the right and left lights).
Fuse blown
Brake lights on VAZ 2105, 2107 cars are powered through fuse No. 11 (F11) 10A in the mounting block. In addition, it also has interior lighting. So, if the “stops” and the lamp do not work at the same time, the fuse has definitely blown. Replace the burnt fuse with a new one. Subsequently, it will be necessary to find out the reason for the blown fuse, since there may be a short circuit.
Brake light switch sensor faulty
It is located under the brake pedal. When the driver presses the pedal, the sensor contacts are closed, and current flows to the brake lights and into the rear lights. The electric current comes to the sensor through the red and white wire from the fuse mounting block, and goes to the “stops” along the red wire, also through the mounting block. It is necessary to remove the wires from the sensor, connect them together with a piece of wire, turn on the ignition and see if the brake lights are on. If they suddenly light up, change the sensor-switch.
For a more thorough check, use a test lamp or tester to check for the presence of current in the red-white wire. Suddenly there is a break in it. Current is supplied to it from the 11th fuse in the mounting block.
Burnt out contact tracks on the rear light boards
Visually inspect the rear light boards. If necessary, check the integrity of the tracks using a test lamp or tester. You can solder wires onto a faulty track and thereby restore its functionality.
No "mass"
The negative wires come from the taillight plugs (black wire) and are attached to the body. The fastening of the wires to the body should be checked for oxidation.
The wiring blocks of the mounting block have come off, or their contacts have oxidized
Clean the contacts in the blocks (you can simply remove and reinstall them several times) and make sure they fit securely in the mounting block.
Open or short circuit in wiring
Check the main components of the brake light wiring diagram for short circuits or open circuits using the diagram below
Special attention should be paid to the red wire in the wiring harness to the brake lights. It stretches across the entire car along the right threshold
It may fray or burn out during welding work.
It may fray or burn out during welding.
Electrical connection diagram for brake lights on a VAZ 2105; Electrical connection diagram for brake lights and parking brake on a VAZ 2107 car.
The plus in the brake light connection system comes from terminal “30” of the generator. Minus – black wires in the rear light plugs connected to the body.
Notes and additions
— It should be noted that the brake lights only light up on a vehicle with the ignition on.
How much do light bulbs cost?
The rear lighting fixtures of the VAZ 2106 use the following types of lamps:
- turn signal – A12-21-3 (P21W), power 21 W;
- side light – A12-5 (T5W), power 5 W;
- reverse indicator – A12-21-3 (P21W), power 21 W;
- brake light – A12-21-3 (P21W), power 21 W;
- license plate illumination – A12-5 (T5W), power 5 W;
- rear fog light – A12-21-3 (P21W), power 21 W.
P21W (left) and T5W lamps used in the rear lights of the VAZ 2106
What legal ways are there to improve headlight efficiency?
Replacing lamps
The first thing that comes to mind is replacing the standard light bulbs with lamps with increased luminous efficiency, such as OSRAM Night Breaker Unlimited or Philips X-treme Vision +130 (don’t consider it an advertisement). Yes, according to the manufacturers of these lamps, as well as many motorists who have experienced all the delights of these products, there really is an effect. Moreover, if you buy lamps with a white light spectrum, this will allow you to get less tired while driving and also put less strain on your eyes.
Headlight polishing
Constant temperature changes, sand and stones that fly from under the wheels lead to the fact that after several years of operation, the front optics become not only unpresentable, but also ineffective. The headlights become cloudy not only from the inside, but also from the outside, and the outside is much stronger and more intense. Polishing the exterior of your headlights is an opportunity to restore your headlights to their former attractiveness and efficiency. This work can also be done by each of you, you just need to have the necessary tools and materials. Read how to properly polish headlights here.
If polishing does not give anything or the headlight glasses are very cloudy, there are cracks and other defects, you will have to replace the glass or headlight assembly.
Allowed xenon
Often, automakers produce several configuration options for one model, as well as according to the requirements of a particular country. Therefore, for the same car, the same model and year of manufacture, the manufacturer can install different types of optics. If you wish, you can find original headlights with standard xenon specifically for your car, which are simply installed without any complicated manipulations. However, not everything is so simple; there are some difficulties. Firstly, the cost of the headlights, and secondly, legalization, that is, approval of the changes made to the design with the traffic police. All this, whatever one may say, will entail serious expenses, and besides, not every car has an original xenon alternative.
Read with this
- How do Audi LED matrix headlights work?
- Features of self-adjustment of headlights on a gazelle
- Troubleshooting low beam lamps on the Lada Kalina
- Types of car lamp bases and their markings
- How to repair headlights yourself? Let's look at different ways
- DIY taillight tinting
- How to polish headlights with your own hands? polishing headlights at home
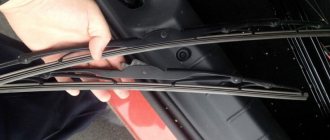
- Where is the wiper relay for VAZ 2107?
- Headlight adjustment
- Clutch drive maintenance technology for Lada 2110
How to adjust fog lights on a VAZ 2110 car
Fog lights (FTL) help to move quite comfortably on dark roads, in conditions of thick fog or heavy rain. In order for fog lights to effectively illuminate the road, they must be adjusted correctly. On a VAZ 2110 car, we make adjustments as follows:
- set the headlight range control to the zero position;
- place the machine on a flat area, at a distance of 5 meters from the wall;
- on the wall we mark a horizontal line that is on the same level as the fog lights on the car;
- using a laser on the wall we mark the center of each headlight;
- since the lifting angle of the PTF should be 2 times less than that of the low beam, the second horizontal stripe is drawn 2-3 cm lower (the tilt angle of the VAZ 2110 headlights is 1.3%!), and not 5 or 6 cm ;
- We carry out the adjustment for each PTF, at this moment closing the second headlight so that its light does not interfere with the adjustment;
- We adjust each headlight first in the center, and then in height.
Just like when setting the low beam, it is important to set the same pressure in the tires; ideally, you can put a person behind the wheel to create the same load as would be when driving a car. In the instructions that come with the headlights of the VAZ 2110, it is recommended to install the PTF at a distance of 30 centimeters from the ground; when adjusting the height of the light 5 meters from the wall, the strip for adjusting the fog lights is at a level of 29 cm
In the instructions that come with the headlights of the VAZ 2110, it is recommended to install the PTF at a distance of 30 centimeters from the ground; when adjusting the height of the light 5 meters from the wall, the strip for adjusting the fog lights runs at 29 cm.
The industry produces fog lights that are installed not only on BA3 2110-2112, but also on Lada Priora. The fog lights of Lada Granta, Kalina-2, Lada Largus, Datsun Mi-Do and On-Do have the same design; the main manufacturers of VAZ optics are AvtoSvet (Kirzhach), Bosch.