Payment for goods and downloading of the book in electronic form (PDF format) is made on the website.
To do this, you need to find the book you are interested in and click on the “Buy” button. The price of the book is indicated on the button.
For convenience, the price on the website for residents of Russia, Belarus and Kazakhstan is presented in rubles.
For residents of Ukraine in hryvnias, and for all other countries - dollars.
After clicking on the “BUY” button, a payment window will open where you can select a payment system with which you can pay for the selected book using any bank card (Visa, MasterCard, MIR, etc.)
When you click on the “Pay by bank card” button, the Portmone payment system will open, which is the easiest way to make a payment.
In addition, the website offers four payment systems for payment:
- Yandex (payment from any bank cards, Yandex Money account, QIWI Wallet, terminals, etc.);
- Portmone (payment from any bank cards, Portmone account);
- PayPal (payment from any bank cards, PayPal account);
- WebMoney (payment from any bank cards, payment from WebMoney wallets).
Payment via Yandex Cashier
After selecting payment via Yandex, the Yandex Cashier payment system will launch, where you need to select a convenient payment method (bank card, QIWI, Yandex Money account, etc.)
After specifying payment details and confirming payment, payment for the goods will occur.
If you have a bank card in a currency other than the ruble, then the money will be debited from the card at the rate of the Central Bank of Russia at the time of the purchase.
This payment method is optimal for residents of Russia, Kazakhstan and Belarus.
Official website of the Yandex Kassa payment system https://kassa.yandex.ru
Payment via Portmone
After selecting payment through Portmone, the payment system will launch, where you need to select the payment method: bank card or Portmone account.
The price in the Portmone payment system is converted into dollars at the exchange rate of the Central Bank of the country where you are located.
If you have a bank card in a currency other than the dollar, then the money will be debited from the card at the rate of the Central Bank of your country at the time of the purchase.
After specifying payment details and confirming payment, payment for the goods will occur.
Official website of the Portmone payment system https://www.portmone.com
Payment via PayPal
After selecting payment via PayPal, the PayPal payment system will launch, where you need to select the payment method: bank card or PayPal account.
If you already have a PayPal account, then you need to log into it and make a payment.
If you do not have a PayPal account and you want to pay using a bank card via PayPal, you need to click on the “Create an Account” button - shown with an arrow in the picture.
PayPal will then prompt you to select your country and provide your credit card information.
After specifying the information required to make the payment, you must click on the “Pay Now” button.
Official website of the PayPal payment system https://www.paypal.com
Causes and signs of rear brake failure
The rear brake mechanism of the VAZ 2107 has one extremely unpleasant feature: it easily overheats. This is due to the design of this mechanism, which is very poorly ventilated. According to the manufacturers, the rear brakes of the “Seven” can be guaranteed to last 60 thousand km without repair, while the front brakes can only last 30 thousand km. In practice, due to the above overheating, the mileage of the rear brakes is slightly lower, about 50 thousand km. After this, the driver will inevitably have to deal with the following phenomena:
- the pads in the brake mechanism wear out partially or completely, and wear can be observed on one side or on both;
Rear pads are worn down almost to the ground - the seals in the working cylinder crack due to high temperature, as a result of which the tightness of the device is broken, which leads to brake fluid leaks and a sharp drop in braking efficiency;
- the return springs in the brake mechanism rust heavily (in especially severe cases, one of them may break, which can lead to the rear wheel jamming);
- The handbrake cable wears out. When the cable wears out, it stretches and begins to sag a lot. As a result, after putting the car in handbrake, the brake pads put much less pressure on the drum wall, and the rear wheels are fixed very precariously.
Taking into account all these points, it is strongly recommended to check the rear brake mechanism every 20 thousand km and, if necessary, carry out its maintenance. Particular attention should be paid to the rear brakes if the following warning signs appear:
- when braking, a strong vibration of the car appears, which the driver feels literally with his whole body;
- after pressing the brakes, a strong squeaking sound occurs, which over time can turn into a deafening grinding sound;
- when driving there is a strong “beating” of both the steering wheel and the brake pedal;
- braking efficiency has dropped significantly, and the braking distance has become much longer.
All these signs indicate that the brakes need urgent repairs or serious preventive maintenance. It is absolutely forbidden to drive with such brakes.
Brake drum cracks
Cracks are a real scourge of all brake drums, not only on “sevens”, but also on many other cars with drum brakes. The vast majority of the warning signs listed above appear precisely after the drum cracks. This happens especially often with cast iron drums. The fact is that cast iron is an alloy of iron and carbon, which contains more than 2.14% carbon. Carbon gives cast iron incredible hardness, but it also makes cast iron brittle. If the driver does not have a careful driving style and really likes to ride with the breeze over potholes, then cracking of the brake drums is only a matter of time.
Drum crack caused by metal fatigue
Another reason for drum cracking is so-called metal fatigue. If a part is subjected to cyclic alternating loads for a long time, accompanied by an abrupt change in temperature (and the brake drum operates precisely under such conditions), then sooner or later a fatigue microcrack will appear in such a part. It is impossible to see it without an electron microscope. At some point, this crack propagates deep into the part, and the propagation occurs at the speed of sound. As a result, a large crack appears, which is impossible not to notice. A cracked drum cannot be repaired. Firstly, welding cast iron in a garage requires special equipment and skills, and secondly, the strength of such a drum after welding will be significantly reduced. So the car owner has only one option: replace the cracked brake drum with a new one.
Wear of the inner walls of the drum
Wear of the inner walls of the drum is a natural process, the results of which are clearly visible after the car has covered the above-mentioned 60 thousand km. Since the inner walls of the drum are periodically subjected to the frictional force created by the friction linings on the brake pads, the inner diameter of the drum inevitably increases over time. Braking efficiency is reduced because the brake pads are less pressed against the drum. The effects of normal wear are eliminated by regrooving the brake drum and then adjusting the brake mechanism to ensure proper contact of the pads with the inner walls.
Grooves on the inner surface of the drum
The appearance of grooves on the inner surface of the drum is another common problem that owners of “sevens” often encounter. The fact is that the rear brakes on the “seven” are designed in such a way that dirt and small stones sometimes get into the drum, especially if the driver drives mainly on dirt roads. One or more stones may become lodged between the brake pad and the inner wall of the drum. When the block presses the stone against the inner surface of the drum, it is pressed deeply into the friction lining on the brake shoe and remains there (the material of the friction linings is quite soft). With each subsequent braking, stones stuck in the block scratch the inner wall of the drum.
Large scratches are visible on the inner wall of the drum
Over time, a minor scratch turns into a large groove, which will not be so easy to get rid of. The way to solve this problem is determined by the depth of the grooves that appear. If the driver noticed them early and their depth does not exceed one millimeter, then you can try to get rid of them by grooving the drum. And if the depth of the grooves is two millimeters or more, then there is only one way out - replacing the brake drum.
Payment via WebMoney
After selecting payment via WebMoney, the payment system will launch, where you need to select the payment method: bank card or WebMoney wallet.
If you already have a WebMoney wallet, then you need to log into it and make a payment.
If you do not have a WebMoney wallet and you want to pay in another way, you need to select any of the methods that WebMoney offers and make the payment
After specifying payment details and confirming payment, payment for the goods will occur.
Official website of the WebMoney payment system https://www.webmoney.ru/
Downloading a book
After successfully completing the payment (by any method) and returning to the KrutilVertel store from the payment system website, you will be taken to the successful payment page:
On this page you need to indicate your e-mail, where access to download the book will be sent.
If you are already registered on our website, then simply follow the link to your personal account.
The book you purchased will be in your personal account, from where you can always download it.
Please note that after making the payment, you need to return back from the payment system website to the KrutilVertel website.
If for some reason you did not return back to the site and closed the payment system tab with a message about the successful completion of the payment, please let us know - we will send you a letter indicating access to download the book.
Removing the rear brake drum
Now let's look at the most important thing - how to remove the rear drum on a VAZ 2114, what tools are needed for this and how to then install a new one instead of the old drum.
To begin with, it’s worth saying that it is strongly recommended to remove the rear drums at least once a year (and if more often, even better), even if there is no indirect suspicion of their wear. This is due to the fact that brake drums, which have been standing in place for many years, become very sticky, and they can only be removed by pouring them heavily with VeDeshka and using enormous force (which can result in harm to both the motorist and the car).
That is why, preventive annual dismantling of the drums, their inspection and installation in place is a guarantee that in the future there will be no problems with such an operation.
When repairing brake drums, the only lubricant used is VD-40 or its close analogues. It is not permissible to use gasoline, kerosene and other technical liquids during this operation.
Treating the drum with WD-40
And so, let's move directly to removing the brake drum.
First, let's collect a set of necessary tools:
- jack;
- wheel wrench (17 or 19 - depends on the installed wheel bolts);
- wrenches 7, 10 or 12 - depending on the size of the guide pin;
- hammer;
- a wooden plank (as a spacer when working with a hammer - so as not to damage the metal parts);
- lubricant like WD-40 or similar in properties.
Regarding the last point, you should immediately make a clarification - you need to use exactly the specified lubricant or as close as possible to it. The use of any other liquids - solvents, kerosene, gasoline and the like - is strictly not recommended. Now let's look at how to remove the rear brake drum on a VAZ 2114.
This should be done according to the following scheme:
- securely stop the car (put the handbrake on and place a shoe under the wheels);
- raise the rear of the car using a jack (roll or bottle);
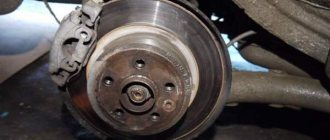
- remove the wheel;
- thoroughly and generously treat all joints with VeDe-40 type lubricant;
- wait about 5 minutes (so that the lubricant has time to act) and remove all dirt with a rag;
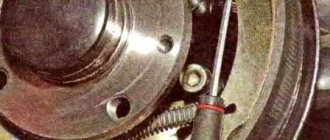
- unscrew the mounting pins;
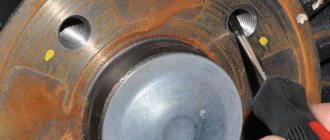
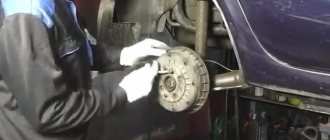
- carefully apply a series of blows to the edges of the drum (through a spacer or using a rubber/wooden mallet) until it begins to move by hand;
- remove the brake drum.
Removing the brake drum using a hammer
Installing the new drum in its place is done in exactly the same way, but in the reverse order. Also, there is another, often faster and at the same time safer, way to dismantle the old drum (you can also try it in a situation where prolonged hammering did not lead to success and the part did not move from its place).
This should be done as follows:
- fix the car in place and hang it up (all as in the previous method);
- remove the wheel;
- unscrew the two installation bolts from their sockets;
- screw the same bolts into the other mounting sockets of the drum (there are four of them on the drum - two have bolts screwed in, the other two are empty);
- begin to gradually tighten one bolt, then the other, so that their heads always remain parallel to each other (in order to achieve this, you can turn each bolt half a turn in turn).
Removing the brake drum using bolts
Thus, passing through the drum and resting on the reverse side, these bolts, when tightened, will pull it out of place, as a result of which the entire dismantling process will be as safe as possible and will not cause any damage to the car parts.
Problems when paying with bank cards
Sometimes difficulties may arise when paying with Visa/MasterCard bank cards. The most common of them:
- There is a restriction on the card for paying for online purchases
- A plastic card is not intended for making payments online.
- The plastic card is not activated for making payments online.
- There are not enough funds on the plastic card.
In order to solve these problems, you need to call or write to the technical support of the bank where you are served. Bank specialists will help you resolve them and make payments.
That's basically it. The entire process of paying for a book in PDF format on car repair on our website takes 1-2 minutes.
If you still have any questions, you can ask them using the feedback form, or write us an email at [email protected]
How the rear brakes work on the VAZ 2107
The rear brakes of the “seven” consist of two important elements: the brake drum and the brake mechanism located in this drum. Let's look at each element in more detail.
Brake drum
As the car drives, the brake drums attached to the rear wheels rotate with them. These are massive metal parts with holes for mounting pins located around the perimeter of the drum. These studs hold both the drums and the rear wheels of the VAZ 2107.
Two cast iron brake drums for VAZ 2107
Here are the main dimensions of a standard “seven” brake drum:
- internal diameter - 250 mm;
- the maximum permissible diameter taking into account boring is 252.2 mm;
- internal drum height - 57 mm;
- total drum height - 69 mm;
- mounting diameter - 58 mm;
- number of mounting holes for the wheel - 4;
- the total number of mounting holes is 8.
Brake mechanism
The brake mechanism of the “seven” is mounted on a special brake flap, and this flap, in turn, is securely screwed to the wheel hub. Here are the main elements of the VAZ 2107 brake mechanism:
- a pair of brake pads with linings made of special material;
- a double-ended brake cylinder (the word “double-ended” means that this cylinder has not one, but two pistons that extend from opposite ends of the device);
- two return springs;
- hand brake cable;
- handbrake lever.
The rear brakes consist of a drum and a brake mechanism
The two pads in the rear brake mechanism are tightened by return springs. Between these pads there is a double-sided cylinder. The operating sequence of the brake mechanism is as follows. The driver presses on the brakes. And the brake fluid begins to quickly flow from the main hydraulic cylinder into the double-sided cylinder in the drum. Double-sided pistons extend and press on the pads, which also begin to move apart and rest against the inner wall of the drum, securely fixing the device. When the driver removes the car from the handbrake, the brake fluid pressure in the system decreases sharply, and the pistons of the working cylinder move back into the device body. The return springs pull the shoes back to their original position, freeing the drum and allowing the rear wheel to rotate freely.
