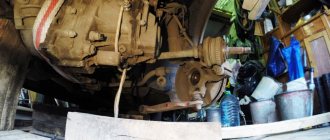
Clutch disc assembly
The clutch is one of the components of a car's transmission. When this system breaks down, further movement becomes difficult, sometimes the car stalls, and sometimes it simply does not move when you press the accelerator pedal. Let's look at how to diagnose and replace clutch elements of a VAZ 21099 car with your own hands.
Clutch system failures are felt instantly, here is a list of the main symptoms.
- When driving uphill, when you press the gas pedal, the car does not move, despite the ever-increasing engine speed.
- When driving in a straight line, acceleration time increases significantly, the engine often overheats, and fuel consumption increases.
- When stopping, pressing the brake and clutch pedals simultaneously will stall the engine.
- It is difficult and crunching to switch gears on and off when the car is moving. When the engine is off, they switch without difficulty.
- In the morning, when you try to start the car, the starter has difficulty turning the flywheel, despite the clutch pedal being depressed, and after starting, the engine runs hard and stalls after a while.
- There is a noise when you press the pedal.
- When changing gears, the car makes a jerk, and sometimes the engine stalls after it.
- The clutch release pedal is difficult to press.
- Full pedal travel exceeds 16 cm.
Signs and causes of clutch failure
How to check the clutch
The VAZ 2108, 2109, 21099 clutch consists of a basket, a pressure bearing, a drive and driven disk. The main signs of a clutch malfunction are clutch slipping and incomplete disengagement:
- When switching off is incomplete (the pedal is pressed), there is difficulty shifting gears with the engine running, noise and crackling noises when changing gears, and large free play of the clutch pedal.
- When the clutch “slips” (the pedal is released), a burning smell may be felt in the cabin from the burning of the clutch disc linings, the car’s dynamics will deteriorate, the engine may overheat, and fuel consumption will increase.
Most often, the cause of a breakdown of the VAZ 2109 clutch is improper operation of the car. For example, if the car “sits down” in the snow and you continue to accelerate hard, or really like to start with slipping, all this shortens the life of the clutch. In addition to the clutch disc itself, the release bearing can also fail - it serves to smoothly engage and disengage the clutch. When the release bearing wears out to the limit, you can hear a characteristic squealing sound - this is a sure sign that the bearing needs to be replaced. The cause of clutch failure may also be a breakdown in its drive mechanism, for example, a break or jamming of the clutch drive cable, a breakdown of the lever system, a fluid leak from the hydraulic drive if the clutch is hydraulic, or other similar breakdowns in the drive.
By the way, when replacing the release bearing at a service station, they may advise you to also replace the clutch disc. Usually, if problems begin with the clutch, it is better to replace all these parts, because replacing the clutch is very difficult: you need to remove the gearbox. But if someone wants to save on this, then all clutch parts can be purchased separately.
To work you will need the following:
- wrenches 8, 10, 13, 17 mm;
- torque wrench, 8 mm socket;
- jack;
- container for draining oil;
- inspection hole or lift.
- flat screwdriver, hammer.
When removing or installing the gearbox, do not rest the input shaft of the gearbox on the clutch pressure spring petals, so as not to damage them.
https://youtube.com/watch?v=%250Ahttps%3A
Causes and troubleshooting
Installing the disk on the machine
Symptoms 1 and 2 indicate critical wear of the clutch driven disc or contamination of it with engine oil that has leaked from the cylinder block or gearbox due to leaky seals of these units. To more accurately determine the cause, just look into the engine compartment and look through the window on the clutch housing cover. If there are traces of oil on the flywheel teeth, then the seals will have to be replaced. If there are no traces of oil, the clutch driven disc needs to be replaced.
Symptoms 3, 4 and 5 indicate incomplete shutdown of the mechanism. This occurs when drive parts break, driven and pressure disks are deformed, the cable breaks and the VAZ clutch drive is incorrectly adjusted.
Symptom 6 indicates a breakdown of the damper springs or wear of the release bearing. Symptom 7 indicates that the wheel hubs are jammed on the gearbox shaft splines. They just need to be removed, cleaned and lubricated. Symptoms 8 and 9 indicate that the cable needs to be replaced and the drive adjusted. Replacing the clutch assembly is also carried out after purchasing a used car.
Adjusting the VAZ 21099 clutch drive is a very simple procedure, it is done like this.
- First you need to take a ruler and measure the distance the pedal moves when pressed. If it is less than 12.5 or more than 13.5 cm, we proceed to adjustment.
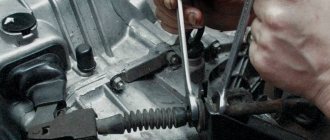
- We look into the engine compartment, remove the battery, find the place where the cable passes through the gearbox bracket (next to the ignition coil). It is secured with adjusting nuts on both sides of the bracket.
- If we need to increase the pedal travel, turn the nut located clockwise, located closer to the car interior. If, on the contrary, it is necessary to reduce the stroke, turn clockwise the nut that is closer to the front bumper.
- Again, measure the distance with a ruler: if it is within the recommended limits, the adjustment is complete.
Replacing the cable is also not a very difficult task.
- Open the hood and unscrew the adjusting nuts.
- Remove the cable from the gearbox bracket.
- Remove it from the clutch fork.
- We move into the interior, knock the lock washer off the pedal pin and remove the cable end.
- We take out the rubber gasket from the front panel from the side of the engine compartment and take the tip out.
The cable has been removed, now we install the new one in the reverse order. After installation, adjustment is required again.
Replacing the disk yourself
How to adjust a hydraulic clutch
It should be noted right away that on front-wheel drive cars, replacing a disc is a little more difficult than on classic models. In addition, different brands and models of cars have their own nuances for removing and installing the clutch. First you need to read the instructions and recommendations for changing the clutch yourself. It would be a good idea to consult with experts.
When replacing the clutch on a VAZ 2109, there is no need to completely dismantle the gearbox, drain the oil, remove it completely, etc.
How to change a clutch in a garage
So:
- First you need to hang the front of the car on tripods.
- Next, the front wheels are removed.
- It is detached from the gearbox and removed from the bracket.
- You also need to disconnect the speedometer cable from the gearbox.
- After this, the mounting bolts that secure the ball joints and steering knuckles are unscrewed.
- Next, you need to loosen the rear left trailing arm fixation.
- Carefully remove the mounting bolts of the extension bracket on the left, after which the lever rotates 90 degrees.
- A “mass” can be attached to the gearbox, which is also dismantled.
- The lower flywheel protective cover is unscrewed.
- The engine mount on the left side is turned away.
- The engine mount located at the rear is removed from the body, this also applies to the gearbox drive clamp.
- The drive is removed from the gearbox.
- The gearbox mount is unscrewed from the engine.
- The gearbox is removed from the engine and will hang on the drives.
- The clutch is unscrewed, in some cases it is the clutch basket.
- The release bearing is replaced.
- Using a convenient mandrel designed for centering such disks, we replace the driven disk.
- Assembly is carried out in the reverse order of disassembly.
In practice, everything will not happen as quickly as in theory, especially for beginners. Today, thanks to videos and photos, you can replace almost any part with your own hands, and you don’t have to contact a car service center. Detailed instructions will help you easily dismantle and properly secure the clutch disc.
It is important not only to strictly follow the recommendations, but also to the quality of the purchased spare part. Among the wide variety, you must first of all understand that the price must correspond to the quality
The process of replacing the clutch release bearing on a VAZ 2110
When replacing the clutch release bearing of a VAZ 2110, the main difficulties are that you additionally have to dismantle several more components and the most labor-intensive process is the process of removing the gearbox. In a word, to replace a small bearing, you need to disassemble almost the floor of the car.
It is better to carry out all work on an overpass.
Units and parts to be dismantled:
- accumulator battery;
- air cleaning element together with a box and an air flow sensor;
- clutch cable;
- Transmission.
Signs of bearing failure
The main sign of a bearing failure on a VAZ 2110 is a slight knocking sound when the clutch is depressed. If this sound occurs in the summer, there is almost a 100% guarantee that a replacement will have to be made. If in winter, then this may be a simple change in the dimensions of the bearing cup due to a decrease in temperature. The metal from which the release bearing is made is extremely durable, so even if a knocking noise occurs, you can do nothing for a couple of days and just watch to see if it gets stronger.
Replacement instructions
If you are still sure that the release bearing of the VAZ 2110 has failed, then you need to get to work without delaying for long, having first purchased the same new bearing and other components that will be needed during the work.
Tools
- a set of keys;
A set of keys - Screwdriver Set;
- container for draining transmission fluid;
- rags;
- new transmission fluid (if we plan to replace it at the same time).
Stages
In order to get to the release bearing, you will need to partially or completely remove several fairly large components of the car.
Preliminary work
Unscrew the left nut and loosen the right one that secures the hub. After the wheels are loosened, we lift the car on a lift or jack it up until its front wheels leave the ground. During this procedure, observe safety precautions and place the vehicle only on very strong supports.
- We dismantle the wheels.
- Remove the motor protection.
- We loosen the fastening on the transmission drive rod (after marking the previous installation location in order to simplify the adjustment of the gear shift lever during assembly).
- We disconnect the gearshift drive rods from the gearbox.
- Turn off jet propulsion.
- We dismantle the starter.
- We dismantle the suspension arm and ball joint located on the left.
- Remove the cover on the clutch housing.
- Disable the speed meter.
- We remove the left drive, leave the right one in place, just loosen the hub nut on it.
- We hang the motor (after placing a reliable support under it), which will make it possible to prevent the motor from moving and a possible break in the heater hose. We unscrew the fastenings of the supports located on the gearbox and disconnect the clutch housing from the cylinder block. We move the box away from the engine and remove it.
Removing the release bearing VAZ 2110
- Having released the lock, remove the bearing assembly first from the shaft and then from the holder.
- Remove the bearing from the coupling.
- Before replacing the old bearing, we check the new one.
It should rotate freely and there should be no binding. Installation location - The side that protrudes more during installation should face the coupling.
- The bearing is fixed using a holder and placed on the shaft, then secured with a bracket.
- When replacing the release bearing, inspect the clutch system.
Clutch system for VAZ 2110 Assembly occurs in the reverse order. - After all the components have been assembled, you need to check and adjust the VAZ 2110 clutch. If you work without an assistant, this will take about five hours.
Video “Replacing the release bearing”
This video shows the bearing replacement process. An experienced auto mechanic talks in detail not only about how to change this unit, but also describes the principle of its operation.
Replacing the disk yourself
Clutch disc basket VAZ 2109
It should be noted right away that on front-wheel drive cars, replacing a disc is a little more difficult than on classic models. In addition, different brands and models of cars have their own nuances for removing and installing the clutch. First you need to read the instructions and recommendations for changing the clutch yourself. It would be a good idea to consult with experts.
When replacing the clutch on a VAZ 2109, there is no need to completely dismantle the gearbox, drain the oil, completely remove the VAZ CV joints, etc.
How to change a clutch in a garage
- First you need to hang the front of the car on tripods.
- Next, the front wheels are removed.
- The clutch cable is detached from the gearbox and removed from the bracket.
- You also need to disconnect the speedometer cable from the gearbox.
- After this, the mounting bolts that secure the ball joints and steering knuckles are unscrewed.
- Next, you need to loosen the rear left trailing arm fixation.
- Carefully remove the mounting bolts of the extension bracket on the left, after which the lever rotates 90 degrees.
- A “mass” can be attached to the gearbox, which is also dismantled.
- The lower flywheel protective cover is unscrewed.
- The engine mount on the left side is turned away.
- The engine mount located at the rear is removed from the body, this also applies to the gearbox drive clamp.
- The drive is removed from the gearbox.
- The gearbox mount is unscrewed from the engine.
- The gearbox is removed from the engine and will hang on the drives.
- The clutch is unscrewed, in some cases it is the clutch basket.
- The release bearing is replaced.
- Using a convenient mandrel designed for centering such disks, we replace the driven disk.
- Assembly is carried out in the reverse order of disassembly.
In practice, everything will not happen as quickly as in theory, especially for beginners. Today, thanks to videos and photos, you can replace almost any part with your own hands, and you don’t have to contact a car service center. Detailed instructions will help you easily dismantle and properly secure the clutch disc.
It is important not only to strictly follow the recommendations, but also to the quality of the purchased spare part. Among the wide variety, you must first of all understand that the price must correspond to the quality
Any car sooner or later needs repairs, and if the gearbox becomes difficult to engage, most likely the problem lies in a faulty clutch. Replacing it on VAZ cars is not a difficult job, but quite labor-intensive, and requires certain metalworking skills.
We are replacing
Tools
The initial stage of repair work to replace the DS is to prepare all the tools that will be needed in the process. This is about:
- a set of wrenches - you will need both socket and cap wrenches;
- new DS for VAZ 2109;
- chisel;
- jack;
- several bricks;
- tape measure or ruler.
It should be noted here that in total, replacing an element takes on average about 4 hours if all actions are performed correctly. So please be patient. For a more detailed description, we have also prepared a video for you, which you can watch at the end of the article.
Step-by-step instruction
- When you drive onto a pit or overpass, put your car on the parking brake.
- Open the hood and disconnect the battery.
- Next, you need to remove the engine splash guard on the left side.
- Take a wrench and remove the hub screws from both front wheels. Use a chisel if necessary.
- Now you need to jack up the front wheels and unscrew them, using bricks as supports.
- Next, unscrew the two upper gearbox mounting screws.
- After this, it is necessary to dismantle the starter. Take a wrench and unscrew the three corresponding nuts.
- When the starter is removed, you need to place a jack under the power unit, which includes the motor, clutch and gearbox, and unscrew the side support of the motor.
- Using wrenches, unscrew the gear shift link and the rear unit support.
- Now you need to remove the clutch protective cover using a wrench.
- When the cover is removed, you can unscrew the front gearbox mounting bolt. Also unscrew the rear nut.
- Once the bolts are unscrewed, you can remove the gearbox using the top bolts until they stop.
- The box will hang on the wires, and its limit switch will rest on the lever extension. This will create a gap through which you need to remove the clutch mechanism.
- Lubricate the guide with engine oil and install the release bearing.
- Then remove the old DS and install a new one in its place.
- The gearbox can be placed on the guides, and then the two lower screws can be tightened. Next, while rotating the crankshaft, tighten all the clutch basket bolts evenly.
At this point, the process of replacing the DS can be considered complete. Reassemble everything in reverse order. After changing the element, it is necessary to adjust the clutch pedal.
- Press the pedal into the floor, placing a tape measure next to it, which also needs to be rested on the floor with one end. When the pedal is in its lowest position, it is necessary to record this value by noting the distance at the center of the pedal pad.
- Next, the pedal can be released, but you need to make another mark when it is in its highest position. Remember this distance.
- Now calculate the amount of free play - if it is more or less than a segment of 125 - 135 mm, and after replacing the DS this will be the case, then it needs to be adjusted. The regulation process itself involves changing the length of the cable sheath.
- Open the hood and locate the end of the pedal cable. It is clearly visible, so finding it will not take much time. Using a wrench, loosen the locking nut securing the cable to the lever, and tighten the second nut. Do this until the pedal free play is in the range of 125 to 135 mm.
If you have any questions regarding the process, we invite you to watch the video.
Replacing the VAZ 2109 clutch with your own hands
If, when starting the engine, noises are heard and vibrations appear, “working jerks” are felt, the pedal stroke has increased, the dynamics of the car have changed, the gasoline consumption has increased, most likely the VAZ 2109 clutch needs to be replaced. Most often, the reason for this is violation of the rules for using the vehicle. For example, the driver likes to start with a slip, or he had to get out of a snowdrift. One of the parts of the unit may also fail. For example, a release bearing. When it "flies" a strong "squeal" is heard. The result is clutch failure.
What exactly needs to be done can be determined by diagnostics at a service station. Or you can see it with your own eyes during dismantling. How to repair this unit yourself will be discussed further.
Required spare parts
To install the VAZ 2109 clutch you will need a new unit. It is better to take models recommended by the machine manufacturer with article numbers 2109-1601000, 801122, 2108-1601085, FR 761. The price of the set depends on the manufacturer and seller, ranging from 2300 to 3600 rubles.
Tools required for repairs
To replace the VAZ 2109 clutch basket you need to prepare the following tools:
- standard set of keys;
- jack.
Do-it-yourself repairs are quite advisable, since the price for replacing a VAZ 2109 clutch as of March 3, 2022, on average in car services is 3.2 thousand rubles.
But self-repair is quite accessible even without an assistant, and without completely removing the gearbox. The principle of repair and the sequence of work are identical for models 2108-2115, so we suggest you see how such dismantling is performed on a VAZ 2114:
Order of Operations
To carry out repair work, you need to place the car on an inspection hole, put it on the handbrake, disconnect the negative terminal to de-energize the on-board network, and remove the engine mudguard. Now you can start disassembling:
- Install a jack that will temporarily replace the front pair of wheels. You need to unscrew the nuts on them, remove the chassis and put them aside.
- To remove the contact part of the ball joint from the hub, you need to unscrew the bolts.
- Instead of the 2 upper conventional bolts, you need to install cylinder head fasteners.
Now you can remove the starter; it is attached to three nuts that need to be unscrewed.
At this stage it is necessary to install a jack under the engine. After this, the side motor support is detached.
After this, you can disconnect the rear engine mount and unscrew the gearshift linkage.
The protective cover must be removed from the clutch.
- The box is secured with several bolts; first you need to unscrew the front one.
- Now the transmission is accessible, the rear nut is unscrewed first.
The gearbox bolts are located on the left wing side, they need to be unscrewed until they stop and the gearbox should be removed
It is important to ensure that the end of the assembly rests on the lever extension. This will create a gap that will allow you to remove the clutch.
Disassembly is complete. At this point, the guide for the clutch remains. It needs to be thoroughly lubricated. After this, you can put the release bearing on the guide.
Subsequent operations are performed in the reverse order of the above steps. Important! There is no need to rush while completing the work. All operations are performed consistently and calmly. Make sure that after assembly there are no “extra” spare parts left.
Let's summarize
If the check shows that the free play is normal, but you doubt your competence in adjusting the unit, contact a service station. Incorrect settings can cause rapid clutch failure. If you want to complete the work yourself, you can find the necessary information on the vehicle manufacturer’s website or in its service book
It is important to complete the work in a timely manner so as not to get into an unpleasant situation on the road. Monitor the service life of clutch parts, for example, the service life of the driven disc is 100 thousand kilometers
But, if a motorist has an aggressive driving style, it can decrease by 2-3 times. How to replace a VAZ 21099 clutch, watch this video:
Article rating:
VAZ 2109 clutch replacementLink to main publication
Related publications
Air conditioning Chevrolet Lacetti
Symptoms of malfunction
The clutch release bearing itself will tell you that its life is already at its limit or it has completely failed. Therefore, your task is to monitor the behavior of the car and promptly respond to emerging problems.
Sign of breakdown
Peculiarities
The clutch pedal becomes hard to press
Initially, this only causes a certain discomfort, since you have to apply more force to change gears. But this phenomenon should not be ignored. Bearing needs to be replaced
Difficulty engaging first and reverse gears
This indicates that the bearing's life is gradually ending, and you urgently need to take action. If you don't do this, you will soon be unable to engage any of the gears in your transmission.
The car doesn't pull
There is a loss of efficiency and performance of the box. Consequently, it is not possible to change gears correctly and quickly. This makes maneuvers, overtaking and a banal increase in speed more difficult.
This happens occasionally at first, and therefore almost every time you change gears. This symptom clearly indicates that it is time to send the car to a service station or garage for repairs.
Old and new VP
If the release bearing is not replaced in a timely manner, the gearbox will soon fail, the clutch will not work, and this will lead to dire consequences.
Consequences of wear
If you have encountered such a phenomenon as wear of the clutch release bearing, then you probably often drive your own VAZ 2109. It is time and the many kilometers traveled that lead to such breakdowns.
If the bearing is not replaced in time, this will result in the following consequences:
- Any subsequent trip may be the last for the car;
- The clutch disc will overheat, which will lead to destruction of the lining;
- In addition to replacing the bearing, you will have to replace the entire clutch disc;
- It is not uncommon for the clutch to fail. If you hear an incomprehensible noise coming from the clutch system, then there is a problem with it.
Why do you need clutch adjustment?
If you do not adjust the pedal travel in a timely manner, this can ultimately cause serious damage. At best, expensive repairs will be required, and at worst, the main unit will have to be replaced. Increased pedal travel is accompanied by partial activation of the system. In this case, the disk remains in contact with the surface of the engine flywheel. Insufficient stroke does not ensure full engagement of the driven disk. Therefore, the so-called slipping occurs. In other words, a certain part of the torque is lost.
Diagnostics of the clutch system operation
To perform self-diagnosis, you will need a ruler. The main signs of the need to adjust the system may be characteristic jerks or impacts when the car starts to move, the pedal sinking, or the presence of noise when the pedal is pressed and the clutch is activated. It is very easy to check the functionality of the system. To do this, perform the following operations:
Turn on the engine. After warming up, slowly release the pedal and start driving. If the car starts moving immediately when the pedal is released, this may indicate that there is not enough free play between the elements of the clutch system.
In the case when the car starts to move only when the pedal is fully released, this means that its travel exceeds the norm. When the movement occurs with a lag after the pedal returns to its original position, this means that the stroke is below normal.
Now you can start measuring. The exact standards for a specific car model are indicated in the technical documentation. For domestic cars, the norm is the distance from the floor to the edge of the pedal within 160 mm. If the value does not match, an urgent adjustment must be made.
Clutch pedal adjustment
Periodic adjustment of the VAZ 2109 clutch pedal is carried out for the following reasons:
- When driving on a non-adjustable clutch pedal, subsequent repairs are possible, because exaggerated energy costs for incorrect operation of the mechanism will cause malfunctions of other components of the car.
- Due to improper functioning, the clutch pedal periodically does not function. This leads to the fact that the pressure plate of the unit is forced into “engagement” with the motor flywheel, as a result of which they are subject to accelerated wear.
- If the pedal stroke is insufficient, the vehicle slips, i.e. the required torque of the wheel pair is lost.
To carry out diagnostic work on adjusting the clutch pedal, you need to use an arithmetic ruler to measure the length of the pedal stroke to the floor. If it does not correspond to 16 cm, then adjustments are necessary.
Signs of incorrect operation of the clutch mechanism: there is no possibility of a smooth start from a standstill, movement from a standstill is accompanied by jerks and jolts, when changing gears the transmission makes increased noise, the pedal of the mechanism falls to the lower position. In practice, it turns out this way: if the vehicle began to move from the moment the pedal began to be lowered, then the free play does not correspond to the required value. When the pedal is completely released, the vehicle does not move, which means there is no free movement in the car.
Clutch pedal adjustment:
- Unscrew the nut located under the clutch pedal.
- Tighten the locknut located below until it stops.
- Next, screw in the fasteners located under the clutch pedal.
- We tighten the rubber washer to the clutch fork as far as possible.
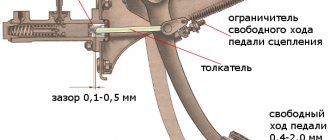
- To increase the pedal stroke, you need to screw the fastener onto the tip. To reduce the pedal stroke, you need to unscrew this fastener. The VAZ 2109 clutch pedal is adjusted until the limit of 12-13 cm is reached.
- After completing the pedal adjustment operations, you need to: depress the pedal three times, measure the length of the pedal stroke, adjust the operation until the required stroke length is achieved.
To adjust the hydraulics you need:
1. Remove the spring from the mountings of the working cylinder and the clutch fork. 2. Adjust the fasteners located on the clutch cylinder rod. 3. The recommended free play value is 0.5 cm.
Often, a large pedal stroke depends on the height of its location from the driver's floor, and this creates certain difficulties. To adjust the height, a series of simple plumbing operations and a wrench set to “12” are required:
- We find two fasteners on the steering column shaft, one is a thrust screw that limits the height adjustment position, the second is a lock nut that changes the movement of the pedal.
- Unscrew the stop screw.
- We give it rotation until the pedal movement normalizes.
- Screw in the locknut.
If slippage is observed after adjusting the clutch, then the following operations must be performed:
- Remove the stem locknut.
- Move it until there is no free movement.
- Return the rod one full turn.
- Determine whether the clutch has free play.
- Test the operation of the transmission gears. If there is an incomprehensible noise, you need to perform the above operations again.
- Screw in the locknut.
Clutch repair on VAZ 2108, VAZ 2109, VAZ 21099 cars
1. Remove the gearbox from the VAZ 2108, VAZ 2109, VAZ 21099 (see “Removing and installing the gearbox”).
1:709 2. Install the mandrel into the pressure plate hole. NOTE You can remove the clutch without a mandrel, but at the same time hold the clutch driven disc - the driven disc may fall out of the clutch housing.
USEFUL ADVICE
A mandrel for centering the driven disk can be made according to the dimensions of the input shaft, or you can use the old gearbox input shaft instead of the mandrel.
2:1911 3. Unscrew the six bolts securing the clutch housing
leniya. Remove the clutch housing assembly with the pressure plate and driven disc installed inside the clutch housing. Hold the clutch driven disc while doing this, otherwise the driven disc may fall out.
NOTE When removing the clutch housing bolts, block the flywheel using a screwdriver.
3:1061 To stop the screwdriver, install one bolt securing the clutch housing (for clarity, the operation is shown with the engine removed).
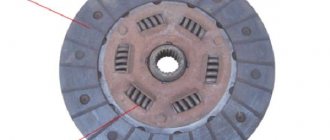
4:1801 4. Cracks on the driven disk parts are not allowed. Check the wear of the friction linings 1. If the heads are behind
moldings 2 are deepened to a distance of less than 0.2 mm, the surface of the friction linings is oily or the rivet joints are loose, then the clutch driven disc must be replaced. Check the reliability of the damper springs 3 in the sockets of the driven disc hub; if the damper springs are broken, the clutch driven disc must be replaced.
5:1130 5. Check the runout of the driven disk if warping of the driven disk is detected during visual inspection. If the driven disc runout exceeds 0.5 mm, replace the clutch driven disc.
6:1965 6. Inspect the working
e friction surfaces of the flywheel and clutch pressure plate, paying attention to the absence of deep marks, scuffs, nicks, obvious signs of wear and overheating. Replace defective components
7:839 7. If the rivet connections 1 of the housing parts and the clutch pressure plate are loosened, replace the housing with the pressure plate assembly. Using an external inspection, evaluate the condition of the diaphragm spring 2 of the clutch pressure plate. Cracks on the diaphragm spring are not allowed. The contact points between the spring petals and the clutch release bearing must be in the same plane and have no obvious signs of wear (the amount of wear should not exceed 0.8 mm). Otherwise, replace the clutch pressure plate assembly.
8:2321
8. Using an external inspection, evaluate the condition of the support rings of the pressure spring. The pressure spring rings should not have cracks or signs of wear. Otherwise, replace the housing and pressure plate assembly.
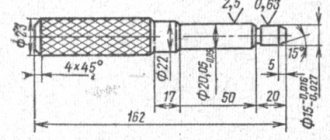
9:861Rice. 5.4. Checking the condition of the clutch drive disc:
A, B, C - controlled dimensions; 1 - pressure spring; 2 - casing; 3 — pressure disk; 4 - intermediate ring
9. To check the clutch drive part, secure the pressure disk 3 (Fig. 5.4) assembled with the pressure spring 1 and casing 2 to a device with an intermediate ring 4 with a thickness of B = (8.3 ± 0.04) mm. This device replaces the flywheel with the clutch driven disc. Disengage the clutch three times with a release stroke of 8-9 mm, applying a load to the petals of pressure spring 1 at a diameter of C = 34 mm. In this case, check that: - the shutdown stroke (8.0+0.1) mm corresponds to the pressure plate stroke of at least 1.4 mm; — the difference in the deviation values of pressure plate 3 was no more than 0.25 mm; — size A was in the range of 29-31 mm; — the load on the petals of pressure spring 1 at diameter C with a stroke of (8.0+0.1) mm was no more than 1100 N, the peak shutdown load was no more than 1300 N. 10. Before installing the clutch on a VAZ 2108, VAZ 2109, VAZ 21099 check the ease of movement of the driven disk along the splines of the gearbox input shaft. If necessary, eliminate the causes of jamming or replace defective parts.
10:3378
11
Please note that when installing the clutch driven plate into the clutch pressure plate housing, the more protruding part of the hub is directed towards the pressure spring
11:834 12. Insert the centering mandrel into the splines of the driven disk from the pressure spring side.
12:1498 13. Install the clutch on the flywheel along the three centering pins (shown by arrows) and tighten the six bolts securing the clutch to the flywheel evenly diagonally, holding the flywheel from turning. After this, remove the centering mandrel and install the box in front
h.
next article:
How to install the clutch disc correctly
- Remove the six bolts from the clutch basket using an eight-millimeter wrench. Be careful not to strip the bolt heads.
- Remove the clutch cover along with the driven disc.
- Check its condition. The driven disk must be free of cracks and deformations. Otherwise it needs to be replaced.
- Check the working part of the flywheel and release mechanism. They must be free of chips, burrs and deep marks. If there are such deformations, then the flywheel and release mechanism need to be replaced.
After inspection, you need to assemble the clutch disc. Pay attention to how to correctly install the clutch disc:
It is installed in the opposite order, but the less protruding part should face the flywheel.
Also, when installing a new clutch disc, it is better to use a centering mandrel. If it is not included in the kit, then purchase it. Fortunately, it is not expensive at all.
Source
How to replace a VAZ-2109 clutch disc without removing the box
The clutch in a car serves as the connector between the engine and transmission. This unit takes on all the load that occurs when changing gears. Accordingly, the part can rightfully be considered a consumable item, because car owners regularly face the need to replace it or schedule maintenance. It is almost impossible to influence the degree of wear of this unit. Therefore, after the clutch has exhausted its service life, it must be replaced partially or completely (in case of serious malfunctions).
When is it necessary to change the unit?
The mechanism requires servicing in the following situations:
- The clutch "drives". Motor power drops.
- The unit slips or incomplete activation occurs.
- Clicking noises are heard when changing gears.
- The clutch disengages automatically.
- Vibration is noticed when the clutch pedal is pressed.
Nuances of the work
Following all the recommendations from the automaker's manual does not guarantee that everything is done simply and quickly. Not every car owner has the opportunity to drive the car onto a pit or overpass. A lift is perfect for carrying out work, but not everyone has one either.
When you contact any service, the replacement will be made within a couple of hours, but for such a service you will need to pay a considerable amount. It may take a whole day to do the work yourself. Maybe more if you don't have experience in car repairs.
Most of the time is spent on disassembly and assembly. The operation to replace the node will take you no more than half an hour. Later in the article we will look at the process of replacing a clutch without a pit/lift.
Before starting work
Almost every car owner is interested in the question: is it possible to perform a replacement without dismantling the gearbox? You are unlikely to find a definite answer, but the procedure is quite feasible. First of all, find several large stumps up to 40 cm high, and also get a few additional bars. To prevent the car from simply falling during the work, take care to install a pair of regular wheels under the car.
Whether to remove the gearbox or not - you will have to answer this question specifically. Because if you act carelessly, the gearbox may simply fall to the ground, and lifting it from under the car will be very problematic.
Initially, disconnect the battery so that the machine's electrical system is de-energized. You can then proceed to the process shown in the following list:
- Remove the wheels and move them away from the car.
- Remove the steering ends and free the racks.
- Unscrew the ball joint mounting bolts.
- Remove the engine protection using the cable.
- The next step is to drain the oil from the box.
- Loosen the rocker nut and remove it.
- Unscrew the nuts on the two pillows.
- Place a jack or other support under the engine.
- Disable the reverse sensor.
- Disconnect the wires from the starter, unscrew the nuts and dismantle it.
- Unscrew the nuts on the flywheel guard and fork.
- In this step, remove the CV joint on the right side. The left side should not be dismantled.
- Unscrew the fixing bolts to the gearbox block.
- In the last step, unscrew the nuts that are located above the right CV joint.
Clutch replacement
After the preparatory work has been completed, you can remove the box. However, don't rush. To continue the process, take the two bolts from the upper arm. These elements have a thread suitable for our situation. Screw them in from above and you can begin to separate the units using a crowbar. This clutch replacement scheme is very labor-intensive. Remove the release bearing through the gap and unscrew the basket bolts. Compared to the instruction manual, the replacement process is slightly different. The new release bearing is installed in its place. Next, the disk is placed on the flywheel, and only then the basket is put on top.
The bolts need to be tightened approximately two turns. They should not be over-tightened.
In the next step, with extreme caution, begin to slide the input shaft onto the disc splines.
During the replacement process, pay attention to the petals of the basket. These elements have an insignificant operating life
Therefore, if necessary, they should also be replaced.
After carrying out operations to replace the clutch, reassemble the car in the reverse order. At this point we can consider that the repair is completed.
To summarize, we note that from the article you learned how to replace the clutch on a VAZ-2109 with your own hands. If you feel a lack of experience in car repairs, then the best way out of the situation is to contact a service station. In this case, you will save a lot of time, nerves and money.
How to change a clutch disc
The clutch replacement process is quite lengthy, so you need to stock up on time and patience.
To replace the clutch, you must first remove the gearbox.
- First of all, remove the crankcase protection and unscrew the gearbox mounting bolts.
- Remove the negative wire from the clutch housing.
- Using two wrenches, remove the clutch cable from its bracket.
- Disconnect the block from the wire from the starter contact.
- Remove the starter from the gearbox by unscrewing the three nuts.
- Remove the gear shift system drive end.
- Disconnect the speedometer and gearbox drive cables.
- Remove the contact with a wire from the reverse indicator switch block.
- Loosen the nut securing the arm to the suspension.
- Unscrew the three bolts that secure the braces to the body.
- Remove the ball joint nut cotter pin.
- Remove the ball joint.
- Remove the CV joints. Pull them aside.
- Unscrew the bolts that secure the clutch shield and also dismantle it.
- Unscrew the three bolts and the crankcase mounting nuts.
- Install suitable wooden beams on the fenders and place a block on top to hang the engine.
- The block should rest on the bars and nothing else.
- Attach the engine to a block that has a bolt with a hook. For this procedure, it is allowed to use rope or wire.
- Unscrew a couple of nuts securing the rear engine support to the body.
- Unscrew the nuts securing the engine to the gearbox.
- When removing the gearbox, first move the gearbox horizontally, otherwise the input shaft may be damaged.
Please note that this method is the most convenient, since it can be used to remove the gearbox without a hoist or hoist. This may only require a couple of jacks.
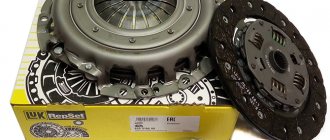
Clutch selection
When choosing a clutch kit, you should focus not only on your available budget. By saving or buying a fake, you risk getting even more problems in the future.
Valeo kit
Today there are several main manufacturers whose clutches should be purchased for the VAZ 2109.
Manufacturer
Peculiarities
VIS
This is a stock clutch that the VAZ 2109 is equipped with from the factory. If there are laser markings on the discs, this is definitely not a fake. Plus, the company allows you to send an SMS indicating an identification code. If it is a fake, you will be notified accordingly. Good quality, but nothing special to say about them
Valeo
French manufacturer, which is actively counterfeited on the domestic market
To catch fraud, pay attention to the cost and quality of components. Although the brand is from France, Valeo couplings can be produced in Italy, Spain, South Korea
Good quality components ensuring smooth, easy operation. Perfect for female drivers. If you use the clutch correctly, it will last for about 150 thousand kilometers. The flywheel is almost eternal, and the disks are not afraid of overheating within acceptable limits
Luk
A German company that has proven itself well in its homeland and has also earned a lot of praise among Russian motorists. They dampen vibrations perfectly, and real Luk clutches always have an element for damping vibrations of the pressure and driven disks.
Kraft
You can only find negative reviews about Kraft couplings from competitors. An impressive part of the sets under the Kraft brand, presented in Russia, were produced in Turkey, but under a German license. The kit includes a soft release bearing that performs well even under heavy use. The flywheel is very durable. On average, the clutch can withstand 150 thousand kilometers. But if you don’t spare the clutch, the life will be significantly reduced.
Kraft kit
Regardless of the quality of the selected kit, if it is installed incorrectly or due to rough operation of the vehicle, the life of the clutch will not be able to reach those declared by the manufacturer. Therefore, drive your car accordingly.
Changing the clutch
Almost everything is ready to tear the box out of the engine, but there is no need to rush. In order to continue the process, you need two bolts from the upper arm of the classic. They have the same threads as those that connect the engine block and gearbox. We screw them in from above, and after that you can begin to separate the nodes using a small crowbar.
The presented replacement of the VAZ- 2109 is a rather painstaking process, but in order to do everything quickly and reliably, you can go to great lengths. Through the gap that formed after the previous procedure, you need to get rid of the release bearing, unscrew the bolts on the basket. But the installation is somewhat different from the instructions that can be found in the guides. We put the new release valve in its place. After this, we install the disk on the flywheel and the basket on top of it. We tighten the bolts literally two turns, they cannot be tightened. Next, very carefully we begin to fit the input shaft onto the disc splines.
It is worth considering that the petals of the basket of this car have a small amount of wear. This is quite normal, since the bearing works in constant contact with them. So, if you notice such a detail, do not despair. It will not bring you any unpleasant surprises if you replace the basket on time.
There is a special offer on our website. You can get a free consultation with our corporate lawyer by simply submitting your question in the form below.
Replacing the clutch at home
Clutch basket VAZ 2109
Before starting to replace the clutch, it is necessary to ensure all conditions for this operation. First you need to raise the car on a jack or lift. This way, you can better see all the damaged parts. After this you need to:
- Remove the exhaust pipe clamp. It comes off very easily. However, if it has never been removed before, you will have to lightly hit it with a hammer from the back side.
- Disconnect the driveshaft.
- Remove the rear flange.
- Unhook the starter (see Repairing the VAZ 2109 starter yourself - an opportunity to save a lot of money). This operation will become available only after all the bolts holding it are loosened.
- You need to start removing the gearbox handle.
- However, first of all, you should disconnect the beard by unscrewing the 3 bolts that hold it in place.
- Remove the rubber band and ring.
- After this you can remove the handle.
- Before you begin removing the clutch, you must unscrew all the bolts that secure it to the engine.
Clutch basket for VAZ 2109
- Unscrew the speedometer cable (see VAZ 2109: how to properly repair the speedometer). Remove two bolts.
- Unscrew the traverse. After this, you can easily remove the box.
- When all the bolts are unscrewed, you can remove the basket.
- You need to unscrew the bell.
- It is necessary to clean the gaskets with a knife to remove excess sealant.
- Pull out the oil seal. Clean it and put it back in place.
- Insert disc.
- Clean the entire surface and spray with degreaser. This manipulation is necessary so that the sealant fits well and then holds the gaskets.
Clutch basket for VAZ 2109
Apply sealant and install gaskets.
- Put on the bell.
- Remove the clutch bearing (you can remove it using pulling movements). Put a new one in its place.
- Put the gearbox in place.
- Pour in the oil.
Clutch adjustment
You can adjust the clutch as follows:
- Loosen the lock nut so that the adjusting nut can move.
- Using the tension nut, slightly tighten the cable (the car should move forward).
- To control the tightening, you can use the clutch pedal.
If these steps do not fix the clutch, then there is another problem. Perhaps the clutch cable itself needs to be changed.
Repair work
If you decide to do everything yourself, follow the following sequence of actions.
- Drive onto an overpass or pit. This will make it more convenient for you to work.
- Raise the front of the car using a reliable jack and securely fix the nine.
- Remove the wheels.
- Disconnect the clutch housing ground and clutch cable. Next you will have to remove the transmission.
- To do this, remove the starter by disconnecting the wires, terminals and unscrewing the three mounting nuts.
- Disconnect the speedometer cable and reverse cable.
- Remove the brace fastenings to the suspension arms and move them to the sides.
- Disconnect the ball joints from the swing arms. To do this, you need to remove the cotter pin, unscrew the nut, and knock out the support pin. Then the two nuts are unscrewed and the hinge is disconnected.
- Using a pry bar, press out the tip of the inner CV joint. Be sure to plug the hole formed in the gearbox using improvised means, otherwise oil will begin to pour out of the gearbox.
- Remove the lower clutch housing protection. There are only 3 bolts holding it in place.
- Make supports from bars, bricks for the box and engine.
- Remove the rear supports.
- Unscrew the remaining fasteners and pull the gearbox horizontally. Be careful not to deform the pressure spring lobes with the input shaft.
All steps from start to finish
Open the hood and find the gearbox. The starter will be located nearby. All nodes are covered with a filter that needs to be removed:
- Disconnect the negative terminal of the battery (key “10”);
- We disconnect in turn: the mass air flow sensor connector (oval), the adsorber valve (we press the tongue from below). We also loosen and remove the fastening tie for the “thick wire”;
Getting rid of unnecessary details
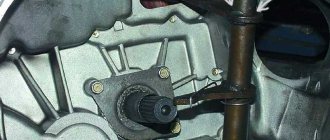
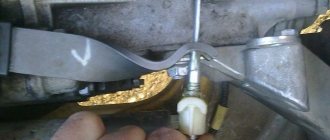
A “fork” will be attached to the top of the crankcase - a bent plate with a slot. This is the clutch fork (see photo).
Found the most important detail
Using pliers wrapped in electrical tape, try to pull the tip forward.
Clutch adjustment on Lada Granta (first method)
Here we will look at how to adjust the clutch on a Lada Grant:
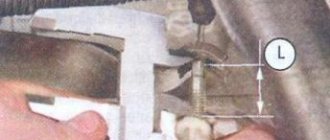
- Grasping the end of the cable, pull it forward as far as it will go.
- Using a caliper, measure the distance from the fork to the plastic leash. The distance should be exactly 27 mm.
If everything is set up and checked, measure the clutch pedal travel.
We measure the free movement distance
The distance from the “top point” to the “bottom” should not exceed 146 mm.
Alternative clutch adjustment method (second method)
No calipers are needed here:
- Carry out step 1 as indicated above - pull the tip forward.
- Let go of the tip and look: if the leash does not fit tightly to the fork, screw it onto the rod.
- Press and release the pedal (3 times), repeat steps 1 and 2.
Achieve the following: when the pedal is not pressed, the leash should be pressed tightly against the metal, at the same time, the displacement of the fork should not be noticeable. Let the displacement be equal to 1-2 mm.
About the mass. clutch housing. VAZ 2109
Look at the battery. Two wires come from it from the munus terminal, one (thick) should be screwed to the engine (to the body), the other (thinner) to the body.
Is this how it feels or not?
Yes, this is the crankcase. The wire doesn't have to be attached there. But in any case, there must be reliable contact between the body and the engine.
In the first photo there is an injection car (I can see by the perforated tube that protects the bundle of wires, and where you poke with needle-nose pliers, a rubber plug is placed), and in the second, judging by the fine filter, there is a carburetor engine. Have you lost a lot of weight?) ) Which car is yours?
This wire can be attached to the engine anywhere (it doesn’t matter), the main thing is that it reliably connects the engine and the body. Without this wire, the engine will either not start at all, or will work through the f&*^u
Throw a wire of a suitable cross-section in any convenient place, between the engine and the body, and the battery is a reliable minus for the body.
Clutch malfunctions and ways to eliminate them
Replacing the release bearing on a VAZ 2109
A car is a whole system, but it is fully studied by man and each symptom of a malfunction corresponds to the rules for elimination. Below are almost all the causes of clutch malfunctions and how to eliminate them.
Increased noise when turned on
- If there is increased noise when the clutch engages, this indicates wear or damage to the release bearing. There may also be a grease leak from the release bearing. The solution is to replace the bearing (step-by-step instructions for the process are given below).
- Increased noise when the clutch is engaged can also be caused by a breakdown of the damper springs that make up the clutch driven disc. In this case, you will have to replace the driven disk itself.
Jerks
- If jerking is observed when shifting the clutch, then the friction linings may have become oiled. Remedy: Thoroughly rinse the surfaces of the linings with a special liquid and be sure to replace worn gearbox and engine seals.
- Jerking can be caused by jamming in the clutch release drive. To eliminate this problem, you first need to find the reasons that contribute to the jamming. Then replace these same parts.
Clutch slipping
- If the clutch does not engage fully, then we may be talking about increased wear or burning of the friction linings. The solution is to replace the linings.
- This can also be caused by oiling of the same linings. The elimination method is the same as for regular oiling - rinsing with white alcohol and replacing the seals.
- The clutch may slip due to damage or jamming of the drive. In this case, you will need to again find the parts that contribute to the jamming and replace them.
Clutch leads
- If the clutch does not slip, but moves, this may indicate insufficient pedal travel. By adjusting the clutch release drive, the malfunction can be eliminated.
- The clutch can also jam if the driven disc is warped. In this case, the disk is either replaced or straightened.
- A stuck HP hub can also cause the clutch to slip. You just need to clean the splines and rinse them with alcohol. If the splines themselves are very worn, the input shaft should be replaced.
- If the pressure plate is skewed or warped, replace the clutch housing.
- If the rivets are loosened or the friction lining is broken, the clutch will again not engage completely. In this case, the linings are replaced or the runout is checked.
- The performance and functioning of the clutch cable may be impaired. The cable is replaced and everything starts working as before.
Read more: Mix 5w30 and 10w 40 oil
Signs of a malfunctioning clutch system
- When a car is driven on a road with an incline, the car does not climb up the road, despite the car's engine speed constantly rising.
- Increased speed when driving in a straight line, increased fuel consumption, engine overheating, increased fuel consumption.
- If you press the clutch and brake pedal, the engine will stall.
- If the engine is running, it is quite difficult to change gears. Such problems do not arise with the engine turned off.
- During a cold start, it is difficult for the starter to turn the flywheel, although the clutch is intact. It is also difficult for the engine to run and stalls.
- When you press the clutch pedal, extraneous sounds may occur.
- When changing gears, the car may jerk or the engine may stall.
- Depressing the clutch pedal may be difficult.
- The clutch pedal travel exceeds normal (14 centimeters).
These causes indicate too much wear on the clutch disc or contamination of the working surface with oil. Inspect the disc as well as the flywheel. If they have traces of oil, the seals need to be replaced. If you do not see any traces of oil, be sure to replace the clutch driven disc with a new one.