This type of malfunction, such as non-working brake lights on a VAZ 2107, is a common situation that every owner of this brand of car faces. The reasons why the brake lights on the VAZ 2107 do not light up are factors such as burnt out light bulbs, short circuit in the wiring or oxidation of the contacts. Driving with faulty feet is not only prohibited, but also dangerous, so let’s find out how to find and fix the problem yourself.
Troubleshooting procedure
Lamps fail most often. It's best to start with them. If they are working properly, remove the plugs from the frog and connect them together. The plugs should have +12.
If there is no voltage, check the fuse. If the fuse is intact, check connector Ш12. By applying 12V to pin 3 of the Ш12 connector, voltage should appear. Check the voltage at the fuse contacts. If there is voltage on the fuse on both sides, we try to apply +12 directly to the frog plug. If the lights come on, change the fuse box.
The fuse box can only be repaired in specialized workshops. In this case, the board track could have burned out.
When there is voltage at the frog plugs, but the lights do not light up, we check 12V directly at the contacts of the lights board. If there is voltage, but the lamp does not light, check the connector contact. When there is voltage at the board contact, but the lamp does not light up, remove the lamp and check for the presence of 12V directly on the current of the conductive surface of the base. If there is voltage and the contact is clean, check the housing part of the base. If necessary, replace the flashlight board.
It is extremely rare for the brake light wire to break. The wiring harness comes out from under the instrument panel and runs along the floor of the car under the carpet. Both brake lights are connected in parallel. We check the integrity of the wire from the frog to the lights. If necessary, replace a separate stop wire.
What to do if there is no charge, weak charge (battery is discharged)?
If the battery of your VAZ 2107 is discharged, then one of three elements may be “to blame”: the generator, the voltage regulator, and the connections between them. Determining “who is to blame” can be very simple, even without additional devices. How this article will help.
We carry out testing using standard equipment
To monitor the operation of the generator on the “seven” there are two instruments: a voltmeter and a control light on the instrument panel. With their help, you can track the cause of your troubles.
1) Turn on the ignition without turning on the starter
and look at the warning light. It should shine at full intensity, as in the photo. The voltmeter needle, normally, stands on the white part of the scale (photo). Let's say everything is OK - go to point 2 - start the engine.
The battery charge control lamp is on
Position of the voltmeter needle before starting the engine (ignition on)
The lamp does not light, the voltmeter needle remains at zero when the ignition is turned on.
Check fuse No. 10 in the mounting block. 99% of the time it will be burnt out. In this case, all other lamps on the instrument panel will also be de-energized. Replace it with the same one and test again. If the fuse burns out again, you need to look for the cause, that is, a short circuit. We check whether the wires from the generator are disconnected, whether the insulation is frayed somewhere, etc. Diagram 3 at this link will help you find the reason
The lamp does not light up, the voltmeter needle shows normal
We check the wires on the generator to see if the wire has come loose from terminal “61”. If everything is normal there, you need to check whether there is a “plus” on this wire using a test lamp, an indicator screwdriver or a multimeter.
Terminal “61” of the VAZ-2107 generator
If there is a “plus”, we check the “tablet” (aka “chocolate”) and the generator.
There is no “plus” - you will have to remove the instrument panel and check the lamp. Replace the burnt out one. How to remove the panel, watch the video
2) Start the engine
The control lamp should go out, the voltmeter needle goes into the green sector and is located from the middle to the right edge (photo). If everything is so, then most likely the generator is working normally.
The voltmeter shows normal voltage (charging is present)
The lamp remains on or dims slightly
If you give it gas, it goes out at high speeds and lights up again when they decrease. The voltmeter needle is in the white sector and goes to the edge of the green when the speed increases. The generator output is faulty. The same conclusion if the lamp continues to light at any speed, and the voltmeter needle is in the white sector and even goes to red.
Voltage too low (motor running). Weak charge
Read, it may come in handy: If the electric motor of the heater (stove motor) of the VAZ-2107 does not work
Removing and replacing rear lights
The procedure for replacing rear lights is as follows:
- First you need to turn off the ignition, open the hood and disconnect the terminals from the battery.
- Then open the trunk of the car and remove the protective cover on the headlight, disconnect the mount and disconnect the wiring connector from the contacts on the board. Be careful not to damage them.
- Using a size 8 socket wrench, you need to unscrew the four nuts that secure the taillight. Having done this, under the nuts of the studs you will be able to see the tips of the ground cable.
- Next, you need to carefully remove the taillight from its seat. To change the diffuser, it must be removed from the optics body.
- The procedure for installing and assembling optical elements is performed in reverse order.
Technical characteristics of the “Seven” injection engine
In carburetor systems, the creation of a combustible mixture is carried out directly in the chambers of the carburetor itself. However, the essence of the operation of the injection engine on the VAZ 2107 comes down to a different approach to forming the fuel-air mixture. The injector sharply injects the fuel itself into the working cylinders of the engine. Therefore, such a system for creating and supplying fuel is also called a “distributed injection system.”
The injection model VAZ 2107 is equipped from the factory with a separate injection system with four injectors (one injector for each cylinder). The operation of the injectors is controlled by the ECU, which regulates the flow of fuel to the cylinders, obeying the requirements of the microcontroller.
The injection engine on the VAZ 2107 weighs 121 kilograms and has the following dimensions:
- height - 665 mm;
- length - 565 mm;
- width - 541 mm.
The power unit without attachments weighs 121 kilograms.
Injector ignition systems are considered more convenient and modern. For example, the VAZ 2107i has a number of important advantages over carburetor models:
- High engine efficiency thanks to precise calculation of the amount of fuel injected.
- Reduced fuel consumption.
- Increased engine power.
- Stability of idling, as all driving modes are controlled via the on-board computer.
- No need for constant adjustment.
- Environmentally friendly emissions.
- Quieter engine operation thanks to the use of hydraulic compensators and hydraulic tensioners.
- You can easily install cost-effective gas equipment on the “Seven” injection models.
However, injection models also have disadvantages:
- Difficult access to a number of mechanisms under the hood.
- High risk of catalytic converter damage on rough roads.
- Capriciousness regarding fuel consumed.
- The need to contact a car repair shop for any engine malfunctions.
Table: all 2107i engine characteristics
| Year of production of engines of this type | 1972 - our time |
| Supply system | Injector/carburetor |
| engine's type | Row |
| Number of pistons | 4 |
| Cylinder block material | cast iron |
| Cylinder head material | aluminum |
| Number of valves per cylinder | 2 |
| Piston stroke | 80 mm |
| Cylinder diameter | 76 mm |
| Engine capacity | 1452 cm 3 |
| Power | 71 l. With. at 5600 rpm. |
| Maximum torque | 104 Nm at 3600 rpm. |
| Compression ratio | 8.5 units |
| Oil volume in crankcase | 3.74 l |
The VAZ 2107i power unit initially used AI-93 fuel. Today it is allowed to fill AI-92 and AI-95. Fuel consumption for injection models is lower than for carburetor models and is:
- 9.4 liters in the city;
- 6.9 liters on the highway;
- up to 9 liters in mixed driving mode.
The car has economical fuel consumption due to the use of an injection system
What oil is used
High-quality maintenance of an injection engine begins with the choice of oil, which is recommended by the manufacturer itself. AvtoVAZ usually indicates in the operating documents of such manufacturers as Schell or Lukoil and oils of the following type:
- 5W-30;
- 5W-40;
- 10W-40;
- 15W-40.
Fuse box VAZ-2107
The VAZ-2107 fuse box is located in the engine compartment, to the right of the engine (if you look in the direction of travel of the car). It contains the main fuses and relays. To check whether any of them have burned out, you need to open the hood and the plastic cover of the block, on which the names of the fuses and their nominal values should be indicated.
R1 - relay for turning on the heated rear window . If the heating does not work, check this relay, as well as fuse F5, replace the burnt or faulty ones. If the relay and fuse are working, check the contacts for connecting the wires to the heating strips on the rear window (on the side closer to the side doors)
R2 - headlight high beam relay . Works in conjunction with fuses F12 and F13. If only one headlight does not shine on high beams, most likely the problem is in the lamp, which is time to be replaced or in fuse F12 or F13 (right/left headlight, respectively)
R3 - headlight low beam relay . Works in conjunction with fuses F16 and F17. If the low beam does not work in both headlights, it is most likely the problem with this relay. First of all, replace it with a working one. If it doesn’t help, both lamps could have burned out (this happens) or their fuses.
1 — connector for the relay for turning on the headlight cleaners and washers . If your car does not have these devices, then the presence of a relay is not necessary.
We recommend: Valve desiccant - how to make a special tool with your own hands?
2 — connector for the horn relay . In the figure, a jumper is installed so that the sound signal works without this relay.
3 — connector for the cooling system fan motor relay . In the figure, a jumper is installed so that the fan operates without this relay. Be careful with this connector. Failure to contact the jumper in the absence of a relay can cause the fan to fail, and this can lead to overheating of the coolant and, accordingly, the engine. When the first signs of overheating appear (according to the temperature sensor and boiling of the liquid), turn off the engine as soon as possible.
4 — tweezers for replacing fuses 5 — spare fuses 6 — tweezers for replacing relays
Try to always have spare fuses of different ratings, so that if they blow out on the road, you don’t have to look for the nearest car shop.
COMPONENTS FOR CAR TUNING
The production of spare parts and accessories for the VAZ 2107 has long ceased to be the exclusive domain of a limited number of supplier enterprises. On store shelves there is a large selection of additional equipment for car tuning. Rear headlights for the specified car model are present in the most extensive range.
Component manufacturers offer the following types of flashlights:
- Sports version with four separate round and two rectangular signals. They are arranged in the form of separate modules, and the plastic body can be painted to match the color of the car body.
- Skylain lights have an unusual appearance with three round indicators, and in the upper part there are rectangular turn and reverse signals. The visible part of the body is made of high quality transparent plastic and has a chrome finish.
- Rear headlights of the Ciliac type for the VAZ 2107 differ from other designs by the presence of LED direction indicators, which prevent the signals from being illuminated even in bright sunlight. The device is very popular among car owners due to its unusual shape.
- Tinted lamps are designed specifically for lovers of unusual color schemes. They feature round signals with powerful lamps that are clearly visible in any lighting conditions.
- LED rear lights of a classic design, made in carbon color. The indicators in the device are located closest to the color scheme of the original device. The diodes have high brightness and short response time.
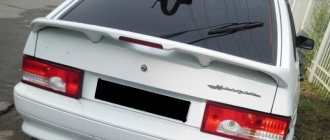
The rear lights of a VAZ 2107 car must first of all inform traffic participants about the driver’s intentions and actions. High information content of signals will help to avoid misunderstandings on the roads, and in some cases, emergency situations.
Brake lamps, how to check their functionality
If the fuses are okay, you need to move on. You should open the luggage compartment and remove the taillights to check the integrity of the brake lamps.
It is advisable to check them by inserting spare lamps, since very often upon visual inspection the lamp may appear to be working. If replacement bulbs are not available, remove suitable bulbs from other locations, such as turn signals, parking lights, etc. After replacement, press the brake pedal and check for the presence of light. It is necessary to carry out replacement and other operations in both headlights, because in some vehicles, when one brake light fails, the second one also stops working.
If the light appears, then the cause of the breakdown was indeed the brake lamps, but if the fault could not be eliminated, we proceed to the next stage - checking the contacts.
Reasons why the reverse lights of a VAZ car do not light up
Why might the reverse lights not light up?
First, you need to find out why the reverse lights do not light up - maybe the bulbs are simply burned out (see Replacing bulbs in the rear light of a VAZ 2110: do it yourself) and you don’t even need to change the sensor? Here are some reasons:
The reverse lights are burnt out. You can check their performance by removing them from the flashlights and checking them with a multimeter.
- Damaged wiring is another reason. Everything is more complicated here - you will have to search longer. And it is checked in the same way - using a multimeter for continuity or resistance.
- Poor contacts on the reverse sensor. As you know, nothing with poor contact usually works.
- Violation of the insulation on the wires near the sensor leads to their short circuit.
- The fuse has blown (see VAZ 2110: how to replace fuses). Which one needs to be clarified for each car in the repair manual.
- Well, the breakdown of the sensor itself - this is evidenced by both the lights not turning on when reverse gear is engaged, and the constant glow of the lights.
To fix a malfunction of the lights, you may have to perform all the repair points, but you can start with the sensor. The price for it is small - usually about 100 rubles, so you can buy it and change it, and then solve problems as they arise.
Tools
So, what do you need to replace the reverse sensor yourself:
A set of keys. Although this is even said loudly. You will need a 22 key and in some cases a 24 key
An extended 22mm socket will be needed to remove the reverse sensor
Multimeter
Be sure to get a multimeter
- Small container for oil
- Screwdriver
- Pliers
- Knife
- Insulation tape
- Hammer
- Chisel
The main causes of brake light failure
Unlike dimensions and hazard lights, your car must have working brake lights. They signal to cars behind that the driver is slowing down. Notifying drivers behind when braking helps prevent collisions and accidents. It is quite difficult to detect a stop fault on a VAZ 2107 yourself, since these signals are located at the rear. In order to see the operation of the brake lights, you will need two people, one of whom must press the brake pedal, and the second must control the effect.
When you press the brake pedal, the following effects may occur:
- The brake lights are on - there is no malfunction and the car can continue to be driven.
- If they don’t light up, you need to look for the problem. Moreover, the signal that both lamps on the car are not lit indicates the need for a global check, since paired light elements burn out in rare cases.
- They are half lit - if only one brake light is on, then you need to disassemble the second headlight and check the serviceability of the lamp. It is more likely that the lighting element (light bulb) has failed, and less often the cause may be a broken contact.
The reasons for the stop malfunction on the VAZ 2107 are:
Flashlight weight
- Fuse F11(10A) has failed. A fuse consists of a fuse-link that burns out when a large current passes through the circuit. The fuse is designed for the appropriate current value, so its blowout may be due to a short circuit or the installation of high-power lamps.
- Wiring is shorted or damaged. This type of malfunction often occurs after work has been carried out in the interior or luggage compartment.
- Oxidation of contacts. Oxidation may form over time at the junction of the lamps with the socket, or at the junction of the wires to the headlights, which is caused by poor contact and moisture getting inside the taillight headlight unit.
- Burnout of incandescent lamps - lamps have their own resource, so often the inoperability of the brake light is associated with their burnout.
- The malfunction of the toad or frog is a sensor that is located in the brake pedal structure. The sensor closes the contact when the brake pedal is pressed, causing the brake light to come on.
parking lights
Dimensions on the VAZ-2107 are activated by the leftmost of the four key switches located under the gearbox control lever . This switch is a three-position switch: the side light, along with the license plate light and instrument lighting, is turned on in the second position.
On the fuse block, which is located under the hood of the car near the windshield closer to the passenger seat, the rear side lights fuses are numbered F14 (8A/10A) and F15 (8A/10A). In this case, fuse F14 is responsible for the operation of the side lights of the left front headlight and the right rear light, as well as:
- a lamp indicating the operation of the dimensions;
- license plate lights;
- engine compartment light bulbs.
Fuse F15 is installed in the side light circuit of the right headlight and left rear light, as well as:
- instrument lighting;
- cigarette lighter lamps;
- glove compartment lighting.
Typical faults
If the brake lights do not light up, then it may be the car's brake light lamp itself. The simultaneous failure of lamps from both lampshades is rare, but such a breakdown does occur.
- The brake lights on the VAZ 2107 may fail due to poor connection of the vehicle's electrical connectors.
- The fuse has failed.
- The brake frog has failed.
- Brake light problems.
Recommended: Check Engine Light Is On - What Does It Mean?
A lamp can burn out for a number of reasons. This includes a long service life, manufacturing defects, and dirt or water that gets on the base.
The most common manufacturing defect is the lack of connection to the lamp body wiring. In this case, the lamp base often begins to rotate even with minor efforts.
Sometimes the solder on the base oxidizes. This problem can be easily fixed by scraping off the solder with a knife or sandpaper.
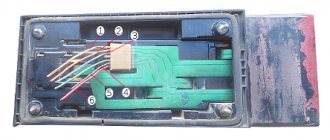
The lamp board also oxidizes. In this case, the surface is cleaned with a washing eraser until shiny.
Different lamps may experience different malfunctions at the same time. It can happen at the same time!
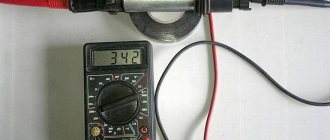
A visual inspection of the lamp may not reveal anything. It should be checked by direct connection to the +12 source.
Poor connector connection. The taillights are connected to the electrical circuit using connectors. This is where the maximum amount of trouble lurks.
Stoplights may not burn due to a poor connection or board oxidation. Remove the connector and wipe the board with a washing eraser until it shines.
The failure may also be in the connector itself. The connector contacts are very delicate. They may move away or burn out. If they move away, they are lifted up a little with a needle. If the contact is burned out, then either replace it or replace the entire connector.
There is a Ш12 connector in the fuse block. Contacts may also come loose there. Move it.
Fuse failure. The brake light lamps operate through fuse 11. You can check it with a tester. The fuse in older units is 8A. The new blocks have 10A. Fuses must be installed only with the calculated rating. They are designed to operate at a certain current in the circuit. All current-transmitting electrical wiring elements are designed for a slightly higher current. Excessive current in the circuit can lead to failure of both the wiring itself and the fuse box tracks.
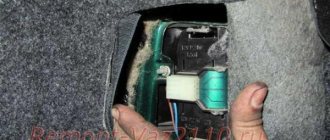
Frog malfunction. The frog is located on top of the brake pedal. It is very easy to check its serviceability. Remove both connectors from the frog and connect them together. If the brake lights come on, it means it needs to be replaced.
The frog is secured with a nut on the rod and a lock nut. Remove the retaining plastic nut, remove the lock nut and remove the frog from the bracket.
When installing the frog, ensure that the stoppers light up when you press the brake pedal 1.5-2 cm. Be sure to install the protective plastic rod nut. This will protect the rod from failure.
How to improve and brighten
The taillights of any car are a sign of driving safety. They are the ones who show the cars behind us what we are going to do or are already doing. On a clear day, the brightness of the standard lamps in the flashlights may not be enough, so it makes sense to increase this brightness.
Such a modification does not threaten any troubles, since it is impossible to dazzle even with bright “stop lights” or “turn signals”. How to increase brightness at minimal cost? The simplest option is to replace the standard lamps with halogen ones, which create a greater luminous flux.
Such lamps can be installed on the reverse gear, brake light and turn signal. You shouldn't put them on the fog light. This power will simply melt the glass during prolonged operation.
Important! When installing such lamps, the fuses responsible for their operation may blow out. The issue is resolved by installing fuses of a higher rating.
But, of course, they will not fit into the rear light fixtures. It takes a decent amount of time to ignite them - up to 5 seconds. or more, and the taillight lamps must react with lightning speed. We don’t want the brake light to come on when someone drives into us. And a turn signal that blinks once after performing a maneuver will not add safety. In addition, installing expensive ignition units on brake lights is stupid, to say the least.
But “halogen” lamps, of course, are not the best option - incandescent lamps, especially halogen ones, do not tolerate constant switching on/off and will quickly burn out. The best option is an LED light source, which creates an increased luminous flux.
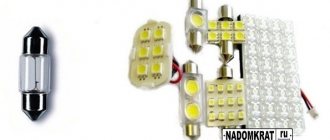
A more labor-intensive option is to install LEDs or LED strip yourself. It is good because it will not only increase the brightness of the light fixture, but also improve its appearance.
Tuning with LEDs
We will be tuning with LED modules and an LED strip with 5050 LEDs with a power of 0.21 W each.
We remove the rear lights, remove the glass and circuit board from them and put them aside. Naturally, we will not modify the glass. Now, from plexiglass or any other suitable material, we cut out the inserts for the brake signal window and turn signal. We will leave the standard lamps in the fog light and reverse signal.
Now we cut the tape into strips of 9 LEDs. We cut strictly in the places indicated by the manufacturer - they are most often marked on the tape with scissor icons.
In total, you will need 5 segments for the turn signal and two for the side light. We solder the segments together, observing the polarity (marked on the tape). For turns and dimensions, of course, separately.
There will be three modules in the braking signal; we also solder them together. Using double-sided tape, glue the turn strips and above them one marker light strip onto the insert. We install the insert itself in place and fix it with sealant. We lead the power wires through the reflector into the hole for the turn signal lamp - it won’t be there anyway.
Important! We connect the tape responsible for the side light so that it glows red. To do this, you need to supply power to the +12V and R contacts.
We do the same with the modules - we glue them onto the brake light insert, and glue the insert into place using sealant.
Now, using the same sealant, we glue the second tape of the side lights to the place indicated by the arrows in the photo. Naturally, we glue it with the edge to the partition.
We remove the turn signal, side light and brake signal bulbs from the board. We solder the wires from our new lighting devices to the corresponding tracks of the board (see photo from the “Connection diagram” section). At the same time, we observe the polarity: minus of the tape and modules - to the ground track, pluses - to the tracks that powered the corresponding light bulbs.
We install the board in place, assemble the flashlight, install it on the car, and connect the power connector. Turn it on and check it.
In the photo the brake light is on and the side light has turned into a strip. The brake light appears yellow, but is actually bright red - it's just poor camera color rendering. The turn signal is not turned on, and the problem is very clearly visible: the LEDs shine through the glass, which, to put it mildly, is not entirely aesthetically pleasing. We were clearly in a hurry with the installation of the lantern. Well, we'll have to solve this issue with tinting. It will not only hide the LEDs, but also decorate the car.
Tinting
This operation can be carried out in two ways: using a tinting film and a special tinting varnish. We'll try both.
Varnish tinting
We go to a car store and buy a special tinting varnish. We remove the headlight, remove the glass from the headlight. Some people simply cover the body with masking tape and tint it directly on the car, but we won’t do that. Wash and dry the glass thoroughly.
Carefully read the instructions for the varnish (it is in an aerosol can) and cover the glass with the first layer, spraying the varnish from a distance of 25-30 cm. After the layer has dried, apply the second one and after it has dried, check the result by assembling the headlight and connecting it to the on-board network.
The main thing is not to overdo it with tinting. On the one hand, a thick layer of varnish will have a very presentable appearance, on the other hand, it will greatly weaken the light of the light bulbs. We will paint without fanaticism, in two layers. The LEDs and red glass of the brake lights are not visible through it - that's enough. We install the lantern in place and admire it.
Film tinting
You can tint with film by car, so we won’t remove the light fixture. Just wash the glass thoroughly. We cut a piece of film to the size of the lantern with an allowance of a centimeter on each side.
Spray the glass with a weak soap solution, remove the protective layer from the film and apply it to the glass. Using a rubber spatula, carefully rub the film from the center to the edges, expelling water from under it. We cut off the excess with a stationery knife or sharp scissors and grind the edges.
Another tuning option with self-installed discrete ultra-bright LEDs is presented in the video below. Here the side light is combined with a brake signal.
Taillight tuning ideas
How can you improve the rear optics in the Seven:
- Installation of sports optics. This lantern includes four round and two rectangular light elements.
- The next option is to use Skyline headlights. Such devices are equipped with three round light indicators, as well as two rectangular lights and brake lights that are located above them. In this case, the body of the product is made of transparent plastic, which is coated with chrome.
- Installation of so-called eyelashes instead of traditional lights. The main difference between the cilia is their original shape, as well as the presence of diode direction indicators. As practice shows, they burn well even in bright sun.
- Using glass tinting as tuning. You can buy tinted optics that are ready for use, or you can tint them yourself. The tinting procedure itself can be carried out using a film or a special varnish. It should be noted that it is better to install more powerful lighting sources in tinted devices to ensure good visibility of the signals.
- You can also use diode headlights in the classic version. You can also buy such products at an auto store or install LED elements yourself. One of the main reasons why owners of “sevens” choose this option is the speed of operation, as well as good brightness.
LANTERN DEVICE
The rear headlights are an original unit containing the following elements:
- sockets for installing incandescent lamps;
- built-in reinforcing deflectors,
- printed circuit boards for connecting lights to the power and control system.
All modern lighting equipment necessary for tuning a VAZ 2107 car has standard connectors. The taillights easily connect to the on-board network without any modifications. This simplifies the task of car owners in installing this type of product with minimal time. Flashlights produced for this model fully comply with the requirements of the state standard.
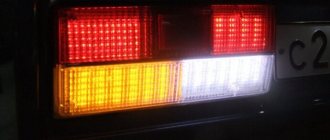
The design of the vehicle provides the following signals on the rear lights:
- side lights – red;
- direction indicator – orange;
- brake light - red;
- The reverse indicator is white.
The light panels are quite large in size, which ensures they are highly informative for traffic participants. They are clearly visible at a considerable distance, and the meaning of the signals in the perception of drivers has an unambiguous interpretation.
Video “Replacing a foot on a Mercedes”
This video demonstrates how to replace a brake light with your own hands using the example of a Mercedes (the author of the video is Ivan Poknya).
The VAZ 2107 wiring diagram is quite simple. You can identify and fix the problem yourself. If the brake lights on the VAZ 2107 do not light up, then the fault should be looked for in certain places. To determine the problem you will need a tester, an eraser, two pieces of wire and wrenches.
Electrical check
If the audit has not yet given certain results - positive or negative - we continue our check with the electrical system. It must be said that not all car owners like to tinker with it, and some prefer to roll up at this stage, turn on the emergency lights and go into the hands of the nearest car service center. But for those who don’t give up and have at least a little knowledge of electrics, we recommend continuing.
Fuse
- an important element that can also fail. Try replacing the corresponding one with a spare one. Maybe that's the reason.
We look through the wires of the electrical circuit. After all, they, especially if the machine is already old, could fray and collapse. We start with the positive from the generator. We call the wires passing through the interior, since they are the most vulnerable to mechanical stress. We pay close attention to contacts. If some part of the circuit does not ring through, we change the wire.
All this can be done using a control light, one contact of which is connected to ground, and the second to the current terminal (the second option is to throw a long wire to the battery). If even after these manipulations the brake lights on the VAZ 2107 do not work, then most likely there is a problem in the mounting block itself with fuses and it will have to be repaired.
Source
Why don't the VAZ 21099's stops work?
Quite often it is possible to hear about a problematic situation when the feet in a VAZ 21099 vehicle do not work. This cannot be called a minor nuisance, since the driver can use the device to signal to moving cars that he is braking. Cars are warned and also reduce speed.
If the defect is not eliminated, in the event of an accident you will compensate for the repairs of those involved in the accident. The owners will become the injured party as a result of the inspection. This kind of accident can happen often.
There are many reasons why brake lights don't work. This is both the most trivial case and the most thoughtful. It is worth reading on the Internet about how to correctly identify a malfunction and eliminate it. You will then be able to know when your car is working correctly. The information will become relevant for many drivers.
