Good day friends =)
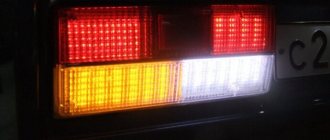
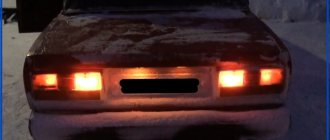
One day, while driving away from the yard, a friend said that the license plate light was not on. oO. Indeed.
The next day (not to do this in the evening) I decided to disassemble the lampshades and see what happened to them. This picture appeared before my eyes.
I think, well, what should I put here? And then I remembered. When I was still at nine, in the summer I ordered light bulbs from Ali for our base. Hmm) I should try it, why was I waiting for the package in vain_)
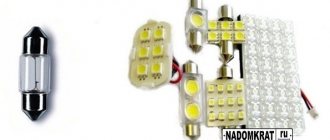
This is what they look like
Price: 28.60 rub. / PC.
Agree, the price for a lamp that costs from 70 rubles in a store is ridiculous. Yes, someone will say that the store has quality, but again you don’t know, maybe this is one batch, and assembled at the same factory in China) So why not =) At the same time, we’ll check how long they will live.
Well, I got distracted) I stuck it in the lampshade, checked it, it doesn’t work. Hmm...I remembered about the polarity, turned it around, and voila, there is light =)
I also stuck one thing into the interior lighting. I bent the mustache a little and it worked like a glove)
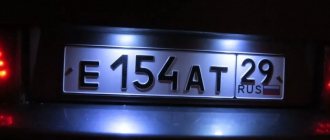
Why is the VAZ 2114 license plate illuminated? To identify a car in the dark, the color of the lamp must comply with the legislative standards of GOST and traffic regulations. White or yellow lighting is recommended rather than blue or red. The original lighting has one drawback - in the presence of a wide color variety, the process of operating the car is difficult, so the lighting system needs serious modification or complete replacement.
Variants of doves for number plate illumination
How to replace the license plate light bulb?
All this work will take little time, about five minutes. You need to prepare a flathead screwdriver and take new light bulbs. Then perform a few simple manipulations:
- Turn off the lights.
- Open the trunk.
- Take a plastic screwdriver and use it to pry the lampshade by the sealing clips.
- Remove the backlight housing and disconnect the contacts.
- Pull out the sealing sleeve.
- Make a replacement.
- Reinstall the structure.
- Check the functionality of the device.
Tuning the ceiling
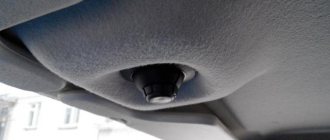
Such a pleasant and exciting thing for a car enthusiast as do-it-yourself tuning is also possible with a courtesy lamp. Instead of the usual one, a lampshade with a programmable LED lamp is installed. It has advanced features:
- selection of three brightness modes, this selection is made by switching the switch at intervals of one second, the last switching on is remembered;
- shutdown delay 6–8 seconds with smooth lamp extinguishing;
- automatic shutdown when the door is not closed or not tightly closed after 30 minutes.
In what ways can you achieve original license plate lighting?
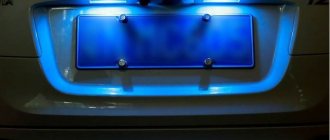
Recently, there have been frequent cases when LEDs are inserted into the ceiling instead of conventional lamps. Such lighting is bright and attractive, making the car original and interesting. It is important that the lighting has a color acceptable by GOST standards and that the numbers are readable.
It can be installed on a VAZ 2114 car in two ways.
First way
Replace standard incandescent lamps with LED lamps (they have the same contacts as in factory products).
Attention: if you are installing an LED lamp, it is important not to reverse the polarity, otherwise the lamp will not function.
It is also important to choose the right light bulbs; too bright ones will quickly fail and take up too much energy. It’s also not worth installing very expensive products, because the lighting will become very noticeable, distracting drivers from the road process. Low quality light bulbs can have various defects and quickly fail. So we buy light bulbs from trusted representatives and use them economically.
Second way
Install LED strip. To do this, you will need resistors - 3 pieces and the same number of LED strips. Their colors are very diverse, but it is best to choose white or yellow tones.
Attention: traffic police officers pay attention to such luminous strips, and may impose a fine for failure to take into account the rules for installing lighting devices. You need to take this factor into account before installing the product!
If a motorist, in spite of everything, wants to replace the standard backlight with LED, the following steps must be followed:
- Solder a resistor to the positive end of the LED segments.
- Attach small wires to its end and the negative side.
- The result is a design with two contacts, which are powered by wires from the standard backlight.
To give the tape an original design, you need to take a piece of plexiglass and glue the strip onto it with silicone sealant. Next, we connect the wires of the tape to the contacts of the factory backlight lamps and make insulation.
At the next stage, we prepare the surface for installing the product:
- remove the lampshades;
- degrease the fastening side with solvent;
- after drying, apply sealant and glue the LED strip;
- We seal the tape along the edges and leave it until completely dry.
Attention: the diodes are distributed in the corners and fixed with sealant, this way you can avoid moisture getting into the structure. During operation, too many wires will come out, but do not pay attention to this, in the end there will still be two of them. The wires are connected to the standard backlight or to a separate button.
We check the operation of the design in action. If everything is functioning correctly, the job has been done effectively. In exactly the same way, you can illuminate the license plate around the edges, but this can lead to problems with the traffic police. Let's remember this!
LED lighting looks attractive both during the day and at night, making the car bright and original.
Options and methods for installing LEDs for license plate lighting
Many car owners install additional lighting on their license plates. And for good reason.
Firstly, LED lighting has a long service life and low electrical energy consumption.
And secondly, such lighting is an excellent car tuning, allowing you to make it more aesthetically pleasing for little money.
LED backlight for VAZ 2114 license plate
It is important to know that installing additional lighting is only allowed on the rear license plate!
There are two ways to install LEDs as car license plate illumination.
The first option is to simply replace conventional light bulbs with diode elements.
The second option involves installing additional LED devices.
Of course, you can contact a service station for these services. However, this problem can be solved with your own hands, which will allow you to save a lot of money.
For tuning, diode strip is mainly used.
It can be installed in two ways:
- Fastening the tape to the car body. To do this, you need to buy a diode strip (ideally three-matrix), which can be directly connected to the on-board network. Then measure the required length of the tape and cut a piece. Solder the wires and wrap the soldering points with insulating tape to protect them from moisture. Next, you should attach the lighting elements directly to the body using clamps or glue. Now all that remains is to connect the wires, not forgetting the polarity.
- The introduction of an LED strip into the lampshade to illuminate the room. To do this, you need to prepare a piece of LED strip in the same way as described in the first option. Then you need to dismantle the lampshade and remove all the contents from it. Attach the LED strip to previously prepared pieces of plastic, or, in extreme cases, to protective glass. After installing the tape, you can connect the wires to the standard wiring, remembering to insulate all connection points. All that remains is to check the functionality of the structure and screw the lampshade into place.
License plate lighting upgrade option
The methods described are the most common in modern practice, but there is another option.
It consists of installing an additional lantern made of organic glass and foil. The wires are attached to the LED strip in the same way as in the first option. Then the tape should be attached to pre-selected plexiglass, 3-4 mm thick. The foil will act as a reflector in this design. The edges should be treated with silicone sealant and the wires should be connected directly or routed to a separate switch.
How to change the license plate light bulb of a VAZ 2114
To replace a light bulb you do not need to have any special skills, and this work will only take 5-6 minutes. All you need is new lamps and a suitable screwdriver.
Replacing the VAZ 2114 license plate light bulb consists of the following simple steps:
- turn off the lighting;
- open the trunk;
- pry up the sealing clamps of the lampshade using a screwdriver;
- pull the backlight housing out of the lampshade and disconnect the contacts;
- remove the coupling and insert new light bulbs;
- We assemble the entire structure in reverse order.
Electrical diagram of VAZ-2115-01
Years of production 2115: 1997—2012. This is a circuit with a regular button for rear fog lights (with locking), a fluorescent interior light, a connector for the clock and an 8-pin connector for the injector wiring. 1 — block headlights; 2 — fog lights; 3 — air temperature sensor; 4 - generator; 5 — electric motor of the engine cooling system fan; 6 — fan motor activation sensor; 7 — engine compartment lamp switch; 8 — block for connection to a single-wire type audio signal; 9 — sound signal; 10 — oil level sensor; 11 — front brake pad wear sensors; 12 — washer fluid level sensor; 13 — spark plugs; 14 — ignition distributor sensor; 15 - switch; 16 — carburetor solenoid valve control unit; 17 — carburetor solenoid valve; 18 — carburetor limit switch; 19 — speed sensor; 20 — starter; 21 - battery; 22 — relay for turning on fog lights; 23 — coolant level sensor; 24 — brake fluid level sensor; 25 — reverse light switch; 26 — coolant temperature indicator sensor; 27 — engine compartment lamp; 28 — windshield wiper gearmotor; 29 — oil pressure warning lamp sensor; 30 — block for connecting to the rear window washer electric motor; 31 — electric motor for windshield washer; 32 — ignition coil; 33 — instrument cluster; 34 — mounting block; 35 — brake light switch; 36 — blocks connected to the injection system wiring harness; 37 — ignition switch unloading relay; 38 — ignition switch; 39 — glove box lighting lamp; 40 — switch for the glove compartment lighting lamp; 41 — rear window heating switch; 42 — fog light switch; 43 — fog light switch; 44 — external lighting switch; 45 — alarm switch; 46 — steering column switch; 47 — instrument lighting regulator; 48 — hydraulic corrector scale illumination lamp; 49 — socket for a portable lamp; 50 — side direction indicators; 51 — switches in the front door pillars; 52 — lamp for individual interior lighting; 53 — electric heater fan; 54 — additional resistor of the electric heater fan; 55 — heater electric fan switch; 56 — backlight lamp for the electric heater fan switch; 57 — backlight lamp for heater control levers; 58 — display unit of the on-board control system; 59 — trip computer; 60 — switches in the rear door pillars; 61 — block for connection to the clock; 62 — electric fuel pump with fuel level sensor; 63 — ashtray lighting lamp; 64 — cigarette lighter; 65 — trunk lighting; 66 — trunk light switch; 67 — interior lamp; 68 — parking brake warning lamp switch; 69 — external rear lights; 70 — internal rear lights; 71 — plugs for connecting to the rear window heating element; 72 — license plate lights; 73 - additional brake signal. See the complete diagram in one file below (click to enlarge):
There is a harness for the carburetor ignition system with a speed sensor; it is not connected to the injector. The 4th wire of the interior lamp is the ignition, so that when the ignition is turned on, the backlight goes out immediately. Jumper on Ш11 for wipers. On 2109 they are powered through a fuse on the motor (6-pin), here it is not used and therefore there are 5 wires going to the motor.
Circuit 2115 with “high” panel 21083 is similar to circuit 21099 (except for the rear harness).
To diagnose it, you will need to remove it from the car and visually inspect it. It is also recommended to ring the contacts going from the lamp to the wiring.
Lamps
Lamps installed from the manufacturer's factory have a filament. After the first replacement, many install brighter LED lamps in place of the standard ones, which can illuminate the number much more efficiently and prettierly, giving the car a more beautiful look.
Standard lamps have the number W5W. The incandescent lamp has a power of 5W, which is quite enough to illuminate the room.
Cost of W5W lamp: from 20 rubles;
You can also install LED analogues instead of the standard lamp. LEDs consume less electricity and have a higher luminous flux.
It should be noted that according to the law on the safe operation of cars, the consecration of the license plate must allow one to see letters and numbers from a distance of at least 20 meters.
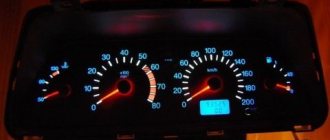
What to do if the headlights blink at idle
Based on the principle of operation of electrical devices in a car, it is concluded that the light blinks at idle speed of the engine when the generator malfunctions. But this needs to be checked accurately, for which the following is done:
- The engine starts and the headlights turn on. The car should run like this for up to 20 minutes.
- The measuring procedure is performed using probes connected between ground and terminal “B+”.
- The values that you received must be written down on a piece of paper, and then checked with the numbers indicated in the technical documentation of the vehicle.
Experts say that for most cars the normal voltage is 14-16 volts. Even with minor deviations, there is a possibility of the voltage regulator breaking down. To solve this problem, it needs to be replaced.