This indicator is extremely important in VAZ 2114 cars. Due to their unusual design, they are quite popular on par with foreign cars. To correctly buy a used car of this brand, you will need knowledge about body geometry.
Body geometry is a measure that represents the sum of all dimensions between control points. They are usually installed by the manufacturer. If this indicator is violated, then when driving the car will wobble to the sides, and turning the steering wheel will become much more difficult. Also, incorrect geometry can affect safety in the cabin.
Distances can be divided into two types:
The first type is the distances from the points of the doorways;
And the second view is between the points of the hood and the space under it.
Replacement or welding
If a crack forms on the spar, a patch is usually placed in this place.
The crack is first welded, covered with a piece of metal and spot welded on top for reliability. Typically, a semi-automatic machine with carbon dioxide is used for this. During welding, spacers are placed on the spar to prevent it from being pulled to the side. Otherwise, the body may become deformed. If possible, it is always better to purchase a new part, which costs more than temporary repair work. But, with a limited budget, in some cases, you can save money.
For example, if the metal is rotten, then the side members (front and rear) can no longer be repaired. Even if you weld, the rot will continue around it. In addition, welding on soft metal can disrupt wheel alignment, tires will begin to wear out faster, transmission parts will begin to break, and body deformation may occur. How long will this repair last? At most, for a couple of weeks. Agree, replacement is much cheaper.
But if the crack is a consequence of a VAZ impact or collision, welding will be sufficient. But here you need to be very careful. Typically, a crack forms after an accident only if the body has also become deformed.
And in this case, it will be necessary to first level it, and only then can you proceed to welding work.
But is it necessary to contact a service station or can the replacement for 2108 and 2109 be done independently? Remember, you shouldn’t skimp here either. Do your own VAZ repairs only if you understand body work and know how to work with a welding machine. When you encounter it for the first time, you are unlikely to be able to perform high-quality repairs. And all of the above problems may follow.
Straightening and repairing the body can also only be done in a car repair shop. If you do not have the skills and special equipment, it will be difficult to cope with the task.
When is wheel geometry adjustment necessary?
A wheel is a unit that is made using different materials, each of which has individual chemical and physical properties (weight, center of gravity, density, etc.).
If there are no deviations in the adjustment parameter, then the car has:
- Excellent handling;
- Slight tire wear;
- Sufficient maneuverability;
- Good stability;
- Minimum fuel consumption;
- No additional braking when coasting;
- Low tendency to skid during turns.
Wheel geometry adjustment will be required in the following cases:
- After repairing the chassis, namely replacing suspension arms, ball joints, steering rods, pendulum arms and steering ends. It is also recommended to do a wheel alignment after installing new shock absorbers or struts, springs or silent blocks. In the latter cases, re-checking the wheel alignment is recommended after two to three thousand kilometers.
- After completing work related to adjusting the ground clearance - installing spacers, replacing shock absorbers or springs with shorter or longer ones.
- After “re-shoeing” the car. Checking the wheel alignment is especially important if the tires were stored improperly (lying on their side).
- Every 18-20 thousand mileage or annually (here it all depends on what comes first).
- After hitting an obstacle or after an accident.
- After completion of the break-in or in case of purchasing a used car.
Voltage regulator operation
Control dimensions for checking the geometry of the underbody of a VAZ 2108 (2109, 21099) car.
But there is one huge problem - depending on the crankshaft speed, the generator can produce voltage from 10 to 30 Volts, and such a spread is unacceptable. Therefore, it is necessary to stabilize the voltage at the same level - 12 V. In fact, of course, the generators produce a little more - 13.6-14.6 V. Only in this case will the battery be charged normally. You can stabilize the output voltage, but the problem is that the current consumption is very high.
And the zener diode must have considerable dimensions and, accordingly, cost. But it is much easier to stabilize the power supply to the rotor winding. If the voltage applied to it is stable, then the magnetic field will not change under any circumstances. This action is carried out using a voltage regulator. The maximum current consumption of the excitation winding is no more than 2 A. Structurally, the regulator is combined with a brush assembly.
Removal of damaged body elements, replacement and repair of body parts
The deformations encountered during the repair of damaged vehicles are so varied that it is almost impossible to find bodies with the same degree of damage. Many salvage bodies during restoration require mechanical action, i.e., cutting off certain parts that prevent one or another unit or component from being removed from the car (for example, front suspension, radiator, engine, fuel tank, spare wheel and many other parts in depending on the location and magnitude of the damage). In these cases, at the stage of disassembling the car, it is necessary to separate the deformed part of the body or entire panels that are part of the entire body of the welded structure. To perform these operations, a mechanized tool or a hand hacksaw, chisel, etc. is used.
The sequence of operations when disassembling and removing individual damaged body elements must be such that the repaired unit does not receive additional deformations that cause distortion of geometric parameters due to weakening of the repair site. During repairs, it is recommended to use conductors and spacers that are installed in body openings and hold in a normal position a unit that has lost support as a result of removing a deformed body element (for example, when replacing side panels and central pillars).
The technology for removing corroded or severely deformed body panels that are unsuitable for restoration depends on the method of their attachment to the body. The greatest difficulty is caused by the removal of panels that are part of a welded body, usually connected to each other by welding (contact, electric arc or gas).
Panels, which are elements of all-metal bodies of welded construction, are cut down with a hand chisel or pneumatic chisel (Fig. 20), cut with saws, scissors or gas cutters. Electric and pneumatic cutting machines with abrasive cutting discs are often used for these purposes (Fig. 21). Before performing work to remove damaged body elements, the boundaries of the area to be removed are marked.
Rice. 20. Cutting out a defect with a pneumatic chisel
Rice. 21. Use of hand-held grinding machines: a – smoothing the weld; b – cutting along the spot welding line; c – location of the grinding wheel (1 – grinding wheel; 2 – protective casing; 3 – tilt angle of about 15)
The main method of body assembly in the production process of a modern car is resistance welding, and to remove the panel it is necessary to remove the points of the welded areas (Fig. 22). Welding points are removed with a finger cutter or a specially sharpened drill using a drill by drilling through the thickness of the sheet of the panel being removed, after which the panels are separated using a chisel and hammer blows (Fig. 23).
Rice. 22. Replacement of the rear wing: a – removal (dashed lines indicate the places where the wing is cut down); b – welding of the repair part
Rice. 23. Process of removing a welded panel
To separate parts at the place of seam welding, part or all of the welded joint area is ground off on one of the parts, as shown in Fig. 21. When tool access is possible from the side of the part being removed with minimal impact on the remaining part, only part of the welded joint area is ground down. The operation is performed with a carbide cutter with a diameter of 4...6 mm using a high-speed grinder or drill with a specially sharpened drill. If access to the welding points from the side of the part being removed is not possible, then use a regular drill, drilling the welding points through from a convenient side, having previously marked the centers with a core.
To separate parts at the point of spot welding, the following technique is often used: the area to be removed is first cut off so that only a strip 15...20 mm wide with spot welding remains, which is then separated with pliers or wire cutters.
Parts removed from the body - panels, and sometimes power elements (struts, side members) - are obviously more convenient to edit separately from the assembled body. The feasibility of removing body elements is determined by the condition of ensuring the necessary strength of the body after repair and the overall labor intensity of the repair work performed.
957
Lada 2115, 2114
VAZ 2110 control points: VAZ 2110 body control points
A selection of body dimensions, data on the body geometry of the VAZ 2115 and control points of the VAZ 2115, VAZ - 2114 from the factory documentation. A significant part of the repair work on cars, especially those received after road accidents, falls on body repairs. In most cases, repairs require checking the geometry of the attachment points of components and assemblies of the vehicle chassis.
VAZ 2115 body dimensions: 0 – base lines; 1 – axes of the front bolts for fastening the front suspension braces; 2 – center of support of the front suspension of the power unit; 3 – center of the support of the left suspension of the power unit; 4 – centers of the upper hinges of the front telescopic struts of the front suspension; 5 – centers of the hinges of the front suspension arms; 6 – points of intersection of the axes of the welded bolts for fastening the steering mechanism with the surfaces of the brackets; 7 – attachment points for the rear suspension support of the power unit; 8 – points of intersection of the axes of the rear welded bolts for fastening the rear suspension arms with the surfaces of the rear side members; 9 – centers of the upper supports of the rear suspension shock absorbers
Damage to car body can be very different. Therefore, the repair rules in each individual case must be different, most suitable for these damages, and it is necessary to make maximum use of the possibilities of straightening damaged panels. If possible, it is necessary to avoid thermal effects on the metal so as not to disrupt the factory welding and anti-corrosion protection of the body. Remove the front body panels only in extreme cases, to determine the location of damage, straighten or align the body. In cases of significant body damage, it is recommended to remove all interior trim to facilitate measurement, inspection and installation of hydraulic and screw jacks to correct distortion and damage to the body.
By editing it is necessary to restore the original linear dimensions and locations of the power units, the dimensions of the openings of the wind window, hood, and doors. Protrusion of the front surfaces and removable parts relative to adjacent panels is eliminated by fitting and adjusting them.
Control body dimensions, data on Lada 2115 geometry and VAZ 2115 control points from various repair bases.
Cost of downloading the file: 10.00 usd The link will be available within 16 hours after payment. After payment, a link to download the file will be sent to the specified email, or you can click the 'Buy' button again and the file download will start automatically.
Relays and fuses VAZ 2114
- F1 for 10 Amps (A) rear fog lights and rear fog light warning lamp.
- F2 for 10 A turn signal lamps, turn signal relay, hazard lights, hazard warning lights.
- F3 7.5 A lamps for interior lighting (both) and trunk, ignition lighting, powertrain control system control lamp, brake lamps, computer, if available.
- F4 20 A carrier, relay and rear window heating element.
- F5 20 A horn and its relay, cooling fan.
- F6 30 A power windows and their relays
- F7 30 A motor for heater, headlight cleaner, windshield washer, cigarette lighter, glove compartment light bulb, rear window heating relay coil.
- F8 7.5 A right fog lamp.
- F9 7.5 A left fog light.
- F10 at 7.5 A left side marker, lamp signaling the inclusion of the side light, lamps for illuminating the sign, engine compartment, illumination of switches and instruments, instrument lighting switch.
- F11 at 7.5 A right side.
- F12 at 7.5 A right low beam.
- F13 at 7.5 A left low beam.
- F14 for 7.5 A left high beam and a light indicating that the high beam headlights are on.
- F15 at 7.5 A right far.
- F16 30 A - a light indicating insufficient oil pressure, brake fluid level, engagement of the parking brake, low battery, instrument cluster, relay for monitoring the health of lamps, indication of control systems, reversing lamps, turn indicators and their relays, as well as an alarm if turning mode is turned on, computer, generator excitation winding is turned on at the moment the engine starts.
Location of relays and fuses of the new model
- K1 - relay for turning on headlight cleaners;
- K2 - relay-interrupter for direction indicators and hazard warning lights;
- K3 - windshield wiper relay;
- K4 - lamp health monitoring relay;
- K5 - power window relay;
- K6 - relay for turning on sound signals;
- K7 — relay for turning on the heated rear window;
- K8 - headlight high beam relay;
- K9 - relay for low beam headlights;
- F1-F20 - fuses.
Connection diagram of the new type mounting block
- K1 - relay for turning on headlight cleaners;
- K2 - relay-interrupter for direction indicators and hazard warning lights;
- K3 - windshield wiper relay;
- K4 - lamp health monitoring relay;
- K5 - power window relay;
- K6 - relay for turning on sound signals;
- K7 — relay for turning on the heated rear window;
- K8 - headlight high beam relay;
- K9 - relay for low beam headlights;
- F1-F20 - fuses.
Location of old-style relays and fuses
- 1 — relay for turning on the headlight cleaner (K6);
- 2 — rear window washer time relay (K1);
- 3 — relay breaker for direction indicators and hazard warning lights (K2);
- 4 — windshield wiper relay (K3);
- 5 — contact jumpers in place of the relay for monitoring the health of the lamps;
- 6 — relay for turning on the heated rear window (K10);
- 7 - spare fuse;
- 8 — relay for turning on the high beam headlights (K5);
- 9 — relay for turning on low beam headlights (K11);
- 10 - fuse;
- 11 — relay for turning on the electric motor of the engine cooling system fan (K9);
- 12 - relay for turning on the sound signal (K8).
Old-style mounting block connection diagram
- K1 — rear window washer time relay;
- K2 - relay-interrupter for direction indicators and hazard warning lights;
- K3 - windshield wiper relay;
- K4 - lamp health monitoring relay (contact jumpers are shown inside, which are installed instead of the relay);
- K5 - headlight high beam relay;
- K6 - relay for turning on headlight wipers;
- K7 — power window relay;
- K8 - relay for turning on the sound signal;
- K9 - relay for switching on the electric motor of the engine cooling system fan;
- K10 — relay for turning on the heated rear window;
- K11 - low beam headlight relay.
Due to the winter, constant snowfalls, 5% tint, and even the fact that the mirrors already have built-in heating, I decided to connect it
It warms perfectly, melts the ice once or twice, droplets of rain (or melted snow) soon disappear completely, so it’s a great thing! Now I don’t understand how you can drive in bad weather without heated mirrors
Need to buy: 3m. wires (it took me that much), a regular 4-pin relay + a wire block for it, a 7.5A fuse (10A is also possible), a button for heating the rear window of a VAZ 2114 + a wire block for it. FOR THE POLARITY OF THE MIRRORS WIRES, I don’t care. We remove the on-board computer, connect everything stupidly according to the diagram wiring, I also wrapped the relay with anti-squeak so it wouldn’t rattle
I downloaded the diagram somewhere, then showed it to the electrician, he approved it, made his own small changes (I changed them), so enjoy it)
The body of the fourteenth model and its features
Volkswagen Polo sedan body control points
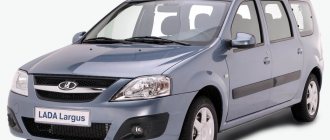
The fourteenth model can be said to belong to a new class of Russian cars, being as close as possible to foreign cars. At the same time, the VAZ 2114 still remains a people's car. However, if desired, the car owner can tune the car, easily turning it into a stylish sports car that has sweeping body lines and a modern body kit.
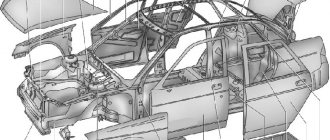
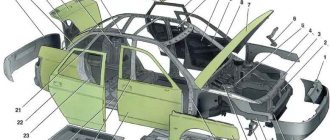
The body of this car brand is worth considering separately, since it has a very successful design solution. By analogy with other VAZ models, reliable bolted or welded connections are used to connect body parts. The entire body, including the most inaccessible places, is carefully treated with anticorrosive.
The main difference between the VAZ 2114 body is its faceted shape. It is this that gives the model an attractive appearance. But there is also a drawback - corrosion processes more often affect hollow spaces in the frame. In this regard, we can highlight the front pillars, which suffer quite often in cars of the fourteenth model.
The front fenders of the car can be easily removed. The bumpers are made of plastic, but have additional reinforcement in the form of aluminum beams.
How to change the silent blocks of the front control arms on a VAZ 2108?
1. Unscrew the nut of the guy wires.
2. Remove the old silent blocks using a chisel.
3. The new component should be pressed in.
The car must be driven into a pit or overpass. If there is engine protection, remove it. Then you need to unscrew the nuts of the screws that secure the front arms. Using a wrench, unscrew the screw nut that secures the front stabilizer link to the arm, after which you need to knock out the screw itself. The car should be placed on a jack and the wheel should be unscrewed. Then, using a 24mm wrench, you need to remove the brace nuts. To make this easier, treat them with VD-40 and clean the threads with a brush. Next, you should unscrew the nut and dismantle the ball joint, which is also secured with screws. The lever is removed. When the lever is dismantled, you can begin to replace the silent blocks of the extension, while the worn silent blocks must be removed, usually a chisel is required for this. The installation site is cleaned of corrosion. New elements are pressed one by one into the lever using a vice. The part is usually difficult to install, so you may have to use a sledgehammer or hammer
At the same stage, you need to pay attention to the condition of the ball joint - if it seems to you that it will not last long, then the best option would be to replace it. The front arm component is then replaced. If it is completely broken, then you need to get rid of its remains.
Before installing a new silent block, it should be treated with soapy water or dishwashing detergent, after which the part is pressed in in the same way. The screw needs to be tightened slowly; if the element itself is slightly twisted, you need to correct it with a screwdriver. Once the arm is installed, the nuts on all replaced parts should only be tightened when the vehicle is off the jack and on the wheels.
As you can see, the process of replacing parts is not particularly easy and can be done by a motorist who understands something about self-repair. If you are not sure that you can do it yourself, we recommend that you perform this task at a service station.
In normal condition
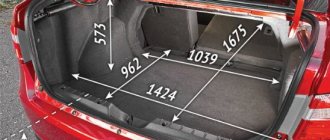
In the luggage compartment of the VAZ 2114 there is enough space to transport a variety of cargo of varying weights. If necessary, the volume can be increased by folding the seats or using additional features. The minimum trunk volume of the Lada 2114 is 330 liters. If you have bulky cargo of varying weights, you can additionally use special fastenings for transporting things on the roof. The luggage compartment has the following dimensions with the seats folded down:
- The length is 830 mm.
- The width is 935 mm.
- Height 400 mm.
The disadvantage is the large loading height. The owner of the car can carry out tuning by installing a push-button opening and closing mechanism. You can carry out this procedure yourself or contact a specialist for this. After installing such a mechanism, the driver will be able to open the door without getting up. To do this, just press a button on the remote control. This is more convenient than using a key for this purpose.
For example, this is important if ice is frozen in the area of the castle. When transporting things, the requirements for their dimensions and weight are determined by traffic rules
It is allowed not only to transport those that fit completely, but also those that protrude without violating traffic rules. It is important to ensure that the load, regardless of its weight, is securely secured.
Angle of longitudinal inclination of the axis of rotation
Caster angle is a parameter that is unique to front suspensions. He is responsible for the car's handling during sharp turns.
Essentially, this is the angle that characterizes the tilt of the steering axis of the wheel back and forth.
Caster angle can be positive, negative or zero.
On sports cars, the caster angle can reach seven degrees. The main reason for the deviation is the failure (deformation) of the lower wishbone.
Thanks to the caster angle, the steering wheel returns to its original position (if the parameter is correctly adjusted).
On conventional cars, the pitch angle is positive (for example, in the Mitsubishi Outlander XL this parameter is 2.35 degrees).
Body geometry of the VAZ 2114 and its meaning
Violations of the body geometry have certain consequences, which are reflected in the general condition of the car in the following ways:
- Deterioration in controllability and vibration when accelerating (manifests itself at 80 km/h and above).
- Increased tire wear.
- Noise from suspension elements.
- Increased fuel consumption, etc.
The VAZ 2114 has a hatchback body type, for which, however, as for other types (station wagon, sedan, etc.), violation of the geometry affects various parameters.
The symmetry of the wheels is broken, as can be judged by:
- reducing vehicle stability on the highway;
- uneven tire wear.
The diagonals of the body are broken, which is noticeable in the frames of the front/rear windows and in the doorways of the car.
Specific folds may form on the bottom or frame.
For cars that are used for a long time on roads of poor quality, it is recommended to periodically check the geometry of the body (at least 1-2 times a year).
Diagnostics at the technical center
In large populated areas you will definitely find a specialized technical center where they can carry out a complete diagnosis of the body geometry. Here we usually have the computer equipment we need, connected to a special stand. Diagnostics can be carried out using mechanical systems, special systems with fasteners, laser systems and computer diagnostics. The vehicle is first slightly disassembled and installed on a stand. After a kind of “scanning,” the data is sent to a computer, where a three-dimensional model of the car is created. The computer then conducts a comparative analysis of the machine data and the original model data.
The main advantage of such a check is maximum accuracy. But this method requires time and, of course, money, approximately you will have to spend several thousand rubles on this.
Repairing VAZ 2108: body repair
Model VAZ 2108
The first domestic hatchback with front-wheel drive, the VAZ 2108, was produced for 20 years, from 1994 to 2004. In its model range, this car became the progenitor for subsequent models of the “eighth” and “ninth” families. Initially, the power plant was a 1.3-liter engine with a power of 65 hp. s., which was equipped with a 4-speed gearbox. Although the price of the car was quite high, the eight was popular among the people for its large trunk volume and reliability, it should be noted that these parameters were very significant in those days.
People called the figure eight “chisel” for its original angular shape. The body, in turn, is an all-metal frame made of several elements (both spot welded and removable - front fenders, doors and rear cover).
Thanks to the frameless design, which distinguished the eight from its predecessors, the body became much lighter, which gave the car a sporty feel. In addition, the distinctive features of the “chisel” can be considered a modified dashboard, which is significantly different from the usual “classic” ones, and an improved interior heating system. The Eight was so beloved by domestic motorists that despite the car’s considerable age, it still wraps kilometers of domestic roads on its wheels. This means that for a VAZ car, body repair of the 2108 model is inevitable, since road conditions and the quality of the metal do not leave the body much chance of a long life without repair. Most domestic cars begin to “bloom” after 5 years of operation. Body robots are considered the most difficult and most expensive part of car repair, and sometimes even the most experienced craftsmen are very reluctant to undertake major body repairs. So do-it-yourself body repair of a VAZ 2108 is the best option for a skilled and patient car enthusiast. At the beginning of work, you need to find out for yourself what you mean by the concept of body repair. That is, you need to correctly assess the condition of the car body and its elements and then choose the most suitable repair technology for you. Well, if you do not have the slightest idea about repairing the body of a VAZ 2108 and the only tools you have are a standard set of keys and a screwdriver, you can significantly reduce the cost of repairs , simply by independently carrying out dismantling operations that precede body repairs. These include:
- Removing the doors.
- Removing the trunk lid.
- Removing the hood.
- Removing the radiator grille and bumpers.
Next, we present to your attention a brief photo instruction “Body repair of a VAZ 2108”.
Preparation for major body repairs
Doors
- First, you need to disconnect all the wires going inside the door (speaker power, power windows, alarm system);
- Dismantling the doors begins with removing the door opening limiter, for which, using a “10” socket wrench, unscrew the two bolts securing its mount to the rack;
- Then we unscrew the bolts securing the door hinges to the car pillar, while at the same time holding the door from skewing.
Advice! Since the doors are very massive, it is best to dismantle them with an assistant.
trunk lid
Removing the trunk lid
Removing the trunk lid:
- The internal decorative lining is attached to the body with self-tapping screws or latches. To remove it, you need to unscrew the screws or unclip the latches, respectively;
- Turn off the power to the license plate lighting and remove the wiring harness from the internal cavity;
- Holding the cover, unscrew and disconnect the stops;
- Unscrew the bolts securing the cover to the hinges and remove it.
Hood
Advice! The hood is quite heavy, so it is recommended to remove it with an assistant.
- Before unscrewing the mounting bolts, their position should be marked to facilitate subsequent installation of the hood. Accordingly, if the hood is replaced with a new one, there is no need to mark the bolts;
- Disconnect the windshield washer tube;
- We disconnect the engine compartment lighting lamp; the lamp itself can also be dismantled so as not to damage it during installation of the hood;
- We take out the wiring harness from the inner pocket;
- Unscrew the mounting bolts and remove the hood from the brackets.
Advice! If you are installing an old hood, you should stretch a wire along the internal channel, first tying it to the wiring harness. This will make it easier to later pull the wiring into place in the inner hood pocket.
Disconnect the washer and light bulb
Radiator grille and bumpers
Since the hood has already been removed, uninstalling the radiator grille is not difficult:
- We unscrew the two bolts securing it to the body;
- The plastic latch is pressed out;
- Using little force, remove it from the car.
Removing the radiator grille
The bumpers are made of a plastic alloy with high elastic properties, which allow the bumper not to burst due to severe deformations and impacts. We begin to remove the front bumper by unscrewing the two nuts securing it to the body brackets on both sides.
We finish by unscrewing two bolts also on both sides of the body
Stage 2
To remove the rear bumper, you need to unscrew two nuts and bolts on each side securing the bumper to the base of the car body
Removing the rear bumper
Advice! The nuts are most likely highly susceptible to corrosion, so it is recommended to pre-treat them with special products.
Geometry and control points
Owners of the “Nine” cannot do without knowledge of control points and body geometry if they intend to independently repair or tune the body in the future
In addition, it is very important to know this when you buy a car, and you need to properly check the body
Most often, the following geometric dimensions of the VAZ 2109 body are checked:
- The diagonal of the windshield frame, marked in the photo as A. It should be equal to 1270 mm (plus/minus 4 mm);
- The distance between the middle of the upper beam of the windshield frame and the middle of the lower beam, marked in photo B, should be equal to 550 mm (plus/minus 2 mm);
- The diagonal of the hood, marked in the photo as B, should be equal to 1400 mm (plus/minus 5 mm);
- The long diagonal of the rear side window, marked in the photo as D, should be equal to 555 mm (plus/minus 2 mm);
- The short diagonal of the rear side window, marked D in the photo, should be equal to 380 mm (plus/minus 2 mm).
- Absolutely legal (Article 12.2);
- Hides from photo and video recording;
- Suitable for all cars;
- Works through the cigarette lighter connector;
- Does not cause interference to radios and cell phones.
Ruler for measuring the geometry of a car body
The folding ruler is the most commonly used measuring device for measuring body geometry.
p, blockquote 14,0,0,0,0 —>
p, blockquote 15,0,0,0,0 —>
A measuring ruler is capable of measuring the distance between two points. Each distance must be cross-checked with two additional control points.
p, blockquote 16,0,0,0,0 —>
A modern ruler for measuring body geometry is a telescopic measuring device with height-adjustable pointers. Even when unfolded to its full length, it does not cause measurement errors. Depending on the type of ruler used, additional measurement may be required between the pointers. Additional accessories in the line include attachments and extensions for tight placement in inspection holes.
p, blockquote 17,0,0,0,0 —>
The ruler allows you to take measurements when there are obstacles between the measured points.
p, blockquote 18,0,0,0,0 —>
All cars are symmetrical about an imaginary central plane located along the center of the car. However, there are a few points on some cars that, for various reasons, are not symmetrical, but they do not make the entire car asymmetrical. Without symmetry, a car would be very difficult to make and even to sell.
p, blockquote 19,0,0,0,0 —>
It is important that the indicators are firmly inserted into the inspection holes.
p, blockquote 20,0,0,0,0 —>
As mentioned earlier, if the pointers were set to different heights, then the value on the ruler scale may differ from the actual distance between the points being measured. For the correct value, you need to additionally measure the distance between the indicators with a tape measure.
p, blockquote 21,0,0,0,0 —>
The ruler and pointers must be straight. The indicators should be positioned 90 degrees relative to the ruler and have no play.
p, blockquote 22,1,0,0,0 —>
It is important that when measuring, the length of the indicators is set at the same distance.
p, blockquote 23,0,0,0,0 —>
p, blockquote 24,0,0,0,0 —>
If you do not need to obtain exact values when measuring, but compare one side to the other, then the ruler does not have to be parallel to the plane of the machine. You can compare distances with the opposite side, as well as with similar points on the same whole vehicle (comparative measurement).
Editing the damaged body of VAZ 2113-2114-2115
Editing the body according to reference dimensions.
Basic reference dimensions for checking the body floor 0 – baselines 1 – axes of the front bolts for fastening the front suspension braces 2 – center of the front suspension support of the power unit 3 – center of the support of the left suspension of the power unit 4 – centers of the upper hinges of the front telescopic struts of the front suspension 5 – centers of the hinges front suspension arms 6 – intersection points of the axes of welded bolts for fastening the steering mechanism with the surfaces of the brackets 7 – points for attaching the rear suspension support of the power unit 8 – points of intersection of the axes of the rear welded bolts for fastening the rear suspension arms with the surfaces of the rear side members 9 – centers of the upper supports of the rear suspension shock absorbers
A significant part of the repair work on the VAZ 2115, especially those received after road accidents, falls on the repair of the bodies of the VAZ 2113. In most cases, repairs require checking the geometry of the attachment points of components and assemblies of the Lada Samara 2 chassis
Damage to the body can be very different. Therefore, the repair rules in each individual case must be different, most suitable for these damages, and it is necessary to make maximum use of the possibilities of straightening damaged panels. If possible, it is necessary to avoid thermal effects on the metal so as not to disrupt the factory welding and anti-corrosion protection of the body. Remove the front body panels only in extreme cases, to determine the location of damage, straighten or align the body.
In cases of significant damage to the body, it is recommended to remove all internal upholstery parts to facilitate the measurement, control and installation of hydraulic and screw jacks to eliminate distortions and damage to the VAZ 2114 body.
By editing it is necessary to restore the original linear dimensions and locations of the power units, the dimensions of the openings of the wind window, hood, doors
Protrusion of the front surfaces and removable parts relative to adjacent panels is eliminated by fitting and adjusting them.
Components of the body and their dimensions for the VAZ-2115
The body of the VAZ-2115 car is the supporting element of the entire structure. By type, this model is considered a 5-door sedan, driven by a one and a half liter power plant.
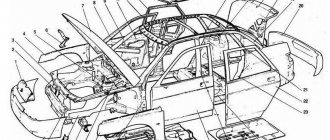
The car body frame consists of the following elements:
- roof;
- sidewalls;
- base;
- non-separable parts;
- hanging units;
- parts of the interior.
Mounted ones include:
- hood;
- doors;
- wings;
- bumpers;
- radiator decorative grille;
- trunk lid.
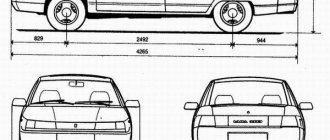
- the length of the car in millimeters is 4330;
- from the middle of the front wheel to the front end – 860;
- from the center of the front to the middle of the rear wheels – 2460;
- to the rear from the last mentioned point - 1010;
- total height of the vehicle – 1420;
- distance between side mirrors – 1979;
- the distance between the wheels located at the front is 1400;
- rear bumper size – 1650;
- the rear wheels are spaced 1370 millimeters apart.
Basic Concepts
Body geometry refers to the exact dimensions of the vehicle established by the designers of the manufacturing plant. The main parameters of paramount importance are:
- width – both front and rear tracks;
- length of the wheelbase;
- the distance between the side members and their length.
As practice shows, a violation of one or several of the above-mentioned parameters leads to a noticeable deterioration in terms of vehicle controllability.
The secondary dimensions are as follows:
- door openings;
- windows;
- engine compartment volume;
- trunk capacity;
- car interior size.
If these standards are violated, this only leads to a deterioration in the appearance of the vehicle.
A track is the distance between coaxial wheels. Moreover, this distance is measured from point to point, which are located in the center of the tread.
In turn, the wheelbase is the distance between the axles of the car. The control points here are the middle of the hubs.
How to check body geometry with a regular tape measure
It is less accurate, but it can be used to get a general idea of the violation of the geometry of the vehicle body. First of all, we check the front track: measure the distance from the middle of the tread of the front left wheel to the middle of the tread of the right front wheel. Then we check the rear track in the same way. We compare the received data with the information of the manufacturer. The discrepancy between the results will serve as evidence that the geometry of the car body is broken. We check the length of the wheelbase in the same way (we take measurements between the center of the front wheel hub and the center of the rear wheel hub). Also, using a regular tape measure, we check:
- trunk;
- engine compartment;
- doorways.
Preparatory work and elimination of minor damage
Where to start repairing the VAZ 21099 body? In any case, it must begin with an assessment of the technical condition of the car and determining the scope of body work, its feasibility and cost. To do this, you need to inspect the car and identify:
- dents and other deep damage;
- possible chips;
- scratches;
- peeling of paintwork;
- presence of rust.
It is possible to eliminate minor damage yourself if you have special tools and devices that every car owner has. The car's structure allows you to perform simple manipulations after dismantling some body elements. First of all, you need to remove the following parts:
- doors;
- trunk top;
- hood;
- radiator grille;
- bumpers.
Next, these parts should be treated with a special anti-corrosion agent. It is necessary to take into account that each part weighs a lot, so for such work, as a rule, you will need an assistant.
Before painting is carried out, damage with rusted edges requires immediate elimination, since corrosion is an irreversible process and the area of damage can quickly grow. The procedure for doing body work with your own hands involves performing a number of actions.
- Removing the old layer of paint from the entire surface area of the part using an electric drill with an attachment.
- After cleaning the part from the paint, you can understand how much space the rust occupies.
- Damaged areas of the part are removed with special scissors.
- Use a hammer to bend the edges inwards for ease of applying putty.
- To remove rust from a VAZ 21099 part, use a metal brush.
Linear dimensions of the car body
If your car is accidentally hitched in a parking lot and small dents appear, there is no reason to panic. How much will such a repair cost? How long will it take? There is only one answer to these questions - not much, if you repair the device yourself. To do this, you will need to remove the damaged part and install a new one. If she doesn't weigh too much, she won't need a partner.
Restoration and processing of front wheel arches of VAZ 2108, 2109, 21099
The problem areas of the front wheel arches of VAZ 2108, 21081, 21083, 2109, 21091, 21093, 21099 cars are the areas of the body most susceptible to dirt and water (and, accordingly, the development of corrosion), not covered by fender liners (lockers).
These are the lower parts of the A-pillars (the place of the lower fastening of the front fender, the wheel mudguard and the lower part of the fender liner), the lower parts of the front side members, the hole in the mudguard of the engine compartment for the tie rod end. In the most advanced cases, there is a “cup” to which the upper support of the rack is attached (see photo above).
We will restore and process the arch of the right front wheel of the VAZ 21083. The arch is in a medium degree of neglect. Welding work will be required to patch holes from through corrosion, subsequent treatment with bitumen mastic and pouring Movil into the hidden cavities of the body. We use the cheapest and most common materials for arch repair, but despite this, the work will be of fairly high quality. After restoration, the arch will not require repairs for at least five years.
Necessary tools, accessories and spare parts
— Grinder with thick and thin cutting wheels
— Drill with brush attachment
— The simplest welding machine can be used for electric arc welding with electrodes (double) and a protective mask
— Compressor with a hose and a special gun for processing hidden cavities
— Hand brush for metal
— A can of bitumen mastic, a can of Movil, a can of gun lard, some metal paint, primers for it, a bottle of solvent, a couple of brushes
— A small sheet of metal 0.8-1 mm thick
Preparatory work
— Jack up the car on one side and remove the wheel
— We remove the rubber plugs for the technological holes of the hidden cavities of the car body
— We clean the arch from contamination with a metal brush
It is necessary to remove the peeled parts of the old protective coating and any dirt on it.
The procedure for restoring and processing the front wheel arches of VAZ 2108, 21081, 21083, 2109, 21091, 21093, 21099
We cut off damaged areas of the body (eaten by through corrosion)
In our case, these are areas in the area of the lower part of the arch and a hole in the mudguard of the engine compartment for the tie rod end. We use a grinder with a thin circle.
Photo: cut out sections of the arch with through corrosion
We clean rust-covered areas of the arch down to metal
We use a drill with a brush attachment, a hand-held metal brush, and a grinder with a thick grinding wheel. We protect around the cut areas and areas that lack a protective coating and have rust. In our specific example, these are: the bottom of the arch, the lower part of the front side member, the area around the hole for the tie rod end, the areas around the technological plugs.
We clean the areas of the arch with peeled off protective coating and cut out the rusted areas with a grinder
We weld the cut sections of the arch
We cut out patches from a metal sheet and clean them from contamination. To make patches with an exact contour, you can first make and try on a template from cardboard, and then cut out the patch using it. The places where the patches are attached (under the weld seam) must be well cleaned.
We press the patch tightly to the damaged area, adjust it and weld it with short seams (every two centimeters) along the contour. We weld from the center to the edges, slowly, so that the patch does not move and the old protective coating does not flow due to strong heating, filling the seam.
Paint over the cleaned areas of the arch
First, we degrease the cleaned areas and patches with a solvent, then cover them with a couple of layers of primer (waiting 15-20 minutes between layers). After the primer has hardened, apply a couple of coats of paint. We wait for hardening (the period is indicated on the can).
Restored sections of the arch
We treat the front wheel arch with bitumen mastic
Using a brush, apply two or three layers of mastic 0.5-1 mm thick on the entire surface of the arch (on the cleaned areas and on the old protective coating). Before applying each new layer, wait for the previous one to dry (the period is indicated for cans for a specific mastic).
We treat the wheel arch with bitumen
Processing hidden body cavities
Using a compressor and a special gun (spray gun), we treat the hidden cavities with a mixture of Movil and gun fat through the technological holes. The mixture is made in a ratio of 50/50 (Movil/cannon fat). Before application, you can warm up the prepared mixture (but not necessarily).
Compressor with a gun for flushing hidden cavities
Reinstall the rubber plugs for the technological holes
Reinstalling the fender liner (locker)
Notes and additions
— In a similar way, you can restore and process the front wheel arches of VAZ 2113, 2114, 2115 cars and their modifications.
— You should take a responsible approach to the choice of bitumen mastic, Movil and cannon lard. The quality of the repairs will directly depend on their quality. Bitumen mastic should be taken from rubber-bitumen, but not rubber-bitumen, non-hardening Movil.
Geometry check: factory dimensions
Geometry is the exact dimensions of the VAZ 2108 body. And when checking, the most important of them come forward. As a rule, one of the main parameters of the body is the size of the side member, wheelbase, distance between the wheels on one axle, etc.
Note. When changing the dimensions of the VAZ 2108, it is imperative to observe the weight of the body and its curb weight.
No less important is the distance between the points of the door and window openings, the location of the internal combustion engine compartment, the dimensions of the trunk, and so on.
Note. Wheelbase and track width are one of the most important indicators of correct body geometry. The first coefficient is measured by measuring the distance between the front and rear axles of the car (for the “eight” it is 2460 mm), the second - by measuring the distance between the right and left wheels on the same axle (for the “eight”: 1400 mm in the front - 1300 mm in the rear).
The table below shows the original, factory dimensions of the V8 body, which will make it possible to check the metal frame for deformation and find out how much the VAZ 2108 body weighs, which is also important
Body inspection using 3D measurement
This method consists of comparing the height, length and width of the main structural elements with reference options. This can only be done using special three-dimensional systems. Such a system itself establishes the planes from which the counting is made.
Width measurements are taken from the central plane. The central plane (line) is a line that conditionally divides the car along the center into equal halves. On some models, the manufacturer already places such marks in the lower or upper part of the body. Both parts of the car must be completely identical and symmetrical.
The height of the machine is measured from the main plane. This plane runs parallel to the car bottom.
From the zero plane placed in front of the car, its length is measured.
What causes damage to the body of the “nine”
There is an opinion that Soviet cars are equipped with an “indestructible” body. It is impossible to say this one hundred percent, but it is also wrong to refute such a statement. Indeed, the diagram of which is presented in the article is made to perfection, but over time, any quality will come to an end.
VAZ 2109 body geometry
Almost all car bodies older than 5-7 years need repair. And there is nothing surprising about this. The living conditions of recent years, the huge amount of harmful substances, the general deterioration of the environment - all this cannot have a positive effect. Difficult, almost extreme, modern operating conditions also cause a lot of harm.
As a result, the state of the metal surface becomes deplorable, the internal combustion engine and parts are sent for disassembly, and instead of a worn-out but close-to-the-heart car, a new car takes its place. All this can be avoided if you know the features of the body layout, understand the intricacies and carry out preventive maintenance in a timely manner.
Signs of violation of factory geometry
- Vibrations appear, accompanied by atypical extraneous noise.
- The overall controllability of the car decreases: when moving, it is “pulled” to the side, making maneuvers difficult.
- The car loses stability when driving, especially at high speeds.
- The suspension, as well as the entire chassis of the car, often begin to fail.
- Tires wear out quickly and unevenly.
- Fuel consumption increases.
- It is impossible to adjust the wheel alignment correctly.
The presence of such symptoms indicates that urgent restoration of the geometry of the car body is necessary.
VAZ 2113 body characteristics table
| Length, mm | 4122 |
| Width, mm | 1650 |
| Height, mm | 1402 |
| Body type | 3-door hatchback |
| Trunk volume, l | 330 |
| Number of seats | 5 |
| Ground clearance, mm | 160 |
| Wheelbase, mm | 2460 |
| Availability of replacement bodies | VAZ 21083, 21093, 21099, 2115, 2114, 2113 |
As can be seen from the table, when replacing the frame of the thirteenth model, it is not possible to convert it to a VAZ station wagon body, since it simply does not exist in the Samar family.
Photos and video materials will allow you to learn more about the VAZ 2113 car and its body. Step-by-step repair instructions presented in our publications will make it possible to carry out repairs yourself. We hope that this article was valuable and useful.
Changes
Overall, despite some similarities, the 2115 has a significantly more modern design. This was largely due to the presence of bumpers and other external elements made of plastic. All of them help protect the body from minor damage and the negative effects of corrosion.
The most notable innovations in this model are the following:
- additional brake signal installed directly on the spoiler;
- new rear lights;
- highly reliable security system;
- a tailgate sill that allowed the loading height to be reduced;
- more streamlined body geometry;
- door moldings;
- modern electrical equipment.
At the time the design was completed, the VAZ-2115 was a modern and quite beautiful car. At the same time, its interior turned out to be much more comfortable than that of the old models of the Volzhsky Automobile Plant. The driver was able to regulate:
- steering wheel height;
- seat position, etc.
The designers installed a console between the front seats. The heating system and the ECU also turned out to be more advanced. Moreover, the trunk of the model in question is much more spacious than its predecessors.
The body of the fourteenth model and its features
The fourteenth model can be said to belong to a new class of Russian cars, being as close as possible to foreign cars. At the same time, the VAZ 2114 still remains a people's car. However, if desired, the car owner can tune the car, easily turning it into a stylish sports car that has sweeping body lines and a modern body kit.
The body of this car brand is worth considering separately, since it has a very successful design solution. By analogy with other VAZ models, reliable bolted or welded connections are used to connect body parts. The entire body, including the most inaccessible places, is carefully treated with anticorrosive.
This fact does not exclude the need for additional processing, which is guaranteed to provide the body elements with additional resistance and durability.
The main difference between the VAZ 2114 body is its faceted shape. It is this that gives the model an attractive appearance. But there is also a drawback - corrosion processes more often affect hollow spaces in the frame. In this regard, we can highlight the front pillars, which suffer quite often in cars of the fourteenth model.
The front fenders of the car can be easily removed. The bumpers are made of plastic, but have additional reinforcement in the form of aluminum beams.
Trunk volume of VAZ-2114: dimensions and exact parameters
VAZ-2114 is a car that replaced the discontinued “Nine”, and immediately gained popularity and became in demand. Compared to its predecessor, this car model has several differences. The differences affected not only the external parts of the body, but also the interior. In particular, the VAZ-2114 has a large trunk volume. Door sill trims, moldings along the sides, a spoiler with a brake light - all this gives the car a modern appearance.
External changes affected the performance characteristics of the machine. In particular, this model has excellent aerodynamic qualities. It is stable on the road, even when driving at high speed. The combination of body colors and attached parts gives this car the appearance of a foreign car.
Thanks to its appearance, this car has aroused increased interest among people who are involved in tuning. At relatively low financial costs, such a car can easily be made into an original car that stands out from the crowd, thereby emphasizing the individuality and sense of style of its owner.
Trunk
Due to the ability to fold the rear seat, this car can easily be transformed into a utility vehicle. For this car model, the trunk volume is:
- 330 dm3 with seats folded down;
- 600 dm3 with rear seats folded.
