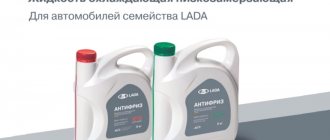
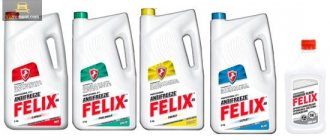
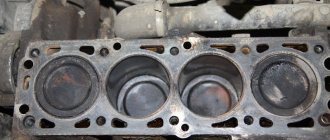
Car owners use as a refrigerant antifreeze or antifreeze. It’s just that a driver who recently bought a car cannot understand what kind of liquid is poured into the tank unless the former owner of the car tells him himself. But the coolant prevents the power unit from overheating. Therefore it is important to know what is the difference different types of coolant from each other and which one to fill into the engine.
Why does a motorist need to know this?
Coolants differ from each other in characteristics, origin and composition. If you don’t know what’s in the system, you can mix it by adding antifreeze or antifreeze. This will negatively affect the operation of the engine and the cooling system as a whole. Three cases in which the car owner should know what coolant is poured into the system:
- when buying a car . If the car has just been purchased, then experienced mechanics recommend that the future owner find out what refrigerant is in the car. The next question that the car owner will have to ask the seller is: “When was the coolant changed last?”;
- in case of problems with the cooling system in the car. For example, when the stove does not work well or the engine overheats. The cause of these problems is poor quality refrigerant. Therefore, you need to understand what kind of coolant the manufacturer has allowed to be used in the car;
- with stable operation of the cooling system. In this case, you will need to change the coolant to the exact one that was filled before purchase.
There are several types of coolants. They are used to determine the operating temperature range and protective characteristics.
What types of refrigerant do the companies produce:
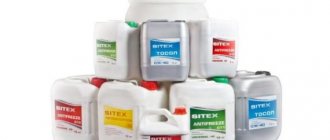
Antifreeze is a domestic brand of coolers. The abbreviation stands for “Organic Synthesis Technology”. Consists of components:
- ethylene glycol;
- distillate.
Antifreeze appeared in Soviet times. And antifreeze came to the Russian markets after the collapse of the USSR. Antifreeze is a development of Western specialists. This fluid cools the engine in the summer and does not freeze in the winter. Antifreeze is classified into the following types:
- G 11 (green liquid) - silicate technology is used for production. Coolant consists of organic compounds. Protects the system from corrosion. Compatible with aluminum radiators. Domestic antifreeze belongs to this class;
- G 12 (red) – carboxylic acids are used for production. Organic compounds are also added to the liquid. This antifreeze can be used for five years without changing it in the car;
- G 12 + - made from a combination of organic and synthetic additives. In Europe, when creating this brand of antifreeze, silicates are used, and in the USA, on the contrary, nitrites are used;
- G 12 ++ - production of this class began in 2008. This is a liquid developed on a synthetic basis. Compatible with copper and brass radiators;
- G 13 – class appeared in 2012. Consists of new generation environmentally friendly compounds. Does not harm the environment and does not harm the radiator grille or the cooling system as a whole.
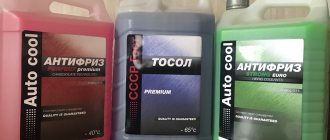
Red-colored compounds ensure engine operation down to minus 65 degrees Celsius. Compositions of blue and green color - up to minus 45 degrees.
Why should a car owner be able to distinguish coolants in the tank?
If the car is used by one owner constantly, then he, as a rule, is aware of what antifreeze is currently filled. But situations are different: for example, a car was purchased recently, and it is impossible to contact the former owner. In this state of affairs, you need to be able to distinguish antifreeze from antifreeze in the car’s tank. There can be many similar reasons:
- If malfunctions are detected in the cooling system (for example, inadequate operation of the stove, boiling engine, etc.). It may turn out that the cause is the wrong brand of coolant. In this case, the car owner must definitely determine which brand of antifreeze is no longer worth purchasing. Or the situation is the opposite: the antifreeze works without interruption, flawlessly. The car owner, in this case, must find out what brand of coolant is used so that he can buy it next time
How to determine what is flooded
They determine what is in the car using simple methods and experiments that an ordinary car owner can carry out:
- touch and smell . Domestic antifreeze is not oily, and antifreeze is odorless and feels very much like oil;
- some liquid from the system into the freezer If it freezes, then it is a low-quality antifreeze. If it does not freeze, it means G 13 antifreeze is filled;
- combine with water. You need to pour water and coolant into the bottle in a 1:1 ratio. Wait one hour. If a precipitate appears and a separation between water and liquid is visible to the eye, then this is antifreeze. If nothing happens, then it is antifreeze;
- measure density. To do this, you will need a hydrometer, and the ambient temperature should be above 20 degrees Celsius. Place the device in the liquid and look at the density display. If it is 1.073 - 1.079 g/cm, then the system is filled with antifreeze.
There is another method that explains how to understand what kind of coolant is poured into the cooling system. Take a metal plate and a piece of rubber. Place both items in a container with coolant from the car's expansion tank. After half an hour, take them out and carefully inspect them. If a protective film appears on both, it means antifreeze is filled. If the film appears only on metal, then we have antifreeze. Unfortunately, it will not be possible to determine what color the antifreeze or antifreeze is, unless it was filled in very recently.
Summarizing
How to distinguish antifreeze from antifreeze? The answer is quite simple. Due to the fact that the two previously compared coolants have different chemical components and technical characteristics, there are fairly reliable ways to identify them. To understand how to distinguish antifreeze from antifreeze in a tank, it is necessary to compare their chemical properties in detail.
Good to know: Is it possible to mix antifreeze with antifreeze in a car cooling system?
When examining coolant, it is very important to follow the recommended methodology. To know how to distinguish antifreeze from antifreeze in a car, you need to know their main differences.
Is it possible to mix antifreeze with antifreeze?
Mixing synthetic and mineral refrigerants results in the formation of particulate matter. They clog the pipes and filter elements. As a result, the circulation of coolant through the system is disrupted. This leads to overheating of the motor. And high temperatures, in turn, negatively affect:
- oil seals. Due to sudden temperature changes (for example, overheating of the engine in winter), rubber seals crack and become dull.
- cylinder head. She is deformed. This leads to a major overhaul;
Therefore, you should never mix antifreeze and antifreeze
It is important to be able to differentiate between these two refrigerants. However, there are two classes of modern coolants that are universal. These are G12 and G13. When mixed with other types of refrigerant, they do not harm the system.
The main differences between these coolants
What are the differences between traditional antifreeze and Antifreeze? First of all, it’s about - this is the same coolant only of domestic production. The history of how motorists in the post-Soviet space began to call any antifreeze “Antifreeze” goes back several decades.
Back then, under the Soviet Union, the only type of refrigerant was sold on the car market and it was called “Antifreeze”. That's where it came from. Some motorists mistakenly believe that the main difference between Russian Tosol and any other refrigerant is its blue color. However, this is not the case. The color of the consumable depends solely on the dye that is added to it, but it does not affect any performance characteristics. So the opinion that blue color is the main difference between Tosol and antifreeze is erroneous.
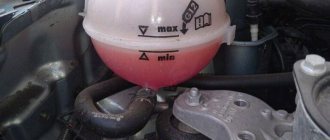
Adding distilled water to the expansion tank
Compound
Actually, the performance characteristics and composition of the substance are the main difference between them. Domestic coolant contains ethylene glycol and distilled water. In addition, Tosol also contains additional additives based on salts of inorganic acids. In particular, we are talking about phosphates, silicates, nitrites and nitrates.
Any antifreeze contains ethylene glycol and distillate, as well as propylene glycol and alcohol. But it is organic additives that play a key role here. Their composition is especially valuable for consumables, since these additives increase the anti-corrosion and anti-foam properties of the material.
Characteristics
"Antifreeze." As a result of the fact that a protective layer appears on the surface of the metal components of the cooling system, the thickness of which often does not exceed 0.5 mm, this affects heat transfer. It is because of this that gasoline consumption may increase, and the service life of the vehicle’s engine will be reduced. In practice, domestically produced refrigerants lose their properties after 30-40 thousand kilometers.
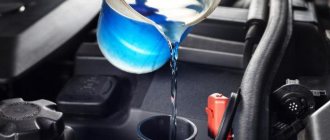
Pouring green coolant into the vehicle's expansion tank
Since antifreeze may contain phosphates and silicates, this coolant can form gels and deposits on the walls of the cooling system. The formation of deposits in the system can subsequently lead to clogging of the radiator and, accordingly, its failure.
Antifreeze. High-quality refrigerant forms a protective layer only on those system components that are more susceptible to corrosion. In addition, heat transfer is not disrupted, which means that the use of such coolant is safer for engine parts.
“Failure” when pressing the gas pedal
A failure is a sudden interruption in the operation of a car engine. A common problem.
It can occur in different operating modes when you press the gas pedal. Accompanied by a drop in vehicle acceleration and even stopping. Possible - short failure (2-3 seconds), deep failure (3-10 seconds), jerk (1-2 seconds), twitching (series of jerks), rocking (series of failures).
This article discusses ways to independently eliminate the failure when pressing the gas pedal in the operation of a warm engine of VAZ 2101, 2102, 2103, 2104, 2105, 2106, 2107 - “Classic”, 2108, 21081, 21083, 2109, 21091, 21093 , 21099 - Samara-1 family, 2121, 21213 - Niva, 1111, 1113 - Oka, 2140, 2141 - Moskvich, GAZ Volga, etc., associated with one or another malfunction installed on them carburetors 2105, 2107 Ozone, 2108, 21081, 21083 Solex and their modifications.
And also the main reasons for its appearance are given.
Reasons for failure when pressing the gas pedal on a carburetor engine
All causes of “failure” are based on either over-leaning or over-riching of the fuel mixture entering the engine cylinders when the gas is pressed. As a result of such a violation, the engine either does not receive the required amount of fuel and operates with failures, or it is simply flooded with fuel with a similar result.
This should be taken as a starting point when diagnosing this malfunction.
An over-lean fuel mixture is caused by a decrease in fuel supply through the carburetor due to clogging of its jets and channels, “suction” of foreign air, gasoline leakage, and low level in the float chamber.
An over-enrichment of the fuel mixture is caused by a violation of the adjustment of the position of the carburetor flaps, or the leakage of the needle valve, connections and seals.
In detail about the signs and causes of failure in the operation of a carburetor engine of a car: “Signs and causes of failure in the operation of a carburetor engine of a car.”
Methods for eliminating failures in the operation of a carburetor engine when pressing the gas pedal
Checking the condition of the fuel filter at the inlet to the carburetor
A dirty and clogged filter makes it difficult for fuel to enter the carburetor float chamber, which leads to a decrease in its level, a leaner fuel mixture at different engine operating modes and, as a consequence, the occurrence of failures. Contamination of the strainer occurs due to clogging and corrosion of the fuel tank, fuel lines, and the use of low-quality fuel.
Cleaning the fuel filter on carburetors 2108, 21081, 21083 Solex and 2105, 2107 Ozone is almost identical. Unscrew the filter plug with an open-end or spanner wrench (2108 Solex - key 13, 2105, 2107 Ozone - key 19). Remove the mesh filter inserted into it. Clean it thoroughly (for example, with a toothbrush), blow it with compressed air and put it back. Also clean the filter hole in the carburetor.
Fuel strainers and their plugs for carburetors 2108, 21081, 21083 Solex, 2105, 2107 Ozone
If you detect severe clogging of the carburetor fuel mesh filter, you should pay attention to the cleanliness of the fine fuel filter, the fuel pump filter, and the mesh filter on the fuel intake in the gas tank. It is worth inspecting the fuel system of the car, if necessary, cleaning the fuel lines and gas tank
We check the connections for “suction” of foreign air into the carburetor
As a result of excess air entering the carburetor, the fuel mixture becomes leaner, causing a “failure” in the engine when opening the throttle and idling. Inspect the hoses and tubes leading to the carburetor. They should not be damaged (broken, worn out...), the fit on the fittings should be tight. Clamps should be placed where necessary (fuel pipes, pipes for supplying crankcase gases to the carburetor and to the vacuum brake booster).
Special attention to the integrity of the gaskets under the carburetor and (or) deformation of the carburetor flange (lower part). This is the most common place for leaks
To check with the engine running, spray the gasket area under the carburetor with water. If the engine begins to run smoother (water has clogged the cracks), then check the gaskets and flange.
The image below shows the probable places where foreign air is “sucked” into the 2108 Solex carburetor (except for the gasket under the carburetor).
Places for “suction” of foreign air into the carburetor 2108, 21081, 21083 Solex
On classic VAZ 2105, 2107 cars equipped with a remote pneumatic valve of the carburetor EPHH system, often damage or loose fitting of the tubes leading to the pneumatic valve leads to the “suction” of foreign air and causes failure.
On carburetors equipped with an electromagnetic valve, extraneous air can be sucked in through its seat if the valve is not tightly screwed on or through its worn sealing ring.
You should also pay attention to the integrity of the rubber o-ring on the fuel mixture “quality” screw. A noticeable failure when starting off is also possible if the tube of the vacuum ignition timing regulator is not sealed or has come off.
A noticeable failure when starting off is also possible if the tube of the vacuum ignition timing regulator is not sealed or has come off.
An article on our website on eliminating the “suction” of foreign air into the carburetor is “Suction of foreign air into the carburetor.”
Checking the fuel level in the carburetor float chamber
With an increased level of fuel in the carburetor float chamber, the mixture is greatly over-enriched and entering the engine cylinders can “flood” the spark plugs, which causes failures in its operation.
At a low level, the fuel mixture, on the contrary, is lean and when pressing the gas pedal, instead of the expected acceleration, the driver feels a failure, since the engine does not receive fuel of the required quality.
It is necessary to let the engine run for a while and then quickly remove the carburetor cover (top part). As a result, you can observe the actual fuel level in the float chamber. You should measure it immediately. Until the gasoline evaporates. On the 2105, 2107 Ozone carburetor, the approximate fuel level passes through the middle of the inclined surface of the front wall of the float chamber (it is marked in the image with a red line).
Fuel level in the float chamber of carburetors 2108, 21081, 21083 Solex and 2105, 2107 Ozone
On the 2108, 21081, 21083 Solex carburetor, the fuel level is 29±1 mm from the bottom of the float chamber (any, first or second). You can measure with a ruler or caliper. In the image, the fuel level is marked with a red line. This figure is very arbitrary, although many carburetor operators, when setting the fuel level in the carburetor float chamber, rely on it, not recognizing the adjustment by the position of the float.
Fuel level adjustment details:
“Adjusting the fuel level in the float chamber of the carburetor 2108, 21081, 21083 Solex”,
“Adjusting the fuel level in the float chamber of the carburetor 2105, 2107 Ozone.”
We check whether the fuel and air jets, emulsion wells, channels in the small diffusers of the main carburetor metering systems (GDS) are not clogged.
Their purity directly affects the mixture formation process at different engine operating modes. Depletion or enrichment of the fuel mixture due to clogging of these jets leads to “failure” when you press the gas pedal.
It is necessary, with the carburetor cover removed, to unscrew the fuel and air jets of the main metering systems (GDS), clean them, rinse them, and blow them with compressed air. On the 2108, 21081, 21083 Solex carburetor, the GDS air jets are combined with emulsion tubes and are removed along with them. On 2105, 2107 Ozone emulsion tubes can be removed by lightly screwing a self-tapping screw into them and pulling up with pliers
Clean and rinse the emulsion wells, clean the channels of the small diffusers of both chambers, pay attention to their markings and correct installation
Here you should pay attention to how tightly the GDS fuel nozzles are wrapped. If they are not turned all the way, the fuel mixture will become very rich.
We turn out and clean the fuel jets of the GDS.
We remove the diffusers, clean them, and blow out their channels.
Air and fuel jets, emulsion tubes and emulsion wells of GDS carburetors 2105, 2107 Ozone, 2108, 21081, 21083 Solex
On cleaning the carburetor, there is an article on the website - “Cleaning and cleaning carburetors 2108, 21081, 21083 Solex, 2105, 2107 Ozone.”
We check whether the outlet openings of the transition systems of the first and second carburetor chambers are clogged
The lumen of the holes narrows over time due to accumulated deposits and carbon deposits and may gradually disappear altogether. As a result, when you press the gas pedal and begin to open the throttle valves of first and then the second chamber (when the transition systems are operating), fuel does not flow in sufficient volume, the fuel mixture becomes lean, and failure occurs.
It is best to clean the holes in the transition systems by removing the carburetor and turning it upside down with the throttle valves. It is convenient to clean with a thin wooden stick or copper wire, rinse with acetone, and blow with compressed air. You can clean the vias by cleaning the idle system in-place (since they are interconnected). Cm.:
“Cleaning the idle system of carburetor 2108, 21081, 21083 Solex”, “Cleaning the idle system of carburetor 2105, 2107 Ozone”.
The image shows the outlet openings of the transition systems of the first and second chambers of the carburetor 2105, 2107 Ozone.
Outlets of the transition systems of both carburetor chambers 2105, 2107 Ozone
On carburetors 2108, 21081, 21083 Solex, the location of the outlet holes of the transition systems is identical, only in the first chamber, instead of two, there is one hole in the form of a slot.
Outlets of the transition systems of both chambers of the carburetor 2108, 21081, 21083 Solex
In this situation, a “failure” may occur due to a malfunction of the accelerator pump (AP) of the carburetor. First of all, you need to check its atomizer, then the valve channels and diaphragm
In general, it is worth paying attention to the operation of the accelerator pump when any types of “dips” occur, since it is involved in the operation of the carburetor and the car engine in all modes except idle
Accelerator pump nozzles for carburetors 2108, 21081, 21083 Solex, 2105, 2107 Ozone
In addition, the operation of the accelerator pump is affected by the fuel level in the carburetor float chamber. At a low level, the performance of the fuel pump decreases, since it does not receive enough fuel.
“Checking and repairing the accelerator pump of the carburetor 2108, 21081, 21083 Solex”,
“Checking and repairing the accelerator pump of carburetor 2105, 2107 Ozone.”
Notes and additions
— If after carrying out the above manipulations the failure when pressing the gas pedal does not disappear, you should look for its cause in other systems of the car. For example, faulty spark plugs or broken high-voltage wires have almost the same symptoms.
The reasons for failure when pressing the gas pedal that are not related to the carburetor (ignition system, fuel system, malfunction of the engine itself) are discussed on our website in the article:
“The reasons for failure when pressing the gas pedal are not related to the carburetor”
More articles on the site on the topic of “failure” in the operation of a carburetor engine Setting the ignition timing (angle) of VAZ 2108, 2109, 21099 for 92nd gasoline Setting the ignition timing 2101-2107 Malfunctions of the distributor Malfunctions of the transition systems of the Solex 2108 carburetor Why they quit spark plugs malfunctioning when the engine is running on gas. The engine air filter becomes clogged.
How to test antifreeze for quality at home
According to the author. A very common question on my website is how to check antifreeze or antifreeze for quality? Is it fake or not, does it correspond to the declared characteristics, or is it better not to put it in your car?
Moreover, it is advisable to do the process itself at home without resorting to any complex processes. I have an answer for you + a useful video version below (you could say a life hack). Without delay, let's get started...
Antifreeze or antifreeze are made on almost the same principle. They may differ in various additives, but the base is almost always the same, it is Ethylene glycol or Propylene glycol (the simplest alcohols) + distilled water. BUT there are always negligent manufacturers or simply outright counterfeits that will not bring anything good to your car (namely, the cooling system)
Top up or replace?
The first thought that comes to mind when searching for the right coolant is to fill in what was there before! But how do you find out what was poured into the car several years ago? Owners often ask to sell them “antifreeze for Volkswagen.” Or - even worse - on the advice of the ignorant, they begin to look for a liquid of a certain color.
This myth is one of the most persistent in the automotive world. Like, if the liquid was blue, then you need to add blue too. But the color of the coolant is determined not by its chemical composition, but by the dye. Now coolant is conventionally divided into four types according to the set of functional additives! And you can't mix them.
What happens if you add another yellow coolant, but made using a different technology, to a yellow coolant? Dissimilar additives will begin to “butt” with each other and stop working as intended. As a result, precipitation may fall out of the solution, disrupting the operation of, for example, the heat exchanger of the heater. And it will all end with repairs.
Test by fire
After antifreeze or antifreeze begins to boil, it is worth checking them for fire. It’s better not to check with a regular lighter; you need an open source of fire, preferably various types of burners
The thing is that low-quality products (or rather their vapors) can ignite. If you bring the fire over the evaporation (when the liquid is on the “slab”) and they light up, it is better to refuse the purchase
Most likely, a low-quality base was used, not the same components that were included in the original formula.
Of the minuses , again, it’s better not to do it at home (it won’t take long to burn down the apartment).
Heat test
You can check the quality of antifreeze by heating it. Regular manufacturers claim that their composition will withstand + 105, +110 degrees and will not boil.
You will need a tile, a container (either glass or metal), and a thermometer (that can withstand high temperatures).
Next, heat the liquid and watch when it boils.
If the process started at + 80, + 95 degrees Celsius, this is very bad! A good result starts from + 105 degrees
When antifreeze or antifreeze boils at low values, this may indicate low-quality alcohol in the composition, or no alcohol at all, but more on that later.
The MINUS of such a test is that it is not advisable to do it at home, so as not to inhale the fumes.

