24.01.2018 1,
If you find that your gas tank is rotten or you accidentally punctured it, then do not rush to buy a new one. Even buying a used gas tank can cost a pretty penny. First you need to identify the extent of the damage.
We remove the gas tank, dry it and check for rust. For most cars it is located on the rear right side of the car. If necessary, clean it of all deposits. Cleaning can be done either with improvised means (sandpaper) or with special mechanisms (sandblasting).
Soldering the gas tank
After assessing the identified damage, you can begin soldering the gas tank. The most popular method can be considered cold welding. We clean the surfaces where the gas tank is damaged. Mix the epoxy resin and hardeners in a separate bowl. Apply a homogeneous mass to the hole.
It is necessary to apply a fabric patch on top of the homogeneous mass, having previously generously lubricated and soaked it with the same mixture. After the resin has cured, you must ensure that the entire surface of the hole is covered and generously covered with resin and patch. Such a patch may take more than one season, but you should not rely on it for the rest of the time you use the car.
This soldering is suitable in most cases, but for plastic tanks a different soldering method is required. In this case, you need a soldering iron (250 W). If there is major damage, additional pieces of plastic (of the same brand as the gas tank) will be required. Each plastic part must be marked.
Plastics are mainly divided into three types. PP (polypropylene), ABS (acrylonitrile butadiene styrene), PA (polyamide). It is necessary to solder the plastic gas tank only from the outside. If necessary, use reinforcing materials (fine metal mesh). After soldering plastic products, do not allow the soldered parts to cool suddenly.
Communities › Kulibin Club › Blog › a simple way to solder a gas tank
video of a simple method of soldering a gas tank - maybe someone will be interested?
Comments 49
I impregnated the fabric with epoxy glue and glued it! And here the tank must be washed
Why have stores stopped selling cold welding?
Why have stores stopped selling cold welding?
Well done! passes! Have you tried heating it with a gas burner? wouldn't it be faster?
Well done! passes! Have you tried heating it with a gas burner? wouldn't it be faster?
There is a gas canister with a screw-on burner, but at work the electricity is free!
It felt like they were shooting at the tank with a shotgun. And it’s also not clear how to do it without acid?
Why are you all stuck on acid! If you don’t know how to solder without it, it doesn’t mean you can’t solder without it!
It felt like they were shooting at the tank with a shotgun. And it’s also not clear how to do it without acid?
Solders well and holds up well
No! - I wouldn’t do that...
This is not the first year I've done this
same question. Anyone needs to be treated with acid. I soldered like this www.drive2.ru/cars/toyota...3102/journal/911824/#post so far the flight is normal
acid removes the oxide film from the metal! and if the metal is heated enough, the tin will lie very well! But we don’t solder with acid! bad effect on soldering! (only in extreme cases)
How do you solder without flux or acid? This is impossible.
if the metal is well heated, the solder will fall very well and easily! Rosin flux and acid are only assistants!
if the metal is well heated, the solder will fall very well and easily! Rosin flux and acid are only assistants!
I agree 100%!
Damn, I was waiting for the explosion)))) What a bummer))
I personally saw how exactly this method caused a friend in a place with a tank to fly 10 meters away from the fumes! although the tank has been evaporated and treated with special chemicals! VERY SHORT! Why not just make hatchets with mesh?
Source
Gas tank, soldering iron, solder...
To solder a metal gas tank, a powerful soldering iron (500 W) is required. Before soldering, the hole area must be treated with soldering acid. The solder must be fusible; in extreme cases, a copper plate will do. After soldering, it is necessary to cover the entire surface with resin to prevent rust from appearing.
If there is minor damage during the trip, you can use a folk remedy, of course, if you have laundry soap on hand. It is necessary to strongly rub the surface in which the holes are supposed to be made with soap. The soap will clog all the small cracks and thereby help you get to the nearest service station. This method is only intended to help you get to the nearest service station. serving.
All the methods described do not guarantee long and high-quality operation of your gas tank. If a part breaks, the part must be replaced. In our case, we postpone the timing of replacing the gas tank, but in the end, sooner or later, it is necessary to replace the broken gas tank.
Gas tanks that are part of the fuel system of modern cars are most often made of two materials: cross-linked polyethylene (plastic) or metal. However, if something happens to a plastic tank, this material can only be repaired in extremely rare cases; most often it is replaced. As for containers made of metal, the situation with them is somewhat simpler and in many cases it is possible to repair a fuel tank made of this type of material.
Moskvich 426 “Primus” (third life) › Logbook › Soldering the gas tank
Sunday evening was dedicated to repairing the gas tank.
Soldering a gas tank is a new skill for me. I've never had to do this before. Of course, if I had a sedan, then most likely I would give up on everything and buy a new tank; they are still on sale. On the other hand, a new tank from recent years of production can rot faster than an old one that is already full of holes. My uncle had a ’95 Combi, and the tank rotted into holes within 4 years.
The tank must have at least some kind of coating on the inside: either tinning or galvanizing. It’s not a fact that it is available in IL tanks from recent years of production.
Most of all I was afraid of unscrewing the fuel intake and fuel level sensor. Because of them, last night could have been either a “walk in the park” or “a steeplechase in full gear” with the hellish Kama Sutra, drilling, cutting threads, etc. Well, the end result was a “jog in the park.”
With a sinking heart, I raise my best screwdriver over the tank... (if I were religious, I would cross myself and say a prayer)
On the sensor, 3 screws came off “free”. Another impact screwdriver. I was afraid that the impact screwdriver would not work due to the fact that the tank might spring back when impacted. Nevertheless, “the trick was a success.” Then I unscrewed the 3 fuel intake screws with an impact screwdriver. There is one screw left on the sensor and 2 on the fuel intake. I decided to cut the slot deeper with a grinder. Now 2 of them are unscrewed, and one on the fuel intake is broken. Apparently he went too far with the cut.
I take out the sensor and look into the tank. I expect that there may be a typical picture for an old car: the whole bottom is rusty brown with a layer of red rusty sand. But, nevertheless, the condition of the bottom pleasantly surprised me: it is light with a intact coating, only with points of emerging corrosion. Just dots and not spots. This means the tank needs to be repaired.
I try to turn the remaining screw by half the cap with pliers, it breaks off. I'm removing the fence. We have the last piece of the screw sticking out. Since the fragment sticks out quite high (as thick as the sensor and washer), I decide to weld a new cap onto it. At the same time, it will heat up from welding.
Safety is very important here. I poured gasoline out of my tank 11 years ago and it had been lying open all this time. The remaining gasoline had long since evaporated and there were no dangerous vapors in it. Therefore, I could easily practice welding.
To avoid welding to the tank itself, I put a washer on the piece of bolt. I welded the bolt, cut it under the slot and unscrewed the last screw. HOORAY! We managed to unscrew everything without damaging the tank!
Then I cleaned the layers of old paint, anti-corrosion and surface rust from the tank with a brush on an angle grinder, having previously sealed the sensor and intake holes with tape.
Now inspection. The situation is as follows: A hole in the float pan, filled with a self-tapping screw with a washer and a rubber gasket. Next to it is another hole, not repaired. In general, the entire float pan is in a very suspicious condition.
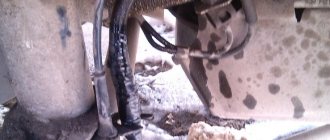
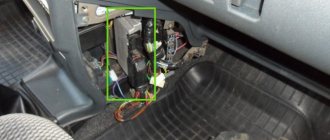
Another small hole in the corner of the tank (top right in the photo). You can't see any rust around it from the outside, it's visible from the inside.
Two “dark” places where spot welding of the internal bulkhead to the bottom of the tank.
The fuel intake tray had already been welded (well welded and not sealed) before me in a circle.
In principle, of course, it would be possible to weld everything too, but I didn’t want to unnecessarily release the metal of the tank for further corrosion, and it was interesting to practice soldering.
I cleaned off the rust in the solder areas using a flap wheel on an angle grinder. I'm afraid to clean it too much, as I might end up with big holes. I took Soldering Acid and a gas torch and tried to tin the fragment. It turns out very badly, the acid boils, the solder does not stick, flows away wherever it wants, collects in thick drops, etc. Nothing works.
I took a brass mesh. It turns out a little more successfully with her, although she is too small for such things. I was looking for one with a 2mm cell, but I only managed to get it with a small cell, I think 0.5mm. The grid burns from the burner flame. And in general, the burner does not provide sufficiently targeted heating. I took a gas soldering iron instead of a torch, and then things went better. The main thing here was to direct the flame clearly towards the solder. Then the acid does not boil away and the solder sticks where it should. Moreover, it is necessary to heat with the highest temperature at the tip of the flame. Catching this tip is quite difficult, but over time I managed to get the hang of it.
Here's what happened:
Come on, laugh!
It will do for the first time. Please don't make fun of me too much. And also for soil leaks, since the task was to fill it with as much grease as possible. The place still doesn’t have any views.
Installation of door locks and limiters Assembling the steering column Assembling the pedal assembly and master brake cylinders with VUT and signaling device. Replacing the left steering knuckle and connecting pipes and hoses Rebuilding the right side of the suspension with replacing the steering knuckle and connecting pipes and hoses Bleeding the brake system Repairing (soldering) the gas tank and installing it
Pulling the fuel line
Installing the engine
Installing the transmission Installing the exhaust system Test run Assembling the cooling system and installing the heater. Start longer. Pre-installation of electrical wiring.
Material and characteristics of the metal tank
We will be considering a container made of metal, because as mentioned above, such a gas tank can be repaired. As for the material from which this container is made, in 95% of cases it is a soft steel sheet. This sheet has additional treatment, usually a secondary lead coating, which slows down irreversible corrosion processes.
The advantage of this material and the reason why it can be repaired is that when deformed, it is possible to level the metal sheet. If for any reason a gap appears in such a gas tank (for example, a breakthrough due to an accident or thinning of the material due to rust), then it can be soldered or welded.
Causes of gas tank damage
Naturally, there can be many reasons for mechanical damage. However, it is worth mentioning the most common ones:
- Corrosion;
- Bloating due to high blood pressure;
- Deformation or ruptures due to an accident;
- External mechanical factors.
All reasons except the last one are obvious; as for the fourth point, it is due to the location of the fuel tank. This means that in many cars the gas tank is located under the car and one of its sides is perpendicular to the ground. In this case, stones flying out at an unpleasant angle, the bottom touching bumps or debris on the road can lead to some damage to the fuel container, but even in this case it can be repaired, for example, by soldering it.
Causes of gas tank cracks
On most cars, the gas tank is located in the rear (right, left, under the rear seat). This design feature is explained by safety for passengers and the driver. In addition, vehicle handling is improved. However, the rear part of the body is quite often exposed to external damage during the operation of the car, as a result of which the gas tank also suffers.
The most common cause of cracks is mechanical stress leading to holes in the container. Considering the quality of Russian roads, sometimes even a slight impact is enough to cause a hole to form.
Significant causes of damage also include metal corrosion, which is an inevitable process. The more mileage a car has, the higher the likelihood of this type of problem. Less common are power system faults. Since a rarefied pressure is created in the middle of the tank as fuel is consumed, this affects the condition of its walls. During operation, small cracks may appear on them, and as a result of their enlargement, leakage occurs. This situation indicates the need to repair the gas tank.
One of the reasons for gas tank damage is corrosion.
What to do if your tank leaks
The appearance of a crack, hole or any other type of damage to the gas tank is typical not only for domestic cars, but also for foreign cars. When the seal of the tank is broken, it is necessary to fix the problem as soon as possible. Operating a vehicle with such a malfunction can lead to disastrous consequences, and danger threatens not only those in the car, but also those around them. Due to the fact that the fuel tank is a simple structure, restoring the tightness will not be difficult. However, much depends on the degree of damage and the feasibility of such an event. Since gas tanks are made of different materials, different repair methods are used.
Fuel tank repair
First of all, before you begin, you need to understand that although the process of repairing a fuel tank is not very complicated, you must adhere to the mandatory precautions and be extremely careful at some stages of the work, so you can avoid possible troubles and reduce the risk to life .
First of all, when starting repairs, the owner must drain all the fuel from the tank, to the last drop. To do this, you can use a regular rubber tube, but if the process is inconvenient, use a jack, tilting the car in the desired direction.
Soldering the fuel tank
Now it is necessary to assess the degree of destruction, and this degree is divided into two points:
- Normal dents, no fuel leaks. In this case, you can level the walls of the tank by supplying compressed air inside.
- Damage to the tank with fuel leakage. Let us dwell on this point in more detail, since it poses the greatest threat.
So, the first thing to remember is that under no circumstances do you weld immediately after draining the fuel. The tank can also be sealed only after time has passed. This is due to the fact that explosive fuel vapors are stored in the gas tank, which detonate when heated, and this is extremely dangerous.
To seal the tank, you need to rinse the tank thoroughly and fill it with water. Rinse with hot water and detergent. If you decide to solder the tank using tin solder, then you don’t have to fill it with water, since the temperature will not be high. However, such soldering is suitable only if the damage is small.
If the gaps are larger and hot soldering with fire is required, be sure to fill the tank with water, but in the place where you want to solder the gap, you must leave a small pocket of air by tilting the gas tank accordingly. At the same time, when carrying out soldering, do not close the lid of the fuel container under any circumstances, since the gas formed during heating must escape freely.
Repairing a cracked metal gas tank
In order for gas tank repair to be not only competent, but also safe, certain rules must be followed. They boil down to the fact that all additional equipment will need to be dismantled, the fuel drained and the container washed.
When repairing a cracked gas tank, it is necessary to drain the fuel, remove the container and wash it.
How to remove the gas tank
Removing the gas tank involves removing the hatch, cable, neck, fuel sensor and pump. The list of certain elements, as well as the process of dismantling them, depends on the specific car.
Tools you may need:
- pliers;
- side cutters;
- screwdriver;
- wrench or socket of appropriate size.
Sequence of actions during dismantling:
- First, the remaining fuel is drained. For this purpose, the design of the tank has a special hole in the lower part. To prevent fuel from spilling on the ground, prepare the container in advance. If there is no plug, gasoline can be drained using a hose and a pump bulb.
Before removing the gas tank, it is necessary to drain the remaining fuel.
- After emptying the tank, disconnect the connector, which is responsible for connecting the wires to the fuel level sensor. This connector may be located under the rear seat or in the luggage compartment. The element can be separated by snapping off the special tab. After this, disconnect the ventilation hose located at the bottom of the tank.
After the fuel has been drained from the tank, remove the connector with the fuel sensor wires, as well as the power supply to the fuel pump.
- Using a screwdriver, loosen the clamp of the fuel supply hose and tighten the tube. If the hose does not come off, try turning it in different directions.
One of the stages of dismantling the gas tank is the removal of the fuel hoses, for which the fastening of the clamps is loosened
- Removing fasteners. To do this, unscrew the nuts that secure the clamps securing the gas tank to the body, and then remove them from the studs. The free side is lowered, then the second side of the fastening is released.
To dismantle the tank fastenings, unscrew the nuts securing the fuel tank clamps
- Remove the gas tank filler cap by simply unscrewing it. After this, the tank is moved to the side to release the neck from the rubber seal.
To remove the gas filler neck from the seal, you will need to remove the plug.
- The ground wire is disconnected from the tank body. It is secured with a nut, which must be unscrewed with a wrench of the appropriate size. There are no longer any elements holding the fuel tank in place and it can be removed from the vehicle.
When nothing interferes with dismantling the tank, it is removed from the car
Cleaning the gas tank
After the fuel has been drained from the tank, it will need to be cleaned of contaminants, for example, by washing under running water using detergents. After drying the tank, it is necessary to clearly indicate the places of future work and understand whether there is a need for its dismantling or restoration is possible directly on site. Is it possible to repair a gas tank without draining the fuel? You need to understand that doing quality work, even with the slightest leak, is problematic. When all the preparatory aspects have been resolved, they proceed directly to the repair procedure.
To reveal the extent of the damage, the container must be washed and dried.
Necessary tools and materials to repair a cracked metal gas tank
Depending on the chosen repair method, the list of tools and materials used will differ. In general, you will need the following:
- tire pump for supplying compressed air;
- hose connected to a hot water supply;
- special cleaning liquids;
- petrol;
- drill;
- bolts and nuts;
- file;
- degreaser;
- sandpaper;
- primer paint.
How to solder a gas tank
One common method of repairing cracks in a metal fuel tank is soldering. To carry out the procedure, you will need a soldering iron with a power of more than 200 W, soldering acid and tin. Leave the tank neck open during operation. Let's start restoration:
- We determine the location of the leak.
- If any deformations are found, we straighten them out.
- We carefully clean the soldering area and degrease it, for which you can use any product (acetone, solvent, gasoline).
Before soldering, the damaged area is cleaned to bare metal.
- Apply soldering acid to the soldering area.
- To make it easier to tin the problem area, heat it with an incandescent lamp or hairdryer.
To apply tin, the damaged area must be heated
- We tin the metal. If the crack is large, we fuse tin in several layers until the damage disappears.
For large crack sizes, tin must be deposited in several layers
- When the soldering area has cooled down, clean it of rosin with a solvent or other means.
After soldering is completed, the area is cleaned of rosin with a solvent.
On old gas tanks, in addition to eliminating the crack, it is appropriate to clean the tank from corrosion, and then apply primer and paint.
How to brew a gas tank with a semi-automatic machine
To carry out welding work on the fuel tank, you will need to pour water inside to prevent ignition of gasoline vapors. The welding site is cleaned to bare metal, removing corrosion using a wire attachment on a grinder or drill. If a large area is damaged, it is cut out, a metal patch of similar thickness is applied, and then scalded. After cooling, the container is covered with primer and painted.
Cold welding repair
When repairing a crack in a fuel tank using cold welding, the same preparatory measures are performed as for soldering (draining fuel, washing, drying, cleaning). If the damage is in an accessible place, the container does not need to be removed from the vehicle. When working with cold welding, you must take care to protect your hands, i.e. use rubber gloves. Then cut off the required amount of the composition and knead it well in your hands. As a result of the chemical process, the product will begin to soften. At this moment, it must be applied to the damaged area with great force, and then leveled.
One way to repair a gas tank is to use cold welding
For greater reliability, a piece of fabric is placed on top of the first layer, then the second layer is applied. Depending on the type of cold welding, it may require dilution with various means. In this case, it is recommended to perform the kneading procedure in a metal container.
Sealing a crack with epoxy resin
Repairs using epoxy resin are resorted to when it is not possible to carry out a full restoration by soldering or welding. All epoxy components are mixed according to the instructions. The damaged area of the gas tank is thoroughly cleaned and a layer of resin is applied to it, after which it is covered with a piece of fiberglass or a clean rag soaked in the same substance. Several such layers are applied. When the patches are dry, you can fill the gas tank with fuel and continue driving. It is worth considering that epoxy resin, as well as cold welding, has an excellent expansion coefficient and low bending strength compared to metal. This suggests that repairing a fuel tank using such materials is a temporary measure.
We recommend: The car doesn’t start well when it’s hot: we look for and fix the problem
Conclusion
So, as you can see, there is nothing complicated in repairing a tank, and although this text presents only one of the methods that allows you to solder a tank, the other methods are also not particularly difficult. The main thing in this matter is to follow the precautionary rules prescribed above, otherwise the consequences can be severe for both man and machine.
A leak in the gas tank occurs as a result of physical wear or due to damage with collapse of the housing. Fuel vapor accumulates in an empty tank, so welding and heating can cause an explosion. Many motorists ask how to properly seal a gas tank. There are several repair methods: argon arc and cold welding, soldering. Let's look at each of them in more detail.
Checking the repaired gas tank for leaks
After repair work is completed, the tank is checked for leaks. To do this, close all the holes and use a manual or electric pump to create a pressure in the gas tank, 7–15 kPa is enough. Then cover the tank with soapy water and carefully inspect it. It is possible to place the tank completely in water, but this will not be easy. If air does not pass anywhere, then the work has been done efficiently and the tank can be installed on the car.
Close all the holes, pump air into the tank and use soapy water to check the quality of the repairs performed.
If damage to the fuel tank occurs, you can fix such a malfunction yourself, without the involvement of specialists. Depending on whether this happened on the road or was discovered on site, one of the available restoration methods is used. In any case, you can do everything yourself; this does not require special equipment or professional skills. To perform the work efficiently, you must follow the developed repair technologies and follow the recommendations of specialists.
A leaking gas tank is a serious problem that can happen to anyone. Since the gas tank on many cars is located on the bottom of the trunk, it is no wonder that many motorists have no problem damaging it during operation. The tank was damaged as a result of an impact from a foreign object, or from corrosion - it doesn’t matter, because if this has already happened, there is no time to waste, since with every minute there is less and less gasoline in the tank. You will learn further how to repair a leak in a gas tank.
General rules for repairing a gas tank
The presence of a leak is indicated by increased fuel consumption and a specific smell in the cabin. Even a minor crack is dangerous for the life of the driver and passengers. The leak area ignites when struck by a spark. Damage occurs as a result of cracking of the body during driving and exposure to corrosion. Defects occur when there is a malfunction in the vehicle's fuel system. The discharged pressure contributes to the gradual cracking of the walls. Microcracks gradually increase, causing leaks. Before welding the gas tank, you must follow the safety rules:
- be sure to drain gasoline or diesel fuel from the tank;
- thoroughly dry and dismantle the tank, inspect for damage;
- wash inside using specialized detergents;
- After washing with household chemicals, rinse thoroughly and dry.
Washing the tank allows you to completely remove explosive vapors. The repair method is selected based on the material from which the tank is made. Argon arc welding of a fuel tank is only suitable for metal containers; it is recommended to repair plastic products using cold welding; hot soldering is a universal method. Let's take a closer look at how to seal the gas tank yourself.
Repair of any type of gas tank without a trip to the service station
Car breakdown is a fairly common occurrence that can catch the driver in the most unexpected situation. Failure of a gas tank is a serious problem that must be at least partially eliminated at the scene of the accident. This will allow you to transport the car to the nearest service center, where a major inspection and repair can be carried out. Repairing a gas tank with your own hands is not too difficult for people who have some knowledge about such repairs.
The location of the gas tank is the lower right corner of the rear sector of the vehicle. This is due to ensuring safety for the driver and passengers, as well as the formation of the correct center of gravity in the car, which improves its handling. However, the lower section most often suffers from constant physical impact, which leads to repeated damage to all the mechanisms located here. The fuel tank is no exception.
Crack in car gas tank
Causes of damage to the gas tank and basic repairs
Failure of gas tanks is most often associated with the gradual development of corrosion processes. Their effect on the inside of the fuel tank is especially dangerous. The provoking factor for the appearance of rust is water. It is almost impossible to avoid it getting into the tank.
Also, the cause of holes in the gas tank may be a malfunction in the vehicle's power system. A discharged pressure is formed inside the tank, which provokes the formation of an extreme load on all the walls of the fuel container. After some time, it becomes covered with small mechanical cracks.
Rules for repairing a gas tank of any type:
- Before starting the procedure, all available fuel must be drained from the gas tank. Using a jack, the car is installed in an inclined position. Gasoline is drained using pipes. Next, the gas tank should be thoroughly dried.
- Determine the extent to which it is necessary to completely remove the fuel tank for repair work. It is recommended to take into account the area of damage and the degree of ease of repair.
- Determine the feasibility of conducting full monitoring of the tank for the presence of additional holes.
Cold welding gas tank repair
Cold welding is suitable for containers with hard plastic walls or for metal tanks. Glue does not adhere well to thin-walled tanks, so such repairs will be ineffective. The adhesive composition is selected in accordance with the type of container material. It is recommended to wear gloves when repairing a gas tank using cold welding. The crack is cleaned of contaminants and degreased with nefras.
Two-component mixtures are combined in the proportion specified by the manufacturer. The prepared solution must be used within 10-20 minutes depending on the brand name. The glue is applied to the damaged area in layers and smoothed, pressing it to the surface. 2-3 hours after repair, the tank is ready for use. The glue in the form of a bar is thoroughly kneaded with a damp hand and the crack is covered.
Cold Welding Selection
When choosing a cold weld, it is necessary to take into account that it must be resistant to gasoline. Only minor damage can be sealed with it. Moment superglue or similar special compounds from other manufacturers are perfect for eliminating leaks on the road. The rags are cut into patches, soaked in glue and attached to the hole in several layers. This repair method is temporary; it allows you to get home or to a service station and completely solder the holes.
Communities › DIY › Blog › Soldering a gas tank without difficulty
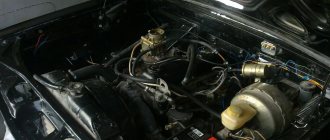
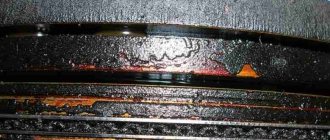
We removed the gas tank for body repair of the car, the tank was a little rusty, I decided to remove the rust by sandblasting, and after cleaning it turned out that it was rotten in one place.
Cooking is not an option at all, somehow it’s DIRTY, so I decided to solder it, I think it would be more correct. Soldered with regular soldering acid and a 30-watt soldering iron.
Comments 76
orthophosphoric acid ("zinc" will do) + a non-electric soldering iron, heated by a "hammer" blowtorch. It will take longer to remove the tank and clean it than to solder it, but it holds tightly. No matter how many tanks I used it on, not a single one had to be redone.
I don’t understand what’s weird about welding if the tank is removed and there’s no more vapor in it?!
sandpaper on x-th and what you cleaned with is called sandpaper)))
This is called crap, I soldered the tank with a 250 watt ax. And that didn’t help, I still sweated
this soldering will fall off because the power of the soldering iron is not enough, here 100 watts is needed no less, and the acid will show itself very soon in the form of rot, it has been verified more than once for acid lovers to redo 2cm of wires, this rubbish eats up inside and is not visible, but here is nigella acid and a blob that rests on 2 x 3 points and underneath the acid does its job
only for a short time - the soldering does not hold vibration at all.
only for a short time - the soldering does not hold vibration at all.
Even the soldered wires fall off, there are no loads at all. It’s not for nothing that everything in a car is connected by crimping and welding.
it falls off not because of this, but because of the properties of tin included in the solder, the more of it the worse it will be, but the better the conductivity of tin at a temperature (I don’t remember at what temperature, so I won’t lie) it suddenly looks like powder, so depending on the conditions in the solder, the amount of in alloying substances and for some reason few people know about this, so they say that the soldering is falling off))) so in my jig all the connections are soldered and varnished and that - nothing has fallen off yet and the solder was clearly not there 61 if I find the tag I'll write back later
“in a jig, all connections are soldered” - this, of course, is a compelling argument...
I mean, I'm talking about additionally installed equipment
I fill the empty tank with ammonia three or four times, shake the tank, check it with a torch and cook
I don’t know, I didn’t watch the video, but I saw how they burned a 25 liter gas cylinder, which had previously stood open for 2 weeks, it banged 2 or 3 times, and I also saw with my own eyes how cylinders were cut using ferrous metal, do you think someone is deflating them? sometimes you come across full or half-filled ones, but there are practically no empty ones, you just burn a hole with a gas cutter and kick it with your foot and roll it to the side with a stream of flame so as not to interfere, sometimes the cylinder tries to fly away like a jet, then you have to hold it with your foot; they also cut filled fire extinguishers or shock absorbers
Chat 100 grams of ammonia and even cut it with a grinder. I even strip propane cylinders this way.
With 30 watts and radio components you can’t warm up everything, but here the tank... I can’t believe it.
The tank is iron - iron does not conduct heat as quickly as copper or aluminum or radio components - so the soldering area turns out to be hot and does not transfer heat to the rest of the iron - when I started soldering iron I was surprised by this fact.
with such a problem, you don’t even need a soldering iron; just use a gas can, melt the tin and it will close the hole for 3 minutes and it was worth writing a memoir because of this
Some may not have enough luck. All TB rules are written in blood.
Are you saying this as a former submariner?
And there people are responsible for mistakes not only with blood but also with their lives.
Don't take it for rudeness... I take my hat off to your skill. But you are wrong in the way you present the information. Tomorrow someone will read your comment and God forbid it will be some car depot mechanic or a mechanic. And he’ll tell some welder after technical school to weld, don’t piss, I won’t do it. And without a clear understanding of the technology, there will definitely be... And if it happened today, then tomorrow, with great disregard for safety precautions and common sense, there will be trouble. You saw people burning. I once received a call with an insistent request to weld the fuel tank on a tractor, but it turns out there were 700 liters of carpenters in it, the hole from the broken bolt from the step was plugged with a wooden cap and drain the fuel from the tank, much less no one was going to remove the tank itself... I don’t know how it ended this story…
Soldering
Compared to cold welding, fuel tank soldering is more resistant to mechanical stress and external factors. To eliminate a leak, prepare a patch 4-5 cm larger than the area of damage. Repair of plastic products is carried out on the outer part of the walls of the gas tank with a 250-watt soldering iron. When sealing, you need to select a patch from the same material. The type of plastic is indicated on each part. Most often, gas tanks are made of ABS, polypropylene or polyamide.
For high-quality adhesion, a substrate of fine reinforcing mesh made of metal or copper is required. The substrate is fused into the wall of the gas tank, evenly distributing liquid plastic over the entire surface of the defect until a new uniform coating appears. The procedure is performed quickly so that the plastic does not harden, otherwise sagging will form.
In metal containers, you can seal the hole with a thin metal or copper patch. You can heat the case using a blowtorch or iron. The patch is attached with low-melting solder along the entire perimeter using a 500-watt soldering iron, having previously treated the joints with soldering acid. After soldering, you need to let the body cool, then cover the patched area with bitumen mastic or paint. The coating will protect the patch from corrosion.
Plastic tank repair
To repair a plastic tank you will need:
- soldering iron with a power of over 200 watts (hatchet);
- pieces of the same tank;
- metal mesh (steel or copper) with a pitch of no more than 1 mm;
- alcohol;
- brush;
- sandpaper;
- metal scissors;
- jigsaw
If you decide to repair a plastic gas tank, then buy the same one. This can be done at a disassembly site or through an advertisement in the newspaper. Cut a piece from the repair gas tank that covers the damage by 3–5 cm in each direction.
It is very important to use the same plastic for repairs as the one from which the gas tank is made. Otherwise, there is a high probability that different plastics will not connect.
It is advisable to cut out the plastic from the same area of the repair tank where the damage is located. If this is not possible, do not worry, because you can even seal the fuel tank with several pieces of plastic.
Using metal scissors, cut a piece of mesh of suitable size and shape. Clean the surface of the tank with coarse sandpaper, then degrease it and the mesh with alcohol. Heat the soldering iron to such a temperature that it easily melts the plastic, place the mesh on the tank and fuse it into the plastic. Do not press hard or hold the soldering iron in one place for more than 2-3 seconds, so as not to push or deform the fuel tank. This is especially important where the fuel pump or float is located. It is not necessary to completely recess the mesh into the plastic; it is enough that both materials are connected. Clean and degrease the patch, place it on the tank and start heating it. It is necessary to fuse it with plastic and metal mesh. Do not press hard, do not hold the soldering iron in one place for more than 3-5 seconds, so as not to push through the plastic. When the patch has completely cooled, the plastic tank will stop leaking.
Repair using electric welding
Welding a fuel tank using a argon arc welding machine and tungsten electrodes is considered the most reliable method. It reliably connects non-ferrous metal with alloy steel. Most gas tanks are made of aluminum, so inverter welding is not suitable for repairs. The repair area is cleaned of oils and dirt. The patch is welded around the entire perimeter, trying to maintain a homogeneous gas environment. The seam is smooth and durable. After cooling, the repaired area is painted or covered with bitumen mastic.
Plastic gas tank repair
Repair using epoxy glue is the fastest. This is a temporary measure to fix a leak along the way. You can patch the hole using a plastic welder - an extruder. Welding tanks using this method requires certain experience and knowledge of technology. It is recommended to practice on a small piece of plastic before welding. To correctly calculate the productivity of an extruder, you need to know the size of the cross-section of the crack. Welding begins from the edge of the fracture, laying the molten plastic welding wire evenly across the entire width of the hole with a small margin. For thorough welding, movements are made across the crack, completely filling the hole. In order for the seam to lie evenly, it is necessary that the hot air gun and the shoe of the device are evenly heated.
How to check a gas tank for leaks after soldering
After completing repair work on the gas tank, it is necessary to perform a leak test. To do this, it is necessary to create a pressure of about 7–15 kPa in the tank, having previously plugged all the holes for the hoses and leaving only one for the pump. After this, soapy water is applied to the container. The absence of bubbles indicates a successful repair and no leaks. If it is possible to immerse the tank completely in water, then the tightness is checked in this way. However, in this case you will have to put in a lot of effort, because completely lowering the tank under water is not so easy.
There are different ways to restore a gas tank; the specific one you choose depends on the nature of the damage and its extent. Repairs do not require extensive experience or special equipment. Using a tool that almost every motorist has, restoring the tank is possible in a garage. The main thing is to follow the rules and follow the algorithm exactly.
During the operation of the car, the gas tank, which is part of the fuel system, gradually wears out. The easiest way is to replace it with a new one if a tank leaks, but this is expensive. If the crack is minor, then you can deal with this problem yourself, regardless of whether your car has a metal or plastic gas tank.