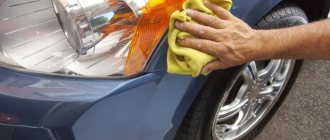
When processing a car body to create a uniformly smooth surface, it is almost impossible to do without a primer. Correctly selected acid, epoxy or acrylic primer for a car creates additional protection, eliminates dents and irregularities, and ensures a tight fit of paintwork materials. The most popular due to its ease of use and quick-drying properties is acrylic. However, other types of primers have their own advantages and applications.
Automotive primers and their application.
Primer is a special composition that is applied to the surface of the car before applying the paintwork.
The soil has a high content of pigments. The main function of the primer is to improve adhesion (adhesion) with the subsequent layer of paintwork. When repairing a car body, they usually prime the putty repair area, which also has fragments of the old paintwork. Pure metal also needs to be primed. Thus, auto enamel is applied to the primer or to the old paintwork (provided that the old coating is compatible with the applied enamel).
Soils have different compositions and, depending on this, have different properties.
Anti-corrosion (“acid”) primer:
It is applied to clean metal and protects it from corrosion. This is a primary primer and must be coated with a secondary primer, that is, putty or paint cannot be applied to it immediately. It is always recommended to cover the “bare” metal with an anti-corrosion “acid” primer. If the metal of the new body panel is coated with high-quality factory primer, then “acidic” primer is not used.
Epoxy primer
Epoxy primer is intended for anti-corrosion protection of metal surfaces. Just like acidic soil, it is primary. For further painting of the surface, it must be covered with secondary primer. It is worth mentioning here that epoxy primer sprayed onto a flat (without minor defects) surface can be painted even without sanding paper. But this can be done before it has completely hardened, several hours after priming. If the primer has hardened, it must be treated with sanding paper and primed with acrylic primer. Then dry the acrylic primer, sand it for painting and then you can paint.
Epoxy primer contains special resins and special active additives that prevent the development of corrosion processes on the metal surface. It dries quickly and after curing becomes resistant to mechanical and temperature influences. The surface covered with this primer, even without applying paint and varnish materials, is well protected from corrosion.
Epoxy primer after application forms a dense film that does not have pores.
The disadvantage is the long drying time. At a temperature of +20 °C it averages 12 hours. An increase in drying temperature leads to uneven polymerization of soil layers and leads to the appearance of defects.
Two-component pore-filling primer:
This primer is most often used before painting a car. Porosity-filling primer can be applied in a thick layer. It fills the pores that remain on the putty, as well as the marks left by sanding paper.
However, you need to remember that the putty surface must be prepared for priming according to all the rules and the risks from sanding should not be too large. If you fill too deep scratches with this soil, then after some time, after drying, the soil will sag and all defects will be visible.
One-component nitro primer:
Apply before painting with alkyd or nitro enamels. This primer is not compatible with acrylic car enamels or metallic paints. The main advantage is that it dries very quickly.
One-component acrylic primer:
It is convenient to use as it comes in an aerosol package. But it is also sold in regular containers.
Sufficiently high quality soil. Dries quickly and is easy to use. Compatible with almost all types of paints.
Primers for plastic:
When repairing plastic, special primers are used to increase adhesion. If you are painting new plastic, then after priming with a special primer you can immediately apply paint.
Application of primer:
Before spraying, the primer must be thoroughly mixed, and in some cases, if necessary, diluted with a thinner to a working viscosity. When diluting different soils, you need to check the instructions for each specific product.
It is forbidden to dilute with solvents to the working viscosity; only thinners must be used.
Next, it is important to filter the soil.
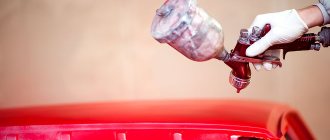
For application, primer spray guns with a nozzle of 1.5 - 2.0 mm are usually used. Apply 1 – 2 layers. If desired, you can apply more layers, taking into account the fact that in preparation for painting, part of the primer will be sanded off. But you need to remember that it is not recommended to apply a layer that is too thick, especially since it will not dry well. Each layer must be applied after the previous one has dried. Interlayer drying time is approximately 10 – 15 minutes.
Preparing the surface for applying primer: - clean from dust; — before priming, plastic parts must be wiped with an antistatic agent; - degrease the surface.
Ground grinding:
When sanding dry before painting, use P400. When preparing with water, P800 is used. In areas of panels that have a complex shape, as well as in hard-to-reach places, you can use Brite tape.
Should I work dry or with water? Water is a source of corrosion, and some primers are designed for dry sanding only. The advantage of working with water is the absence of dust. Also convenient to use sanding paper. It clogs less and if it does clog, just rinse it with water. When working dry, you can use a sander to speed up the work. And, most importantly, the risk of corrosion is reduced.
A reasonable solution can be considered dry sanding using water in inconvenient places. Bumpers can be easily sanded with water, making sure to dry thoroughly before painting.
It is better to use a primer color similar to the color of the applied paint. This will make it easier to cover the repair area. You can also tint the primer to match the color of the paint.
A light gray color can be considered universal; it will match any paint color.
Is priming necessary before painting? Why primer before putty?
It has long been known: paint does not stick to ferrous metal. Cunning technologists have come up with a way to combat the problem. A layer of primer is applied between the paint and the car body. This intermediate layer ensures the strength of the connection. On the one hand, the primer adheres tightly to the metal of the car, on the other hand, it adheres well to the paint.
Ensuring adhesion of the paint layer to the body is not the only function of the primer. Many of its types perfectly protect the car from corrosion, excluding the penetration of moisture. Even if a crack or chip appears on the top paintwork, the primer will prevent the body from rusting.
A layer of primer should be applied not only when painting pure ferrous metal, but also after repair work on a putty surface. Putty, like pure body metal, does not blend with car paint.
The only case when you don’t need to prime before painting is when working on a relatively new car on the original coating to change the color. This approach applies to cars under 1 year of age. In this case, it is enough to “roughen” the coating, that is, process it with medium-coarse sandpaper. A rough, rough surface will ensure good adhesion of the new paint coating to the old one.
Features of selection and application
If you are wondering which primer you can choose for a car and you are interested in how long it can be stored at home, then carefully study the videos presented on thematic sites.
Priming the underbody and body of the car before painting it prevents the occurrence of rust and corrosion on the surface of these parts, after which reliable adhesion and rapid “adhesion” of acrylic paint to the surface being treated is ensured. Today the market is overflowing with various products for body repair, including two-component putties, which can be epoxy or polyester.
Before using putty, prepare the surface (matt it and clean it from corrosion). At the beginning of mixing the putty, a pink hardener from a tube is added to it; its proportion should be 1:20. After this, the resulting mass must be diluted with a small spatula until a homogeneous consistency appears.
Advantages and disadvantages
Aerosol soil, like any other product, has its advantages and disadvantages. If we talk about the advantages of the spray, we can highlight the following factors:
- simplicity and ease of use;
- compactness;
- even smooth coating;
- the possibility of smooth transitions during local processing;
- lack of preliminary preparation of material for work.
Primer BLACK 400 ml aerosol
The disadvantages of the spray include 2 factors: low productivity and the ability to use only a fluid consistency. To paint the entire car, it is unlikely that you will be comfortable working with spray cans - it is troublesome, time-consuming and ineffective. It is much more rational to prepare a large container of a two-component product and use a pneumatic gun. But the aerosol is indispensable for local types of car repairs. If you are painting over a scratch, scuff or chip, the aerosol option is much more convenient. It is more efficient and will help to better process the desired area.
Sometimes liquid fluid mixtures are not suitable for treating a car body - they flow down the metal without giving the effect of a durable protective film. An aerosol auto primer will also not work for you here—you’ll have to buy viscous mixtures in cans.
Primer for cars in a can
Advantages and disadvantages of soils
Despite the fact that the primer is not visible at the end of the work, both the quality and durability of the completed painting depend on it. After high-quality coating application, the following are guaranteed:
- protection against rust and corrosion;
- smooth substrate for painting;
- presentable appearance of the car;
- there are no reasons for cracking, bubbles and subsidence in the enamel.
What primer should be chosen to achieve this is up to the car owner to decide for himself, but one piece of advice from the experts is worth listening to. The point is that you cannot skimp on this mixture.
You should choose proven brands: only in this case can you count on getting a high-quality result.
Cheap primers are dangerous because during drying they shrink unevenly, which leads to disruption of the evenness of the coating, loss of appearance, the formation of cracks and the formation of rust.
The main types of soils used for car repairs
- Epoxy type - anti-corrosion primer for cars. This type of mixture provides an excellent protective coating for steel due to the fact that it contains high quality resins and additives. This primer can be used for various types of vehicles. Paint can be applied directly to such primer. You can use it with the wet-on-wet method. It can also be used with hardener H 5950 or H 5960 from Novol.
- Reactive anti-corrosion primer based on polyvinyl resins. It can be used on a variety of materials. This versatility is explained by excellent adhesion quality and increased corrosion resistance. The material is applied in a very thin layer, but at the same time has good resistance to environmental influences
- Acrylic primers for cars with one component. They are sprayed using a special gun. The material provides adhesion to a metal substrate; it does not have anti-adhesion properties. Mainly used for leveling surfaces. Dries quickly.
- Two-component primer contains acrylic resins. It has a high degree of viscosity and provides a large coating thickness. Masks significant defects. It has excellent adhesion properties to various materials and has a high degree of corrosion resistance. Excellent insulation of polyester putties and acrylic paints. Since a mixture of white and black is mixed, you can achieve the desired shade, and this is important when choosing paint colors.
- A one-part plastic primer can also be applied using a paint gun. It increases the adhesive properties of primers, acrylic and polyurethane varnishes.
There are primers of various colors that allow you to save paint. Acrylic types are used together with special acrylic thinners. It is important to remember that it is better to use solvents from well-known brands.
Do not forget that when carrying out body work it is necessary to use things such as a respirator and gloves, which will help minimize unpleasant phenomena.
Directly primer the car body
To prime your car, you will need a good compressor, a spray bottle with a special nozzle, and the primer itself. It would also be very wise to prepare the room for this work, since the car’s primer must be of high quality. On the street, a lot of dust will fall on the car, and other objects may stick to the fresh primer. A room for priming a car is especially important in the autumn, when leaves fly off the trees en masse. In this case, you simply cannot perform this procedure on the street. And drying in direct sunlight does not bode well for this layer of paint. So it’s best to do everything in a cell or in a specially prepared room. The car should be primed taking into account some features:
- degreasing solvent is the most important condition for applying a primer to the body;
- when priming, the thickness of the layer should be taken into account - it should be constantly the same throughout the entire body;
- it is necessary to apply the primer to the body using approximately the same movements as regular paint;
- it is almost impossible to avoid unevenness on the surface of primed metal; you should not struggle with them during opening;
- you should choose a good compressor for the job - the higher the pressure, the better the results;
- A lot also depends on the professional level of the spray gun, because the primer is not easy to spray;
- choosing the primer itself based on price is the biggest mistake of those who want to get a good result.
To everything else, it is worth adding the priming conditions. Many specialists, after finishing spraying the primer, apply a special layer of coarse paint with a very low concentration. This makes washing the body quite simple. Washing is necessary for many reasons; we will discuss its features below. After priming, the car must dry; you cannot wash the car until the primer is completely dry. You can use any tools in place of coarse paint that will help you identify areas that need washing. Otherwise such places will not be visible.
Types of primers for cars: primer, filler
To carry out body repair work, the same types of primers are used as in industrial enterprises during the production of a car. In general, there are 2 main types of mixtures:
- Primary or primer is used to protect the metal from the corrosion process and at the same time ensure reliable adhesion to the paint.
Primary primer - primer
- A secondary type of primer or filler is used to level out minor unevenness in the surface that will subsequently be painted. This allows you to create a uniform, smooth substrate. Fillers, in turn, are divided into sandable (most often used for body elements with defects that need to be hidden) and non-sandable (suitable for new and non-defective elements).
Secondary primer - filler
Today's range of formulations allows you to purchase a primer that has the properties of both a primer and a filler. For example, REOFLEX PRIMER FILLER (450-600 rubles).
Basic Concepts
Acrylic primer is a special mixture that contains acrylic and a certain amount of hardener. Depending on the number of elements, the soil can be one- or two-component.
A similar material is used to fill pores, and also as a protective layer when covering wood.
In some cases, it acts as a substrate for the main paint. The thickness of application of these solutions depends on the material being coated (50-100 microns or more). The amount of filler allows you to change the characteristics of the soil, which can be either adhesive or filling.
One of the most popular products on the market is Reoflex, which is used as a leveler. It can be applied to both wet and dry, pre-cleaned surfaces.
Dilute the mixture
Acrylic primers are component compositions. The technology of their dilution depends on this. For such purposes, experts recommend using several substances:
- The optimal thinner will be a special acrylic mixture that is compatible with a particular brand. Often, such solutions are recommended by the manufacturers of these products.
- Water. This mixture can only be used in cases where the soil contains a similar component. Water-acrylic mixtures are often diluted.
Some users recommend using a special thinner 647. But this issue is controversial, since the use of this product depends on the properties of the selected primer.
The amount of thinner often does not exceed 25% of the total volume of the mixture. Please note that it is important here to also consider the amount of hardener that is added to the solution when mixing.
You can find out the exact proportions and recommended solvent on the packaging. It is important to follow all basic recommendations to obtain high-quality and durable protection.
How to dilute acrylic primer
Many materials used in the external environment are susceptible to various factors. One of the methods of protection is to cover them with special solutions.
For such purposes, painting primers are increasingly being used, which reduce the risk of destruction or corrosion on the surface of the product. You can learn more about the characteristics of these products on specialized websites.
Classification by composition
The composition of the mixture determines the place and technology of its application. The presence of aggressive acids in the primer forms a protective film due to chemical interaction with the metal. The presence of resins provides physical impermeability to moisture.
The addition of zinc, aluminum, and chromium powders creates the effect of galvanized body and parts, and inert particles guarantee water repellency.
In addition, application is carried out on different materials and each of them requires its own mixture.
All primers for cars are divided into 2 main types:
- Primers (from the English prime - “main”, “first”), intended for primary processing. Their main tasks are to create anti-corrosion protection for the body and ensure better adhesion of the car enamel to the surface.
- Fillers (from the English fill - “fill”). They are used during secondary finishing for leveling, forming a substrate for paint and protecting against weak mechanical influences.
Acidic (for rust and problem areas)
The action of these compositions is based on the principle of passivation or phosphating, since the most commonly used component in them is phosphoric acid. It allows you to implement the mechanism of adhesion to the surface:
- penetration of the primer into the metal structure to a depth of 0.05 microns due to corrosion of the surface;
- entering into a chemical reaction with the formation of sparingly soluble phosphates;
- the formation of a durable anti-corrosion film from them during hardening.
It is recommended to apply the primer in 2 layers, as a result of which its maximum possible adhesion to the surface being treated is achieved. This provides not only protection against rust, but also high quality and durability of the paintwork. The adhesion process of acid mixtures is equally effective with any alloys from which a car can be made (galvanized and galvanized steel, non-ferrous metal, aluminum alloys, etc.). The aggressiveness of the impact is used to process hard-to-reach places and parts.
It should be taken into account that it is no longer acceptable to putty on such a surface. Application of the material causes a reaction that destroys the primer layer.
Epoxy for metal
Another equally popular group of primers are epoxy resin-based primers. When using them, material properties such as viscosity and density are used. Resins create an air- and moisture-proof thick layer up to 0.15 microns, which provides long-term (up to 7 years) protection for treated parts. The use of such mixtures prevents the appearance of bubbles, and the increased stickiness allows them to be applied over putty, metal and remnants of old paintwork.
Epoxy primers do not require sanding. You can putty and paint over them without waiting for complete drying. And although it is recommended to apply a layer of acrylic on top of them, practice shows that this is an unnecessary precaution. Being chemically neutral, epoxies can act as an insulator between problematic or incompatible surfaces and materials.
Acrylic primer
Acrylics belong to the class of fillers (secondary primers) and are intended to eliminate minor risks and surface defects remaining after sanding, as well as to create a substrate for final painting. To ensure color stability, they use colored pigments: red, black, white and gray. For minor abrasions and scratches, this makes the damage invisible, and also increases the covering power of the enamel and saves its consumption.
Many acrylic mixtures allow for a “wet on wet” painting method. This eliminates grinding and saves processing time and labor costs. But the mixture should be applied in 2-3 layers to create a thickness of 100-150 microns. Acrylics are resistant to temperature fluctuations, humid conditions, and mechanical vibrations. You can work with them on both metal and plastic.
They are two-component; depending on the TDS, they are mixed with a hardener and solvent in various ratios - 5:1, 4:1 or 3:1. This determines the viscosity and adhesive properties of the resulting material. But single-component aerosol levelers, produced in cans, have gained particular popularity. They are convenient for cosmetic repairs, do not take time to dilute the mixture and dry quickly.
Composition for plastic parts
To prime plastic parts (bumpers, fenders, interior decorative elements), special adhesive compounds are used, which are applied in one layer and create strong adhesion to the material. This is achieved by liquefying the surface and then hardening it. Most often, one-component acrylic and alkyd mixtures are used for these purposes. They are transparent, and to distinguish the primed surface from the untreated one, a little silver paint is added to them.
However, in 80% of cases, plastic parts go on sale already prepared and do not require reprocessing.
Preparing the car for priming
In order to prime a car, it is necessary to place it in a clean room with the proper level of ventilation. If you plan to apply the primer locally, then all nearby parts of the body to which the composition will not be applied must be covered with paper and secured with masking tape.
Then prepare a spray gun (spray gun) for the primer composition. It is advisable not to save on this instrument, although it will not be cheap - from about 10,000 rubles.
Depending on the volume of work, you need to choose one of two types of spray guns:
- For full priming, it is better to use a gun with a nozzle diameter of 1.8-2.0 mm. It is more versatile, and if there is no budget or other possibilities, it is better to purchase such a device.
- For partial and spot priming, a spray gun with a nozzle diameter of 1.3-1.4 mm is more suitable.
The best primers for the underbody of a car
High-quality metal surface coating increases service life and reduces the cost of car ownership. Therefore, it is necessary to responsibly select materials for body processing.
Rating of the best primers for the underbody of a car, according to Yandex.Market:
- HB BODY 992 brown to protect steel surfaces from corrosion. The soil is quick-drying and resistant to aggressive chemical compounds. Application method: spray, brush or roller. The composition can be diluted with a solvent by 10-30%.
- RAST STOP is an aerosol to protect the underbody of the car from corrosion. Fills hidden cavities well. The composition has water-repellent properties and is suitable for surfaces with ribs, weld marks and fasteners.
- LIQUI MOLY Unterboden-Schutz Bitumen is a bituminous primer for anti-corrosion protection of metal parts. Packaging: aerosol can, coating color: black.
RAST STOP aerosol for protecting the underbody of a car
Popular mixtures have a good ratio of cost and quality. Underbody primers are available from several online retailers.
Applying acrylic primer to a car
Acrylic primer is applied to:
- fill pores;
- create a protective layer;
- slightly level the surface, giving it greater smoothness;
- create a base for the paint.
The thickness of acrylic primer application can range from 50 to more than 100 microns.
Depending on the number of elements, the primer can be one-component or two-component .
The first is applied in a thin layer and is mainly used for applying to new parts before painting. This ensures improved adhesion and rust protection.
A two-component primer is more versatile and suitable for any work on the body.
It is necessary to strictly observe the proportions when diluting the primer
In addition, only thinner is added to a one-component primer (approximately 1 part thinner to 5 parts primer). No hardener is added. In a two-component mixture, you need to first add a hardener and then a thinner (usually 1 part hardener and 1 thinner to 4 parts primer).
How to dilute automotive acrylic primer
These mixtures contain many elements. And it is from the final composition of a particular primer from a particular manufacturer that you need to select a substance that can subsequently be used to dilute the primer. There are only two best options:
- Water - but only if it is one of the components of the acrylic primer itself. The packaging should then bear the inscription “water-acrylic”. If the old primer has hardened to a solid mass, then the water needs to be heated almost to boiling water.
- Special acrylic thinners are an excellent option for thinning. It is recommended to select them of the same brand as the soil itself.
Most often it is recommended to maintain the following proportion - 4:1 with the addition of a thinner. For more detailed information, please refer to the instructions on the product label.
For example, the label of Novol Protect 300 4+1 MS primer says that for 4 parts primer you need to take 1 part hardener and 25%-35% thinner.
It is important to understand that acrylic fillers remain in an unchanged state for 30-60 minutes, which is how long after mixing they will be ready for use. This time must be taken into account when stirring the primer and applying it.
The resulting composition is applied using a spray gun. But before you fill the mixture into the device, it must be filtered (for example, through nylon or a double layer of gauze). This is done in order to cut off all large fractions that could clog the pneumatic sprayer.
How to apply filler - tips and tricks
The following sequence of actions must be followed:
- If small smudges or other minor defects have formed, then after drying they can be easily leveled by sanding.
- The primer must be applied in a thin, even layer.
In order to get the desired effect, apply 2 or 3 layers of acrylic primer. Between each application you need to wait about 20-40 minutes. At this time, evaporation of particles occurs. But you should be very careful, since the required evaporation period depends to a large extent on the ambient temperature, as well as on the thickness of the applied layer, the composition of the primer and its proportions, the type of surface being treated, and many other factors.- To achieve a uniform, smooth effect with a minimum amount of smudges formed, it is necessary to cover the surface using cross movements.
- It is the pneumatic sprayer that allows you to achieve a more even and uniform surface, compared to using a brush.
- After the last acrylic layer of primer has been applied, it is necessary to wait for 20-40 minutes first, and then increase the temperature in the room where the car is parked. This will speed up the drying time of the soil and its hardening.
- At the final stage, after complete drying, the surface is sanded. Sanding can be done mechanically or manually, and can also be done dry or wet.
How to apply primer - tips and tricks
Primers are mainly needed to enhance adhesion between the substrate and the paint. The principle of working with it is somewhat simpler:
- Before opening the primer, you need to shake it well.
- You should try to make the applied layer as thin as possible, applying a minimum amount of composition. For work, you can use a brush or swab.
- After applying the layer and before painting, you need to wait 5-10 minutes (check the packaging for the exact time) until the primer dries completely.
- Before applying paint, you need to make sure that the primer layer is smooth, even and free of any contamination.
- If the surface has pores or minimal roughness, a second coat of primer can be applied in the same way as the first.
How to properly dilute the soil?
To dilute the primer correctly, you must first thoroughly mix the contents of the jar and lift all the components from the bottom. After this, you can add hardener and solvent in the proportions indicated on the can. The finished mixture must be filtered through a filter or gauze folded in several layers.
In one-component primers, only a thinner (approximately 20%) is added before painting; no hardener is added. In two-component primers, a hardener is first added in the ratios indicated on the can, and then the mixture is brought to the desired consistency with a thinner.
When working with metal primers, it is necessary to use “native” hardeners and thinners, although many craftsmen use solvent 647 as a thinner.
Preparing the car
The work must be carried out in a clean and dry garage; there should be no dust or other dirt in it. It is important that the room has good lighting and ventilation.
Once the room is ready, you can begin preparing the machine:
- it is thoroughly washed, removing all, even hard-to-reach, contaminants;
- remove old paintwork;
- those areas where corrosion has appeared must be thoroughly sanded;
- After this, the working surface is degreased using anti-silicone.
You should take care of doors and windows. All areas of the machine that are not primed must be covered with thick polyethylene or paper, securing them with masking tape to prevent the composition from getting on the rubber gaskets.
When the car is ready, you need to take care of the correct preparation of the equipment and composition for the primer.
Preparing the premises
It is highly undesirable to carry out priming in an open space, as flying dust, scorching sun and other factors will negatively affect the result. To carry out this type of work, it is best to prepare a sterile room, which is pre-cleaned and slightly moistened. To get an idea of the priming room, you can watch the corresponding video, which will tell you the dimensions and conditions of the work area.
It is very important to take care of the ventilation of the room, since the vapors of the primer material are very harmful to human health. In this case, drafts should be avoided, as this can lead to an uneven result. The room must be provided with adequate lighting. If you work in low light, then when inspecting the car on the street you will find many defective areas and defects.
Features of do-it-yourself priming
If you plan to prime the car exclusively with your own hands, then first of all you need to take care of your own protection, using a special suit. Mask and safety glasses.
The primer is carried out in several stages. The first time it is applied in a very thin layer and allowed to dry completely. The secondary layer is laid at least 2 times, each time waiting until the previous layer has completely dried.
Whether all layers have dried or not must be checked according to the instructions; it indicates how long it will take for the composition to completely harden. After this you can start sanding. It is performed either with regular sandpaper or with a special machine. After each pass, you need to remove the resulting dust, and check the result by touch - the surface of the car must be absolutely smooth, without scratches or unevenness. Only in this case will the paint lie flat and have good adhesion to the body.
Treatment
The soil can be treated either dry or with water. It should be remembered here that soils partially absorb water, which over time leads to corrosion of the metal. Therefore, it is better to process dry. A special grinding machine can help with this. Under metallic, the body should be sanded with R-600 and R-800 sandpaper. But for ordinary acrylic, R-400 and R-500 will be enough.
What to do with new parts?
New parts need to be given extra attention, because they are covered with shipping primer (usually black). In order for the repair of the machine to be of high quality, the transport soil must be cleaned with R-240 sandpaper down to the metal. After this procedure, you can put 2-3 layers of soil. And after 10-15 minutes, show it with a primer or paint of the opposite color. The next day you can clean it up. During processing, development may show minor unevenness. In this case, you will need to re-prime the flaws or the entire part.
Do-it-yourself car priming is absolutely safe if you approach it correctly. The fact is that during any paintwork, including body priming, it is necessary to use personal protective equipment (respirator, gloves, suit). Primer vapors are very harmful to the body. Therefore, be attentive to your health.
Primer preparation
Before purchasing a primer, you should consider in advance several options that the market offers. The primer must be correctly selected in color and composition. This will make the work much easier and improve quality.
Before filling the spray gun, the primer is thoroughly mixed until smooth. If a primer with a hardener is used, it must be added as accurately as possible. In this case, you should not mix the entire volume of primer with the hardener, since its application will occur in several stages, and the pre-prepared primer may set during the drying period of the previous layers.
After mixing all the components, it is advisable to strain the primer through a special filter to cut off large particles. If this is not done, the spray gun may become clogged, which will lead to the ejection of large drops of soil and the formation of smudges. For straining, you can also use ordinary gauze, which is folded into several layers.
Particular attention should be paid to obtaining a primer of the required consistency. For this purpose, the spray gun kit includes a special device that allows you to measure this parameter. To dilute the soil, it is necessary to use an appropriate solvent. Ideally, the solvent should be from the same manufacturer as the primer.
Main stages of work
Briefly, the main stages of applying primer to a car will look like this:
- Prepare the car and garage for repair work.
- Stock up on the necessary tools and select a primer.
- Clean the surface from paint and rust residues, wash thoroughly and dry.
- Apply the selected primer in several layers and let them all dry thoroughly.
- Sand the body so that no scratches or irregularities are felt when touched.
- The car is ready for painting.
Immediately before you start painting the car, its surface will have to be degreased again for better adhesion to the metal.
Primer technology
Now let's take a closer look at this stage of work. First of all, you need to prepare the work area. If this is a garage, then it is desirable that it be clean, well lit, warm and have ventilation. This way, you can avoid installing additional heating sources in the form of IR heaters or the appearance of dust accumulations on the body.
The next step is to cover all untreated areas of the body where the material may get when applied with a spray gun, and also remove all plastic covers on the parts that will be repainted. Usually they cover everything with a film using masking tape, leaving only those areas of the metal surface to which the primer will be applied.
From materials and tools you will need:
- grinding machine with various replaceable abrasives.
- sandpaper.
- primer, solvent and hardener.
- spray gun and air compressor.
This is a basic set of equipment and consumables.
The next step is preparing the finished primer composition before painting the car. It is important to strictly follow the proportions indicated by the manufacturer of the material on the packaging. It is advisable to use the hardener and solvent of the same brand so that there are no problems with differences in composition. You can also use 646 as a solvent. To maintain proportions, you can use measuring containers; do not do everything by eye, especially if you are not an experienced painter. Next, the composition is filtered with special filters offered by manufacturers, otherwise you take gauze, fold it into 3 - 4 layers and run the finished primer composition through it. This is done to filter out various lumps and debris, which may subsequently clog the spray gun.
In most cases, 2 - 3 layers of primer are applied to the surface of the car body, this is enough to ensure good conditions before applying the main paint.
Many people are interested in the question: “How long does the primer dry before painting?” The answer depends on the type of material used. So, say, if a hardener is used, then a drying period of 10 - 15 minutes is allowed between layers, and the finishing layer is dried for about 18 - 20 hours. Without using a hardener, one layer of material will dry in 24 hours, but this approach is very rarely used, due to a large loss of time for work.
When choosing a primer color, people often look at the shade of the finishing paint. So, if these are light colors, then take white or combine white and the desired tone of paint. If the surface is black, then take a black tint accordingly. But there is also a universal color - this is a gray primer, it is used for surfaces of both light and dark tones.
Set of tools and consumables
- Spray gun. It is needed to uniformly apply primer to the surface of the car. You should not expect a good result from doing the job with a cheap and low-quality spray gun.
- Sander. Sanding can be done by hand, but it will take much longer and will affect the quality of the work.
- Primer. When choosing a primer, you should consider the color of the car and the type of paint that will be used in the future.
- Alcohol. Before priming work, it will be necessary to degrease the surface.
- Fine sandpaper. Usually R-800 and R-1200 are sufficient.
Primer application methods
Depending on the area of the surface to be treated, you can use either an aerosol primer or a spray gun. In the first case, we are talking about quick repair of minor damage, since the composition is one-component and quite liquid, it will have to be applied at least three times.
If a large area of the body is to be treated, then it is worth using a spray gun, with which two-component compounds are used, which harden quite quickly.
Priming a car yourself is not as difficult as it might seem at first glance. For the job to be successful, it is important to prepare the car and garage, stock up on the required amount of primer, prepare the tools and act slowly.
Layering process
The first layer of primer is usually applied in a thick enough layer to evenly cover the surface, and the material itself will fill all micro-irregularities and chips. Next, let it dry for about 10 – 15 minutes. If necessary, rub problem areas and apply a second layer. They wait for it to dry a little, if all is well, then leave it for about a day and move on to the final painting.
After drying, you need to clean the surface. It is not advisable to "wet sand" as some primers absorb moisture and this process can cause rust and blistering of the paint in the future. They are usually sanded with a machine. Preparation for acrylic is done using abrasives of grades R-400 and R-500, and for metallic grades R-600 and R-800.
If you decide to paint a new part that came from the factory, then you must remove the shipping black primer using a P-240 abrasive down to the metal. Subsequently, 2–3 layers of primer are applied. After a period of 15 - 20 minutes, a developer in the form of a contrast paint is applied to the part. The next day, while sanding, you can use the developer to see minor imperfections and eliminate them by applying an additional layer of material.
It is advisable to carry out all work in protective clothing and glasses, gloves, and a respirator. To avoid paint getting into your eyes or dust into your respiratory system.
Why is the primer additionally sanded? Since this is a binding layer, it has some roughness and bumpiness, and if applied unevenly, such places can form defects in the form of sagging or smudges. You need to work very carefully with a machine or manually using sandpaper, because you will be sanding a thin layer of primer paint; if gaps appear somewhere, they can be eliminated using primer in an aerosol can and spot painting. Sand with fine-grained abrasive P800 - P1000. If there are strong flaws indicated by the developer, then they are eliminated using locally applied finishing putty and primed again, achieving an ideal surface.
Here is a video with tips on applying primer before painting a car.
Application, drying and sanding
Before applying primer with your own hands, you should properly prepare the surface:
- blow out;
- easy to wipe with a dust-collecting cloth;
- degrease with anti-silicone.
Typically, the primer is applied with a sprayer under a pressure of 2-4 atmospheres. You should first adjust the torch and practice on some surface. After this, you can prime the car using the following recommendations:
- primary primers should be applied in a thin transparent layer, which will have strong adhesion to the metal and subsequent coatings;
- it is necessary to take into account how long the first layer dries in order to dry it well to avoid “preservation”. Drying time - 30-90 minutes at room temperature;
- Secondary primers are applied in 3 layers. It is necessary to observe how much filler primer should be applied in order to obtain a layer of average thickness. Each subsequent layer can be poured only after the previous one has become matte, which requires an exposure of 5-10 minutes.
After the soil has dried, the presence of defects is checked.
If necessary, sanding is performed dry or wet, for which in the first case an eccentric sander with a soft pad is used, in the second - P600-P800 sandpaper.
Do not rub the primer onto the putty or metal. Rubbed areas should be primed and sanded.
Tips for doing the job
On the Internet you can find videos and step-by-step photographs that clearly demonstrate the entire process of priming a car and applying paint yourself. In this case, a spray gun is used - a special tool used for painting various surfaces by spraying a dye.
A primer intended for processing metal and plastic, removing traces of rust, and providing anti-corrosion protection, differs in its composition and technical characteristics from primer compositions that are used for plastic or wood.
Automotive primer dries in a short period of time; it must be diluted with a solvent and hardener. It is better to adhere to the proportions indicated on the can and not try to independently choose a different ratio of components. The primer prepares the surface of metal or plastic for further painting using a spray gun and ensures high adhesion of the coating. In rare cases, the primer composition can be applied to the surface in an absolutely even layer and then wait until shrinkage occurs - a natural phenomenon that car enthusiasts encounter before painting their vehicle.
When a primer applied with a spray gun to the surface of a metal or plastic dries and begins to exhibit its rust-repellent properties, unevenness and roughness appear. After completing the work, you can compensate for these defects and make them invisible on metal and plastic by using sandpaper. You can find out how long it will take to wait for the applied composition to completely dry in the instructions for use, which are always included with the purchased primer mixture.
If the body or underbody of the vehicle is heavily corroded, then it makes sense to abandon the use of a modifier primer, since it is impossible to determine by eye how deep the rust has penetrated into the metal and then make sure that you have applied a sufficient amount of primer mixture that can transform the rust into persistent inert layer. Primers with anti-corrosion properties are never used for processing wooden parts.
Types of primers for cars, their pros and cons
In automobile factories, after welding a body from stamped parts, priming takes place in 7 stages, including phosphating, high-temperature drying, etc. When carrying out repair work, car enthusiasts do not use such complex industrial technologies on their own. The maximum that is available is to warm up the applied coating with a hairdryer. Ordinary household, not professional.
Primers used for DIY repairs have the following composition.
| Kinds | Preliminary work | Application |
| One-component. | Do not require special preparation before use. Sold in metal or plastic cans. Available in an aerosol can. | Brush or spray gun. Used for small repairs with a small area of damage. |
| Two-component primers. | Consist of polymer and hardener. The ingredients are mixed immediately before application. | They are often made from acrylic polymer or epoxy resin. This composition must be applied quickly until it hardens. |
Primers are primary and secondary. Primary ones are applied directly to ferrous metal. This is an anti-corrosion primer, it protects it from rust. Disadvantage: low adhesion. Therefore, to increase adhesion, a layer of secondary primer - adhesive - is applied over the primary one. The combination of two layers provides anti-corrosion protection and good adhesion. Two-layer application of primer is more complex in technology than single-layer application and is more expensive.
Based on the material, primers are divided into:
- acrylic coating;
- epoxy;
- acidic.
Acrylic is the most common type of primer. It is used both for metal, including galvanized, and for work on plastic and putty. This universal primer is widely used in body repair work. It belongs to the category of two-component. Prepare it no more than an hour before application. You have to wait from 3 to 8 hours for complete drying.
Layers and drying time
So, how long does it take to dry the primer mixture, which is applied to plastic parts and requires the use of a spray gun? Unlike putty, the drying time of the primer mixture is on average 30 minutes. The putty sometimes takes a long time to dry - from 24 to 48 hours. Any qualified car service worker will confirm that it is better to use several types of primer before painting a vehicle. At the beginning of painting, it is recommended to apply a phosphating primer for cars or an acid primer, after which the best “adhesion” of the surface is ensured. It should be remembered that before applying the primary primer, you will need to clean the body and underbody of the car from dirt and degrease these parts using Anti-Silicone.
Secondary primer is applied in 2 or 3 layers. The use of a pneumatic spray gun can hardly be overestimated, because it allows you to hide irregularities and scratches on the surface of the body. Sometimes auto repair shops do this work so skillfully that sanding is not required before painting the car.
It doesn’t matter whether you decide to perform operations such as puttying, priming and painting the car yourself or whether you prefer to contact a car service. You can find out how long it will take for the applied compositions to dry and which acrylic paint is best to use for painting your car by studying special literature or thematic sites on the Internet.
Before you start painting your car, you should decide on the type of paint, the technology for applying it, and expert advice. The most important thing at all stages of the work is to strictly follow the instructions and follow the recommendations of specialists.
Sources:
https://kuzov.info/grunty/ https://autokuz.ru/materiali-instrument/gruntovka-dlya-avto.html https://okuzove.ru/materialy-i-instrument/gruntovka-dlya-avtomobilya-aerozol .html https://krasimauto.com/materialy-dlya-pokraski/klassifikatsiya-gruntovok-dlya-avtomobilya-chto-nuzhno-znat.html https://avtoskill.ru/remont-obsluzhivaniye/chem-razbavit-akrilovuyu-gruntovku -dlya-avto-mozhno-li-razbavlyat-vodoy-rastvoritelem.html https://www.stroim-2014.ru/chem-razbavit-akrilovyj-grunt/ https://autobryansk.info/chem-razvesti-akrilovyj- grunt.html https://kupolnie-doma.ru/info/chem-razbavit-akrilovyj-grunt-dlja-avto/ https://chevroletcars.ru/info/chem-razbavit-akrilovyj-grunt-dlja-avto/ https ://www.em-grand.ru/post-kak-pravilno-razvesti-gruntovku-dlya-pokraski-avto.html https://krasimauto.com/pokrasochnie-raboty/gruntovka-avto-pered-pokraskoj.html
What is the soil for?
The metal sheets of a car's skin may have minor defects that appear when painted. Therefore, to level the surface you need to prime it. Additionally, the machine receives reliable protection against corrosion.
Purpose of a primer for the underbody of a car against rust:
- Improving the adhesion of varnish and paint to the surface.
- Reducing the influence of harmful environmental factors on metal.
- Protection of the casing from impacts and scratches.
- Creating a leveling layer before finishing painting.
- Prevention of exposure to chemically aggressive substances.
Underbody primer is a viscous liquid that forms an impermeable layer on the metal. After hardening and smoothing out any imperfections, the car is ready for final painting. Types of soil differ in consistency, chemical composition and packaging method.
Properties of primer for cars
The characteristics of all types of primers must be taken into account by craftsmen at the initial stage of application. It is important for the master to master all painting skills to prevent delamination of the product.
There are primers on the market that combine the characteristics of a primer and filler. Naturally, it is more rational to use different materials for applying to metal and plastic.
Guaranteeing perfect adhesion is only 50 percent of the success, which is decided by the soil. It is important to take into account anti-corrosion features. An attempt to apply an anti-corrosion primer for a car with a massive ball will cause a decrease in its strength and lead to cracks. This is exactly the case when a lot does not mean good. The autoprimer is applied with a thin ball, which must be dry before applying subsequent ones.
Types of automotive primers
Types of car primers vary depending on the manufacturer and price.
There are three classes:
- Epoxy.
- Primer/car putty with a leveling structure.
- Sealant.
Types of soil according to protection mechanism:
Types of car primers vary depending on the manufacturer and price.
Passivating - metal chromates are added to their composition, which gives the car material passive characteristics:
- if droplets of water subsequently fall on the body, the oxidation process will not occur;
- This class includes goods marked GF-031 and other types that comply with GOST;
- the fender and bottom of the car are additionally protected with a lead-based compound.
Tread protection - protects the body. This layer takes on any negative impact of the environment.
Features of tread protection:
- the manufacturer supplemented the composition with metal dust with the most insignificant potential, in comparison with the body, based on lead, zinc, aluminum;
- This class of goods includes epoxy primers of the EP-057 type. This is an ideal suspension of powder with metal particles in resin. The composition must be stabilized before application; bentonite and polyamide hardeners are most often used;
- primer, which is dominated by inert microparticles, is intended for minor repair work on vehicle bodies. It does not react with impurities and elements of other products used. Mechanical features protect the metal from water droplets;
- in this class, FL-OZK and GF-21 are in demand;
- phosphating primer for cars. Acids are considered their main component, they work firmly with the metal of the vehicle and create a tread ball with their hardly soluble layer. Maximum adhesion rates allow these mixtures to be applied with a minimal ball, compared to others;
- aggressive acids uniquely penetrate the metal ball, adhesion increases to the maximum level;
- This series is distinguished by the brand - VL.
The primer takes on any negative environmental impact
Corrosion modifier - it is rational to apply when painting vehicles with visual traces of rust:
- the active substances begin to interact with the untreated surface, forming a deeply penetrating tread ball;
- To ensure an ideal reaction, the master must ensure the proper air temperature. Its indicator is from fifteen degrees and above. The primer is applied by hand, brush or spray. Doesn't corrode your hands.
Nuances of choosing a primer
When choosing a material, it is initially important to check the production date. Craftsmen try to use materials from the same company in their work, since otherwise the active substances may contradict each other and ruin the work done.
The main thing: it is better to buy only proven companies. How much does a car primer cost? There is only one answer - not cheap.
Which soil is best for cars? Let the master make this choice. Each product is accompanied by an application leaflet, which contains information about how long it takes for the material to dry. The first and subsequent balls are applied observing all deadlines; in addition, it is important to optimally prepare the surface.
To level the soil, it is necessary to use a sanding layer with different grains. If some mistakes were made at this stage, they can be easily and quickly eliminated by applying a leveling mixture. The consistency of the latter is much thicker. But it is prohibited to interchange putty and primer. The latter copes only with minor errors and irregularities, which cannot be said about putty.
Epoxy primer for car
Primers based on epoxy resins belong to the group of anti-corrosion protection. This type protects the surface of the car physically, creating a durable coating in the form of a thin film.
The materials in this group serve the following purposes:
- anti-corrosion protection of the machine;
- preparing the surface for painting;
- improving adhesion;
- protection from external mechanical factors;
- filling micro-irregularities.
Epoxy two-component primer for cars
This composition can be applied to various groups of metals, as well as to polyester putty. It has excellent properties that make it a highly effective protective agent:
- heat resistance;
- non-hygroscopic;
- resistance to external mechanical damage;
- uniform drying;
- high adhesion.
Especially among the advantages of the epoxy composition, experts emphasize the high environmental friendliness provided by natural components that are friendly to the environment and the human body.
A significant disadvantage of such materials is the long drying time. You will need more than 12 hours for the primer to dry. The use of high-temperature drying methods is contraindicated - the layers dry unevenly, and wrinkles and bubbles appear on the surface.
When to perform anti-corrosion treatment
The best option for applying a protective composition is to the metal surface of a new car. When rust spots appear, the primer only stops the process of destruction of the metal. During operation of the machine, the body skin is deformed with the appearance of microcracks in the paintwork and welding seams.
If measures are not taken, pockets of corrosion will appear in the metal. Therefore, it is better to prime the underbody of the car with preventive surface treatment in order to extend the life of the car. The choice of primer is made in accordance with the requirements for the type of protection of specific surfaces of the car body. Typically, high-quality materials provide corrosion resistance for 3-4 years.
Acrylic primer for car
The acrylic group of automotive primers is the most widely used. This is the most versatile variety, and any master will tell you that with its help you can perform the widest possible type of work.
Acrylic primers are used for all types of surfaces:
- become;
- plastic;
- chrome surfaces;
- galvanized surfaces;
- light alloys;
- paint coating;
- putty.
Automotive acrylic primer SEAL 0.834 l + hardener 0.166 l
If we talk about the tasks that this type of primer solves, we can name the following factors:
- surface leveling;
- filling scratches and chips;
- improved adhesion;
- anti-corrosion protection.
Experts talk about the following properties of the acrylic group of primers:
- heat resistance;
- moisture resistance;
- durability;
- resistance against exposure to atmospheric factors.
After preparing the mixture, it must be applied within 1 hour - after this time it begins to lose its properties. To the question of how long it takes for the acrylic composition to dry, the answer is simple - not for long (from 3 to 8 hours at 200C).
Acrylic primer Ranal S-2000 5+1 with hardener 0.5 l gray