Published: 10/30/2020
- Body wash
- Degreasing (degreasing)
- Instructions for performing work
- How to treat car sills on the outside against corrosion Debriefing tips
- Anticorrosive recipe
- Threshold straightening
- What are the thresholds painted with?
- Types of paint compositions for car painting
- Modern anti-corrosion agents
- Required paint materials
- Choice of putty
- A step-by-step guide to painting your own car sill
- Preparatory stage
- Liquid lockers
- Preliminary repair of car thresholds
- Choosing a product for treating car thresholds with your own hands
- Common mistakes when painting car thresholds
Body wash
Preparing a car at home for painting always begins with a thorough inspection. Spend some money on a good imported body cleaner
There is no need to tell you how to wash a car with a sponge, but inspection takes a more important place here; it is recommended to inspect the following “risk zones”:
- bottom;
- thresholds;
- racks;
- wings;
- joint places.
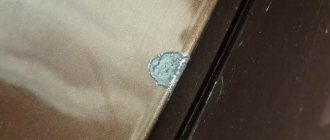
During inspection, you may come across rotten places in the body that need to be taken very seriously. The problem area is cut out with a grinder, and then a patch is applied to it. You can’t do without a welding machine here either. If rust bubbles are found, press them with a hard object. Surely in these places the corrosion has already reached the inner part of the iron - you need to start welding again. Preparing an old car for the next painting is a long process, because such a veteran of the roads cannot do without rust.
Degreasing (degreasing)
Body degreasing with the best compounds
The process of degreasing the body is a mandatory stage in preparing the body before applying putty. The purpose of the technology is to remove water-insoluble compounds. In other words, what cannot be washed off from the body surface with a soap solution is subjected to degreasing.
It is noteworthy that the degreasing process is carried out not only before puttying, but also before the polishing and painting processes. Only this time degreasing is mandatory and much more extensive.
Determining the layer on the body that requires degreasing is quite simple. If the car is not washed for a long time, you can feel rough areas on the car frame by touch. For example, this is often noticeable on the side panel near the bottom of the doors.
Degreaser BOS
So, several compositions are suitable for high-quality degreasing. White spirit is considered the most effective, since it has a minimal effect on paintwork (does not destroy it) and has low flammability. These are the strong qualities of mineral spirits, but some experts don't like it because of the kerosene smell.
Another option, quite effective, is biofeedback. This composition, based on aggressive chemistry, will easily remove any stains, including bitumen ones. It is odorless and will satisfy the consumer in terms of solvent power and safety. BOS is a little expensive, but it always maintains a steady demand, as it is of good quality.
If some garage mechanic advises using petroleum products instead of standard degreasers, you should not believe it. The fact is that kerosene, diesel fuel, and other combustibles are not suitable for a car body, since they leave residue.
Acetones, solvents, alcohols, and so on are also not suitable for degreasing a car body. They can remove stains, but have a negative effect on the paintwork, stripping it off, and are explosive.
As for degreasing technology, the first method involves non-contact cleaning, and the second – contact cleaning. Carrying out degreasing is inexpensive at car washes - about 200 rubles per operation.
Instructions for performing work
Before applying the coating directly, it is necessary to prepare the car body:
dismantle the protection; align the part; wash the car, paying special attention to the thresholds; dry the surface; clean the surface from chips and rust, if any; Cover the threshold with masking tape; treat the thresholds with a rust modifier (following the instructions); wipe the result of the converter reaction dry with a rag, and then degrease with a special agent; prime.
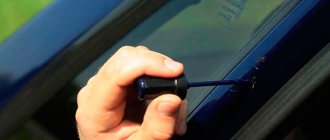
An anti-corrosion coating can be applied to the prepared surface of the thresholds:
- the composition should not be cold;
- shake the can vigorously for 3–5 minutes;
- spray the composition at a distance of 25–30 cm from the body;
- let the first layer dry for 10 minutes and repeat the treatment 2 more times;
- final drying of the composition takes about 24 hours;
- tint with aerosol auto enamel to match the body if the treatment areas are very noticeable.
Anti-corrosion treatment of the car underbody
If desired, and to preserve the coating, you can treat the thresholds with an anti-gravel compound. Anti-gravel coating treatment is similar to anti-corrosion coating:
- First, shake the can vigorously for 2-3 seconds;
- spray evenly at a distance of 15–20 cm from the surface;
- let the first layer dry for 5–7 minutes and repeat the process a couple of times;
- if you want to speed up the drying process, use heating devices;
- Remove the masking tape from the body and install the protection in place.
Another means of protecting the car body from corrosion is mastic. It is not used so often due to the labor-intensive and time-consuming process, although after drying it acquires increased strength and resistance to damage.
It is presented on the market as “Anticor bitumen” - a cold-applied mastic based on rubber and resin. Preparing the car for application is similar. Warm the compound slightly before use to increase adhesion and ease of application. Apply mastic in a thick layer with a paint brush. Drying should be natural; using heating devices will not have any effect.
Our recommendations
To ensure that the process of anti-corrosion coating of the threshold goes as efficiently as possible, use our tips:
- anti-corrosion compounds quickly ignite, so before starting work, remove all heating devices and sources of fire;
- to clean a large surface area from rust, you can use a special attachment on a drill or grinder in the form of a brush with metal bristles;
- do not operate the car earlier than 2 hours after treatment with an anti-gravel compound and 24 hours after anti-corrosion treatment;
- Keep track of the purpose of the products, their composition, and expiration dates when purchasing.
Treating the underbody of a car against corrosion
Some motorists, to be sure, treat the thresholds not only from the outside, but also from the inside to prevent moisture from entering. To do this, it is recommended to fill them with used oil or a mixture of it with Movil. This composition has a persistent unpleasant odor, which is why it is rarely used.
Threshold Process
It is better to carry out the treatment on the same day, both inside and outside; it will take time to dry and ventilate from the smell.
Tools and materials
For internal application, a sprayer with a nozzle in the form of a flexible hose is used. The technological plugs are removed from the end of the threshold, the hose is inserted to the maximum depth, and as the material is consumed, it is gradually removed.
Due to spraying and penetrating ability, the composition will spread over all accessible surfaces, and after drying it will form an elastic protective film.
For external work you will need:
- masking tape;
- degreaser and antisilicone;
- matting sponge;
- anti-gravel cylinders.
If you plan to apply mastic to the bottom areas, then you need to have a solvent and brushes. It is advisable to wear a respirator for respiratory protection and sealed goggles.
Preparing the machine
Surfaces are washed, dried and treated with degreasing compounds. The paint or varnish is matted with a special sponge to improve the adhesion of the anti-gravel.
The car is covered with paper and masking tape so that the sprayed composition does not get on the painted surfaces. When sprayed, the anti-gravel bubbles, which provides surface relief (shagreen). This increases its resistance to impacts.
The resulting decorative effect may be disputed, so it is better to evaluate the result in advance with a test spray. You may have to abandon the anti-gravel coating and apply a more decorative coating to the outer part, a layer of paint and varnish.
Application of anti-gravel
Anti-gravel can be used both outside and on the bottom. Multi-layer application is allowed, the resulting protection allows for this in terms of strength. As the number of layers increases, the noise absorption effect also increases. Unlike paint, anti-gravel can be removed with specialized solvents.
This is interesting: Technology for removing corrosion in a car
After trial use, you need to evaluate the grain structure of the coating; you may have to choose a composition with a finer structure. The choice of goods allows this.
As well as additional anti-corrosion properties, some products provide protection to bare metal in damaged areas. But rust must be removed mechanically, otherwise further development is inevitable, regardless of the properties of the composition.
Anti-gravel painting is possible after complete drying of all layers, removal of shagreen and preparation with a special primer.
How to treat car sills on the outside against corrosion Debriefing tips
- The car is again thoroughly washed and dried. By the way, touchless washing is perfect for our tasks;
- All traces of rust are carefully removed. You can use ordinary fine sandpaper for this (if small areas are affected), or you can use a special attachment for a drill or grinder;
- The surface is coated with a rust converter and left alone for the time specified in the instructions (usually about an hour);
- The threshold is wiped dry with a clean rag, removing all sorts of debris and foam into which the rust has turned;
- The stripping area is degreased; There’s no need to get too fancy here – regular gasoline will do. But those who wish can also use white spirit;
- A primer is applied to the surface; It’s more convenient to take it in a spray bottle - this way it lays down in a more even and thin layer, and it dries faster. It is advisable to make at least two layers of primer, with it drying in between;
- Gravitex is applied over the primer. Manufacturer - at your choice. By the way, many of them declare that gravitex is divided into paintable and not. Our auto mechanics say that there is no difference - all types are subject to painting. But you can buy one that is painted. Gravitex takes longer to dry than primer – up to a day. You cannot use the car during this time.
AutoFlit.ru
Anticorrosive recipe
The presented products narrow the field of activity for experienced car enthusiasts. The best way to correct the imbalance is to make anticorrosion compound yourself. The complex action of the constituent parts, the consistency of the substance and the volume will definitely satisfy the car owner.
The value of the recipe lies in the availability and cost-effectiveness of most ingredients. The composition is based on bitumen or wax compounds. They envelop the metal of the body and hold the entire mass on the surface. The main option is cannon fat. This is a long-established remedy, trouble-free, low-cost, and commercially available.
The availability of auxiliary components depends on the needs of the master. May include:
- Plasticine. Strengthens the structure, adds plasticity and comfort during processing.
- Waterproofers. Protects against water ingress and rust during operation.
- Anti-corrosion inhibitors. Chemical retardants of the destructive process of rotting of metal parts.
To increase efficiency, metal particles are introduced into the composition for strength (zinc, bronze), plastic or rubber compounds, glue or sealant for additional protection of problem areas.
Will regular paint help?
The composition and properties of conventional paints and varnishes do not allow their use as an alternative to anti-gravel. The absence of anti-corrosion inhibitors eliminates the creation of a protective film and allows the action of chemically aggressive reagents and water to spread. The paint fades quickly, does not prevent the spread of rust, and does not eliminate existing problem areas. Water-repellent properties are at a low level.
Why use anti-gravel coating
Anti-gravel is the general name for polymer or rubber-polymer compounds that are sprayed onto the external surfaces of the car. After application, anti-gravel creates a protective film on the thresholds with a thickness of 0.5 mm, which protects open body elements from damage by gravel, prevents reagents from reaching the metal, preventing corrosion of the thresholds.
Anti-gravel paint for car sills is a separate composition. After processing, a durable layer of protective film with a thickness of 0.1 mm remains on the surface. The paint does not ensure long-term preservation of the thresholds; the composition must be renewed every 3 months.
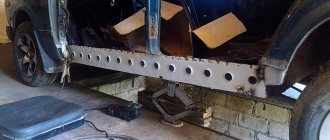
Threshold straightening
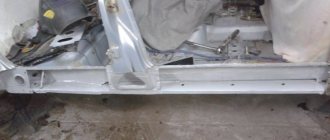
In case of minor damage to the thresholds, it makes sense to carry out minor straightening repairs. But if, in addition to a violation of the geometry of the body or the integrity of the paintwork, deeply damaged or rotten sections of metal are found, then it is more advisable to purchase a new part. Usually the threshold forms a single unit with the body, giving it additional rigidity, but there are also removable thresholds.
Removable threshold
The car's removable threshold is usually located on the outer side of the side member. It protects the body from small stones that jump out from under the wheels.
Straightening the threshold with a spotter
Straightening and subsequent painting of removable car sills is much easier than in the case of a non-removable part. To do this, you must first dismantle it by unscrewing the screws with which it is attached to the spar. Then the dents are straightened, the inside is treated with anti-corrosion primer or ointment, preparation for painting and painting. After re-installing the threshold, areas damaged during installation are repainted.
Fixed threshold
When straightening such parts, the dents are pulled outward. To do this, the old layer of paint is removed, and special extraction hooks are welded to the damaged area. They are grabbed with a special inertial puller (spotter) and the dent is leveled.
In addition, you can cut out the damaged area and replace it with a new one, leveling the surface with subsequent putty and painting. When the straightening is completed, we move on to the preparatory stage before painting the threshold.
https://youtube.com/watch?v=50hc0VsBYvQ
Applying putty
It makes sense to putty thresholds only on previously prepared metal. A carefully cleaned and degreased surface with your own hands is an excellent basis for applying putty. Working on an unprepared part guarantees rapid peeling and poor fit of the filler. It is unlikely that there will be any point in filling the threshold directly over the paint or primary primer.
It is necessary to add the hardener to the composition shortly before use. The preparation time for the working mixture should be approximately one minute, and the mass of the hardener should be within 2-4% of the mass of the entire composition.
In this case, 5–7 minutes are allotted for processing the car part, after which the process of solidification of the composition will begin and it will be useless to do anything with it. The putty is applied in portions, in thin layers, stopping for 5-10 minutes to dry. By pressing on the composition with a spatula, excess air is removed from the mass.
In the room where you are filling your car yourself, a certain temperature and humidity must be maintained. If the moisture level exceeds the specified level, the mixture will not harden completely, and at high temperatures, setting will occur too quickly. When using putty with fiberglass, you need to take into account that its pores are difficult to cover with primer. In this case, liquid finishing putty should be used. After the putty has dried, before painting, the thresholds are sanded by hand or with a sanding machine.
Types of paint compositions for car painting
Automotive paints are classified into four main types depending on the internal composition and the result of painting:
- Acrylic paint. Two-component paint and varnish materials for cars (with hardener), characterized by high resistance to mechanical and chemical influences, attractive gloss and long service life. To paint, it is enough to apply two or three layers.
- Nitro paint. Instantly drying paint, intended for use for local painting work. It is not recommended to use for full body coverage, as nitro paint has low weather resistance.
- Alkyd enamel. Affordable and fast drying paint. As in the case of nitro paint, it is not recommended to carry out full car painting work with alkyd enamel, since it requires subsequent varnishing and polishing.
- Melamine alkyd enamel. Such paints for cars are not suitable for home use - the melamine alkyd paint composition dries at a temperature of 200 degrees Celsius. They provide high body protection and are available in a wide range of glossy colors. Long drying time required.
Apparatus for painting a car There are other types of paints that are not widely used or are unsuitable for home use. Special paints are used in professional workshops; handling them requires certain skills.
Painting the bumper of a VAZ 2109
Despite the widespread use of foreign cars in our country, citizens still own domestically produced cars. Of course, not a single car owner can say that he is completely satisfied with the comfort of the interior and the technical characteristics of the product of the domestic automobile industry, however, sometimes there is simply no other choice - you urgently need a car, but the budget is only enough to purchase a VAZ car. The exterior of the VAZ 2109 is not always pleasing to the eye of its owner, so I want to somehow decorate my “iron horse” in order to enjoy the ride. Often, replacing a bumper can significantly improve the appearance of the entire car; besides, now any car owner can order any bumper and install it on his car, having first painted the part. Due to the simplicity of the procedure, any car owner can paint the VAZ 2109 bumper with his own hands, however, in some cases, professional intervention is still required.
Modern anti-corrosion agents
The correct choice of high-quality automotive chemicals is a necessary condition for successful anti-corrosion treatment of the car body and thresholds. But choosing is not so easy - there are many anticorrosive agents on the market with different levels of effectiveness. How to make the right choice?
As already noted, it is better to remove rust with orthophosphoric acid, VSN-1 neutralizer, or a zinc kit. But for subsequent anti-corrosion protection of different body surfaces (external and internal), different chemicals are used.
External processing
Liquid plastic, PVC film based on rubber resins and combined bitumen mastic are optimal for treating external body surfaces. These are dense synthetic compounds that can withstand severe temperature changes, high levels of humidity and exposure to aggressive chemicals.
Among the best options, we recommend mastics from the brands Dinitrol, Liqui Moly, Body 930, Tectyl Bodysafe. They are applied in a layer of up to 4 mm, create an internal elastic layer and are capable of providing reliable protection of surfaces against rust for up to 18 months.
Internal processing
It is better to treat internal and hidden surfaces and body parts with cannon lard, Movil, as well as oil- and paraffin-based compounds. These are dense mastics that fill microcracks in parts and form a sealed and durable film that can reliably “preserve” pockets of corrosion and protect surfaces for up to 18-36 months.
When choosing, pay attention to anticorrosives and mastics Tectyl, Rust Stop, Body, Amercasol. They are available in auto chemical stores, are affordable and have repeatedly proven their effectiveness.
Protecting your car from corrosion
The best way to rid your car body of rust is to not start it! Measures to prevent car corrosion are no less important than a timely response to its occurrence.
What is important to know? Firstly, mandatory monitoring of the condition of the car body surfaces
It is necessary to inspect bumpers, brake pads, wheels, mechanical joints and joints of body parts, the underbody of the car, and the condition of the paintwork. For used cars - a complete anti-corrosion inspection more than once every 2-3 years with the removal of all small pockets of rust and renewal of anti-corrosion agents, and for new cars such a procedure should be carried out at least once every 3-4 years
Firstly, mandatory monitoring of the condition of the surfaces of the car body. It is necessary to inspect bumpers, brake pads, wheels, mechanical joints and joints of body parts, the underbody of the car, and the condition of the paintwork. For used cars - a complete anti-corrosion inspection more than once every 2-3 years with the removal of all small pockets of rust and renewal of the anti-corrosives, and for new cars this procedure should be carried out at least once every 3-4 years.
Secondly, monitor the hygiene of the car, wash it regularly and remove excess moisture, drops of gasoline and oil, snow deposits and anti-ice reagents from the surfaces - they lead to the development of corrosion processes. After each wash, let the car dry, wipe it thoroughly with a cloth and coat it with protective wax.
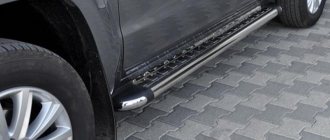
Thirdly, protect the car from mechanical damage and ingress of water and dirt. To do this, you should install threshold protection and mudguards, and constantly clean external drains.
Fourth, regularly treat body surfaces and parts with anticorrosive agents. Also monitor the validity period of the anti-corrosion protection and update it promptly. Do not use cheap mastics of unknown origin and quality - choose proven products.
Compliance with the listed rules will protect the car body from the appearance and spread of rust stains, simplify the fight against corrosion processes and significantly increase the service life of the vehicle.
Required paint materials
Car door sills can be painted independently using:
- a regular can of spray paint;
- anti-gravel coating;
- Raptora is a specialized protective coating based on polyurethane.
The first option is the simplest. It is used for local repair work: painting over a small scratch, updating the factory coating, etc. A can of paint is a budget-friendly product; its use does not require specialized skills or equipment.
With the help of anti-gravel, the car owner:
- will protect the surface of the thresholds from impacts, dirt and moisture;
- seals cracks and chips, which will prevent their further spread;
- will improve vibration and noise insulation.
Raptor is a popular, reliable product for painting automotive parts. The substance is created on the basis of polyurethane. This gives the paintwork a number of advantages:
- high strength;
- resistance to ultraviolet radiation (the color of the part does not fade);
- protection from dirt, shock, moisture and extreme high and low temperatures.
Before repairing, you should select the appropriate material. The spray can and anti-gravel can be used without additional equipment. The raptor is applied using the remote control.
What surfaces can anti-gravel be applied to?
Anti-gravel is distinguished by the method of application and composition. For the protective coating of LPK, headlight units, housings, mirrors, anti-gravel or armor film is used. After application, the composition forms a transparent protective coating up to 0.1 mm thick.
Among anti-gravel films, the most popular products are the following brands:
- 3M 90001 Paint Defender. Balloon anti-gravel, applied in three layers to paintwork, mirror housings, headlight units. It is colorless. The bottle comes with consumables: tape, protective film, degreaser. The protection dries in 4 hours; when drops of water fall on the undried material, swollen smudges form on the paintwork.
- RUNWAY RW6700. A budget protection option made in China, it belongs to the “liquid rubber” class and can be used as an anti-gravel protection for thresholds. The multifunctional composition includes synthetic rubber, is applied only to treated surfaces of the bottom, frames, rims, and is easily removed. The product is resistant to temperature changes and salt reagents.
- KERRY KR-970. Anti-gravel coating with a shagreen effect, the article number uses the marking 971. The product is chosen to protect the bottom of the car, wheel arches, and sills. Dries completely in 4 hours, the product is available in three colors: white, black, gray. Packaging is standard: aerosol can 450 ml.
Choice of putty
One of the important factors before the putty itself is the choice of material. Depending on the reason for the putty, the types of putty will vary. If you plan to carry out repair work yourself, you should consult with a specialist in the store or watch a video on choosing the appropriate material.
Depending on the nature of the damage, the putty can be used for deep or small dents. Depending on this, it will “sit” on the surface differently.
For a deep dent, you will need two types of putty:
- first for deep sealing of the damaged surface;
- then for finishing.
Although there is a universal type suitable for work at the start and finish. You should carefully choose putty and give preference to well-known manufacturers, since after painting, poor-quality material may move away from the surface of the car.
A step-by-step guide to painting your own car sill
Puttying the threshold
To paint the thresholds of a car with your own hands, you need to go through 4 stages in sequence.
Puttying
Leveling the surface of the threshold with putty occurs in the following sequence.
- Degrease the surface of the threshold;
- Mix the hardener with the putty a few minutes before applying it. The proportion of hardener in the mixture should be in the range from 2 to 4%;
- Apply the resulting mixture to the damaged area of the part in a thin layer quickly, within 5-7 minutes;
- Dry the part for 5-10 minutes;
- Sand the treated area;
- Repeat puttying several times until a smooth surface is achieved;
- When using fiberglass-based putty, keep in mind that it is quite brittle, despite its apparent hardness, and porous. Therefore, this stage should be completed with finishing putty.
Padding
Coating the threshold with primer
Coating with a primer prevents corrosion and promotes better adhesion of the paint to the surface of the car. In addition, the primer fills the pores. The procedure for applying it yourself is as follows.
- Degrease the threshold;
- Cover the adjacent surface of the car with film or newspapers;
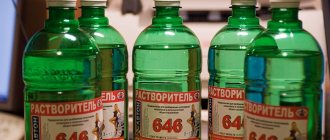
- Dilute the soil with solvent (you can use 647). The primer should be the same color as the paint or a neutral gray;
- Spray primer onto the part. Repeat if necessary;
- Sand the threshold “wet” with P800 sandpaper or “dry” with P400 sandpaper;
- Treat areas of complex configuration with Scotch Brite.
Coloring
The number of coats of paint varies depending on what color primer was applied. If the latter is very different from the paint pigment, then the number of layers increases. Do-it-yourself painting of the threshold is carried out as follows.
- Apply paint from a spray gun to the part at a distance of 20-25 cm; (You can also paint from a spray can if the paint is chosen correctly.)
- Let the paint dry for 3-7 minutes;
- Repeat staining 2-4 times.
Opening with varnish
The final stage after painting the thresholds. Performs protective and decorative functions.
- Thin the varnish according to the instructions.
- Apply the coating to the part twice (with a break for drying) from a paint sprayer with a pressure of 1-1.5 atmospheres, using the same nozzles as for paint.
- Spray 3 layers of a mixture consisting of wash solvent and varnish in a 1:1 ratio.
- Treat the transition zone from the damaged area to the rest of the surface with a mixture further diluted with a solvent. Then coat it with a clean solvent.
- Allow the thresholds to dry completely for 2-3 days.
- Polish and grind the surface.
The threshold, as the most vulnerable part and subject to aggressive influence, regularly needs minor repairs and repainting. It's easy to do it yourself. It is enough just to follow the given technological sequence exactly.
Primer and painting
Next you need to prime the surface. The primer allows the paint to adhere well to the putty.
Primers are epoxy and acid based. It must be remembered that epoxy and etching (acid) primers are incompatible with each other.
Apply the selected primer correctly in one layer, then rub it in with sandpaper. Acrylic primers are gaining particular popularity. They are applied in two layers. Once the priming is complete, sanding is done.
Now it’s time to apply anti-gravel paint; it can also be applied to enamel. The paint comes with instructions where everything is described in detail.
Do not experiment with the choice of paint color - it is better to turn to specialists. They will select the required shade. Painting thresholds involves applying the first layer from top to bottom in horizontal lines. The remaining layers must be applied vertically. The distance from the cylinder to the part should be approximately 20 cm. After the surface of the part has dried, it is polished.
The painting job is complete. All that remains is to install them on the car - you can easily do this yourself. Don't forget to also install plastic door sill covers.
Getting ready to paint the thresholds
Thresholds are functional car parts designed to protect the body from mechanical damage and corrosion. They are equipped with any vehicle, regardless of model and class. They are among the first to “meet” the impact of a collision and are exposed to weather factors. This means that the car owner comes to paint these elements with his own hands quite often.
Preparatory stage
First of all, the surface must be properly prepared. It is necessary to wash the car, inspect it, clean the sills, putty and prime all damage to them.
Preparing the thresholds for painting is easy. Removing thresholds with your own hands is easy. To do this, unscrew the screws that secure the threshold to the spar. Then the metal is straightened using straightening tools, after which the inner surface of the car threshold is painted with a special anti-corrosion paint. If the threshold is seriously damaged and it is necessary to carry out welding work on site, then remove the floor covering, remove the doors and the seat.
Before painting, the surface is sanded, puttyed and primed.
The procedure for preparing a car for painting sills
ATTENTION! A completely simple way to reduce fuel consumption has been found! Don't believe me? An auto mechanic with 15 years of experience also didn’t believe it until he tried it. And now he saves 35,000 rubles a year on gasoline! Read more"
- car washing;
- thorough inspection of the vehicle;
- cleaning the surface of the thresholds;
- putty of damaged areas;
- primer.
Preparing to paint a car and painting the sills with your own hands is a very real procedure. The removable part can be easily dismantled by yourself. To remove the threshold, it is necessary and sufficient to unscrew the self-tapping screws that secure it to the side member. Afterwards, straighten the metal using straightening tools. Next, paint the inner surface of the threshold with an anti-corrosion compound.
If the damage to the threshold is significant, dismantle the doors, flooring, seat - elements located in the vicinity of the threshold. And only then carry out straightening repairs from the inside.
Before painting the thresholds, it is necessary to sand, putty, and prime them.
Liquid lockers
Almost all manufacturers of anti-corrosion materials produce their own liquid lockers. They contain granulated glass, which makes them particularly resistant to mechanical stress. The use of this material allows for high thermal insulation of the machine.
The main advantage of liquid lockers is their versatility.
The composition can be applied to any surface - the configuration, as well as the age of the vehicle, will not make any difference. If, before applying the composition, rust was found on the surface of the arch, then the places of corrosion damage should first be cleaned and covered with a primer.
This method of protection has one drawback - fragility.
Typically, the used composition should be cleaned off and a new one applied after 2 years. But liquid lockers from some manufacturers can last up to 4 years.
Preliminary repair of car thresholds
So, first you need to thoroughly wash and prepare the car. We have already described how to do this in one of our articles. Then you need to carefully inspect the thresholds for damage - dents, cracks, paint chips. If the damage is too great, you will have to disassemble half of the car: remove the doors, seats and floor coverings. If it is possible to remove the thresholds, this should be done. In any case, after the thresholds are released, they are straightened using straightening tools. If it is not possible to straighten the threshold from the inside, then the dents are pulled out using a special device (“pull-out nails”). Naturally, thresholds should be repaired only when it makes sense. Sometimes it is easier to replace a threshold than to repair it.
Next, after straightening, welding or soldering, you can begin preparing the thresholds for the painting process. To begin with, the thresholds are cleaned to remove thickening from the seams, old paint, and also to sand out cracks. Weld seams can be cleaned and smoothed with a grinder; dents and scratches can be smoothed with a grinder. Then, when the threshold becomes smooth to the touch, it is further protected using a sander with a fine abrasive. What should be the result? Damaged areas must be cleaned to bare metal. There should be no pieces of paint, rust spots, or protruding areas.
Working with the surface
After straightening work, cleaning is carried out. This is necessary so that the weld seams are smoothed out, all cracks are sanded, and the old paint is removed.
The necessary tools will be a sanding machine, sandpaper and a Scotch Brite sponge, which can be used not only dry, but wet or moistened with special matting agents.
Threshold painting tool
First you need to smooth out any protruding chips. Weld seams are smoothed using a grinding machine. If they are small, then sandpaper will be enough. Using a grinding machine, the final cleaning of the surface to bare metal is carried out. As you can see, it’s quite easy to do it yourself here. Next, apply the anti-rust agent with a brush. After 10 minutes, the solution can be removed with a rag. This will completely remove rust from the metal surface. Next, the surface is degreased with gasoline or an alcohol-containing solution, after which you can proceed to puttying the thresholds.
Choosing a product for treating car thresholds with your own hands
Despite the abundance of various means of protecting thresholds from corrosion, many car enthusiasts are wondering: how to treat thresholds? We will give a complete and comprehensive answer to this question. It will help the car enthusiast make the right choice.
Read also: How to remove casters from an office chair
1. Anti-corrosion spray BODY-950, capacity 400 ml
Anti-gravel, created on the basis of special resins. Has high adhesion and is resistant to damage. Application requires the use of a special gun. Dries quickly. Cost 4-6$.
Anti-gravel aerosol ELTRANS, capacity from 400 to 1000 ml.
Inexpensive but effective remedy. Does not require the use of a special gun. Consumption of one layer is 400 grams per 1 m². It is recommended to apply in 2-3 layers. Cost for 400 ml. 2-3$.
Anti-gravel KERRY, capacity 650ml.
High-quality anti-gravel that provides effective protection of thresholds. Has a high degree of adhesion. Does not require special skills to use. Cost 3-4$.
Hello, dear friends! The main enemy of any car is rust. It is against corrosion that you need to carefully fight so as not to send the car to a landfill ahead of schedule. One of the important components of care is anti-corrosion treatment of thresholds.
Many people apply different products, use mastic from the inside, coat the internal cavities with gravitex, preserve the car with Movil, etc. All this is done in order to prevent the appearance of rust and delay the formation of the first foci of corrosion as much as possible.
By treating the thresholds with appropriate means, you extend the life of the entire body. After all, it is from here that pathological processes can begin, gradually spreading to the entire machine.
Common mistakes when painting car thresholds
Before you tint the sills on your car yourself, you need to familiarize yourself with possible errors and defects:
- insufficient cleaning and surface treatment leads to decreased adhesion of the paint layer to the part;
- working with excessive humidity – bubbles appear;
- the use of strong abrasives during the polishing process will result in scratches;
- applying a small amount of paint and varnish – “transparent” the primer layer and changing color;
- operation and washing of the car until the paint is completely dry - cracks appear, partial wash-off of the coating.
When working with anti-gravel it is important:
- carry out pre-treatment and cleaning of the thresholds - otherwise rust will quickly appear under the protective layer;
- coating of a “bare” part - the composition has a porous structure; in the absence of putty and primer, moisture and dirt get onto the part.
Independent high-quality repair of car side skirts is available to every car enthusiast. In the garage you can paint your car sills for a small price using regular enamel in a spray can or a special solution. Before starting work, you need to read the instructions for the material used, prepare the necessary tools, and create safe working conditions.
The procedure for preparing a car for painting sills
ATTENTION! A completely simple way to reduce fuel consumption has been found! Don't believe me? An auto mechanic with 15 years of experience also didn’t believe it until he tried it. And now he saves 35,000 rubles a year on gasoline! Read more"
- car washing;
- thorough inspection of the vehicle;
- cleaning the surface of the thresholds;
- putty of damaged areas;
- primer.
Preparing to paint a car and painting the sills with your own hands is a very real procedure. The removable part can be easily dismantled by yourself. To remove the threshold, it is necessary and sufficient to unscrew the self-tapping screws that secure it to the side member. Afterwards, straighten the metal using straightening tools. Next, paint the inner surface of the threshold with an anti-corrosion compound.
If the damage to the threshold is significant, dismantle the doors, flooring, seat - elements located in the vicinity of the threshold. And only then carry out straightening repairs from the inside.
Before painting the thresholds, it is necessary to sand, putty, and prime them.
According to the technology, after straightening and welding work, cleaning begins. For what?
- smooth the welds;
- polish cracks and chips;
- remove old paint.