New Lada 2170
Lada Granta has firmly taken its place in the domestic car market and is taking the leading position in terms of sales per year. AvtoVAZ's new product has pleased fans of comfortable trips at not too high costs. The prototype of a budget foreign car is more accessible to the Russian consumer, but perhaps not so durable.
Products from the domestic automobile industry are advantageous because in the event of a breakdown and the need to replace a part, it can be easily found at any car market. If you have a Lada Granta car, you can do the repairs yourself in your own garage, without additional costs for car services. The main thing is to have the right tools.
As sad as it may be, nothing lasts forever. And Lada Granta cars experience minor malfunctions and major breakdowns. What kind of repairs can you carry out yourself, without resorting to the help of professional craftsmen?
Replacing the Lada Kalina fan at home - step-by-step instructions
2. Next, open the glove compartment and, pressing the two stops, open the glove compartment lid. Remove the cover by pulling it up.
9. From the right end of the panel you only need to remove the cover; you do not need to unscrew the two bolts at “13”. Afterwards, we pull the panel towards the seat and find the fan. It is quite difficult to get the fan, and in order to do this you need to cut out a piece of felt sound insulation.
I have everything, I hope I helped you solve your problems. I think it’s described and shown more than clearly, and you won’t have any problems during disassembly
Thank you for your attention and see you again at vaz-remont.ru.
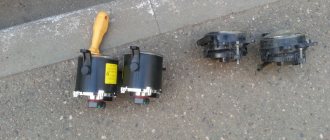
Removal of the fan (supercharger) of the heater stove on a Lada Granta car is carried out in the event of its failure for subsequent either complete replacement with a new (working) one, or for disassembly and repair in order to replace worn parts. To perform repair work you will need a standard set of tools. Perform the following sequence of actions, having first de-energized the car and disconnected the minus terminal from the battery:
Open the glove box lid and, pressing the two plastic latches, tilt it back.
- Pull the cover up and remove it from the brackets on the panel.
- Disconnect the block with the power wires from the heater heater motor.
- We unscrew the three screws securing the fan and remove it from the air blower housing.
- Make the necessary repairs, then install in the reverse order.
At this point, the repair work to remove the heater fan on the VAZ 2190 has been completed.
Sources
- https://www.autosecret.net/lada-granta-vaz2190/127-ustrojstvo-i-remont-lada-granta/jelektrooborudovanie-lada-granta/1279-ventiljator-pechki
- https://vaz-remont.ru/zamena-ventilyatora-pechki-lada-kalina-svoimi-silami-v-domashnix-usloviyax/
- https://remladavaz.ru/kak-snyat-ventilyator-pechki-otopitelya-lada-granta
Engine control unit Lada Kalina
The capabilities of autodiagnostics depend on the type and brand of the ECU (electronic control unit, ECU). The type of ECU depends on the year of manufacture of the car and the engine (environmental friendliness and engine number).
On Kalina 1, 2 cars the following are most often installed:
- Engine 21116 - ECU M74
- Engine 21126 - ECU Bosch Me17.9.7 or M75 (with or without CAN bus).
- Engine 21127 - ECU M74 - 638 (analogue of M74 with a modified board).
- January and Itelma ECUs were installed on cars until 2008.
The ECU of the Lada Kalina is located under the central panel, and in order to view the number and type of the ECU, the ECU should be removed (lift the panel).
Engine control units, in turn, have a certain firmware, but for diagnostics via the OBD2 connector, only the presence of a CAN bus is affected. If you have CAN, you must select an appropriate diagnostic adapter that supports this protocol.
IMPORTANT: If ECUs without CAN bus support are installed, you must use the KKL VAG adapter
It is recommended to carry out ECU diagnostics once every 10,000 km, or every maintenance. The example shows a Bosch unit with firmware b173CR03 (serial firmware) without CAN.
Briefly about ECU firmware:
Flashing (reflashing) the Bosch Me17.9.7 control unit on VAZ cars is only possible using a K-Line adapter, which supports data transfer via the corresponding bus.
Source
Heater radiator: responsible for heating the interior
It’s hard to imagine a modern car without a standard set of devices and options, thanks to which driving the vehicle becomes as convenient as possible, and staying in the cabin is comfortable and safe. The functions of maintaining a favorable temperature regime in the car are assigned to the heating, air conditioning and ventilation system, which, depending on the situation, can heat, ventilate or cool the air in the cabin. At the same time, one of the key components of the heating system is the stove, which includes a radiator that acts as a heat exchanger. The air entering the car interior is heated by the radiator, and it is heated by the liquid that cools the engine.
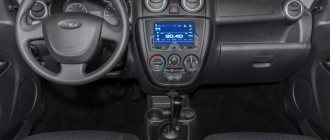
"Lada Granta" is equipped with a large number of options, thanks to which driving the vehicle becomes quite convenient
How does the Lada Granta heating system work?
Structurally, the Lada Granta heating system consists of:
- an air duct directing the flow to the left deflector (deflector is a device for enhancing traction);
- heat exchanger covers;
- seal;
- stove radiator;
- air duct to glass;
- stove body;
- central air duct;
- an air duct directing the flow to the right deflector;
- recirculation shutter rods;
- fan shell;
- directly from the fan;
- a resistor that regulates the operation of the fan;
- main air duct;
- distribution valve rods;
- regulating device;
- a device that directs air to the feet of passengers;
- thermostat shutter rods.
The structure of the Lada Granta heating system allows you to carry out repairs on your own
How does the heating system work?
The heating and ventilation system in Lada Granta is a supply and exhaust system. What does this mean? Air from outside penetrates into the cabin through a special device in the form of an air intake box placed in front of the windshield. The amount of air coming from outside is regulated by a special recirculation damper. The recirculation system provided in the Lada Grant allows for better heating of the air in the cabin in winter and faster cooling in summer (if air conditioning is available). However, you should not abuse the recirculation mode, since this will introduce stale air into the car. It is convenient to use recirculation to protect against foreign odors from the street entering the cabin, but only for a short time. The principle of recirculation is to block the access of air from outside and repeatedly pass internal air flows through the heating or cooling element.
Next, an air filter 7 appears on the path of air flows, which serves as a barrier for dust and dirt particles. Do not forget to change the filter element in accordance with the schedule recommended by the manufacturer. The air, cleared of mechanical particles, is picked up by fan 11, driven by engine 12, and pumped into the car interior.
After this, the air stream passes through the air conditioner evaporator 13 (if provided in the package), under which there is a drainage hole 14 for draining the condensate. Depending on the position of the damper 15, which regulates the temperature, the air moves to the heater radiator or bypasses the heat exchanger. If the damper directs the jet to the radiator, then heated air enters the cabin, the flows of which can be distributed as necessary onto the windshield and side windows or under the feet of passengers.
Heating and ventilation system "Lada Grants" - supply and exhaust
The exhaust occurs through special openings in the rear of the body, which can be found under the trunk lining. For normal operation of the hood, these openings should not be blocked by cargo carried in the trunk. Among other things, a closed hood can cause windows to fog up.
Operation of the Lada Granta stove radiator
There is a heater directly under the windshield; after passing through it, air flows are directed to different parts of the cabin. Judging by the reviews of the owners, the heater installed on the Lada Granta works more efficiently than the heaters of other VAZ models, for example, Lada Kalina.
The heater of the Lada Granta car has a plastic housing
Rules for using a standard heating system
The car's operating manual outlines the basic principles of operation of the ventilation, air conditioning and interior heating systems. To quickly warm up, you need to switch the damper to the air recirculation position and the fan speed to the “maximum” position. In this case, the car windows must be closed. You should not drive in this mode for a long time, as this can lead to fogging of the windows.
The main reason for the accumulation of condensation is the difference in temperature inside and outside and high humidity. To prevent the windows from fogging up, you need to warm them up by pointing the heater deflectors at them and dry the air by turning on the air conditioning. However, when the vehicle is driven under heavy loads (for example, on long climbs) with the air conditioning turned on, the engine may overheat, so in such conditions it is necessary to monitor its temperature. Condensation is usually the result of luggage blocking the vents.
Incorrect operation of the ventilation and heating system may be caused by a malfunction of the temperature sensor located in the interior lamp. It is not recommended to drive with the windows open in hot weather with the air conditioning running.
https://youtube.com/watch?v=RkNRzxfIfBg
The vehicle's ventilation, air conditioning and heating system creates conditions for normal and comfortable driving in any climate zone. AvtoVAZ engineers developed and implemented a simple and reliable heating concept for the Lada Granta model. But for the system to operate effectively, certain rules must be followed, which will help avoid unexpected breakdowns.
Brake system
Reference and information manual on repair and maintenance of the Lada Granta / VAZ 2190 car
Our section of the site is a reference and information manual for the LADA Granta / VAZ 2190 car, a complete operation and maintenance manual, as well as a device for the LADA Granta / VAZ 2190, equipped with 1.6 l 16V (98 hp) gasoline engines. 1.6 l 8V (87 hp), 1.6 l 8V (80 hp).
The entire process of car maintenance and repair is considered in a garage using universal and accessible tools. In some cases, the work process involves the use of a special tool.
The entire section of the site was created based on specific experience that was acquired during the complete disassembly and assembly of the LADA Granta / VAZ 2190 car by our highly qualified mechanics. All presented problems and malfunctions are illustrated with color images with comments on them.
This section of the site is divided into several subsections, which contain the following information:
- device of the LADA Granta / VAZ 2190 car - general information about the car, passport and technical data, data on instruments and control panels;
- general recommendations for operating a car - preparation for departure, OBD instructions;
- information about malfunctions on the road - what and when action should be taken in a given situation;
- Maintenance of LADA Granta / VAZ 2190 – complete step-by-step instructions,
- complete information on the repair of main units - engine, steering, transmission, chassis, brake system (this section provides material on minor and major repairs, assembly and disassembly of components and assemblies, as well as instructions for adjusting the car);
- electrical equipment of LADA Granta / VAZ 2190 – main units, diagnostics of faults, including starter, battery, generator (this section also provides material on replacing lighting fixtures and sound alarms);
- a complete electrical diagram of the LADA Granta / VAZ 2190, which will help simplify the process of troubleshooting electrical equipment in the car;
- replacement of body elements of the LADA Granta / VAZ 2190 car, as well as control dimensions of the car body.
LADA Granta / VAZ 2190. In addition, the presented material will assist car owners in finding the necessary spare parts for the LADA Granta / VAZ 2190.
Our section of the site will be useful to car service mechanics, repair shop employees, service station specialists, as well as owners of LADA Granta / Lada 2190 cars.
How to remove the dashboard
Before replacing the radiator of the Kalina-2 stove, you need to remove the heater unit. The latter, in turn, is located behind the dashboard. We have already looked at how to remove the center console. But in this case this will not be enough. The unit called “dashboard” needs to be dismantled as an assembly, but there are no other options.
The center tunnel cover will get in the way. It is pre-dismantled:
- Unscrew the three screws securing the handbrake cover and remove the cover;
- Dismantle the manual transmission lever. For a car with an automatic transmission, remove the plastic cover, unscrew the screw securing the handle, and disconnect the contact connector. To bend the rivets, use a flathead screwdriver;
- Unscrew the screw securing the tunnel cover, located near the handbrake bracket;
- Unscrew the side fastening screws (2 on each side). Now, the cover can be easily removed.
If no difficulties arise, dismantle the bracket (the handbrake microphone is attached to it). Simply, unscrew the screw head with a 13 key. Next we show a photo where all the actions are displayed.
Step by step, do everything as indicated. Then, the dashboard can be “pushed” toward you:
- Bolts “2” securing the stand on both sides are unscrewed with a 13mm wrench. Nut “3” securing the ground wire must also be unscrewed;
- There is an air duct mounting nut under the front seats. Using a 10mm wrench, unscrew it to remove the air duct;
- In fact, there is a separate wiring harness that goes to ground. It is held in place by nut “1”, which is unscrewed (see figure below);
- The headlight range control assembly needs to be disconnected. Remove the control knob from the dashboard and unscrew the “black” nut (you need a 21 key);
- The “dashboard” assembly is attached to the pedal block with screws “1”. Unscrew them.
The dashboard has pads on each side. They are removed to unscrew two mounting screws (a 13mm wrench will do). Then, the assembly is pulled out towards itself, having previously disconnected the connectors with the wires.
The last operation can be called “dismantling the dashboard assembly.” And they do it only with an assistant.
Dashboard lighting for VAZ 2107: what lamps are needed and how to replace them
In order to replace the lamps in the lighting fixtures of your car, it is not at all necessary to go to a service station and pay a highly qualified specialist. All operations can be done independently with minimal effort and money. Today we will talk about replacing light bulbs in the dashboard (DP) of a VAZ 2107 car.
Location of lamps on the instrument panel of the VAZ 2107
Before we start replacing the light bulbs, let’s see where they are located on the PCB board and what the VAZ 2107 is responsible for illuminating or indicating.
- Fuel level.
- Instrument lighting.
- The direction indicators are on.
- Engine control controller malfunction.
- Exterior lighting is on.
- Emergency oil pressure.
- The parking (hand) brake is on.
- High beam headlights are on.
- Battery charge indicator lamp.
Removing the instrument panel and preparing for replacement
To change the lamps in the instrument panel, the latter will have to be removed. It cannot be said that the PP can be removed with one movement of the hand: the designers of the VAZ 2107 made dismantling a little more difficult than on other cars of the VAZ family. Nevertheless, dismantling the PP is quite feasible in a garage or even a parking lot. In this case, the operation does not require any special knowledge. The tools we will need are:
- small flat screwdriver or knife;
- crosshead screwdriver.
I think all this will be found in the trunk of any VAZ 2107, and we can get started. First of all, we remove the plastic handles from the heating control knobs by prying them off with a flat screwdriver.
Removing the handles from the interior heating system of the seven. We unscrew the nut securing the daily counter reset button (marked with a red arrow), and push the button itself inside the shield.
Now you need to unscrew the screw that is located under the plug and secures the decorative trim. Remove the plug using a flat-head screwdriver and unscrew the Phillips screw.
After this operation, the right side of the panel will move away so that you can get to the flexible speedometer control shaft.
The shaft is removed with bare hands: simply unscrew the nut securing it.
Now remove the instrument panel from the clamp that secures its left side and pull it out slightly to get to the vacuum hose connected to the econometer. It can also be removed with bare hands, but be careful not to tear it.
It remains to disconnect the three power connectors of the instrument panel and the three wires on the VAZ 2107 heater switch. Before disconnecting, it is advisable to mark them so as not to confuse them when assembling the panel.
We remove the decorative trim along with the PP and unscrew the four self-tapping screws securing the shelves (two on each, I marked them with red arrows) to the decorative trim, and the instrument panel can be removed.
What kind of lamps are needed?
Before disassembling your VAZ, it makes sense to drive it to the nearest auto store and stock up on new light bulbs. But which ones to buy? Judging by the first photo, the backlight and indication lamps have different sizes. The choice is simple: if the backlight bulbs have burned out (position 2 in the same photo), then you will need AMN 12-3-1 (T3W) bulbs. If they are indicator ones, then A 12-1.2 (Wl.2).
You can purchase backlight lamps for VAZ either together with sockets or separately. In the second case, the burnt out light bulb must be removed from the socket and a new one installed in its place.
Dashboard illumination lamp VAZ 2107 with and without socket included
LED light bulbs
If you are tired of changing light bulbs in the power supply of your VAZ or are just a fan of modern tuning, then you can install LED light bulbs instead of incandescent ones, since the industry also produces those that have the same standard size, base, socket and operating voltage.
LED lights for the dashboard illumination (left) and indication for the VAZ 2107 car
Important! The battery charge indicator lamp cannot be changed to LED - the battery will not be charged properly
Replacing warning lamps and backlight bulbs
We lay the VAZ 2103 dashboard on a smooth soft surface face down and see the backlight and indication lights (see the very first photo).
I hope that before removing the dashboard, you found out which bulbs burned out and, using the recommendations above, purchased new ones of the right type.
As I already indicated above, backlight lamps can be sold both with sockets, ready for installation, and without them.
Lada Granta stove repair
Although there is no dispute about the quality of the supplied stove, according to laws that do not depend (or depend) on us, the stove may break. The reason for breakdowns of the Lada Granta stove may be as follows:
- clogged radiator
- faulty pump
- loose contacts and staples
- airlock
When the cause of the stove's inoperability is a pump malfunction, then you should be wary. Because this can lead to overheating of the engine and ultimately “jamming”; engine repair will be very expensive. It is better to contact specialists to solve such a problem.
Loose terminals and brackets should be tightened, this is done as follows:
1) Disconnect the battery terminals for your safety and to prevent short circuits when working with electrical wiring
2) Remove the instrument panel. we take out the radio (if you installed it), air supply or temperature regulators.
3) Disconnect the wiring harness connectors for the rear window heating switches, hazard warning lights, etc.
4) Install the loosened staples in their place
5) Reassemble everything in reverse order
Airing, or an air lock, can also cause poor operation of the stove. To solve this problem, first drain the antifreeze by first removing the throttle body hose and opening the expansion tank cap. We remove the hose supplying air from the radiator to the stove from the radiator side and blow it through. This way we eliminate the antifreeze in the stove, which was the cause of the blockage.
Instrument clusters and tuning
Tuning the Kalina torpedo
The listed devices and controls are located on the so-called dashboard of the car. You can install an original torpedo on Kalina, thereby diversifying the interior of the car.
The instrument cluster is closed with a special cover, which is an overlay on the panel. If necessary, the cover can be easily removed and replaced.
Auto-tuning instructions can be found on special websites and forums. Tuning the combination of all devices is not difficult if you have minimal skills in working with a soldering iron. The instrument cluster on Kalina is identical to the combinations on the VAZ 2118 and 2119. Nowadays, the GF 618 instrument cluster on Kalina, based on LEDs, is very popular; it has a built-in route diagnostic computer.
Using the instrument panel, the driver can monitor the vehicle’s condition, driving characteristics and other functions and processes that affect the safety of movement. Also, with the help of indicators, the car owner will be able to operate it correctly. Next, a description of the indicators on the instrument panel will be given to make it easier for a novice driver to understand.
We take out the heater block
Now, pay attention to the first drawing. The heater block is secured with nut “1” to the body, and nut “7” presses it against the dashboard
We have already unscrewed the 7th nut, which cannot be said about nuts “1” (there are actually two of them). So, unscrew all the nuts and pull the heater unit into the cabin.
At the last step, all that remains is to unscrew the screws “1” and remove the cover “2” from the heater unit. After this, you will have access to the heater radiator, which will be easy to pull out of the block. Congratulations! A lot of work was done, but as you can see, the game was worth the candle. However, we talk about replacing and selecting spark plugs in another review.
A part such as the radiator of the Kalina-2 stove is not very expensive, but they require twice as much to replace it. Still, sometimes it is wiser to turn to the services of professionals. There is no need to overestimate your strength. Eliminating the consequences of illiterate repairs will be even more expensive.
The question “why did VAZ engineers make everything so complicated” will be left unanswered. The Grant, as you know, uses a unit of a similar design, the same as discussed here. But the Lada Granta is the best-selling Russian car, bought by thousands of car owners per month.
Reset errors
If necessary or after correcting problems, the driver can delete the error from the control unit’s memory. To do this, you need to activate the service mode, enter the error codes menu and press the Reset button, which should be held for at least 3 seconds. After this time, the codes will be discarded. Deletion is indicated by a message like “——” on the instrument cluster screen.
Controller errors can be reset using software. Typically, this procedure is carried out during regular vehicle maintenance.
Have you diagnosed errors in your car?
Survey
- Yes
- No
Loading …
Heater radiator replacement cost:
| Type of work | Price |
| Replacing the heater radiator, c/o console | from 3000 rub. |
| Replacing the heater radiator, with partial disassembly | from 4500 rub. |
| Replacing the heater radiator, dashboard | from 8000 rub. |
Where to change a stove radiator in St. Petersburg:
If replacing the Lada Granta heater radiator is done in cold weather, before starting the replacement, the car must be kept warm for several hours so as not to break the plastic elements of the interior. You should not try to replace the heater core yourself. If you are not experienced, you can easily get spilled antifreeze from the pipes, which will saturate the entire floor covering. This means dismantling the interior, removing the floor and drying it.
In terms of time, replacement takes from 3 hours to 2 days.
When to replace:
— a decrease in the level of antifreeze without visible smudges; — the smell of antifreeze in the cabin; — fogging of the windshield; — the appearance of smoke or haze in the cabin; — the stove does not heat.
Which stove radiator to choose:
1. Valeo (France) 2. AVA (Netherlands) 3. Nissens (Denmark) 4. Denso (Japan)5. Termal (European Union) When purchasing a stove (heater) radiator from us, we will provide a discount on replacement.
Troubleshooting methods
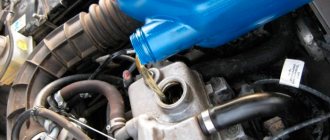
Heating the car interior directly depends on the proper functioning of the engine cooling system, since the air entering inside is heated when passing through the radiator of the Lada Granta stove. It is necessary to check the coolant level in the expansion tank: a decrease in the amount of antifreeze leads to impaired circulation and insufficient heat exchange. This result may also be due to a leak in the valve on the expansion tank plug.
Insufficient heating occurs due to a malfunction of the thermostat or pump in the engine cooling system. The cause of unsatisfactory performance is sometimes an air lock in the heating system. To eliminate it, with the engine warm, remove the heating hose from the throttle valve assembly. Then you need to create excess pressure in the expansion tank - unscrew the cap and blow into it. In this case, coolant containing air bubbles will flow from the removed hose. Similar actions must be performed with the second hose.
This operation should be carried out with great care: antifreeze on a warm engine has a temperature of about 90°C, and when removing the hoses you can burn your hands
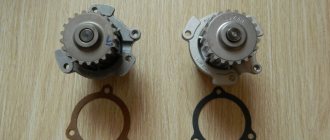
The stove stops heating due to a malfunction of the gear motor that controls the damper that regulates the air temperature. Replacing the VAZ 2190 heater gearmotor can be done with your own hands, however, this is a rather labor-intensive procedure that requires professional experience. The part is located under the hood of the car, and to remove it you will need to dismantle the seals, frill, wiper arms and trapezoid. When replacing a nano gearmotor, it is recommended to check its performance by applying voltage to the corresponding terminals from the battery.
Important elements of the stove design are the heater radiator and the fan that supplies air to it. The heat exchanger must not be dirty, otherwise it must be replaced or repaired.
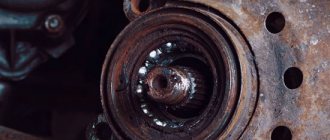
We dismantle the radiator of the Lada Granta stove
This radiator eventually leaked into the car interior. And antifreeze vapors are harmful!
Despite the fact that there are usually no complaints about the quality of the stove, breakdowns can still occur. If you focus on the radiator, it may clog or leak. In any case, you need to immediately begin dismantling the stove, after which it will be possible to inspect it in detail and understand the causes of the breakdown.
Most of the work will have to be done on the top of the engine compartment, as well as from inside the car. In fact, in this case we will not need a pit, a jack, or a lift. Just keep in mind that access to the engine compartment will be extremely difficult.
- To begin, unscrew a couple of clamps that secure the heater pipes to the heater radiator. This frees them up so we can remove the pipes completely.
- Now we will have access to draining the coolant from the radiator. Naturally, you will have to take care in advance of the container where this liquid will be drained.
- If possible, we move the pipes to the side. In principle, most of the work in the engine compartment is completed here.
- Next comes work from inside the car. Near the handbrake you can find one self-tapping screw that secures the tunnel, as well as another self-tapping screw for fixing the parking brake housing. Unscrew them completely. In addition, on the driver's side and on the passenger's side there will be two more screws that secure the tunnel on both sides.
- Using a screwdriver, carefully remove the gear shift knob cover from the groove. At the same time, we lift the tunnel up a little, moving it to the left.
- We unscrew the nuts that secure the gas pedal, as well as the stand under it.
- Two more screws that secure the radiator cap casing must be unscrewed and put aside. The cover can now be completely removed to gain access to the radiator.
- Next you will have to saw it off. Only now the radiator can be removed by holding down the brake pedal, which will interfere.
Installation of a new Lada Granta radiator
We carefully cover its perimeter with foam rubber, after which we begin to work with the window in the stove body.
Carefully cut a small window of a suitable size, closer to the bottom of the stove body.
After this, the new radiator will fit into place very well. All other parts are assembled in reverse order.
Selecting a new heater radiator (verified articles)
A model specifically for the Lada Granta Luzar under the symbol LRh 0190b would be a good fit for the role of a standard heater radiator.
It is completely made of aluminum alloy, and the price of this radiator is about one and a half thousand rubles. In addition to the Lada Grant, it is also suitable for installation in the second version of the Lada Kalina.
In general, so far, alternatives are rarely found on the domestic market. So car enthusiasts have to be content with this radiator. However, it performs quite well, especially if you do not use special additives to “repair” it, which seal the liquid supply channels.
Radiators of the so-called new type are characterized by mounting features. In addition, such radiators are not solid, but consist of two parts. They are assembled together using three self-tapping screws.
As for the “old” radiator model, it has a completely solid structure. However, most of the fastening elements are the same as the new type, so installing any of them should not lead to any difficulties.
Why did it happen so?
Perhaps the automatic requests do not belong to you, but to another user accessing the network from the same IP address as you. You need to enter the characters into the form once, after which we will remember you and be able to distinguish you from other users exiting from this IP. In this case, the page with the captcha will not bother you for quite a long time.
You may have add-ons installed in your browser that can make automatic search requests. In this case, we recommend that you disable them.
It is also possible that your computer is infected with a virus program that is using it to collect information. Maybe you should check your system for viruses.
If you have any problems or would like our support team, please use the feedback form.
Before you start
Before removing and disassembling the stove, you need to purchase new spare parts. The radiator must be from the Lada Granta. You will learn how to disassemble the heater in this article; however, it is advisable to have some experience. It is worth noting that the cost of a radiator for this car is twice as high as a regular one, for example, the one that comes with Kalina. Also, get a canister of antifreeze and a tube of sealant. Naturally, it is better for the replacement to be carried out by professionals in a specialized workshop, but if you decide to work on your own, invite a friend with you. The whole process will take you approximately 3-4 hours.
Inspection and testing of the heater fan motor (stove) Lada Granta
The functionality of the stove fan can be checked by applying 12 volts to the power terminals. If you notice any extraneous noise, first check the condition of the heater impeller. The blades must be of the correct shape, clean, without any inclusions (debris, leaves, etc.). If increased fan noise is still present despite the absence of the above-described deviations, then most likely the bearing in the fan motor is faulty. In this case, you will have to replace the fan motor or the entire assembly.
It happens that the culprit is antifreeze, of which there is very little in the system, as a result the stove blows cold air. However, there are other situations, for example, when nothing happens at all when you turn on the stove. This is all due to problems with the fan. The fan does not work, so no air is blown. There can be several reasons for a non-working fan; it could be a simply failed fuse or wiring problems, or in the worst case, a completely non-working fan. Very often the fan burns out, and an unpleasant burnt smell of wiring can be clearly heard in the cabin.
Body work
The appearance of a car is an important thing that any vehicle owner cares about. But no one is immune from scratches, and you should know how to deal with them correctly so that rust does not form.
Minor damage that does not reach the primer layer can be removed by polishing. To do this, you should use special pastes, which will remove a thin layer of paint in the problem area and even out the scratch to a general shade. Some people use a wax pencil, but after it the surface should be treated with a polish that enriches the color. Shallow but wide scratches, unfortunately, will have to be painted. You shouldn’t be afraid - just use a brush to paint your nails, because you only need to paint the problem area, and not the entire body element. Another simple job is to soundproof the car doors and hood to create additional comfort and acceptable acoustics. This way you will protect the interior from extraneous noise and squeaks, and the sound of music will become more pleasant. In this matter, it is important to choose the right material and follow the sequence of work:
In general terms, the work flow looks like this:
- remove the old casing;
- clean the surface from dust accumulations;
- cut the material to absorb vibration and heat it with a construction hairdryer:
- glue the material end-to-end, roll it with a roller;
- cover the area with noise absorption material;
- seal technological areas;
- glue "Vibroplast".
Replacing the Lada Granta heater radiator
If it's cold in the cabin when the heater is on, it means it's time to repair or replace the heater. Among the most typical reasons why you have to change the heater radiator on a Grant:
- clogging of channels due to the formation of scale or dirt;
- the occurrence of cracks or holes in the heating system.
In some cases, it is possible to get by with repair and restoration measures. For example, before changing the radiator, you can try flushing the system with a special liquid. There are means to get rid of scale inside the heating system, both by draining the antifreeze and the coolant inside. Such products, as a rule, do not harm sealants, gaskets, hoses, etc.
In some cases, it is possible to repair the heater radiator of a Lada Granta car without having to replace it
What is needed to replace a stove radiator?
When starting to replace the radiator, you need to prepare:
- set of clamps;
- sealant;
- antifreeze;
- Phillips screwdriver;
- key to 10;
- insulation (foam rubber);
- file.
Of course, you should purchase a new radiator in advance, and a “original” one, since the heat exchanger of other models will not work.
Sequence of steps when replacing a radiator
Work on dismantling the old radiator can begin from the engine compartment. Here, to create access to the elements of the heating system, it is necessary to remove the battery, the air duct pipe between the throttle assembly and the air filter, as well as the air filter itself.
Then you need to empty the system of coolant by draining it into a previously prepared container. Obviously, if a car owner intends to fill in new antifreeze at the end of the work, the old one does not need to be saved.
Before replacing the heater radiator of a Lada Granta car, you must remove the battery and air filter
The next stage of work is carried out from the interior. To gain access to the heater radiator, you will first have to remove the gas pedal: without this, it is not possible to remove the heat exchanger. Dismantling the pedal, as a rule, does not cause any difficulties: using a 10mm wrench, unscrew the three fastening nuts and disconnect the brake light limit switch and the connector for the electronic gas pedal. In addition, you need to press the brake pedal and lock it in this position.
Next, the plastic cover covering the radiator is removed, after which access to the heat exchanger opens. After this comes the most crucial moment - sawing off the radiator pipes: you should saw off after bending so that the cut part can be removed through the hole into the engine compartment. After both pipes are removed, you can remove the radiator from the niche into the car interior.
To dismantle the old radiator, you need to saw off its pipes
The pipes on the new radiator should also be sawed off so that later hoses can be put on them and secured with clamps. The cut edges of the pipes should be processed with a file, the holes in the engine compartment are filled with foam rubber to provide additional fixation to the structure and to preserve heat in the cabin.
It is more convenient to carry out the work of replacing the heater radiator together: one supplies the pipes from under the hood, the second receives them in the cabin. Sealant should be applied to the pipes of the new radiator and, after connecting to the flexible hose, securely secured with clamps. After this, you need to assemble all the removed parts: gas pedal, battery, air filter, then fill the system with antifreeze. At the end, you should check how the new radiator works: you need to start the engine and let it run for a few minutes, then visually make sure that the antifreeze level has not dropped, there are no leaks, and the heat exchanger has warmed up.
There are no fundamental differences in the procedure for replacing the heater radiator on a Lada Granta with and without air conditioning (unlike replacing the cooling radiator).
Video: personal experience of the Lada Granta owner in replacing the heater radiator
Stable and uninterrupted operation of all vehicle systems can be achieved by constant monitoring of their condition. The serviceability of the Lada Granta heater radiator becomes especially important in winter, therefore, in the process of preparing the car for the cold season, it would be useful to check its readiness for the season, especially if the vehicle is expected to operate at a high intensity in winter conditions. Practice shows that with proper operation, a stove radiator can serve properly for many years, but if it still fails, it is quite possible to replace the heat exchanger yourself.
DIY diagnostics and repair of Lada Granta
For the Lada Grant, do-it-yourself repairs are very relevant, because the brainchild of the domestic automobile industry, sadly, does not please their owners with super reliability. Moreover, the domestic car enthusiast is clearly not looking for the easy way out, which is why in most cases he decides to do the repairs with his own hands. In this connection, on the expanses of the Russian-language Internet there is a kind of club of car enthusiasts-masters, where happy Lada-Grant owners share their experience and secrets in this difficult matter. Moreover, such a club is not alone.
No one will argue with the fact that when embarking on such a responsible task as repairing your own car with your own hands, you must have a good amount of knowledge on this topic. The Lada Granta repair book will be such a source of technical information. In it you can find a detailed description of a very large number of technical problems and breakdowns.
Correct diagnosis of the problem
First you need to conduct a high-quality diagnosis of vehicle malfunctions. However, it is unlikely that a club of simple “fret workers” has expensive equipment for this in the garage. To buy such a diagnostic device, you will have to spend a lot of money. And is it worth it? Most motorists draw conclusions based on their own feelings and observations of their car. Of course, such a superficial analysis cannot give the most accurate verdict, but by consulting a repair book, you can quite accurately determine the type of most technical problems in the Lada Granta without resorting to expensive service stations.
For example, in this book you will find signs of engine malfunctions and other elements of the power system. If you notice a strong noise when the starter is operating, popping noises in the intake pipe, shots in the muffler, strong engine vibration or increased oil consumption, then the above book will indicate the first causes of these problems, as well as provide tips that will help correct these breakdowns.
In this unique guide you will find answers and tips to many questions. For example, the crankshaft does not turn with the starter, the engine is running unstably, increased fuel consumption, overheating of the unit - all these and many other problems will be indicated in the reference book.
DIY repairs
Everything is clear with the diagnosis. If you can detect a problem and determine its cause, then what about when it comes to repairing it yourself? This is where you will need the help of a book such as the Lada Granta Repair Guide. Here you can repair the engine, clutch, gearbox and much more. You can find step-by-step, detailed and extremely clear instructions that will help you solve problems of varying complexity. For example, the book describes in great detail both the replacement of various sensors and the replacement of the entire engine. In addition, there you will find step-by-step instructions for repairing the brake system, electrical equipment and many other systems. Another huge advantage is the clear, clear and colorful illustrations. All this will greatly simplify the process of repairing various systems in your car.
Such manuals can be found quite easily on the World Wide Web, where they are freely available for downloading. Also, do not forget about the service book, which is supplied by the manufacturer; there you can find a lot of useful information on repairing the Lada. Video tutorials are simply invaluable material because they give you the opportunity to see everything in action. This approach is the most effective for absolute beginners.
It is especially useful to watch such video manuals during or before carrying out rather complex work on replacing important spare parts. For example, replacing a steering rack is by no means the easiest thing, but a video report like this will be very useful. In the video you can watch how highly qualified service station workers replace the Lada Granta clutch. If you decide to install a new or replace the standard alarm system with auto start, then these detailed instructions will undoubtedly help you.
Adviсe
Antifreeze leaked into the cabin
To prevent problems with the heater core, you need to carefully monitor it. For example, from the first days of buying a car, periodically look under the car to see if there are dark spots there. And in the engine compartment it would be a good idea to observe the condition of the cooling system hoses. If you notice traces of antifreeze in any of these places, you need to immediately seek help, or carry out repairs yourself.
If possible, the hoses for connecting the heater radiator should be replaced with new ones, having coated the connection points with sealant. But some do not agree with this opinion. After all, sealant from the hose can get inside the cooling system and cause damage to the pump. As a result, the timing belt will break and the valves will meet the pistons.
Preparing for replacement
Any part from the cooling system cannot be removed just like that. First you need to drain the antifreeze, and we considered this operation. And now - the most unpleasant thing. It will not be possible to remove the dashboard unless you get rid of the refrigerant that fills the climate system circuit. The refrigerant is unloaded in accordance with the operating instructions.
Let's start dismantling. First, unscrew the metric screws “2” using a 10 mm spanner. These screws secure the air conditioner valve “1”. Then, using a 10mm flat wrench, unscrew the heater mounting nut “7”. To loosen the clamps “4” and “6” holding the radiator hoses, use a 8-mm spanner.
The hoses are carefully pulled towards themselves. At the final stage, unscrew the screws with a Phillips head (marked as “1”), after first removing the cabin filter.
Before dismantling, ask yourself again whether there is currently liquid in the engine CO or in the air conditioner.
Heating system control
To adjust the fan speed mode, the regulator has a gradation scale. The car owner independently selects the optimal fan rotation mode.
Heating system regulator in the cabin
Failure of the regulator blocks the operation of the entire vehicle interior heating system.
Interior ventilation and heating system of Lada Granta: checking, adjustment
The type of interior ventilation and heating system is supply and exhaust. The operating temperature of the interior heating fluid is in the range from 90 to 94°.
Warm (hot) air is supplied to the cabin by an electric fan. The feed speed is adjusted by a special regulator, which accelerates (reduces) the rotation speed of the impeller.
The electric motor has four positions:
- first;
- second;
- third speed;
- position: off
Stove motor
Air intake follows from the outside through air intakes under the frill in the engine compartment. A filter is pre-installed to clean the flow. Filling: synthetic material.
Air is exhausted through a ventilation window in the rear of the car, behind the bumper.
The heater module is installed in the central part of the dashboard, under the panel. During engine operation, the liquid heats up and circulates along the circuit (water jacket).
The amount of air that comes from outside is regulated by the driver. The flow distribution is also controlled by a damper using a cable drive.
Diagnostics of the stove heating system
- We place the car within the perimeter of the repair area and open the hood.
- Let's start the engine.
- Turn the regulator counterclockwise to the blue sector.
- Using the lever, we alternately activate the first, second, third fan speeds.
Stove fan
We carry out diagnostics using a multimeter.
- We activate the stove heater damper; if no changes occur, then the damper drive is faulty.
- After the engine has warmed up to a temperature of 60 - 70°, turn the regulator lever to the red sector position.
- We check the air temperature, it should correspond to degrees. Otherwise, the damper drive is faulty.
- If necessary, repeat the procedure by moving the regulator to the blue sector position.
Diagnostic process
Instrument panel with which you can perform diagnostics
So, diagnostic operations using the dashboard are not complicated and almost every Kalina car owner is able to cope with this on their own. Following the step-by-step instructions described below, you can carry out diagnostics on any generation of VAZ 1117-1119.
Now let's move directly to the process of performing diagnostic operations:
- We reset the daily mileage indicator. For this purpose, there is a special button on the instrument cluster.
Using the daily mileage button we reset the indicator
Insert the key into the ignition and turn to position 1
Instrument arrows move from the beginning to the final control point
The instrument panel screen shows the software version (in this case UEr 3.0)
Errors received during the diagnostic process. There are 8 and 4 errors in photo 6.
Decoding instrument panel readings
2 — the on-board network voltage exceeds the norm; 3 - fuel level sensor error detected. Occurs if there is an open circuit in the sensor within 20 seconds. 4 - an error has occurred in the coolant temperature sensor. Appears if an open circuit is detected within 30 seconds. 5 - an error has been detected in the outside temperature sensor in the car. If there are no sensor readings within 20 seconds, “-C” appears); 6 — engine overheating detected; 7 — emergency oil pressure; 8 - error or malfunction of the brake system; 9 - low battery charge;
E - error detection in the data packet stored in the EEPROM.
Now all that remains is to compare all the errors that popped up on the screen with those listed above.
What do YOU think about the operation of the stove on the Lada Granta?
If you have already bought a Lada Granta and have already used the stove, we are waiting for your feedback, advice on proper operation and repair! ?
Happy travels and a warm interior to you!
We're sorry, but the requests coming from your IP address appear to be automated. For this reason, we are forced to temporarily block access to the site.
To continue, please enter the characters from the image in the input field and click "Submit".
Cookies are disabled in your browser
. We will not be able to remember you and correctly identify you in the future. To enable cookies, follow the tips on this page.
Stove control
Heating control on Grant is made simple and clear. If on the same “nine” you had to determine at random which regulator regulates what, then everything is clear.
On the switch there are inscriptions with what power to blow hot (or cold) air, next to them there are air temperature regulators, and a regulator indicating what we will heat:
- Windshield
- through the nozzles - into the cabin
- at your feet
- into the interior and onto the glass at the same time
Below the three switches is a handle that moves left and right. With its help, you can determine where the stove gets air from - from the interior or from the outside. You should take it from the interior when there is an unpleasant smell outside, or you need to warm up the car faster.
To defrost the rear windows of the Lada Granta, as on previous VAZ models, there is heating. It is turned on by a button located below the handle.
On-board computer instructions Lada Kalina
Lada Kalina is equipped with a simple on-board computer, the functions of which are quite sufficient for normal use. The on-board computer displays 9 readings on the screen - one, in the top line, is shown constantly, the rest, in the bottom line, can be selected. Next, we will consider all these indications in more detail.
The top line displays the total mileage of the vehicle in kilometers.
In the second line, display information can be selected. This process is controlled using 3 buttons located on the right steering column lever:
The “RESET” button can reset some parameters, the other buttons are responsible for scrolling through them (up/down).
The first parameter is the time in 24 hour format. To set the clock, hold down the “RESET” button until the dial starts flashing. Now, scrolling down, we set the hours, and up, we set the minutes. After setting, briefly press “RESET” to exit to the main menu.
The next parameter shows how much fuel the car consumed during the last trip. This parameter must be reset before leaving. I didn't reset it for about a month, so it read 140 liters.
The next item on the on-board computer is the average speed of the last trip. It also needs to be reset. If you do not do this, it will calculate the average speed for the entire time since the last reset. On average, this figure is 30-40 km/h.
The next parameter displays the number of kilometers that you can travel with the remaining gasoline in the current driving mode.
Next comes the instantaneous fuel consumption reading. Readings from 0 to 19.9 liters. When stopped, the computer will display dashes.
Next comes the average fuel consumption. It can also be reset.
The next indicator shows the time spent on the road. The countdown starts from the moment of the last reset.
Well, the last parameter shows the outside air temperature.