Even if the car door is closed tightly, a fairly large amount of noise still passes through it into the cabin. Therefore, many drivers decide to do their own soundproofing of car doors. This is not the most difficult work, which involves going through several successive stages. Typically, self-insulation is intimidating because of the need to dismantle a large number of elements. Sometimes you need to remove literally everything, as is the case with soundproofing the interior. But with doors everything is much simpler. Therefore, it is not surprising that a large number of car owners decide to do this kind of work themselves. Here you will need to choose high-quality materials and follow certain rules when performing the task.
Method of soundproofing car doors.
Car soundproofing tools
To carry out soundproofing work on your car you will need:
- tools for disassembling the interior*;
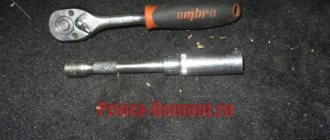
- stitching roller**;
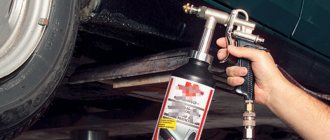
- a heat hair dryer if you need to heat certain materials;
- scissors and knife for cutting material;
- degreaser (solvent, white spirit, etc.);
- rags for wiping;
- spatula for removing old glue and factory sound insulation;
*Tools for disassembling the interior. Thanks to the material, car interior parts remain scratch-free during assembly and disassembly work, and no damage is caused to painted, leather, chrome and other surfaces.
**Stitching roller. A simple tool for rolling out the material on the surface, avoiding bubbles and un-glued areas. Don’t buy rollers with a plastic roller, they won’t roll well into noise, and besides, they definitely won’t last long.
Do-it-yourself Shumka installation
Shvi is the insulation of a car from over-sounds. This procedure is performed in several stages. After disassembly, the first step is to install vibration damping material on the metal base of the body. This eliminates the vibration of the iron, which creates overtones and interferes with the ability to adequately receive sound and feel comfortable in the cabin.
The vibration damping material is a foil with a layer of resin applied to it. Working with this material requires a stitching roller. As a rule, it is purchased or made independently.
A do-it-yourself stitching roller will help you correctly make shvi in a car.
How to make a car noise correctly
The algorithm for performing door inspection is given below:
the door is disassembled and the door card is removed (before starting this work, it is recommended to find out how to do this);
Gasoline solvent Galosh cleans surfaces intended for gluing well
The first layer of insulation (Shumoff M2, M3 or other material) is glued to the inner cavity of the door.
- then the first layer of vibration isolator is rolled in with a roller or other available tool;
- at the next stage, the glued vibrating area (“Galosh”) is cleaned;
- In the same way as laying a layer of vibration insulation, a layer of noise insulation (Comfort 6 or other) is applied.
Sound insulation Comfort 6 should be installed as a second layer
However, the noise insulation layer does not need to be rolled with a roller compared to vibration insulation. The material is only pressed by hand.
Having finished with the inner cavity of the door, you must remember to replace the removed mechanisms and elements (door lock, window regulators, etc.).
Sound insulation of the internal cavity of the door with 2 layers of material
- a large sheet of vibration-proofing material is used to cover the door drainage holes (before this, do not forget to treat the metal surface with solvent gasoline);
- rolling is carried out with a roller.
The final stage of processing begins. During it:
- the door trim is strengthened, the most creaking areas are treated with the remains of vibration-proofing material;
- pieces of vibration isolator are rolled with a roller;
- a layer of noise-absorbing material (Germeton 7 or another) is glued entirely to the skin;
- the door card (trimming) is put in place.
Sound insulation of door trim with Germeton or similar material
Installing the sheathing will not cause any difficulties, no matter how thick the material is. The fact is that when compressed, the thickness of high-quality material will not exceed 1 mm.
At the final stage, it is definitely recommended to check the functionality of the window regulator, lock and other mechanisms. The operation of the acoustic speakers is also checked (whether the wires have come off during the installation of materials).
Video: noise and vibration insulation of car doors
https://youtube.com/watch?v=kg0LrwuiHsw
As you can see, there is nothing complicated in the process of performing the ShVI. The procedure can be easily done with your own hands, and if you follow the instructions, you can do everything without errors or hassle.
Partial and complete sound insulation of a car, reviews and cost of the operation
Open Day, or What to do if the locks on your car are frozen
Basic provisions
- Materials are glued exclusively to dry and grease-free surfaces;
- Be sure to carefully roll the vibration insulation over the entire surface;
- Choose the thickness of the material so that the plastic elements of the interior fit normally into their mounting locations;
- Be prepared for the fact that several pistons may break during operation, so you can stock up on them in advance or buy additional ones during the process;
- Carefully monitor the fastening of parts and the location of electrical wiring plugs; it would be a good idea to take photographs so as not to get overwhelmed during assembly;
- Work must be carried out in a warm room (+20 degrees).
Sealing drain holes
A standard anti-corrosion layer is applied at the bottom of the door, which should not be sealed:
- Firstly, it is extremely inconvenient to do this, since two metal sheets meet there and the surface is not very smooth.
- Secondly, there are holes for removing moisture and condensation. High humidity provokes internal corrosion processes. In addition, dust and debris may accumulate below. So the water drainage should work.
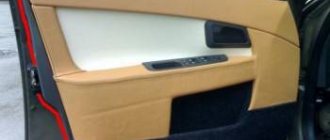
Soundproofing doors
Doors need to make noise. This is the foundation for building an acoustic system, you won’t even recognize the sound of the stock after gluing the doors, the external noise while driving will also noticeably decrease, and the sound of them closing will become much more pleasant. First of all, I want to note that door treatment will have the greatest effect relative to costs, both financial and physical. You are unlikely to feel such a bright effect from treating other surfaces!
Door disassembly
On the Internet you will find a detailed manual for almost any model, so there shouldn’t be any problems here.
Be sure to use special tools to avoid damaging the plastic and paint. If you don’t have access to them, you can use a screwdriver wrapped in electrical tape. The main thing is not to scatter the bolts and caps and remember well which one comes from where, and also pay attention to the location of the wiring plugs. When assembling, you can spend a lot of time remembering where this or that chip is inserted, or you can completely forget to connect something.
Preparing doors for soundproofing
After disassembly, remove all factory insulation and remove any remaining adhesive (any solvent will help with this). When the insides are quite dirty, it makes sense to wash the metal of the door, and after drying, thoroughly degrease both inside and outside. Do not neglect this rule so that the materials are held securely.
If the internal space is covered by a solid shield, it will have to be drilled out to remove it (use a drill the diameter of the rivet rods). In principle, this is even more convenient for rolling, since it is not always easy to get into the technological holes with your hand, and even forcefully roll the vibration with a roller.
Door vibration isolation
Advice: initially apply a frame grille to the metal made from a material of increased rigidity, one that requires heating for installation (For example, “ProfF” from Shumoff).
Then stick and roll up the inner surface of the outer wall with vibration insulation as much as possible over the entire area where you can reach. Usually materials with a thickness of 2-3 mm are used. (Examples: Shumoff series M or Light, Stp Bimast Bomb or Aero.) With thicker ones, the effect will be better, but at the same time the load on the hinges increases and the complexity of installation increases.
The next stage is gluing the outside of the inner wall. There are several options here:
- standard - everything is rolled up under the material used and the installation openings are sealed with it;
- reinforced - installation openings are sealed with a material that becomes sticky and soft only when heated, and at standard temperatures has increased rigidity;
- professional - the holes are riveted with aluminum or linings made of fiberglass, and then vibration insulation is applied on top.
When gluing, leave space for wiring. You can cut the material and glue it under it, or you can partially remove the wires, completely roll up the door (leaving holes for fastenings) and install the wiring back. Also, do not forget to leave holes for the pistons, screws and guides, otherwise the skin will not be installed later. Additionally, watch the edges of the insulated area so that the material does not extend beyond the border covered by the sheathing. Be sure to pay attention to the moving parts; often, due to inexperience, the guides of the mechanical opening/closing buttons are sealed.
Additionally, you can partially glue the casing from the inside, but do not overdo it.
If you make noise on the doors to improve the quality of the music, be sure to install wooden spacers between the speaker and the door iron (pictured above). Select the height of the spacer based on the distance to the casing. In order for it to sit in place during assembly.
Soundproofing doors
Sound absorbers, as a rule, are glued to the inside of the skin.
But it happens that the shape of the cladding is very complex or has a fleecy structure. In this case, it is better to stick the material on the wall of the door itself on top of the vibration insulation. It is more effective to use material with a pyramidal structure (Example: Bitoplast, Germeton).
Do not use splen and similar sound insulators in doors; most of them simply come off at low temperatures. I have had to deal with this more than once.
If you have had problems with crickets and squeaks in the card, then you can glue the joints with anti-creak.
Door assembly
Don't forget to connect all the connectors and install all the mechanisms in their places. Be careful not to use too much force. With proper gluing, the skin should fit normally. Before fully assembling and pulling fasteners, check all controls (lift, lock, mirror controls, speakers, etc.)
If everything is done correctly, now you will hear more bass, the music will become more collected and pleasant, and the external noise when moving will also decrease.
Sequence of procedure
Noise reduction does not have clear, unambiguous instructions. Each car model has its own nuances. However, the sequence of actions is common to everyone.
Dismantling
Before gluing sound insulation to car doors, they need to be dismantled. Then remove the casing and remove the moisture-proof film. Clean all surfaces and degrease using a suitable product.
Vibration isolation
On the inside of the structure, a vibration-proofing layer is glued between the stiffeners. The material should not be allowed to overlap the ribs. This will create unnecessary air pockets and reduce the effect. Therefore, you should carefully mark and cut the material. After gluing, it is necessary to compact it; for this, a stitching roller is used. It is important to leave the drainage holes at the bottom of the structure open.
When finishing a panel with technological holes, you should follow the traces of the removed moisture-proof film. During installation, you can immediately cut holes for fasteners, otherwise it will be more difficult to find them later.
Noise insulation
Let's look at how to properly glue sound insulation to a car door:
- remove standard sound insulation;
- degrease the surface;
- measure, cut out the required piece of material;
- glue the layer, carefully repeating all the bends of the skin;
- along the way, cut holes for the speaker, clips, set of wires, handle;
- Pass a strip of anti-squeak material along the edge of the insulate layer.
After this, the structure is put back. For the other doors the scheme is exactly the same.
Trunk noise insulation
Thanks to proper sound insulation of the trunk:
- the level of external noise will decrease, especially in hatchbacks and station wagons;
- the sound level of your subwoofer and the sound system as a whole will improve qualitatively (sound sounds will no longer be lost in the vibrations of the metal of the luggage compartment);
- reduce heat losses
For vibration isolation, a material of 2-3 mm is usually used. (Examples: Shumoff M series or Light, Stp Bimast Bomb or Aero). To enhance the effect of resonating surfaces of a large area, thicker material is glued, or a reinforcing mesh is made, as is the case with doors.
Sound insulation for the trunk floor is selected from materials with a smooth structure (Example: Shumoff series P or isotone from Stp).
For the walls and trim of the luggage compartment lid, it would be more advisable to use a Shumka with an open structure (Example: Bitoplast, Germeton).
There are usually a lot of uneven surfaces in the trunk, so accuracy and patience will be useful to achieve a good result.
The best soundproofing materials
If you really want to improve sound insulation, then we do not recommend saving on materials. If you have a small budget, it is better to “stretch out” the process over time and paste over parts of the body one by one: first the hood, two months later the doors, and even later the roof and floor. Well, or in another order.
Below we consider the most popular insulating materials.
Vibroplast Silver
This is an elastic material used for noise and vibration insulation. It looks like aluminum foil with a self-adhesive backing. Among the advantages, it is worth noting ease of installation, anti-corrosion properties and water resistance. In some cases, “silver” can act as a sealant. Does not require heating during installation. The weight of the material is 3 kilograms per square meter, and the thickness is 2 millimeters.
Vibroplast Gold
This is the same “silver”, only thicker - 2.3 mm, heavier - 4 kilograms per square meter and, accordingly, has higher insulating properties.
BiMast Bomb
This is the material with the highest efficiency in vibration isolation. It is a multi-layer, waterproof construction. Perfect for audio preparation of speakers.
During installation, it needs to be heated to 40-50 degrees Celsius, so you will need a hair dryer.
The material is quite heavy: 6 kg/m2 with a thickness of 4.2 mm, but its insulating properties are at the highest level.
Splen 3004
This material has high sound and heat insulation properties. It is waterproof and can withstand extreme temperatures - from -40 to +70 Celsius. This is if we talk about operation. But installing splen at temperatures below +10 degrees is prohibited, due to poor initial adhesion.
Thickness 4 mm, weight 0.42 kg/m2. This material is also available on the market in other thicknesses - 2 and 8 mm, with the corresponding names “Splen 3002” and “Splen 3008”.
Bitoplast 5 (anti-creaking)
This polymer material has amazing noise-absorbing and heat-insulating properties. Can be used as a sealant. It perfectly eliminates rattles and squeaks in the car interior, is durable, resistant to decay and water resistant. It has an adhesive backing, which simplifies its installation.
“Anti-creak” is lightweight - only 0.4 kg per square meter, with a thickness of half a centimeter.
Accent 10
This is a flexible material that is used for noise and heat insulation. It is capable of absorbing up to 90% of sounds, which makes it very practical. Has an adhesive layer for easier installation. Withstands colossal temperature fluctuations - from -40 to +100 degrees, thanks to which it can be used on the partition of the engine compartment of a car.
The thickness of the “accent” is 1 centimeter, weight is 0.5 kg/m2.
Madeleine
This material performs sealing and decorative functions. It has an anti-adhesive gasket and an adhesive layer.
The thickness can vary between 1-1.5 mm.
Soundproofing a car roof
Installing additional sound insulation on a car roof will significantly reduce heat loss. In cold weather, the car interior will heat up faster and cool down longer, which will undoubtedly increase comfort. It will be quite difficult to detect a general reduction in external noise, but during rain you can experience a pleasant sensation. The sound of drops disappears almost completely. The quality of the bass will also improve if you have a subwoofer installed.
The procedure for soundproofing the roof itself is not complicated and rolling out the work is quite convenient.
Do not tape the stiffeners - they must be ventilated. Otherwise, condensation will accumulate inside!
Dismantling the casing can cause problems. You need to be careful and do the work with an assistant, so as not to accidentally bend or break it. And be careful with the wiring.
Examples of materials: Light or Aero for vibration, and Germeton or Bitoplast for noise.
Helpful information
Be careful when installing soundproofing. If you make mistakes, then some parts may become deformed when you put them in place. To properly soundproof a car with your own hands, dismantle the parts with the utmost care; remember that most interior design parts are made of plastic and are very easy to damage.
Do not use too much insulating material. More doesn't mean better. Laying Shumka in several layers is not only pointless, but also undesirable. After all, the total weight of the car increases.
If the noise is installed incorrectly, condensation may occur, which will cause corrosion of the body. The gluing must be of high quality; cracks and holes are not allowed in the internal cavities of the body, for example, in the doors or roof.
Soundproofing arches
The main external noise accumulates in the area of the arches and, moreover, it is a fairly vibration-loaded surface. Comprehensive sound insulation of arches will significantly reduce noise levels and improve acoustic comfort.
Sound insulation of arches from the outside
If your car has fender liners installed, you will need to remove them. Glue the outer metal of the arches with a vibration absorber (3 mm). For fender liners, you can use lighter material. Example: Shumoff M series, Stp Bimast Bomb.
It is better not to use noise suppressors outside, even if they are moisture resistant. Practice shows that this is not very effective and the best result will be achieved by proper sound insulation from the interior.
If your car does not have fender liners, then also seal the outer metal with vibration insulation. It is necessary to roll out the material very carefully to form a uniform surface. Then liquid rubber and similar materials (Noxudol 3100, Shumoff layer, etc.) are used on top; they will additionally protect against sandblasting, reduce noise from impacts of small particles and mask vibration insulation.
Sound insulation of arches from the interior
From the inside, the gluing process is standard. The first layer is vibration insulation (example: Shumoff series M, Stp Bimast Bomb), the second is noise insulation (example: Bitoplast, Germeton). It is better to stick the Shumka on the interior parts that cover the arches. But if their material does not allow the insulation to reliably stick, then mount it directly on the vibration.
It should be noted that a noticeable effect is achieved only with an integrated approach. If you use only one of the options presented, you will most likely be disappointed with the result.
General recommendations for working with materials
Vibration insulation is applied first. If it involves heat treatment, then warm it up with a hair dryer. When laying the vibra, it is not enough to simply apply it to the surface; you need to roll it well with a roller in all accessible places until the foil texture disappears. If the material is not pressed well, it will begin to peel off over time.
Please note that the vibration will only have anti-corrosion properties if there are no bubbles underneath it, otherwise moisture will begin to accumulate in these places. Therefore, use a utility knife, carefully piercing them
At the joints, it is better to glue the vibration insulation end-to-end. The vibration does not have to be applied in whole pieces.
But it is better to apply Shumka in as large pieces as possible and under no circumstances cut it into strips, this will reduce the sound insulation effect to almost zero. In addition, individual small pieces will simply fall off over time. It is best to draw a kind of pattern on the roll of Shumka according to the dimensions of the surface to which you are going to glue it. After this, cut out the template and, slowly tearing off the protective film from it, begin sequentially gluing the material. So, step by step you can fix the sound insulation as evenly as possible. In this case, there should be no bubbles either, so go over the material well with a roller. If you do glue the sound insulation in pieces, then be sure to make sure that each part fits tightly to the adjacent one, without leaving any loopholes for noise.
There are no special subtleties when working with the seal; the main thing is to ensure that the material does not stick out at the ends of the parts.
Now let’s look at where sound insulation is most often installed.
Soundproofing a car floor
The car floor is characterized by a large area. The main labor costs are disassembling the interior, removing seats, etc. Gluing the material in this case is convenient, unlike working with doors and trunk.
Since the area is relatively flat and large, it is better to use a thicker vibration for the first layer (example: Shumoff MixF, StP Aero Plus); for the most resonating places, you can use materials that require heating during installation.
The second layer is rolled out waterproof sound insulation with a closed structure (example: Shumoff Comfort 10, Germeton L; StP Accent or Isoton).
Be careful not to cover the mounting holes so that you don’t have to look for them under the thickness of the material.
It should be noted that, oddly enough, floor sound insulation often does not meet the expectations of the average owner. The effect is hardly noticeable, especially against the backdrop of a lot of work done and material costs. But as an additional plus, you will receive improved thermal insulation of the interior, if this is relevant for your region.
Which material to choose
Modern industry produces a variety of materials for noise and vibration insulation. Some car owners prefer to use cheaper industrial materials, but they usually do not withstand prolonged intense vibration. Therefore, the priority choice is specialized absorbent materials intended for use in vehicles. All of them are divided into two large groups:
- sound absorbers;
- vibration dampers.
The structure of noise absorbers (vibrotone, splen) is cellular. In this case, the cells are not located in even rows, but chaotically. Sound waves entering them dissipate and subside. Additional insulation is the aluminum coating of the materials.
Vibration dampers (vibroplast, vizomat) are represented by heavy compositions based on bitumen and foamed polymers. In this case, noise and vibration insulation of car doors is ensured due to the tight fit of the layer of polymer material to the metal and the damping of natural vibrations.
Soundproofing of the engine compartment
The best effect in reducing engine noise is achieved when sound insulation of the engine compartment is done both from the interior and from the outside.
This process is perhaps the most difficult compared to working on other parts of the body. The main difficulty is disassembling the instrument panel. Because modern cars have a lot of electrical equipment, which is located in the dashboard area. Therefore, the process of removal and reassembly will require very great care and attention. Also, you need to take into account that it is unlikely that it will be possible to soundproof the engine in one day.
On the engine compartment side, it is advisable to use thicker vibration insulation; it would not be a bad idea to use a material that requires heating. You need to cover the maximum area, including the most inaccessible places. A material with a reflective surface is suitable for sound insulation in order to prevent possible overheating.
On the interior side, the thickness of the materials is chosen so that the dashboard fits into place.
If all work is carried out correctly, the noise level from the engine in the cabin will decrease significantly (up to 50%). Vibrations will also be reduced, which can be felt on the steering wheel. In addition, if during assembly you use a material such as modelin, etc., then you can get rid of creaks and annoying “crickets” in the dashboard, if there were any.
The main disadvantage is the risk of damaging expensive equipment. It often happens that after soundproofing the instrument panel, failures in the electronics are observed.
Therefore, before deciding to carry out this work, you need to weigh everything carefully.
Advantages and disadvantages
Sound insulation has a number of advantages:
- being in the car is more comfortable, more pleasant, there is nothing distracting;
- the car can be sold at a higher price;
- you will be able to use a good speaker system without loss of sound;
- the door closes softly, without any extraneous noise.
There is no clear opinion whether it is worth doing it. Any tuning has pitfalls. The door becomes heavier, as a result the hinges sag and quickly become unusable. The driver hears worse what is happening outside. You have to focus only on the mirrors.
Before you start tuning, you should learn how to properly make noise on car doors and find out what materials should be used, otherwise independent tuning will lead to serious repairs.
Sound insulation of the hood
I won’t dwell long on the soundproofing of the hood. You can make it as insulation for the engine compartment, but for this it is better to use a car blanket or something similar.
This procedure practically does not reduce engine noise in the cabin. During the drive, a guy took some informative measurements: link to article.
I would advise soundproofing the hood if you have a diesel engine and it rumbles loudly. The hood can also be treated if it vibrates noticeably when driving and you don’t like it. Standard materials: Shumoff series M or Light, Stp Bimast Bomb or Aero for vibration isolation and closed types for Shumka: Shumoff series P or isotone from Stp.
It is better to glue the sound insulation onto the standard hood sound insulation, it will be more convenient. And thus the ventilation openings will not be sealed.
Noise penetrates the apartment: reasons
There are not many such reasons, but sometimes they are not easy to detect with a quick inspection of the doorway. The sound insulation of the door is weak in the following cases:
- The door does not fit well; there are gaps between the frame, threshold and leaf.
- The metal door is not sheathed on the outside. Metal is an excellent conductor of sounds. Moreover, a metal door can even amplify them, resonating and creating additional noise.
- The door is hollow inside. Even if it is made of MDF and chipboard, wood, but is hollow inside, the noise will easily penetrate into the room, even though the material of the door leaf itself does not conduct waves well.
- The apartment has soundproofing for the entrance doors, but the material used is ineffective. First of all, we are talking about cheap Chinese-made products with corrugated cardboard placed in the cavity between two door leaves.
If the front door is tightly built into the opening, all the cracks are closed, then you should think about choosing an effective option for protection from external noise.
Soundproofing the door frame
Another point that needs to be paid attention to is the door frame. We remove the platbands, check that the voids are completely filled, and, if necessary, fill with mineral wool or use polyurethane foam. We plaster and install platbands. The space between the bottom edge of the box and the floor must be filled with foam and plastered.
SOUNDPROOFING a metal door with your own hands. Steel door repair. Improved sound insulation.