On a Lada Vesta car, the door handle is considered a consumable item. This also applies to other VAZ cars where Euro handles are installed. The door handle of Lada Vesta cars is a weak element; they often break and peel off. The outer part of the front door is especially susceptible to this - due to frequent opening by the driver, it suffers more than others. He pulled sharply in the cold, not careful handling - the door handle does not forgive this. Sometimes it does not return to its original position and jams. If suddenly your outer or inner handle breaks, you can deal with the problem by contacting the warranty service of a Vesta dealer yourself. Repairing and replacing consumables is not a tricky matter; to do this, it is enough to know the structure of the door handle on Vesta. Read the article and we will answer your questions in detail: remove, replace, buy the original according to the article number!
Instructions: Lada Vesta door handle - repair
On a Lada Vesta car, the door handle is considered a consumable item. This also applies to other VAZ cars where Euro handles are installed. The door handle of Lada Vesta cars is a weak element; they often break and peel off. The outer part of the front door is especially susceptible to this - due to frequent opening by the driver, it suffers more than others. He pulled sharply in the cold, not careful handling - the door handle does not forgive this. Sometimes it does not return to its original position and jams. If suddenly your outer or inner handle breaks, you can deal with the problem by contacting the warranty service of a Vesta dealer yourself. Repairing and replacing consumables is not a tricky matter; to do this, it is enough to know the structure of the door handle on Vesta. Read the article and we will answer your questions in detail: remove, replace, buy the original according to the article number!
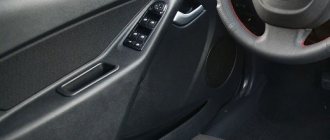
Removing the driver's door trim. Replacing the interior door release handle.
Not long ago, the first breakdown occurred - the inside handle for unlocking the driver's door broke. Initially, I decided to visit the OD under warranty. But I was confused by the phrase that if the case is not under warranty, then the repair will cost 1800 rubles. As a result, having found out that the case of a mechanical breakage of the handle is not covered by warranty (I wonder, and not mechanically, how can it break?), I decided to do it myself. Moreover, based on catalogs and online stores, I determined that the cost of the assembled handle is 364 rubles, and the cost of the handle hook is 152 rubles. The parts arrived original and are completely identical to those that were installed from the factory, both in quality and in markings and performance.
Handle price and article number
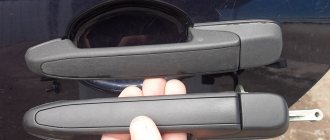
Vesta comes equipped with European-style handles as standard. If replacement is necessary, you can order the same kit in the store or from any official dealer. The price of a set of 4 painted external parts will range from 750 to 2200 rubles. To order, use article number 8450007739.
Salon handles can be sold as a set, but in two pieces, or individually. The average price of 1 part is 400-600 rubles. The article numbers of the interior unlocking elements differ according to the side on which they are installed. To purchase right handles you need to use the number 8450007743, and to buy left handles - 8450007744.
When ordering a set, pay attention to the color of the purchased parts. If interior elements are sold in silver, then the exterior ones can be matched to the color of the car, avoiding additional repainting.
Problems arising with Lada Vesta handles
There are many options for problems that may require replacing door elements on Vesta. The following door faults are recognized by car enthusiasts as the most common:
The outside door handle does not return to its original position. Many Vesta owners encounter this, and immediately after purchase. The company's management even issued an order obliging dealers to check the mechanism and replace it in case of malfunction before sale. Therefore, if you find this problem, please contact us for warranty service. The driver's euro handle is loose. This is also a common malfunction and often appears simultaneously with the first one. Euro door handles creaking. The problem is eliminated by installing a madeline on the top edge of the disassembled part. The likelihood of the above breakdowns increases if you pull the door sharply when opening it towards you. This part of the Lada Vesta car requires careful handling. If a problem occurs during the warranty period, you must contact an authorized service center. This applies to both situations when a part breaks and situations when it does not work well enough.
Removing and installing the ignition switch
If, while checking the switch with a multimeter, it turns out that it is time to change it, you need to act. To begin, perform the same steps on your Vesta as when checking:
- Stop the car, remove the negative terminal.
- Remove the steering column covers, release the lock of the immobilizer wire block, and disconnect the switch from the network.
- Place the chisel under the cap of one of the bolts securing the switch to the steering column. Tap it slowly until the bolt comes out counterclockwise.
- Tighten it using pliers.
- Before installation, insert a new key and turn it to the third position. Secure the switch housing in place and reassemble the steering column.
What to do if the handle does not open - reasons
Sometimes problems with the external elements of Vesta lead to the fact that the door completely stops opening from the outside. The reason may be one of the malfunctions that we mentioned above. In this case, you will have to change the part under warranty or yourself.
The second reason why a car door does not open or close is a malfunction of the lock itself. Even with the rod working normally, it cannot be lowered and raised smoothly, since the lock mechanism is jammed. To solve the problem, it is often enough to lubricate the rod a little and design the part properly so that the lubricant reaches its destination.
Removal and installation
The ignition switch housing is attached to the steering column with a special bolt with a break-away head. Having rested the chisel blade against the edge of one of the bolts, lightly tap the chisel with a hammer to loosen the fastening bolt. Attention! The chisel should not cut the head of the bolt, it should turn the bolt counterclockwise to loosen it. Next, remove the bolt using pliers.
We install the ignition switch in the reverse order, first inserting the key into it in position C (ON) so that the latch of the steering shaft locking mechanism is pushed into the lock body. At a certain tightening torque of a special bolt, its head should come off so that it becomes impossible to unscrew the bolt with a wrench.
If after replacing the ignition switch the engine does not start, look for other causes of malfunctions, check the ignition coils. By the way, you can refuse the ignition key in favor of the Start/Stop button.
Source
Checklist: How to disassemble the Lada Vesta handle and install a new one
You can repair the Lada Vesta door handle yourself. The process will take a few minutes. First you have to remove the part and then replace it with a new one - it's simple. The work is a little different. It all depends on the side on which the part is installed.
External handles
Typically, the outer front European door handle on the driver's side needs to be replaced. It is the one that is used more often, so its opening mechanism wears out quickly.
To replace an element you need to perform a series of sequential actions:
- The inner door trim is completely removable;
- The lock drive rod is carefully disconnected from the cylinder;
- Using a screwdriver, remove the lock cylinder cover from the outside of the door;
- The plug at the end of the door is removed;
- Using a Torx screwdriver, the screw securing the lock cylinder is turned out;
- After this, all that remains is to remove the lock cylinder;
- The Euro handle is moved back and carefully removed from the door, first the back part, and then the front;
- The gasket of the outer euro handle is removed, and a rivet is drilled under it. This allows you to remove the mechanism.
From the passenger doors, it is removed in the same way! With the exception that they do not install a lock drive rod, which means you can skip the first points. Installing the new part is done in the reverse order.
Ignition switch (lock) - removal and installation
Note: For the catalog numbers of the parts used, see here.
In the power supply circuit for most of the vehicle's electrical equipment, except for the emergency, sound and light alarms, interior lighting, side lights, brake lights, security alarms and electric door locks, voltage is supplied through the ignition switch. To increase the anti-theft qualities, the switch is combined with a lock, which is why this device is called the ignition switch.
The lock body is attached to the steering column with four special bolts with break-away heads. At a certain tightening torque, the bolt heads come off, and after that it becomes impossible to unscrew the bolts with wrenches. According to the factory technology, a special device is used to unscrew them, and if it is not available, a simple chisel is used.
The ignition switch is additionally equipped with a steering shaft locking mechanism. Once the key is removed from the lock, the spring-loaded latch is released. When you try to turn the steering wheel, the latch locks the steering shaft from turning.
For a faulty ignition switch, check the correct closure of the contacts in different key positions and the operation of the anti-theft device. To ensure that the contacts are closed correctly, use the tester in the circuit “continuity” mode: in each position of the key in the ignition switch, check the correct closure of the lock contacts using the electrical diagram.
Table - Closing of switch contacts at different positions of the ignition key
| Key position | Closed contacts |
| A (STOP) | — |
| B (ACC) | 1-6 |
| C (ON) | 1-4 |
| D (START) | 1-3 |
For reference: Connector used For connection to the ignition switch, a 6-pin connector TE 1544147-1 is used. Large pins from the NG1 6.3 series (for example TE 1544133-1). Small pins from the Sicma-2/3 1.5 series (for example FCI 211CC2S2160). Two mating parts: TE 1544148-1 with a right-hand lock latch and TE 1544149-1 with a left-hand lock latch. Large pins from the NG1 6.3 series (for example TE 1544218-1). Small pins from the Sicma-2/3 1.5 series (for example FCI 211CL2S2160).
Place the vehicle in the workplace and apply the parking brake.
Turn off the ignition and disconnect the “–” terminal from the battery (key “10”).
Remove the driver's airbag module (DIA) (see here).
Set the front wheels to a position corresponding to the straight-line movement of the vehicle.
Remove the steering column covers and the steering column switch block (see here).
Remove the immobilizer coil (see here).
Install a tool for loosening bolts with a breakaway head onto bolt 1, Figure 7-1, and unscrew the bolt securing the ignition switch (device for loosening bolts with a breakaway head, hammer).
Figure 7-1 — Removing the ignition switch (lock): 1 — bolt with a breakaway head securing the ignition switch; 2 — ignition switch; 3 - steering shaft
In the absence of a special device: Place a sharp chisel against the edge of the head of one of the bolts, and loosen the bolt with light blows of a hammer. In this case, the chisel should not cut the bolt head; it should turn the bolt slightly counterclockwise, just to loosen it. Then use pliers to completely unscrew the bolt.
Set key 2, Figure 7-2, of the ignition switch to position “A” (+ ACC)
Internal handles
To change interior door elements, you will have to spend even less time than on external ones. Let's look at the step-by-step instructions for the driver's door:
- Decorative trim is completely removable;
- Next, the screws are unscrewed to secure the part to the door;
- The handle is carefully removed from the door panel;
- The drive rod is removed from the holder;
- Disconnect all wires and remove the element;
- To install a new part, proceed in reverse order.
Before starting work, make sure that there is really a need to completely remove it from the door. Very often, troubleshooting problems in interior elements requires only removing its top cover, and further work is carried out on the inside of the part. This is the method that is used if it is necessary to eliminate the creaking of opening elements.
Examination
- Remove the negative terminal from the battery.
- Remove the steering column cover (unscrew the fastening screws from the bottom).
- Remove immobilizer No. 1 from the ignition switch (press the lock with a flat screwdriver and disconnect the block with wires No. 2).
- Disconnect the block with wires No. 4 from the ignition switch No. 5 (pull out the lock).
Using a multimeter in ohmmeter mode, we check the contact closure at various positions of the ignition key in accordance with the table:
| Key position | Closed contacts |
| A (STOP) | — |
| B(ACC) | 1-6 |
| C(ON) | 1-4 |
| D (START) | 1-3 |
Door handle covers
Often, in order to hide defects that have appeared during operation, car enthusiasts install chrome plates on the door opening elements of Lada Vesta. Such a decorative element is inexpensive, but gives the car a fresh look. The linings are sold as a set, and you can find them for external and internal ones.
Installing the element does not require special knowledge or skills. The cover is attached to the factory part using double-sided tape, sealant or other adhesive material. Be careful during installation to avoid problems in the future. If the chrome door handle trim is not installed tightly enough, dirt and moisture can get into the resulting cracks, which means there is a risk of rust.
Before purchasing items, study the offers of different stores. Some companies seriously inflate the price and instead of several hundred rubles, you have to pay a couple of thousand for them. However, the quality does not change. You can only pay a large amount for linings made of stainless steel, since their service life is long and their wear resistance is superior to chrome ones.
Source
If the external door handle on a Lada Vesta does not return back
Some Lada Vesta owners are faced with a problem when the outer door handle does not return to its place. If you contact your dealer about this malfunction, the door opening mechanism can be replaced (warranty repairs performed). In response to this situation, AVTOVAZ issued Order No. 28-18 dated March 13, 2018 “to replace the left door opening mechanism module.” The order was sent by one of the Lada.online readers.
If there are cars from the list (Appendix 1) on the territory of the dealership center (unsold, check-in for maintenance and repair), it is necessary to inspect the door opening mechanism module of the left front and left rear. If there is a number “2” on the counterweight (Appendix 2), the module must be replaced. The module with the number “1” on the counterweight must be replaced only if the handle is clearly stuck. When replacing the module, the lock switch lever 8450030224 may break. Module 8450039482 and lock switch lever 8450030224 must be ordered from LADA IMAGE JSC.
Have you ever encountered a situation where the outer door handle on a Lada Vesta broke and does not return? Was the mechanism replaced under warranty?
Source
Typical problems with Lada Vesta door handles
- Most often, door handles on Vesta jam or do not return to their original position. This is especially true for the driver's door, which is used more intensively. This problem sometimes occurs immediately after purchasing a new car. The manufacturer knows about this defect and replaces these parts in the warranty service without problems, so if such a malfunction occurs, you can simply contact the service center, where they will fix it for you. But you can cope with this problem yourself.
- In addition to jamming, many drivers are worried about such a nuisance as the constant squeaking of internal door handles. This intrusive sound can be eliminated by installing additional insulating material or sealant from the inside, which will require dismantling and disassembling the internal element.
- Another common problem is damage to the paintwork near the outer trim. To prevent them from scratching the paint, it is necessary to fix the gasket between the moving element and the body, which can sometimes not be held securely. In order to do this, you need to glue the gasket under the rubbing parts using double-sided tape.
Checking the Lada Vesta ignition switch with a multimeter
In a car, most of the voltage in the power circuit comes after the key is turned in the lock. The functionality of the switch depends on the correct closure of the contacts at each key position. You can check its performance using a multimeter in ohmmeter mode. After preparing the device, do the following:
- Remove the negative voltage from the battery and stop the car;
- Remove the upper and lower steering column casings, first unscrewing the fastening screws with a Phillips screwdriver;
- Press the lock of the immobilizer wire block;
- Disconnect the device from the car network.
The multimeter should show 0 in the Stop (A) position, 1-6 in the ACC (B) position, 1-4 in the ON (C) position and 1-3 in the Start (D) position.
If the range and readings agree and the switch is working properly, then the problem may be due to another reason.
Removing the door handle on a Lada Vesta car
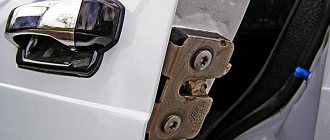
- Looking at the handle from the outside, it seems that it does not have any fastening elements and it is completely unclear how to dismantle it. In fact, access to the fasteners is located under a rubber plug at the end of the door.
- There is a bolt inside under the plug. It needs to be unscrewed using a T15 key. There is no need to completely unscrew the screw; you can simply loosen it a few turns - this will be enough.
- Next, you need to carefully pull out the plastic stopper.
It should come out easily, without any extra effort. The plastic here is quite fragile, so you need to act carefully. If the element does not slide out, you can spray a little liquid lubricant, such as VD-40, into the gap and try again.
- After the corner is removed, the door handle must be moved slightly back and towards you. First the back part is released, and then the front. You also need to act carefully, with smooth movements.
The process described concerns the passenger handle. If you need to remove the driver's, then first you need to disconnect it from the lock that is located in it. To do this, the door cards are removed to open access to the door rods, and the fastenings are carefully disconnected.
Checking and replacing the ignition switch on Lada Vesta and XRAY
In the power supply circuit of most of the vehicle's electrical equipment, voltage is supplied through the ignition switch. If it malfunctions, some of the equipment will not work and the engine will not start. We'll figure out how to check the ignition switch and replace it yourself if necessary.
We also recommend that you read
CHECK Procedure:
- Remove the negative terminal from the battery.
- Remove the steering column cover (unscrew the fastening screws from the bottom).
- Remove immobilizer No. 1 from the ignition switch (press the lock with a flat screwdriver and disconnect the block with wires No. 2).
- Disconnect the block with wires No. 4 from the ignition switch No. 5 (pull out the lock).
Using a multimeter in ohmmeter mode, we check the contact closure at various positions of the ignition key in accordance with the table:
Other articles about Xray cars
The ignition switch housing is attached to the steering column with a special bolt with a break-away head. Having rested the chisel blade against the edge of one of the bolts, lightly tap the chisel with a hammer to loosen the fastening bolt. Attention! The chisel should not cut the head of the bolt, it should turn the bolt counterclockwise to loosen it. Next, remove the bolt using pliers.
We install the ignition switch in the reverse order, first inserting the key into it in position C (ON) so that the latch of the steering shaft locking mechanism is pushed into the lock body. At a certain tightening torque of a special bolt, its head should come off so that it becomes impossible to unscrew the bolt with a wrench.
Source
How to remove interior door handles on Lada Vesta?
Internal handles often bother drivers with squeaking and unpleasant squeaking noises while driving. This problem can be solved by using a gasket inside the Madeleine part or automotive sealant. You must act in the following order:
- Remove the plastic cover. To do this, you need to carefully pry it over the edge with a flat object and remove it. It is better to use special plastic spatulas that will not damage the decorative coating of the door. This interior element does not have any fasteners in the form of screws or bolts, so it is very easy to remove. The main thing is to act carefully so that the thin plastic does not break.
- After the handle is dismantled, you need to carefully glue the joints with insulating material. To do this, you can use madeline, a special anti-creaking noise-insulating tape that is sold in car dealerships, or fabric electrical tape. It is necessary to glue along the entire perimeter, excluding the clamps, so that the part can hold on. Some drivers use sealant instead of insulating material, but after this treatment it will be difficult to dismantle it again if necessary, and it may need to be completely replaced.
- Reinstall the handle in the reverse order. After gluing it will snap tighter, and you need to tighten it well and press it. We check that everything is done correctly by closing and opening the doors several times.
How much will it cost to replace Lada Vesta door handles?
Many Vesta car owners prefer to completely replace them instead of repairing them. Sets of new parts are sold in car dealerships everywhere, and purchasing the required color is not a problem. You can order the necessary spare parts on the Internet, for which you need to know their article number.
Marking and cost of Lada Vesta door handles:
| Number | Installation location | Price |
| 8450007739 | Front outer (right) | from 940 rub. up to 1451 rub. |
| 8450007873 | Front outer (left) | from 940 rub. up to 1451 rub. |
| 8450007872 | Rear outer (left) | from 800 rub. |
| 8450007739 | Rear outer (right) | from 800 rub. |
The cost of a set for four doors is approximately 2500-2700 thousand rubles, depending on their color and point of sale. Craftsmen charge an average of 500 rubles for installing door handles, but knowing how to remove a Lada Vesta handle, you can make the replacement yourself.
Lada Vesta is rightfully considered the best Russian car...
...and is increasingly popular with customers. But this modern model is not immune to problems with door handles, which are typical for all cars produced by the AvtoVAZ concern. Let's look at the main malfunctions of Vesta's door mechanisms and learn how to fix them ourselves.
conclusions
Making minor modifications to the door handles of a Lada Vesta car is not particularly difficult. This does not require any special skills or complex tools, so anyone can cope with the task. The driver just needs to remember that removing external and internal elements requires care and caution, since the plastic on Vesta is quite fragile.
Complete replacement of handles if necessary is also not a problem. In online stores or on shelves, you can purchase sets of a suitable color, or cover parts that have lost their appearance with plastic covers.
Source
