Replacing the door trim on a VAZ 2101-VAZ 2107
Welcome! Car door trim - it undoubtedly gives a different look to the car when you sit in it inside the cabin, because if you remove it, you can see the inside of the door, as well as the wires (If the door has electric windows), and this is often very unsightly, but Who knows, there are people who don’t pursue beauty and thereby create a sports car (In this case, everything is removed from the interior and only the steering wheel and one driver’s seat remain), but still not everyone needs this and therefore the trim will be in the car for a very long time (You could even say all your life) take its place in the cabin, while covering all the parts on which it is installed.
Note! In order to change the trim, you need tools, namely: You will need a screwdriver, in addition to it, we also recommend that you immediately buy holders at the auto store that hold the trim on the car door (There are seven holders in total that attach only one trim to the door, respectively, if you decided to change the entire door trim, you will need to stock up on 28 holders, they break very often because they are disposable and the broken ones are replaced with new ones, which cost a penny in the store)
Summary:
When should you replace your door trim? Everyone decides for himself when he needs it, someone changes it if the casing is torn, and someone changes it because it is very dirty (in paint, for example), but if it is very dirty, then do not rush go to a car store and buy a new one, try to wash off traces of dirt from the old one, if necessary, use special plastic cleaners or car interior leather cleaner, they clean well, in addition, they refresh the color of the part and give them a new look, and if you use them regularly, they will protect parts from their premature aging and the appearance of small cracks on them.
Door lock VAZ 2107
The VAZ 2107 door lock is a part that rarely fails. However, over time, this mechanism may need to be repaired, replaced, or adjusted.
Working principle of the door lock
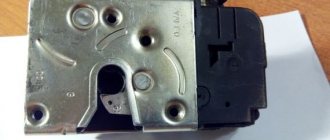
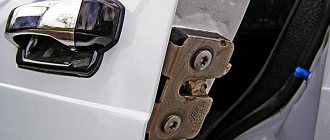
The “seven” door lock consists of a locking mechanism, a key cylinder, external and internal handles that allow you to unlock the door from the outside and from the passenger compartment, as well as buttons for locking the car from the inside. The lock is controlled by transmitting force using rods. The main element of the lock is a rotor with a slot. When the door is locked, it goes behind the opening bracket. When the door closes, the bracket presses on the latch, as a result of which the ratchet is activated and the rotor rotates. When part of the bracket enters the rotor slot, thanks to the springs it returns to its original position, thereby pressing the door.
When the door needs to be opened, the latch flag is pressed, which causes the rotor to rotate through the ratchet and the bracket to release. When you lock the door using a key or a button from the interior, the latch is blocked. As a result, it becomes impossible to open the door. Since there is a rigid connection between the latch and the lock control handles through rods, they also do not work.
Door lock adjustment
If the car doors do not close well and there is a gap between the body elements, then first adjust the door, and then the lock itself. To carry out the procedure you will need the following list of tools:
- 10mm wrench or socket with crank;
- marker;
- lubricant
The adjustment process is performed as follows:
- Using a marker, outline the outline of the retainer on the body pillar.
- When closing the door with great force, unscrew the fastener and move it outward.
- If the door closes normally, but a gap remains, move the lock inside the body.
- When the lock is activated, the door should not move vertically. If it rises, we lower the latch, otherwise we perform the opposite actions.
Video: adjusting door locks on a “classic”
Sometimes situations arise when the locking mechanism does not work well when unlocking from the passenger compartment, despite the fact that the door opens without difficulty from the outside. To resolve this problem, you will need to adjust the position of the inside door release handle. To do this, loosen the screws securing the handle and move it to a position (selected experimentally) in which the door will close without problems. Afterwards all that remains is to tighten the fasteners.
The door does not lock
With the locking element of the doors on a VAZ 2107, such a nuisance can happen when the door does not lock. There are not many reasons for this and they usually lie in the breakdown of one of the elements of the lock (for example, a spring). In addition, water may enter and freeze inside the mechanism during the winter. If a frozen lock can be thawed, then the failed part will have to be replaced or a new locking mechanism installed.
How to remove a door lock
To dismantle the door lock on the “seven”, use the same tools as when disassembling the door. The process itself consists of the following steps:
- Remove the door trim.
- Use a flat-head screwdriver to disconnect the lock power button rod.
Door lock repair
If there is a need to repair a “seven” door lock, the procedure usually boils down to lubricating the rubbing parts, adjusting the locking mechanism, and possibly replacing a broken spring or lock cylinder.
Replacing the larva
If difficulties arise with locking/unlocking the door using a key on a Zhiguli of the seventh model, you have to replace the lock cylinder. To do this, you will need to remove the decorative door trim, and then follow the step-by-step steps:
- Using a flat screwdriver, pry up the lock rod and remove it.
How to replace the door trim on a VAZ 2101-VAZ 2107?
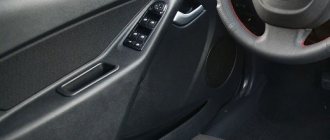
Removal: 1) To remove the trim, at the beginning of the operation you will need to remove all the plugs that cover the screws securing the door handle to the car with a screwdriver, and after the plugs are removed, pick up a screwdriver and use it to remove all the screws that attach the handle and then remove it from the car door.
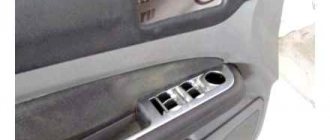
2) After the handle has been removed, proceed to removing the handle that raises and lowers the window at the car door. To do this, use a screwdriver as shown in photo number 1 to press the socket away from the lining, then slide the lining along the handle for lowering and raising the glass and remove it. (see photo 2), then remove the handle itself from the slots on which it is put on (see photo 3) and finally remove the socket itself, which is located under the handle and which you pressed out a little earlier (see photo 4).
3) Next, use a screwdriver to pry up the door handle trim in the place indicated by the arrow and then remove it by threading it along the handle itself.
Note! This facing is held on by only two tendrils (Indicated by arrows in the photo below) and is very easy to remove, but just do not overdo it with force and do not break the tendrils of its fastening!
4) And at the end of the operation, pry up the trim that is attached to the door in seven different places using a screwdriver, as you can see in the small photo below, it is already indicated in which places the holders are located that secure the trim, in the same places and pry it off using a screwdriver a When all the holders are removed or broken, remove the trim and then replace all the broken holders with new ones.
Note! If your car also has a trim that is located under the glass and you don’t know how to remove it, then study the article that describes its removal in detail, and it’s called: “Replacing the door trim on a car”!
Installation: New door trim, installed in its place in the reverse order of removal.
Additional video: If you want to study in more detail the process of removing the trim from a car door, then watch the video that is located just below, but in it the trim itself is attached to the door in a slightly different way, that is, using screws that you will not have , well, if they do, then it was done homemade because the trim has never been attached to the door in this way.
Dismantling the front doors of the VAZ 2105 Zhiguli
- Repair manuals
- Repair manual for VAZ 2105 (Zhiguli) 1980-1992.
- Disassembling the front doors
View of the inside of the front door
| 1 – window plug; 2 – window lifter handle; 3 – internal handle of the lock drive; 4 – armrest handle; 5 – decorative plug; 6 – door lock button. The arrows show the location of the door trim holders. |
Front sliding window drive
| 1 – window lifter handle; 2 – facing of the window lifter handle; 3 – socket; 4 – window lift mechanism; 5 – upper rollers; 6 – screws; 7 – pressure plates; | 8 – sliding glass brackets; 9 – sliding glass; 10 – cable; 11 – lower roller; 12 – bolt; 13 – tension roller |
Window lift mechanism
| 1 – window lifter handle; 2 – handle lining; 3 – socket; 4 – housing cover; 5 – drive roller; 6 – spring brake leash; | 7 – brake spring; 8 – drive roller support; 9 – drive gear; 10 – window regulator housing; 11 – drum with driven gear |
Front left door lock
| 1 – lever of the internal lock drive; 2 – lock lever spring; 3 – external drive lever; 4 – lock switch rod; 5 – rod of the lock lock button; 6 – bracket; 7 – lock button; 8 – external drive rod; 9 – external handle of the lock; 10 – lock switch; 11 – cracker spring; | 12 – retainer block; 13 – lock rotor; 14 – external drive rod; 15 – lock retainer body; 16 – ratchet; 17 – spring of the central roller; 18 – lock release roller; 19 – central roller; 20 – locking lever; 21 – rod of the internal drive of the lock |
When replacing parts and door mechanisms, it must be disassembled.
| EXECUTION ORDER |
↓ Comments ↓1. Vehicle operation 1.0 Vehicle operation 1.1. Starting the engine 1.2 Controlling the gearbox 1.3 Driving the vehicle 1.4 Braking and parking 1.5 Operating a new vehicle 1.6 Adjusting the ignition timing 1.7 Precautions when operating the vehicle 1.8 Caring for the body 1.9 Storing the vehicle 2. Car maintenance 2.0 Vehicle maintenance 2.1 Maintenance operations 3. General information 3.0 General data 3.1 Technical characteristics of vehicles 3.2. Controls 3.3. Control of interior ventilation and heating 3.4 Tightening torques for threaded connections 3.5 Tools for repair and maintenance 3.6 Used fuels, lubricants and operating fluids 3.7 Basic data for adjustments and monitoring 4. Engine 4.0 Engine 4.1 Possible malfunctions, their causes and methods of elimination 4.2 Removing and installing the engine 4.3 Disassembling the engine 4.4 Assembling the engine 4.5 Bench tests of the engine 4.6 Checking the engine on the car 4.7. Cylinder block 4.8. Pistons and connecting rods 4.9. Crankshaft and flywheel 4.10. Cylinder head and valve mechanism 4.11. Camshaft and its drive 4.12. Cooling system 4.13. Lubrication system 4.14. Power system 4.15. Carburetor 2105-1107010 4.16. Carburetor 21051-1107010 5. Transmission 5.0 Transmission 5.1. Clutch 5.2. Gearbox 5.3. Cardan transmission 5.4. Rear axle 6. Chassis 6.0 Chassis 6.1. Front suspension 6.2. Rear suspension 6.3. Shock absorbers 7. Steering 7.0 Steering 7.1 Possible malfunctions, their causes and methods of elimination 7.2. Inspection, check and adjustment of the steering 7.3. Steering gear 7.4 Steering gear rods and ball joints 7.5 Bracket for pendulum arm 8. Brakes 8.0 Brakes 8.1 Possible malfunctions, their causes and methods of elimination 8.2. Checking and adjusting the brakes 8.3 Clutch and brake pedal bracket 8.4 Vacuum booster 8.5. Main cylinder 8.6. Front brakes 8.7. Rear brakes 8.8. Rear brake pressure regulator 8.9. Parking brake 9. Electrical equipment 9.0 Electrical equipment 9.1 Possible malfunctions, their causes and methods of elimination 9.2 Circuits protected by fuses 9.3. Battery 9.4. Generator 9.5. Starter 9.6. Ignition system 9.7. Lighting and light signaling 9.8. Sound signals 9.9. Windshield cleaner 9.11. Heater fan electric motor 9.12. Control devices 9.13. Carburetor pneumatic valve control system 10. Body 10.0 Body 10.1 Possible malfunctions, their causes and methods of elimination 10.2. Doors 10.3. Hood, trunk lid, bumpers 10.4. Body glazing, windshield and headlight glass washers 10.5 Instrument panel 10.6. Seats 10.7. Heater 10.8. Body frame repair 10.9. Paint coatings 10.10. Body anti-corrosion protection 11. Car modifications 11.0 Vehicle modifications 11.1. Features of repair of VAZ-21051 and VAZ-21053 cars 11.2. Features of repair of VAZ-2104 and VAZ-21043 cars 11.3 VAZ-21044 cars with a fuel injection system 11.4. Central fuel injection system design 12. Electrical circuits 12.0 Electrical diagrams 12.1 Interactive electrical diagram of the VAZ-2105 car 12.2 Electrical diagram of the VAZ-2104 car 12.3 Electrical connection diagram of the injection system 12.4 Connection diagram of the instrument cluster 12.5 Connection diagram of the brake system warning lamps 12.6 Connection diagram of the headlight cleaners and washers 12.7 Connection diagram of the heater fan motor 12.8 Diagram inclusion windshield cleaner and washer 12.9 Diagram for switching on direction indicators and hazard warning lights |
How to replace a door trim
The factory facing of Zhiguli is made of leatherette or leatherette. The first stage of work is the selection of material, only then begins the study of the instructions in order to understand how to disassemble the doors of a VAZ 2107 and replace the facing fabric. The canvas is measured, a list of necessary tools for dismantling, adhesive, and fasteners is compiled. Spare clips are also purchased, because when removing the old coating, the plastic elements break.
Materials for upholstery
When choosing fabric, you need to take into account quality, wear resistance, price, and color. The fibrous structure should stretch, this will allow the fabric to be securely fixed to the panel. Possible varieties:
- Genuine Leather. It looks beautiful, but is expensive. Creates sound insulation and withstands humid and harsh climates. The ease of care is dictated by the fact that the fabric does not absorb dirt and does not deteriorate when using aggressive detergents.
- Eco-leather or substitute. It has high wear resistance and is durable. The characteristics are identical to the natural base, only the substitute does not tolerate the effects of chemical detergents. With improper care, microcracks appear, which are then filled with dirt.
- Alcantra. Consists of thin and viscous fibers. The material has a high rate of moisture rejection, so it does not shrink. After the Alcantura is stretched on the panel, it will take the shape of the structure and will not sag over time. There is only one minus - the low level of sound insulation.
- Vinyl and leatherette. They provide strength and durability, and they are also very convenient for reupholstering. The material transmits sound well, so you will need to install an additional layer of insulation.
- Carpet. This is an artificial automotive fabric. This lining will last for many years. It withstands temperature changes, repels dirt, cleans quickly, and blocks the growth of fungus.
Some car enthusiasts are experimenting and upholstering door panels with velvet and even faux fur. Such fabric will partially create sound insulation, but will cause difficulties during cleaning.
Features of dismantling the casing
Equipment with fasteners will help you remove and then fix the cladding. Required:
If replacement of the skin was required because the inner panel was deformed after an accident or cracked, then you can replace it with a piece of plywood. The main thing is to cut out an identical layer. Instructions on how to quickly remove the door trim on a VAZ 2106:
- The handle is removed. To do this, two bolts are unscrewed: lower and upper.
- The bracket that holds the window regulator is pulled out.
- The speakers are removed (if any).
- A knife is used to remove the clips holding the cladding panel.
- The trim is removed from the door card.
It’s easy to install a new element using the same algorithm, just in a different order.
How to remove the front door trim on a VAZ 2106
Problems with the mechanism and locks of the front doors force this procedure to be performed quite often. You can remove the casing either at a service station or with your own hands, especially since the latter will require a minimum of tools and five minutes of free time.
Tools needed to remove the trim:
- flat screwdriver (2 pcs.);
- crosshead screwdriver.
In addition, you will obviously need a new set of trims (or you can, after some decoration, use the old one).
The work of removing the front door trim on a VAZ 2106 takes place in several stages:
- Using a flat-head screwdriver, we pry off the plastic insert, which is a decorative plug for the internal handle with which the door opens. It is easily removable - and it must be removed so as not to be damaged during other work.
- The next step is to remove the clamp, and then the window lifter handle, the door handle fastening (three bolts) and the handle itself.
- Next, using a thin screwdriver, we pry up the door trim (from any angle, it doesn’t matter), and carefully going around the entire perimeter and overcoming the resistance of the latches that hold it, remove it from the door.
- Removing the door trim on a VAZ 2106 is very simple and does not require significant effort from the car owner.
Installation of the upholstery is carried out in the same way, only in reverse order.
Soundproofing doors
It is necessary to disassemble the door not only because of damage to the cladding; sometimes this is done to increase sound insulation. The driver's door is soundproofed first. This procedure will reduce the level of extraneous noise, ensure silent closing of the structure, and improve the sound of music. The silence is broken not only by the bustle of the street, but also by the operation of the propulsion system, transmission, and suspension elements.
Before installation, raw materials for insulation and adhesive are selected. You need to purchase material based on bitumen or mastic using aluminum foil. Good glue has sealing properties, which help protect metal body parts from corrosion. Types of building materials for automotive insulation:
- Bimasts are multilayer raw materials. Their thickness is from 2 to 4 mm. External covering: fabric or paper.
- Vibroplast is flexible and elastic, has high vibration and sound insulation rates.
- Vizomat MP is a material with the addition of foil and aluminum fibers. Absorbs vibration shocks well.
Any material can be used for door trim. Installation of sound insulation is carried out before the door element with trim is installed in place. The selected material is attached to the panel.
The process of manufacturing and installing a door card with trim
Making a door fragment with trim is no more difficult than dismantling the old one. To do this, you will need a standard set of tools, as well as: glue, soundproofing products, and a drill with attachments. First, a piece for covering is cut out from the purchased fabric, and an old piece of material is used in the form of a pattern. If measurements are taken from a panel structure, then you need to leave an allowance of at least 1–2 cm at the edges. It is important to immediately cut holes for the handle, speakers, and fasteners. Manufacturing instructions:
- The fabric is stretched, folds are straightened, holes for fastenings are drilled.
- The fragment is cut out with an allowance of 1 cm, then fixed with glue to the plywood.
- The finished element is mounted in the door using clips.
Re-upholstery of door cards for VAZ 2107
Elements of the interior trim wear out over time and lose their attractive appearance. The door trim of the VAZ 2107 especially suffers during operation. Door cards become frayed, deformed and begin to poorly stay in place. You can simply replace them with new “stock” ones, or you can modernize the interior by installing homemade door cards based on thicker plywood. This solution improves the durability of the upholstery and the acoustic characteristics of the interior. The base can be covered with eco-leather, or you can order a professional reupholstery of the car interior.
Dismantling the door trim of a VAZ 2107
Old VAZ 2107 door cards are removed as follows:
- remove the window handle by pulling out the fixing bracket;
- Unscrew the bolts under the plugs and remove the door handle (armrest);
- remove the trim from the door opening handle;
- remove the speaker (if installed);
- remove the door card by pulling it towards you.
Removing the front door trim
In order to remove the front door trim on a VAZ 2106, we need only two screwdrivers: a flathead and a Phillips:
The procedure for dismantling the upholstery is as follows.
First, pry off the trim on the inside door handle:
Then we can easily remove it:
Now you can remove the window lift control handle, having first removed the retaining ring:
Then, using a Phillips screwdriver, unscrew the three bolts securing the door closing handle:
And take out the handle:
Carefully pry up the casing from all sides and remove it, since there are no more fasteners holding it in place:
The result of the work done is shown in the photograph below:
Making a door card for VAZ 2107
The old sheathing should be used as a template for marking out the new one. You just need to attach it to a sheet of plywood and, using a pencil, mark the outline of the door card and the holes for the handle fastenings, the door opening lever and under the window handle axis. The latter need not be done if the car has (or will be installed) electric windows. Particular attention should be paid to the correct marking of the mounting holes. If you make a mistake, the door trim will not hold well and knock when the body vibrates.
How to remove the door card on a VAZ classic 2106
After watching my video, you will see “How to remove
door
card (
trimming
) on
a VAZ
classic 2106″, how not to break the clips,...
Soundproofing door cards. Replacement of factory pistons. VAZ 2107
Noise insulation: insulating tape 3008v 1mx1.20m 4 mm -256 rubles Piston for trunk upholstery double 2 rubles Installation…
After this, you can cut out the plywood base of the sheathing along the marked contour and drill the necessary holes. The edges of the casing and holes must be sanded.
The foam backing is cut along the finished contour of the skin, taking into account an allowance of approximately 10 mm. It is better to use a two-layer backing consisting of foam rubber and a fabric lining. This material is easier to glue to the plywood base of the upholstery. If you glue foam rubber directly, it, due to its porous structure, intensively absorbs the glue. As a result, it is not possible to achieve a uniform layer and high-quality sizing.
You can sheathe the base with a single piece of leatherette or vinyl leather, cutting it according to the size of the door card. The pattern must be made so that there is an allowance of 50 mm. This ensures that “bald” areas around the edges are avoided in case of an error. This is especially true for vinyl leather, which is subject to deformation and heating with a hairdryer during stretching.
To give a more original look to the covering, it can be made from several multi-colored pieces of leatherette, sewing them together. It is best to sew with a “French seam”, which is distinguished by good strength and attractive appearance.
When everything is ready, you can start gluing the foam backing onto the plywood. MAH glue, which is used in professional tuning studios, is well suited for this.
After gluing the backing, you need to cut it to the size of the plywood base and cut holes in it for attaching the door handle, speakers and the axis of the window handle.
Leatherette upholstery is stretched as follows:
- Place the leatherette blank on a flat surface face down;
- cover the upholstery with the door card blank, laying it down with foam rubber;
- Fix the trim with a stapler on one edge of the trim, stretching the leatherette so that folds do not form;
- make sure there are no folds;
- secure the opposite edge of the upholstery, remembering to stretch it well;
- Secure the side edges of the upholstery with a stapler.
Excess material must be trimmed after attaching the upholstery, leaving a few millimeters so that it does not begin to tear near the staples.
All that remains is to make holes in the leatherette at the places where the handles are attached, for the window regulator and for installing plastic clips (on the back side).
Making the trim for a VAZ 2107 with your own hands is very popular among tuning enthusiasts. By combining different materials and colors, you can achieve a spectacular and, importantly, unique, exclusive look for the “Seven” interior. Therefore, the main motive for making door cards yourself is not savings, but the desire to transform the interior of the car, making it comfortable and beautiful.
Need for replacement
The standard upholstery looks very cheap, which spoils the external design of the domestic car. "Sevens" after 2000 are equipped with the same type of trim as earlier versions of this model. The standard skin is thin fiberboard, which is covered with cheap black polymer.
The standard upholstery is attached to pistons, which become unusable every time they are removed, resulting in the need to replace them. You can replace the standard cheap upholstery on a VAZ-2107 with more advanced materials, which will brighten up the interior of the car. We will find out further what it is to replace the door trim of a VAZ-2107 with your own hands.
Materials for upholstery
You can replace the standard upholstery of door cards with the following materials, which differ not only in price, but also in quality:
- dermantine;
- Genuine Leather;
- auto fabric;
- alcatara;
- almara.
You can use any of the materials listed, but the most affordable and easiest to work with are: dermantine, leather and vinyl. In addition to the main material, 4 mm thick plywood will be required to replace the sheathing. It is recommended to replace standard fiberboard, as it is quite flimsy and wears out quickly. You will also need latches for attaching the upholstery, foam rubber and glue.
Features of dismantling the casing
Homemade door cards for the VAZ-2107 are the optimal solution for upgrading the standard trim. To remove the standard cards on the “seven”, you will need to perform the following steps:
- The window lifter handle is removed, which requires pulling out the clamp in the form of a bracket.
- Remove the door handle by removing the plugs and unscrewing the bolts.
- Remove the trim from the door handle.
- Now you can dismantle the card, just pull it towards you.
After the standard card is removed, you can silence the doors. At the same time, you can perform audio preparation if you plan to install speakers in the front doors.
Door card manufacturing process
It is very easy to make cards on the VAZ-2107 door with your own hands, especially if you have a handy tool. Before starting work, you will need to have patience and time, since it can take up to 3-4 hours to make one upholstery.
The standard card is used as a template for making a new one. To do this, just attach the template to a sheet of plywood, then mark and cut out the base (it is better to use a jigsaw for cutting). On the prepared base, you should mark and cut holes for attaching handles and levers. When tuning the doors of the “seven”, you can simultaneously install an electric drive on the window lifts.
During the work process, special attention should be paid to the correct marking of the holes for attaching the card. If you make a mistake by a few millimeters, the product will not fit well on the door.
After the base is ready, you should use sandpaper to process the sawn edges. This is necessary to ensure that the base is as smooth as possible. We continue tuning the door trim of the "seven", for which we take a piece of foam rubber (it is best to use two-layer foam rubber, consisting of a base and fabric) and cut it out according to the card template.
Replacing the interior door handle on a VAZ 2107
Interior elements wear out over time and lose their attractive appearance. In particular, during operation, the door trim of the VAZ 2107 suffers. Door cards break, become deformed and begin to stick poorly to their places. You can simply replace them with new ones, you can update the interior by installing home door cards based on thicker plywood. This solution increases the durability of the interior and the acoustic properties of the interior. The base of the body can be made of genuine leather (leatherette).
Different materials are used for door finishing:
- auto fabric;
- Genuine Leather;
- Faux leather;
- vinyl leather;
- Alcatel;
- almaru.
The most affordable and common at work are vinyl leather and leatherette.
To make VAZ 2107 door cards useful without outside help:
- 4mm wide plywood for making the door card base (if the old door card base is in good working order, use that for ease of operation);
- new bolts for fastening the body (over time, the old ones harden and do not do their job well);
- foam;
- Faux leather;
- glue.
Old VAZ 2107 door cards are removed as follows:
- remove the window handle by pulling out the mounting bracket;
- unscrew the bolts under the plugs and remove the door handle (elbow);
The old leather should be used as a template for marking the latter. You just need to attach it to a sheet of plywood and use a pencil to mark the outline of the door card and the holes for attaching the handle, the open door lever and under the window handle axis. The last option is to not do this if the car has (in other words installed) electronic windows. Particular attention should be paid to the correct location of the mounting holes. If you make a mistake, the door trim will not hold up well and will dampen body vibrations.
Doors VAZ 2106
During the operation of the VAZ 2106, the doors, like other elements of the car body, wear out intensively. This applies to both door locks, door fastenings and the doors themselves, which often corrode and require replacement. In this article we will look at how to properly replace doors, replace door handles and locks, and upgrade trim.
Door trim for VAZ-2106
The VAZ-2106 came off the assembly line in 1976, and until it was discontinued from production, the technologies for arranging the car's interior remained virtually unchanged. Therefore, the basis of the door trim was a material such as fiberboard, which swelled and deformed over time.
To replace the door trim yourself, you need to purchase tension material (imitation leather). You can also use Alcantara or carpet for the door upholstery. Make a new door card from fiberboard or moisture-resistant plywood of suitable thickness; plexiglass or plastic can serve as a “non-killable” material.
Tools needed:
- knife or cutter;
- drill;
- jigsaw;
- scissors;
- glue.
The work is carried out in the following order:
- The door trim is removed. The main thing when dismantling the old casing is not to disturb the base or damage the fastening elements.
- Using a sharp cutting tool (for example, a knife or cutter), we separate the trim from the old door base.
- The old base must be placed on a new workpiece and outlined along the edges of the element (do not forget to cut holes according to the model of the damaged base for the fastening elements).
- Using a jigsaw, we cut out a new base and use a drill to make all the holes provided.
- From the new leatherette we cut out a new covering for the base, adding a few centimeters to the fold.
- We stretch the material onto the base, bend the edges to the reverse side and place it on the glue. If the base material used allows it, it can be additionally secured with staples.
- We install the trim in place, insert new clips and other door elements.
Below are photos of door trim examples:
Below in the video you will see an example of VAZ door panel trim:
To give softness and convexity to the upholstery, you can use a door pad made of foam rubber up to 5 mm thick.
The manufacturing of the rear and front door trim of a car is carried out in a similar manner.
Replacement of VAZ-2106 doors
The biggest problem for a motorist is corrosion of the metal of car doors; replacement may be necessary for both the front door (and the driver's door is no exception) and the rear one. The price of door repairs in specialized auto repair shops can be unreasonably high, and the only option is to replace the door yourself.
To replace, you can purchase either a new door or a used one (previously used), already assembled with glass, door handles, and seal. At the same time, you should make sure that they are of good quality, especially the seal, card and door trim. The main thing is not to make a mistake and not to purchase “left doors”, which, although they will have the required markings and dimensions, will not fit your car. Either door moldings or various stickers are installed, which an unscrupulous seller can use to hide traces of corrosion.
The process itself will not take much time and a small set of tools:
- powerful Phillips screwdriver (power or impact) with a key for it
- hammer
- pliers.
Work order:
- first, open the door that needs to be replaced and use pliers to compress the limiter until the ends come out of the holes on the body;
We install the door in the reverse order, but it may happen that it does not close. Then you will need to adjust the doors, or the door does not match your sample.
Below in the video you will clearly see how to remove the door of a VAZ:
Lock and door cylinder of VAZ 2106. Replacement
During the operation of the VAZ-2106, all elements are subject to wear and tear over time. At the same time, an important property of the car is its security from unauthorized access.
We must pay tribute to the developers of the VAZ-2106, the door handle and lock are made to the best of their ability. However, the locking mechanism can also break (most often on the front door) for various reasons (due to careless handling). And replacing them is a labor-intensive process.
You will need the following tools:
- crosshead screwdriver,
- socket wrench (or socket) 8,
- extension,
- ratchet or wrench (for the head).
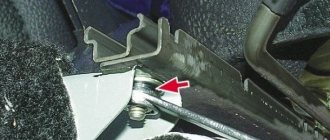
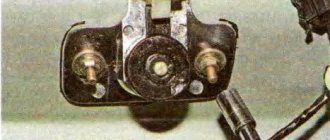
The process of removing the door handle involves minor preparatory work:
- remove the trim from the door (on which the lock is supposed to be replaced). Only then do we carry out the following work step by step:
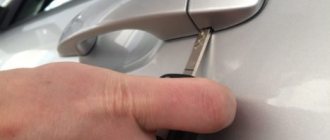
Most often, the lock cylinder is the first to fail; it is reusable and constantly in use. To replace it you will need a flat screwdriver and a needle (or thin wire)
The process of replacing the VAZ 2106 larva:
- carefully remove the spring that wraps around the lock cylinder (throws the key away in the lock when opening), prying it with a screwdriver, and first remembering its original position in order to install it correctly later;
- then using a needle we squeeze out the larva fixing rod (it goes inside the larva), after which we remove the upper retaining ring and take out the larva.
- Installation of a new cylinder, as well as the lock itself, is carried out in the reverse order.
IMPORTANT! It is best to replace the cylinders simultaneously on all car door locks (including the trunk), so that if necessary, you can open all the locks with one key, rather than carrying a bunch of keys with you.
To carry out such repair work, no special skills are required, but it is better to carry out the work indoors, since disassembling and assembling the locking mechanism requires precision in the placement of parts. In principle, this service is not that expensive, so you can entrust it to specialists.
Below is a video on how to properly replace the larva:
Door adjustment VAZ 2106
Adjustment process:
- Using a marker, draw an outline around the door lock latch.
- Next, loosen the bolts and adjust as needed.
- After which, safely tighten the bolts.
Where to move the lock:
How to adjust VAZ door locks. Video
Door cards Soundproofing. Replacement of factory caps. VAZ 2107
The excess material should be trimmed off after securing the spacer, leaving a few mm if you want it to not start to tear near the brackets.
It is necessary to make holes in the leatherette at the places where the handles are attached, under the window for installing plastic clips (at the back).
Making leather for the VAZ 2107 is very popular among DIY tuning enthusiasts. By combining different materials and colors, you get a beautiful, and most importantly, unique, exclusive look for seven interiors. Therefore, the main motive for making door cards yourself is not saving, but the desire to transform the interior of the car, making it comfortable and beautiful.
Door lock VAZ 2107
The VAZ 2107 door lock is a part that rarely fails. However, over time, this mechanism may need to be repaired, replaced, or adjusted.
Working principle of the door lock
The “seven” door lock consists of a locking mechanism, a key cylinder, external and internal handles that allow you to unlock the door from the outside and from the passenger compartment, as well as buttons for locking the car from the inside. The lock is controlled by transmitting force using rods. The main element of the lock is a rotor with a slot. When the door is locked, it goes behind the opening bracket. When the door closes, the bracket presses on the latch, as a result of which the ratchet is activated and the rotor rotates. When part of the bracket enters the rotor slot, thanks to the springs it returns to its original position, thereby pressing the door.
When the door needs to be opened, the latch flag is pressed, which causes the rotor to rotate through the ratchet and the bracket to release. When you lock the door using a key or a button from the interior, the latch is blocked. As a result, it becomes impossible to open the door. Since there is a rigid connection between the latch and the lock control handles through rods, they also do not work.
Door lock adjustment
If the car doors do not close well and there is a gap between the body elements, then first adjust the door, and then the lock itself. To carry out the procedure you will need the following list of tools:
- 10mm wrench or socket with crank;
- marker;
- lubricant
The adjustment process is performed as follows:
- Using a marker, outline the outline of the retainer on the body pillar.
- When closing the door with great force, unscrew the fastener and move it outward.
- If the door closes normally, but a gap remains, move the lock inside the body.
- When the lock is activated, the door should not move vertically. If it rises, we lower the latch, otherwise we perform the opposite actions.
Video: adjusting door locks on a “classic”
Sometimes situations arise when the locking mechanism does not work well when unlocking from the passenger compartment, despite the fact that the door opens without difficulty from the outside. To resolve this problem, you will need to adjust the position of the inside door release handle. To do this, loosen the screws securing the handle and move it to a position (selected experimentally) in which the door will close without problems. Afterwards all that remains is to tighten the fasteners.
The door does not lock
With the locking element of the doors on a VAZ 2107, such a nuisance can happen when the door does not lock. There are not many reasons for this and they usually lie in the breakdown of one of the elements of the lock (for example, a spring). In addition, water may enter and freeze inside the mechanism during the winter. If a frozen lock can be thawed, then the failed part will have to be replaced or a new locking mechanism installed.
How to remove a door lock
To dismantle the door lock on the “seven”, use the same tools as when disassembling the door. The process itself consists of the following steps:
- Remove the door trim.
- Use a flat-head screwdriver to disconnect the lock power button rod.
Door lock repair
If there is a need to repair a “seven” door lock, the procedure usually boils down to lubricating the rubbing parts, adjusting the locking mechanism, and possibly replacing a broken spring or lock cylinder.
Replacing the larva
If difficulties arise with locking/unlocking the door using a key on a Zhiguli of the seventh model, you have to replace the lock cylinder. To do this, you will need to remove the decorative door trim, and then follow the step-by-step steps:
- Using a flat screwdriver, pry up the lock rod and remove it.
