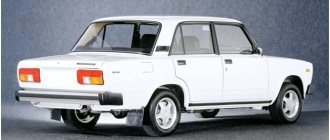
The body of the VAZ-2107 car is a sedan, load-bearing structure, three-volume, four-door. The body frame consists of a body base, an under-engine frame with mudguards, floor panels with reinforcing cross members and sills, front and rear panels and other elements. Body parts and assemblies are connected to each other by welding.
Removable panels and components: bumpers, hood, doors, radiator grille, trunk lid, fuel tank flap.
Doors with sliding glass. The front doors have built-in rear-view mirrors that can be adjusted from inside the cabin. The windshield is shatterproof, three-layer, polished. The rest of the glass is tempered and polished. The rear window has a heating element.
At the front and rear of the body, molded plastic bumpers with chrome-plated metal trims are mounted on brackets.
The front seats are separate and longitudinally adjustable. The seat backs are made integral with the headrests and are also adjustable in angle of inclination. The front and rear seats are equipped with seat belts.
In the car interior, the following panels are installed: an instrument cluster, electrical switches, ventilation and heating controls, a glove box, a shelf, a cigarette lighter, and an ashtray.
A removable plastic radio panel is installed on the floor tunnel.
The heater radiator and fan driven by an electric motor are combined by a plastic casing installed under the instrument panel.
The body floor is covered with waterproof carpeting. Thermal and noise insulating gaskets are placed under it on top of the glued bitumen sheets.
The luggage compartment lining is made of molded plastic.
The bottom of the car body is covered with a compound (BMP-1) or elastic mastic (Plastisol D11-A). Vibration and noise insulating sheets are glued to the inner surfaces of the door panels.
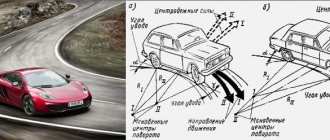
Body parts of the VAZ 2107 are of welded and hinged type. The first ones are connected using welding points and additionally reinforced with an arc. Attachment parts can be connected using bolts. On the VAZ 2107, body parts conventionally belong to three zones of the car: the front, middle and rear. Let's find out what their purpose is, how they affect the geometry of the body, its aerodynamics and whether they can be modernized.
Drum brake mechanism of a VAZ-2107 car
DSTU, technical operation of vehicles, 2014
Economic Perspective of Automobiles until 2030. Calculations of brake systems. Drawing of a VAZ 2107 drum brake mechanism. The brake system is one of the most important and responsible things in a car. The braking system ensures safety when driving and stopping, and safety comes first. We looked at what brake systems modern cars are equipped with. We also considered increased special requirements for the braking system. We calculated the hydraulic brake drive (without booster) of the VAZ 2107, the data showed that the pedal reserve is 84.39 mm. The results meet the standards. We made a drawing of the VAZ 2107 drum brake mechanism, as well as a specification. We considered the entire development path of the braking system. We learned about the new Brake Assist system. Also new are brakes with an electronic operating principle. But manufacturers are in no hurry to put them into mass production. Since there is a great distrust of buyers in the electronic braking system and a high price. New, improved and more advanced braking systems are being introduced every day, resulting in safer roads.
Contents: Explanatory Note, Drawing of Drum Brake Mechanism 2107, Specification
Source
Roof
It is part of the metal body - the basis of the body. The task of the roof is not only to protect the interior from above, closing it, but also to absorb impact energy in an emergency. On the VAZ 2107, the roof is reinforced with cross members that act as stiffeners.
The roof of the “seven” is directly related to the overall geometry of the body. After an impact or accident, it is imperative to check whether the roof has “slipped.” To do this, the dimensions of the door diagonals are measured as follows: from the bottom of the rear corner to the top corner of the front. In addition, for things to be more convincing, the diagonal of the roof itself is measured.
The cost of the roof, as a separate element of the body, starts from 3 thousand rubles. Dimensions, mm: 1290x100x1550. Weight – 15.6 kg.
Detailed description of the VAZ 2107 brake system diagram
Good afternoon dear friends. We continue the series of articles about the structure of a car. Today the turn has come to the brakes - the system responsible for the safe movement of vehicles. For ease of understanding, we will consider its devices using the example of the VAZ 2107 brake system .
Why did they take her as an example? – Because the Zhiguli of the classic family has the simplest circuit that can be found in modern cars. There are no electronic assistants, no anti-lock braking system or various sensors, just the driver, pedal and brake mechanisms. And the principle of operation of brakes in all cars is the same, so we will move from simple to complex.
Let's consider the design, diagram and principle of operation of the entire braking system and each of its components separately. By tradition, the lesson is “seasoned” with educational videos and screenshots with detailed explanations. Let's start with the basics of how a car's braking system generally works.
Paper car patterns – DRIVE2
Keep yourself and your child busy building a paper car model! A large number of paper car models for every taste.
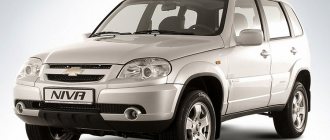
VAZ 2121 made of paper is a Russian SUV for paper modeling. Print the diagram on a color or black and white printer, fold and glue. The model is made on a scale of 1:32 and is very realistic.
Popular model VAZ 2103 made of paper. Print the diagram on a color or black and white printer, fold and glue. The model is made on a scale of 1:32 and is very realistic.
VAZ 2104 made of paper - print the diagram on a color or black and white printer, fold and glue. The model is made on a scale of 1:32 and is very realistic.
The legendary VAZ 2106 made of paper - print the diagram on a color or black and white printer, fold and glue. The model is made on a scale of 1:32 and is very realistic.
Niva made of paper - a domestic SUV for paper modeling. Print the diagram on a color or black and white printer, fold and glue. The model is made on a scale of 1:32 and is very realistic.
Paper convertible is a paper model for printing and gluing. Download the file, print the diagram on a color or black and white printer, bend and glue. The model is made on a scale of 1:32 and is very realistic.
Popular model VAZ 21099 made of paper. Print the diagram on a color or black and white printer, fold and glue. The model is made on a scale of 1:32 and is very realistic.
Popular model VAZ 21099 made of paper. Print the diagram on a color or black and white printer, fold and glue. The model is made on a scale of 1:32 and is very realistic.
Paper OKA is a simple and convenient diagram for assembling this car. Print the diagram on a color or black and white printer, fold and glue. The model is made on a scale of 1:32 and is very realistic.
Popular Russian model VAZ 2107 made of paper. Print the diagram on a color or black and white printer, fold and glue. The model is made on a scale of 1:32 and is very realistic.
Zaporozhets made of paper is a popular Ukrainian small car. Print the diagram on a color or black and white printer, fold and glue. The model is made on a scale of 1:32 and is very realistic.
ZAZ made of paper is a popular Ukrainian small car. Print the diagram on a color or black and white printer, fold and glue. The model is made on a scale of 1:32 and is very realistic.
A small paper car is a simple model for assembling a car! Print the diagram on a color or black and white printer, fold and glue. The model is made on a scale of 1:32 and is very realistic.
Educational program on how car brakes work (simple example)
There are pneumatic brakes and hydraulic brakes. Passenger cars use a hydraulic system. Let's talk about her.
On the axle of the car there are bearings on which the wheel hub is mounted, to which the wheel is screwed with bolts or nuts. In order for a wheel to slow down, there must be a braking element that is rigidly connected to it. This element is a brake disc, which is attached to the wheel hub. When the wheel rotates, it also rotates with the hub.
To stop it, they use brake pads with friction linings that clamp it together. The more they press against the disk, the stronger the friction force between them, which slows down the disk, and therefore the wheel, until it comes to a complete stop.
The pads press the pistons located in the brake cylinders. There are two cylinders per wheel. They are located on the sides of the disk and compress it, like clamping a workpiece in a vice. The cylinders are located on the caliper. It is attached to the car axle, the steering knuckle.
To move the pistons in the cylinders, a fluid is used, which transmits force from the brake pedal to them. Therefore, brake pipes through which fluid “flows” and a master cylinder with pistons that compress it were added to the system.
Paper cars print scans for modeling
And so on this page there are scans, paper cars, pictures with retro cars from the times of the USSR for homemade printing, assembly and collection. Models of cars, trucks and buses. To assemble a 3D paper model of a car you will need: a sheet of thick paper for printing a scan of the car model on a printer, scissors, glue.
Volga Gaz 21 made of paper
Pictures of Soviet paper cars, print scans for 3D modeling
VAZ 2005
Gas 460
Zaporozhets
VAZ 21099
Volga Gaz 21 made of paper
Slavuta
ZAZ 969
UAZ Eraz Vaz 2106 Volga gaz 2410 Vaz 2114 Vaz 2108 Oka VAZ 1111 VAZ 2108 VAZ 2131 Niva Volga gaz 31029 Gas 69 UAZ VAZ 2121 Niva VAZ 2105 Raf Raf Gazelle Luaz 969 Oka VAZ 2114 Zaporozhets Zaporozhets 969 VAZ 2104 Zaporozhets 969
How to glue a 3D model of a paper car?
To complete the work, you need to prepare a printer, a sheet of paper, scissors, cardboard material, as well as glue, colored pencils, paints or felt-tip pens.
The instructions are very simple; you can assemble a paper machine without any special skills or knowledge. First, you need to print out a model of the machine you like on paper, then glue the sheet onto cardboard to make the structure durable. The image is cut out along the contour; this is another advantage of this technique of creating a paper machine.
Carefully cut out the car along the outline. Bend it at the folds, apply glue to the fastening paper strips.
Let the glue dry and delight your little one with the assembled model! So if anyone is interested in retro Russian cars, then make them for yourself and find out more about them, and if you haven’t found the model you need and want, then write in x to this page, I will definitely add more.
Source: https://AutoShtuchka.ru/modelirovanie/mashinki-iz-bumagi/mashinki-iz-bumagi-dlya-skachevaniya/
The principle of operation of the braking system
- Press the brake pedal
- It is secured by a rod with the piston of the main brake cylinder (MBC)
- The force from the pedal is transmitted through the rod to the piston, which compresses the brake fluid located in the tubes and cylinders
- Compression energy is transmitted to the working cylinders, which move the pistons along with the brake pads to the disc. He starts to slow down.
The harder we press the pedal, the more the brake fluid is compressed and the more energy is transferred to the pads, which means the faster the car will slow down, until it comes to a complete stop.
The principle of operation is perfectly demonstrated in the video below:
How to make a paper car
Origami is a unique art of folding unusual figures from sheets of plain paper. In this article we will talk about how to make a paper car, so stock up on a set of colored paper and feel free to involve your children in the work and create a whole fleet of paper cars with them!
Lesson #1
First we will make a sports car. You will need a rectangular piece of paper. Its aspect ratio should be 1:7.
1: First fold the top right corner, then straighten and fold the left corner - this way you will mark the folds.
2: Now fold the top of the sheet, tucking the triangles inward at the same time (see picture).
3: Now you need to bend each of the “sticking out” triangles again, towards the middle.
4: Fold the sides of the sheet, and then fold the bottom of the sheet, as shown in the picture (follow the same principle as you folded the top of the sheet at the very beginning of the work).
5: Now fold the figure in half and tuck the protruding triangles into the “pockets”. Ready!
Master class No. 2
Let's make a car using origami technique.
1: Take a square piece of paper and fold it in half from right to left. Unfold and fold again, but this time from top to bottom. This way you will outline the folds and the middle of the sheet.
2: Fold the bottom quarter of the sheet up and bend the corners as shown in the picture.
3: Fold the top half of the sheet down, thereby covering the bent triangles.
4: Now bend the sheet as shown in Figure 5. In this case, the distance from the edge of the sheet to the dotted line does not matter much.
5: To make the windshield, fold the top right corner, connecting the two points marked in red in the picture.
6: Turn the figure over. Ready!
Step by step lesson #3
- Another simple tutorial on how to make a paper car.
- 1: Fold a piece of paper in half, then fold the fold out again.
2: Now fold the top and bottom quarters of the sheet, bend the corners. Bend the top of each of the resulting triangles inward, and fold the part itself in half.
Source: https://www.promyhouse.ru/rukodelie/izdeliya-iz-bumagi/kak-sdelat-mashinku-iz-bumagi.html
Master brake cylinder
It is responsible for transmitting the pedal pressing force to the wheel brake mechanisms. Comprises:
- A cylinder that can be mentally divided into two parts
- Pistons, one for each part. Sealing collars on them so that the medium that needs to be compressed does not flow over the piston
- Springs that return the pistons to their original position and transmit the pressing force from one to the other piston
- A boot that protects the cylinder cavity from dirt and brake fluid leaking out of it (in case of damage to the cuffs)
There are five fittings on the body. Three of them are connected by tubes to the wheel brakes, two are connected to a barrel of brake fluid. You may ask: “Why are there two circuits and three fittings”? Two fittings, they are located next to each other, are needed to supply fluid to the first circuit of the front wheels, one tube for each wheel. There is one on the second circuit, on the rear axle, which is divided by a tee into two rear brake mechanisms.
Principle of operation
- The driver presses the brake pedal.
- Through the lever, the diaphragm of the vacuum booster, the pressing force is transmitted to the pistons of the master cylinder.
- The first to operate is the piston located in the first part of the cylinder. It compresses the liquid, increasing the pressure in the primary circuit, that is, in the front brake system
- This pressure pushes the front brake cylinders, which press the pads against the brake rotor. The braking process begins
- As the pedal is depressed, the pressing force of the first piston increases. It compresses the spring located between the first piston and the second. The pressing force is transferred to the second, which begins to move and compress the brake fluid in the cylinder.
- The pressure in the second circuit increases. It is transmitted to the rear brakes
- The pistons of the working cylinders, which are located in the drums of the rear wheels, are pushed out by this pressure and spread the rear pads. They are pressed against the drum and the rear wheels begin to slow down.
By releasing the brake pedal, the entire structure returns to its original position. The pistons of the master cylinder move back to their original position, the pressure in the circuits decreases. The pistons of the working cylinders are recessed inside, freeing the pads and brake discs.
A hose from a liquid supply barrel is supplied to each chamber of the master cylinder. This is necessary to make up for losses in the system if there are leaks somewhere. Therefore, you need to constantly monitor the level in the barrel. For these purposes, a float is installed in it, falling below a certain level, it closes the electrical contacts and a warning light on the dashboard lights up indicating a low brake fluid level.
Video demonstration of the operating principle of the VAZ 2107 master brake cylinder:
Malfunctions
The main problem is wear in the inner walls of the cylinder and wear of the sealing collars. As a result, the brake fluid is not compressed with sufficient force to fully transfer the force of the pedal to the wheel mechanisms. The driver feels that the pedal has become sluggish. To brake harder, you need to press the pedal deeper. If it is too worn, it can fall completely into the floor and then the brakes will disappear altogether.
Internal springs are the least likely to break. In my practice, there have never been such cases.
The O-rings of the fittings dry out and burst. In this case, the malfunction can be seen visually - the entire master cylinder will be wet, the brakes will lose their “grip”. Some of the pressure will come out instead of the brakes.
The anther can suffer the same fate. The vacuum booster housing will be wet, but the efficiency will not decrease significantly. Therefore, only a visual inspection and a decreasing level in the tank will indicate a problem.
Front brakes
On the VAZ 2106-2107 and all classic Zhiguli models, disc brakes are located on the front axle. They are considered more effective than drums. If we recall the design of the master brake cylinder, then the first circuit, which is responsible for braking the front of the car, is located closer to the rod of the pedal assembly, which means it is the first to operate. This is done for the sake of safety, so that the rear wheels do not skid when the rear of the machine is unloaded.
Design
- Caliper. Attaches to the steering knuckle of the front wheels
- Two cylinders
- Brake pads
- A brake disc mounted on a wheel hub.
How they work
When you press the brake, the piston in the first chamber of the master cylinder is activated. The energy of fluid compression is transmitted through lines (tubes and hoses) to the caliper, on the sides of which there are cylinders. In them, the brake fluid begins to squeeze the pistons out, which press the pads against the disc. Upon contact, as a result of friction, the disc begins to slow down along with the wheel. The harder we press the pedal, the more the pistons are squeezed out of the cylinder bodies - the stronger the braking.
The driver releases the brake pedal, the GTZ piston returns to its original position. The pressure in the lines drops to 0 and the pistons are recessed into the inside of the cylinders, freeing the disc from the “captivity” of the pads. The system returns to its original state and the wheels spin freely.
Malfunctions and their symptoms
The brake lines and hose are not tight . Determined by visual inspection from the master cylinder to the calipers. A leak can be determined by drips, wetness of the tubes and their connections. Often, hoses crack due to wear, from which “brake fluid” leaks. Just look at it; if there are signs of cracking on the surface, then be sure to replace the brake hose.
Jamming and rupture of brake cylinder boots . In the first case, signs can be identified when diagnosing the front brake cylinders. In the second - loss of braking efficiency. “Soft” brake pedal and visual inspection of the calipers. If there are drips on them, the cylinder is leaking. To determine which one, you need to remove the caliper from the hub and determine which one.
Recommendation . In case of jamming, the piston can be pulled apart, but it is advisable to replace the brake cylinder. Sooner or later this will have to be addressed; if it jams once, then where is the guarantee that this will not happen again, but on the track in the field? If the boot ruptures, you can use a repair kit. But, knowing the quality of modern spare parts, especially consumables, it is advisable not to bother with its repair; it is better to supply a new one from a trusted manufacturer.
Creaking when braking from the front of the car, loss of efficiency of the front brakes . If the previously listed diagnostic methods do not show a malfunction, then it may be worth checking the pads. The thickness of the friction lining on them should not be less than 1.5 cm. There are cases when these linings fall apart or wear out to zero. In this case, they need to be changed.
Recommendation. You only need to change brake pads on a VAZ, like on any other car, in pairs. This way they will wear and wear evenly.
Squeaking noise from the front brakes can be caused by excessive wear on the brake disc. We visually determine if there are deep grooves on its surface or deep grooves - we change it.
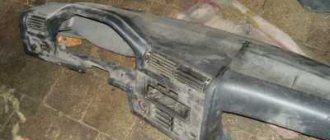
Facing panel (apron) and front bumper
The facing panel or front apron on the “seven” plays more of a decorative role. But besides giving a stylish appearance, an apron also provides many benefits. In particular, thanks to it, during rain, water does not fly directly onto the windshield, but is cut off by this element.
The apron is located directly under the bumper and is a flexible shield that also serves to prevent damage to the front of the car from splashes from under the wheels.
This structural element of the body has special holes for the front bumper brackets and the radiator grille (the latter is attached to it). The apron, due to its “extreme” location (bottom and front), becomes vulnerable to impacts and corrosion. Connected to the body by spot welding.
The design of the "seven" apron must be thought out carefully and correspond to the shape and geometry of the entire car body, otherwise it will simply vomit at high speed. In addition, non-compliance with geometry and design will lead to increased fuel consumption at high speed.
The price for a front apron for a VAZ 2107 individually starts from 600 rubles. The part may be of different workmanship, have a different color and different design features.
Front aprons, sold as a separate element of body decor, come with special mounts to the bumper. As for the original Semerovo ones, they are welded, as mentioned above, to the car body.
The rear apron is also required and must have special fastening plates that ensure its immovable condition and prevent it from coming off on the road.
Front bumper
The bumper is not only designed to retain the energy of a frontal impact first, but also plays a significant role in the exterior design of the Seven. In other words, this is a beam located in front and protects the body from damage in minor collisions.
Thanks to modern synthetic-based materials, bumpers have become much lighter and more beautiful than they were before. Thus, elegant bumpers with bent edges also serve as spoilers, increasing the downforce of the car.
The front and rear bumpers on the VAZ 2107 are made of plastic or thin metal and have chrome trim. They are mounted using special brackets.
The front bumper is equipped with a platform for attaching a license plate and for this reason is 5 cm wider than the rear one.
Today, the owner of the “Seven” is offered three options for bumpers for the VAZ 2107: plastic, plastic with chrome lining, and with brackets for fastening. The price starts from 600 rubles.
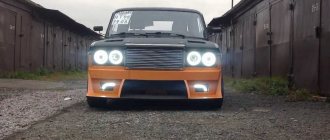
Front bumper tuning
Modernizing the front bumper of the “Seven”, first of all, means improving the appearance. To be honest, the factory bumpers of the VAZ 2107 family look, to put it mildly, fake. They do not carry any visual, or even more importantly, high-quality functionality.
The implementation of the idea of tuning the bumper on a VAZ 2107 (the rear one is also possible) consists in strengthening it with a metal profile of an L-shaped section. In addition, to give a more aesthetic appearance, the part moves slightly from the body.
You need to work with the bumpers removed. Here's what to do:
- Place the pre-prepared reinforcing corner to the bumper and mark the mounting holes, and then drill them in the profile;
- The lower part of the profile bends forward. This creates a fastener for the lower bumper bolt;
- First, the amplifier is attached to the body, then the bumper is attached to it.
As a result, we get a massive bumper that is not afraid of light and medium impacts and looks much more impressive in appearance than the factory one.
Rear brakes
On Zhiguli of the classic 2107 family and others, a drum brake system is used. Because its installation is explained by savings and a reduction in the overall cost of the machine. Moreover, the VAZ of previous years did not have high speeds, so installing rear disc brakes was not advisable, although their efficiency is higher.
Design
- Drum. It consists of two parts: the first is mounted on the axle (fixed), the second is on the hub and rotates with the wheel
- Brake pads
- Brake slave cylinder
- Tension springs
- Spacer plate
- Parking brake lever
Principle of operation
To fully activate the rear brakes, the driver needs to press harder on the pedal. In this case, the second piston of the GTZ starts working and another brake circuit is activated, which is responsible for transmitting force to the brake mechanisms of the rear wheels.
Paper car: step-by-step instructions on how to make beautiful origami in the form of a car (90 photos)
The main advantage of any paper crafts is the availability of the material and its environmental friendliness. In addition, there are many variations of paper products that you can make yourself.
It is also worth noting that even children of kindergarten age can do this type of needlework. You just need to interest them in such creativity. Beautiful paper cars are best suited for this.
Hand (parking) brake
Its name speaks for itself. It is needed to prevent the car from rolling away while parked.
Design
- Handle or pedal inside a car
- Cables with adjusting element
- The lever, which is located in the housing of the rear brake element, is connected by cables to the interior lever
- Pad spacer
How does he work
When you “pull” the handle in the cabin and park the car, the lever inside the drum moves through a cable connection. It is connected to one of the blocks by a movable axis (it can rotate around it). The spacer bar rests on one side against the handbrake lever, and on the other side against the opposite block. The lever has a special shape, which, when it moves, causes the opposite shoe to move towards the brake drum. The block rests against the drum cover, blocking the wheel.
To prevent the car from releasing the parking brake spontaneously, the handle is equipped with a locking system that is activated when it is lifted up. In the case of the foot version - when you press the pedal with your foot. To unlock the handle, you need to press a button on it and you can freely lower it down. In this case, the lever in the drum will return to its original position, releasing the pads, which will close under the action of the return springs.
A visual video of the operating principle of the parking brake and working cylinder on a Zhiguli:
DIY paper machine (diagrams, templates)
Every boy loves to play with cars; he will not soon assemble a metal structure on his own, but teaching a child to make paper models is very easy. Parents will need a little time, paper, glue and scissors. You can create such machines using the origami technique or 3D design; for each method there are the necessary materials, instructions and recommendations.
How to make a car from waste material?
The older the boy gets, the more interested he will be in complex models, including those made from paper. Parents can only suggest which creativity is more exciting, provide the necessary materials and a good mood to complete the task.
For boys, among all the models, it is cars that enjoy great prestige, and buying different designs every day will cost parents a pretty penny. After a while, the child will lose all interest in these beautiful cars, so it is more interesting and useful to make the design yourself.
"Sorcerer" or brake force regulator
It is designed to adjust the force of the rear brake system of the VAZ. This is necessary so that in the event of emergency braking with the rear axle unloaded, the rear of the car does not skid. It is believed that if the rear axle is heavily loaded, then the efficiency of the rear brakes will be higher, due to the stronger pressure of the wheels to the surface. This means the likelihood of skidding is lower, and braking is better.
It is precisely because it is not always clear how it regulates the forces transmitted to the brakes that it is popularly nicknamed the “sorcerer”. We will look in detail at the principle of its operation, what it consists of and how to configure it in the following lessons, do not forget to subscribe.
Thresholds
The main purpose of the thresholds is to protect the vulnerable sides of the car body. For this reason, thresholds are often susceptible to damage. In addition, when getting in or out of the car, passengers and the driver periodically come into contact with them, scratching the elements with their shoes. As a result, the paintwork comes off from them, which causes corrosion and rotting.
On the “seven”, the classic replacement or repair of a threshold begins with adjusting the door hinges. If this is not done, then it will not be possible to replace the threshold correctly due to the gap.
After this, the following is done:
- The doors are removable;
- The threshold is cut off (first the outer part, then the amplifier);
- The new amplifier is welded through the holes on it, as in the photo below;
- A new threshold is set.
The price for a set of thresholds for VAZ 2107 starts from 200 rubles. The thickness is usually 2-3 mm.
The remaining body parts of the VAZ 2107, such as doors and trunk lid, also have a significant place in the design of the body and its geometry.
Each of the body elements of the “seven” has its own ID number, casting pattern and thickness. So, for the roof - 0.9 mm, and for the rear wheel arches - 1 mm.